

Travel in and Out of 3D Objects Using React-Three-Fiber
source link: https://betterprogramming.pub/travel-in-and-out-of-3d-objects-using-react-three-fiber-36fa514ab6b5
Go to the source link to view the article. You can view the picture content, updated content and better typesetting reading experience. If the link is broken, please click the button below to view the snapshot at that time.

Travel in and Out of 3D Objects Using React-Three-Fiber
Exploring textures from outside and inside 3D objects

Image by author — The outside texture is from https://en.wikipedia.org/wiki/File:Blue_Marble_2002.png, and the inside texture is from https://en.wikipedia.org/wiki/File:Equirectangular_projection_SW.jpg
We have written about three.js fundamentals, 3D modeling, color textures, and environment textures via reflection and refraction.
In this article, we are going to apply textures outside and inside 3D objects, and explore examples to travel in and out of 3D objects.
We reused the Create React App working environment in the previous article, installed with the following packages:
- three.js (
three): It is a 3D JavaScript library that renders 3D content on a webpage. It aims to create an easy-to-use, lightweight, cross-browser, general-purpose 3D library. - react-three-fiber (
@react-three/fiber): It is a React renderer for three.js. It allows us to write three.js using JSX, which is more declarative. The React wrapper also handles a lot of things behind the scene, such as canvas resizing and disposing of unmounted objects. @react-three/drei: It is a collection of useful helpers for rendering react-three-fiber. It makes it easier to use many types of objects, such as cameras, controls, images, shapes, 3D models, environments, etc.
Step by step, we travel in and out of 3D objects with the following examples:
Look at the Cube From Outside
In three.js, texture is created by applying an image to a surface, or as a reflection or refraction map. A cube needs six images to construct the textures of the six faces. These images are specified in the following order: pos-x, neg-x, pos-y, neg-y, pos-z, and neg-z.
We use the image of a mustard field.
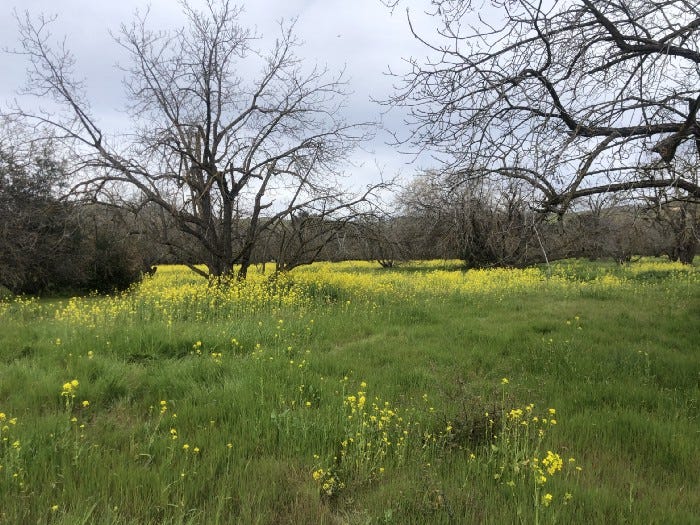
Image by author
Split it into four files, and name them mustard1.jpg, mustard2.jpg, mustard3.jpg, and mustard4.jpg. Put them under the public/textures folder.
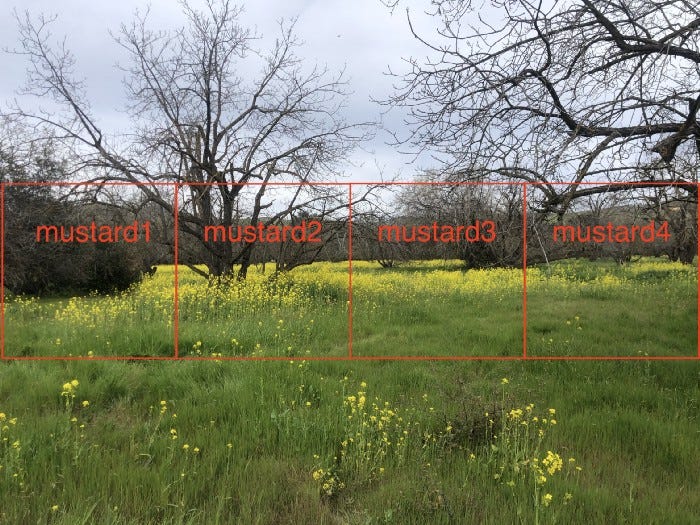
Image by author
Here is public/sky.jpg:

Image by author
Here is public/grass.jpg:

Image by author
These DIY images are not perfect, but they are good enough to prove the concept.
Similar to examples in the texture article, we look at the cube from the outside using the following src/App.js:
We have explained in detail what three.js is and how it works in React. A mesh is a type of object that is triangular polygon mesh based. It is the skeleton that makes up the figure of 3D objects. It is defined by geometry (shape), material (surface), and scene (placement).
- In the above code, the texture images are loaded at lines 7–14. Each texture is set to the
mapprop ofmeshBasicMaterial(line 31). - the
Boxcomponent (lines 6–37) callsuseFrameto perform rotation (lines 16–22). It defines amesh(lines 25–35), which includes a box/cube (line 26) withwidth,height, anddepthdefined as[3, 3, 3]. - The materials (lines 27–34) are configured with
meshBasicMaterial, a material for drawing geometries that are not affected by lights. At line 32, the materialsideis set toTHREE.FrontSide. Boxis displayed onCanvas(lines 41–48), which renders three’s components.Canvassets thecamera’s props to be{ fov: 70, near: 0.01, far: 100, position: [0, 0, 6] }(line 42), and it occupies the whole viewport with a sky-blue background (line 43).- Execute
npm start. We watch at the camera position at[0, 0, 6], outside of the box.

Image by auther
Look at the Cube From Inside
Step inside the cube is easy — simply move the camera position inside of the box.
Here is src/App.js:
- At line 32, the material
sideis set toTHREE.BackSide. - At line 42, the camera is located at
[0, 0, 1]. - Execute
npm start. We watch at the camera position at[0, 0, 1], inside of the box.

Image by author
Travel in and out of the Cube
We can look at the cube from the outside and inside. It allows us to travel in and out of the cube. Two things are needed to achieve it:
- Move the camera around in and out of the cube.
- Make the material both sided.
Here is src/App.js:
- In
useFrame(lines 17–34), the camera moves in each invocation. It moves from the inside of the cube to the outside. If it is too far back (zis beyond 8 at line 23), it moves forward and travels in the cube. If it is too close (zreaches 1 at line 25), it moves backward and travels out of the cube. This movement is repeated. - At line 44, the material
sideis set toTHREE.DoubleSide. - Execute
npm start. We travel in and out of the cube.
Image by author
Look at the Sphere From Outside
We have projected a reflect/refract map on the surface of a sphere. Here, we apply an image directly to the sphere surface.
Since the sphere surface is not flat, an equirectangular map is needed. The equirectangular map is a 2D image that projects a curved surface of a globe on a plane.
The following equirectangular image is downloaded from Wikipedia, and it is placed under the public/textures folder as map.jpeg.
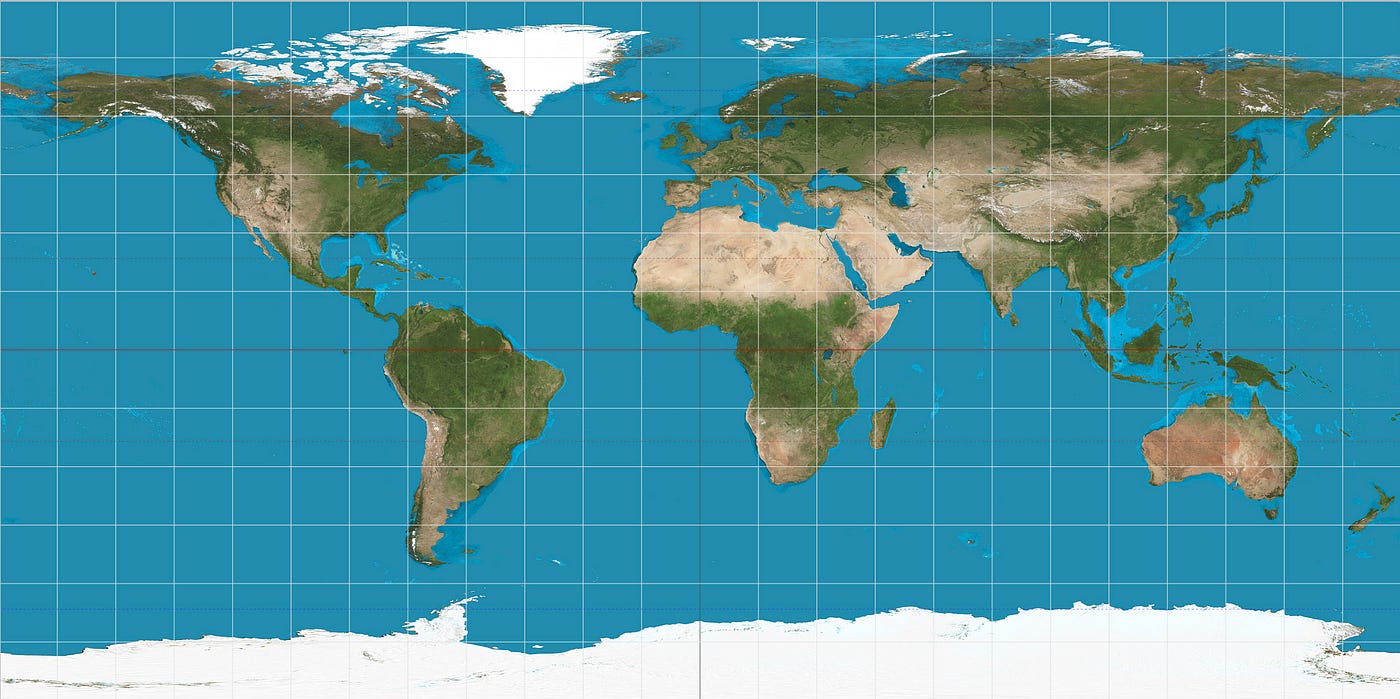
Image from https://en.wikipedia.org/wiki/File:Equirectangular_projection_SW.jpg
Here is src/App.js:
- At line 6, the equirectangular map is loaded for the texture, which is set to the
mapprop ofmeshBasicMaterial(line 20). - The
Spherecomponent (lines 5–23) callsuseFrameto perform rotation (lines 9–15). It defines amesh(lines 18–21), which includes a sphere (line 19) withradius,widthSegments, andheightSegmentsdefined as[3, 64, 32]. - The material (line 20) is configured with
meshBasicMaterial, wheresideis set toTHREE.FrontSide. Sphereis displayed onCanvas(lines 27–34), which renders three’s components.Canvassets thecamera’s props to be{ fov: 70, near: 0.01, far: 100, position: [0, 0, 6] }(line 28), and it occupies the whole viewport with a light sky blue background (line 29).- Execute
npm start. We watch the camera position at[0, 0, 6], outside of the sphere.
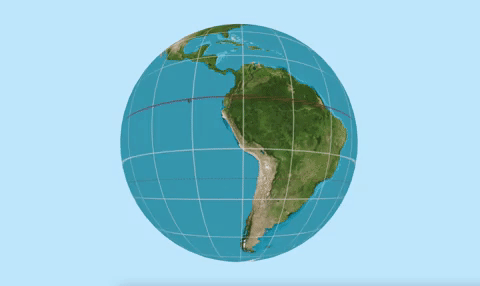
Image by author — The texture is from https://en.wikipedia.org/wiki/File:Equirectangular_projection_SW.jpg
Look at the Sphere From Inside
Travel inside the sphere by moving the camera position.
Here is src/App.js:
- At line 20, the material
sideis set toTHREE.BackSide. - At line 28, the camera is located at
[0, 0, 1]. - Execute
npm start. We watch the camera position at[0, 0, 1], inside of the sphere.
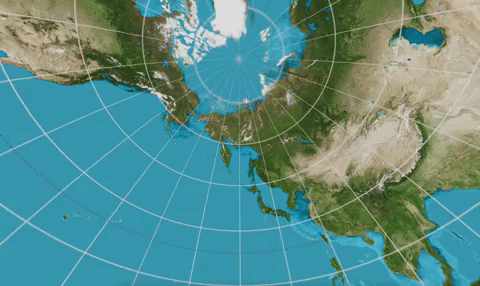
Image by author — The texture is from https://en.wikipedia.org/wiki/File:Equirectangular_projection_SW.jpg
Travel in and out of the Sphere
Similar to the cube, we can travel in and out of the sphere. All we need to do is to move the camera around and make the material both sided.
Here is src/App.js:
- In
useFrame(lines 9–26), the camera moves in each invocation. It moves from inside of the sphere to outside. If it is too far back (zis beyond 8 at line 23), it moves forward and travels in the sphere. If it is too close (zreaches 1 at line 25), it moves backward and travels out of the sphere. This movement is repeated. - At line 44, the material
sideis set toTHREE.DoubleSide. - Execute
npm start. We travel in and out of the sphere.

Image by author — The texture is from https://en.wikipedia.org/wiki/File:Equirectangular_projection_SW.jpg
A Sphere With Different Textures on Both Sides
We have put color map at the frontside, backside, and both sides. How can we show different textures for the frontside and backside?
In order to do that, we need to create two objects — one shows the frontside and the other one shows the backside.
We use the sphere to illustrate how it is achieved. First, download the equirectangular image for the other side, and place it under the public/textures folder as map2.png.
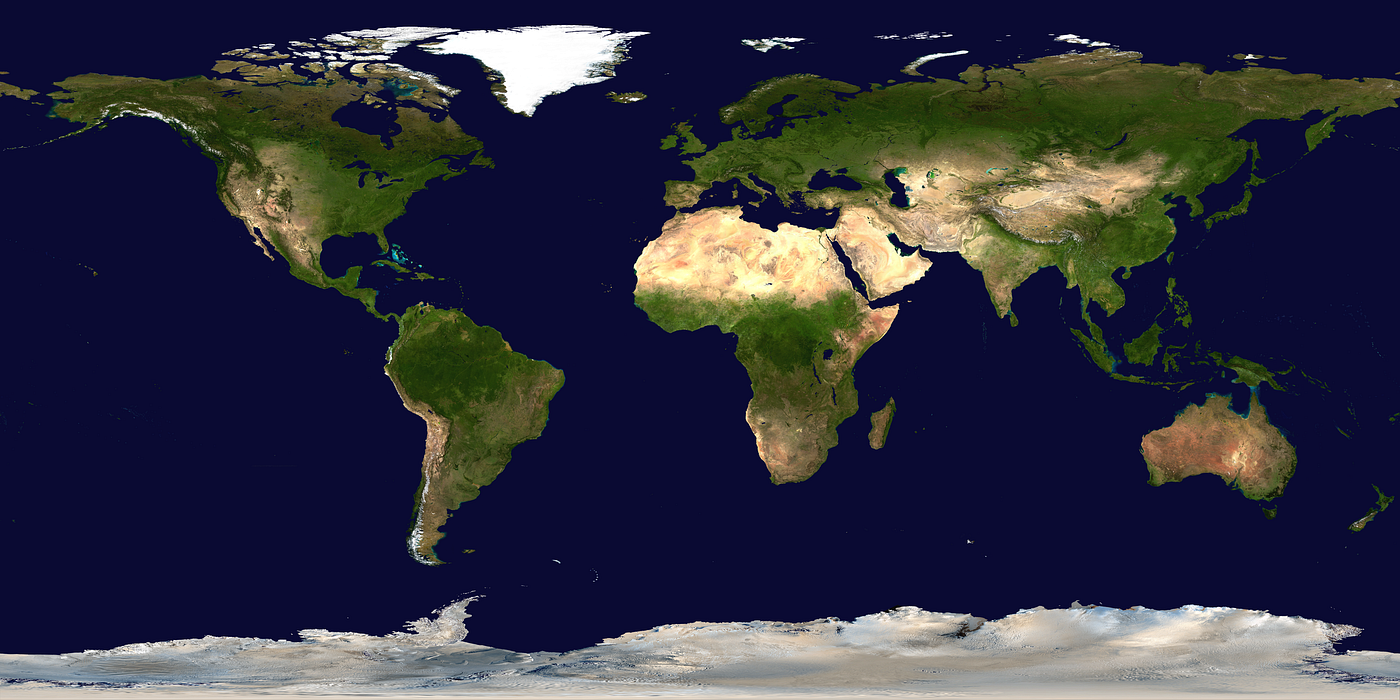
Image from https://en.wikipedia.org/wiki/File:Blue_Marble_2002.png
Here is src/App.js:
- At lines 5–34, the
Spherecomponent takes two props,mapNameandside. - At line 43, the first
Sphereis placed inCanvaswithtextures/map2.pngfor the frontside. - At line 44, the second
Sphereis placed inCanvaswithtextures/map.jpegfor the backside. - Execute
npm start. We travel in and out of the sphere with different textures on both sides.
Image by author — The outside texture is from https://en.wikipedia.org/wiki/File:Blue_Marble_2002.png, and the inside texture is from https://en.wikipedia.org/wiki/File:Equirectangular_projection_SW.jpg
Conclusion
We have shown code examples to look at textures from outside and inside 3D objects. It is also possible to apply different textures to outside and inside 3D objects. By moving the camera, we can travel in and out of the 3D objects.
Thanks for reading. I hope this was helpful. If you are interested, check out my other Medium articles.
</div
Recommend
About Joyk
Aggregate valuable and interesting links.
Joyk means Joy of geeK