

使用 GitHub Webhook 实现静态网站自动化部署
source link: https://jimmysong.io/blog/github-webhook-website-auto-deploy/
Go to the source link to view the article. You can view the picture content, updated content and better typesetting reading experience. If the link is broken, please click the button below to view the snapshot at that time.
本文介绍如何为 ServiceMesher.com 网站配置自动化部署的详细说明,通过本文你将了解到:
- 如何使用 GitHub Webhook 来自动化发布您的网站
- 如何配置 Nginx 代理根据 URI 请求转发到本地服务器的指定端口
自动发布脚本
使用名为 deploy.sh 的 Shell 脚本编译 Hugo 生成 HTML 文件,并放到 Nginx 配置的目录下。该脚本位于 ServiceMesher 官网 GitHub 仓库同级目录下,内容如下:
#!/bin/bash
# 网站的代码仓库目录
input="website"
# Nginx 中配置的网站的 HTML 根目录
output="/home/admin/servicemesher.com"
cd $input
git pull
hugo
cd ..
cp -r $input/public/* $output
该网站部署在阿里云上,操作系统为 CentOS 7.6.1810,并配置好了 HTTPS 。
安装后端服务配置所需的组件。
yum install -y npm
安装 NPM 包。
npm i -S github-webhook-handler
npm i -g pm2
创建 webhook 服务后端
我们使用 NodeJS 创建 webhook 服务后端,后端代码保存在 webhook.js文件中,调用 deploy.sh 来发布,因此需要与 deploy.sh 文件在同一级目录中,监听 http://127.0.0.1:6666/webhook:
当前的所有文件的结构如下:
$ ls -1
deploy.sh
node_modules
package.json
sofastack.tech
webhook.js
webhook.js 文件内容如下:
var http = require('http');
var spawn = require('child_process').spawn;
var createHandler = require('github-webhook-handler');
// 注意将 secret 修改你自己的
var handler = createHandler({ path: '/webhook', secret: 'yourwebhooksecret' });

http.createServer(function (req, res) {
  handler(req, res, function (err) {
    res.statusCode = 404;
    res.end('no such location');
  })
}).listen(6666);

handler.on('error', function (err) {
  console.error('Error:', err.message)
});

handler.on('push', function (event) {
  console.log('Received a push event for %s to %s',
    event.payload.repository.name,
    event.payload.ref);

  runCommand('sh', ['./deploy.sh'], function( txt ){
    console.log(txt);
  });
});

function runCommand( cmd, args, callback ){
    var child = spawn( cmd, args );
    var resp = 'Deploy OK';
    child.stdout.on('data', function( buffer ){ resp += buffer.toString(); });
    child.stdout.on('end', function(){ callback( resp ) });
}
在 webhook.js 所在目录下启动后端服务:
pm2 start webhook.js
查看服务状态:
$ pm2 status
┌──────────┬────┬─────────┬──────┬───────┬────────┬─────────┬────────┬─────┬───────────┬──────┬──────────┐
│ App name │ id │ version │ mode │ pid   │ status │ restart │ uptime │ cpu │ mem       │ user │ watching │
├──────────┼────┼─────────┼──────┼───────┼────────┼─────────┼────────┼─────┼───────────┼──────┼──────────┤
│ webhook  │ 0  │ 1.0.0   │ fork │ 30366 │ online │ 0       │ 6h     │ 0%  │ 30.8 MB   │ root │ disabled │
└──────────┴────┴─────────┴──────┴───────┴────────┴─────────┴────────┴─────┴───────────┴──────┴──────────┘
 Use `pm2 show <id|name>` to get more details about an app
使用 pm2 logs webhook 可以查看后端服务日志。
Nginx 配置
在 nginx 配置中增加转发设置,将对网站 /webhook URI 的访问转发到服务器本地的 6666 端口,即 webhook 后端服务商。
        # GitHub auto deploy webhook
        location /webhook {
            proxy_pass http://127.0.0.1:6666;
        }
GitHub Webhook 配置
在 GitHub 仓库的 Settings - webhooks 设置中创建一个新的 webhook。
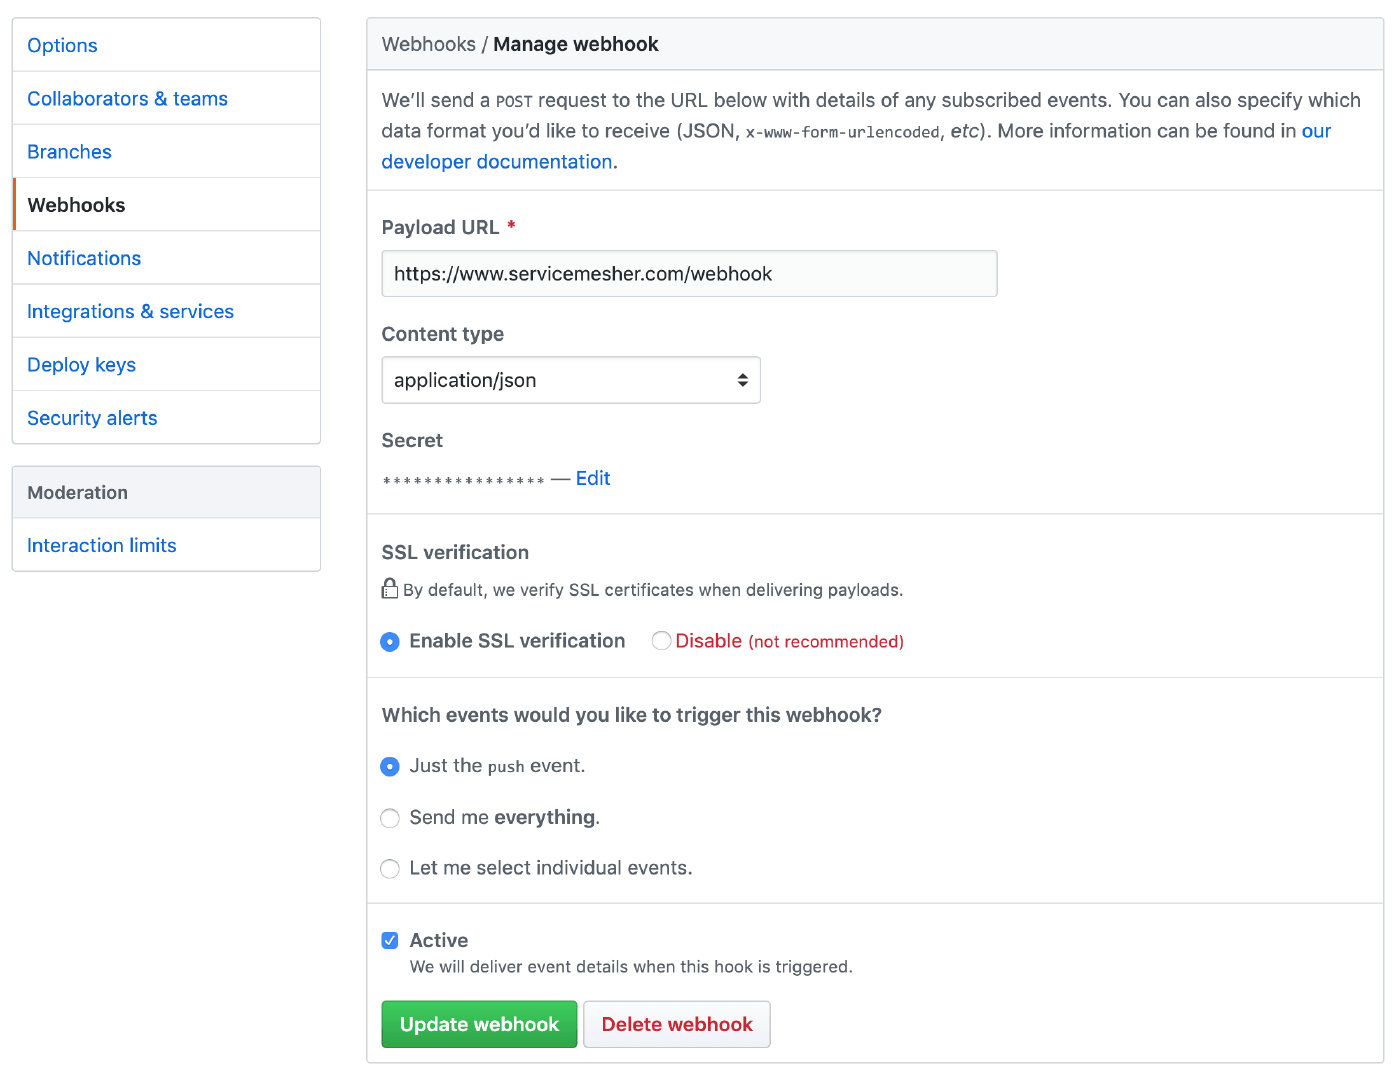
注意选择 Content Type 为 application/json,secret 设置成与 webhook.js 中的相同。
配置完成后 GitHub 将自动调用 Webhook 以验证有效性。
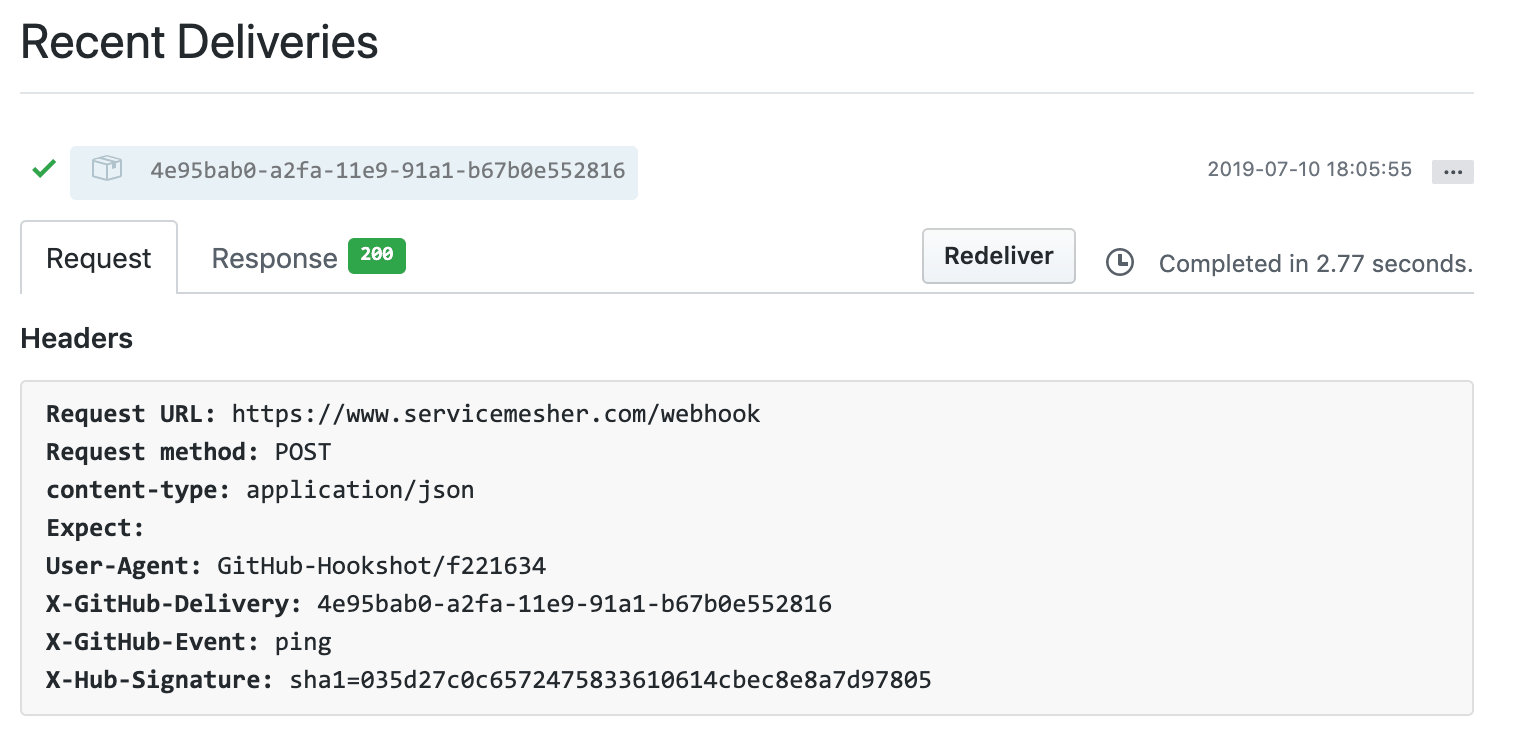
如果看到 200 响应表示成功调用 Webhook 后端服务,这样每次我们的仓库合并后就会触发网站自动部署。
为了加强 GitHub 自动化,还有更多 GitHub App 可以使用,推荐:
这些已经在 servicemesher.com 网站上集成了,感兴趣的读者可以访问 ServiceMesher 官网的代码仓库查看配置。
Recommend
About Joyk
Aggregate valuable and interesting links.
Joyk means Joy of geeK