

Getting Started with a Vue.js App in 2024
source link: https://blog.bitsrc.io/creating-a-vue-js-app-in-2024-274069973542
Go to the source link to view the article. You can view the picture content, updated content and better typesetting reading experience. If the link is broken, please click the button below to view the snapshot at that time.
Getting Started with a Vue.js App in 2024
Build Vue.js apps faster in 2024!

Let’s look at a modern approach to building Vue.js apps in 2024!
This is important in building apps with excellent user experience (UX). And, stepping into 2024, that’s key.
UX not only includes building high-performing apps but also requires you to think about the overall consistency of your app.
For instance, use buttons and text fields with the same look and feel across your app so that users don’t get lost.
Well, this is where you need to build Vue.js apps driven by highly reusable components (AKA — Composable Software). And that’s where Bit comes into the picture.
Pst, if you’re too excited on checking out the code, feel free to checkout my scope on Bit Cloud to get you started!
Building a Vue.js Application with Bit
If you’re unfamiliar with Bit, it’s a build system that lets you design, develop, build, and version your components in isolated environments.
It lets you build apps as independent components where Bit keeps track of the usages of the components across your tree and leverages its CI Server — Ripple CI, to propagate changes to the component tree.
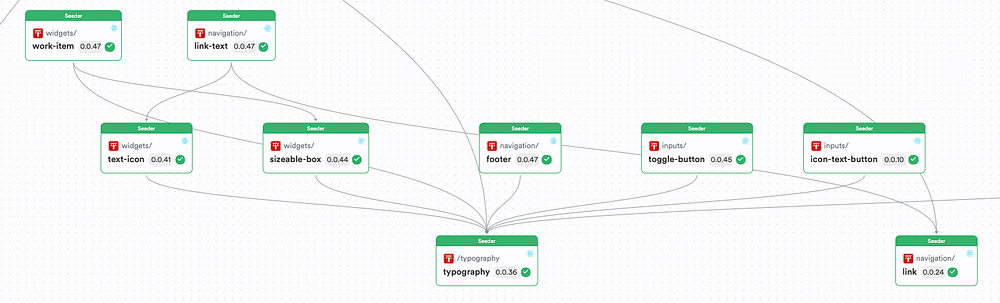
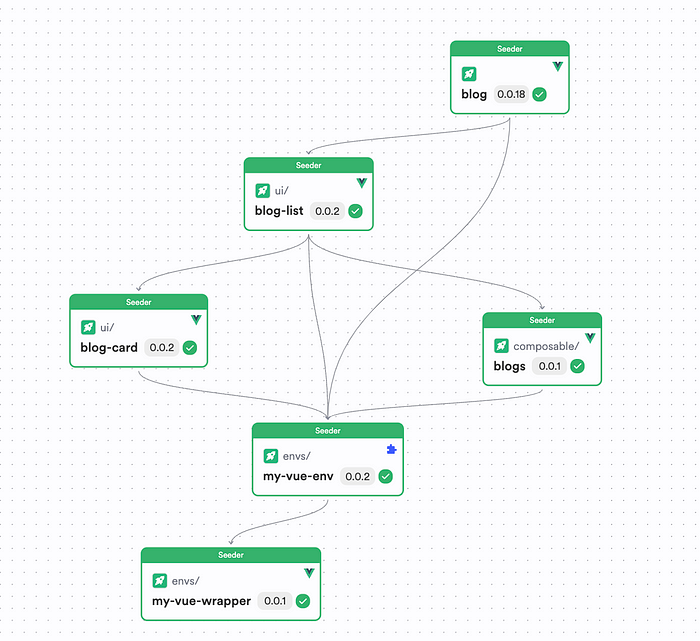
If you take a look at this sample component tree, you can notice that the Typography component is being used across the design system. Additionally, there are more components that leverage other components, but in different implementations.
So, in a nutshell, we are making our components composable and pluggable in any nature. This is true in all front-end components.
Additionally, if you make a change to a component in this tree, you’ll want to make sure that all the components that depend on this single component get updated right?
For example, if I introduced a new variant in the Typography component, would you want your IconTextButton to know that a change was made automatically?
Bit leverages Ripple CI and understands the changes in the tree and will automatically update the changes and ensure the components run on the latest version!
Pretty cool, isn’t it?
Let’s get our hands dirty and deploy a Vue.js app using Bit on Netlify!
Step 01 — Pre-requisites
First, you’ll need to install the Bit CLI using the command:
npx @teambit/bvm install
Next, you’ll need to verify that the CLI has been installed successfully by running the command:
bit --version
If you have installed Bit correctly, you should see the screenshot below.

Next, you will need an account on Bit Cloud to host your composable app.
Step 02 — Creating a Vue.js Workspace
Next, you’ll have to create a Bit workspace to help build composable Vue.js components we can reuse across applications!
To do so, run the command:
bit new vue my-workspace --env bitdev.vue/vue-env --default-scope lakinduhewa.vue-js
Tip: Make sure to replace
lakinduhewa.vue-jswith your Bit Username and Scope.
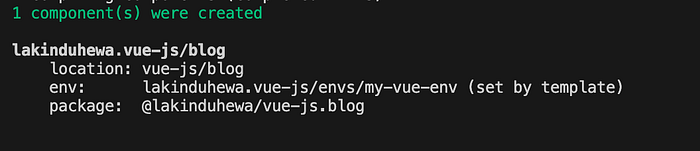
If you’ve executed the command successfully, you should see the output:
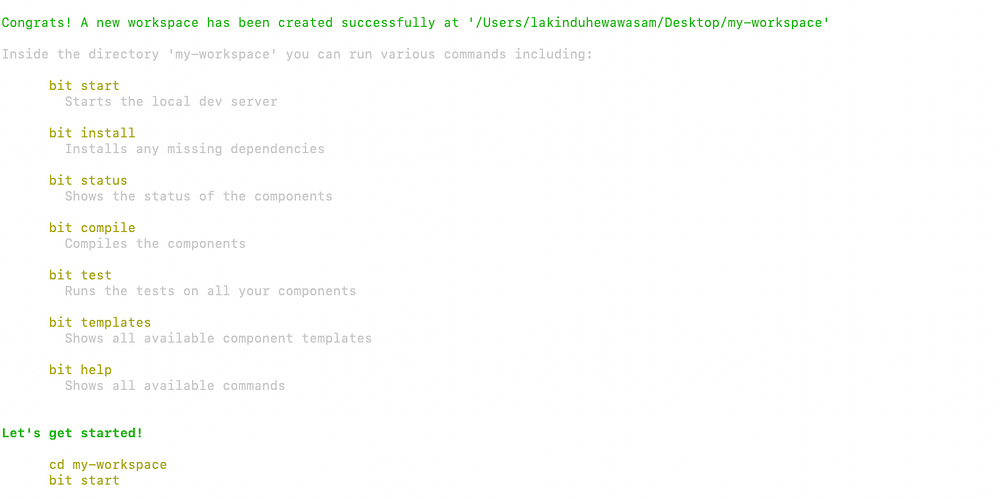
Next, go ahead and launch your dev server with the command:
bit start
You should see the output on localhost:3000:
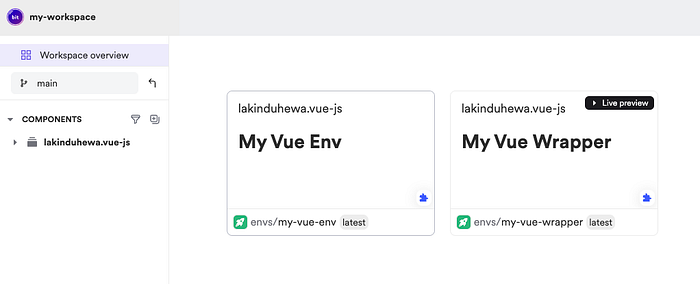
As you can see, the command bootstrapped an environment as well as a wrapper component. The environment component essentially defines:
- The libraries that components using the env will be able to use.
- The test, build and bundling procedures.
The wrapper will be used by the environment to help create the view that you see when you open a component:
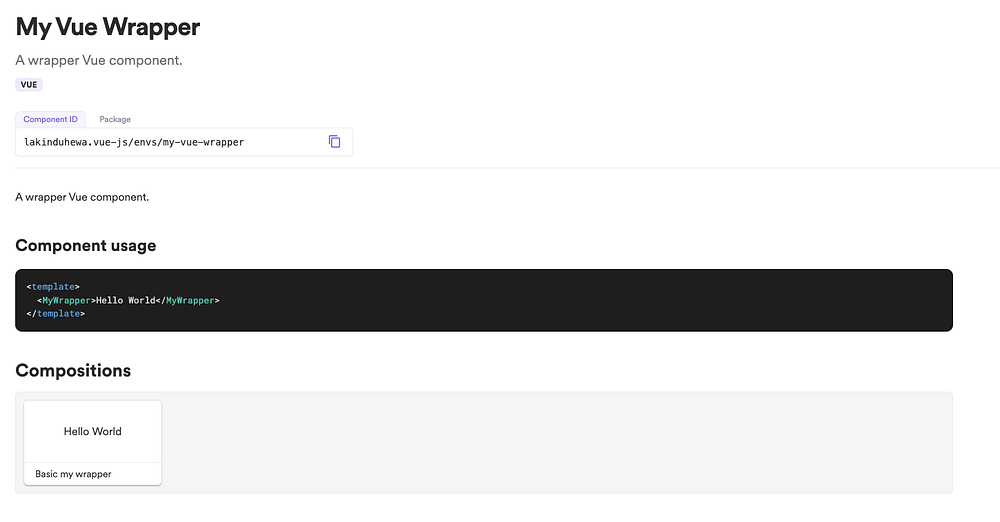
You don’t have to worry about the wrapper component. However, you can use the env that’s created as a base for all components you create in the future. This ensures all components you create have a custom runtime configuration tailored to your requirements.
Did you know? You can update your environment component with dependencies that the components using your environment might need. For example, your components might need axios to perform HTTP requests. So, all you’d have to do is include the axios dependency in your env.jsonc file.
Step 03 — Creating a Vue.js app
Okay, let’s get our hands dirty and build a simple Vue.js app. Let’s build a blog app. It will fetch a list of blogs and render it a card.
So, to implement this, we’ll need the following:
- A
BlogCardcomponent to render each blog item - A
useGetBlogshook to fetch blogs - A
BlogListcomponent to hold the collection of theBlogCard - A
BlogAppcomponent that holds a deployable Vue.js app.
Phase 01: Creating The Blog Card
Let’s create a simple Vue.js component for the blog card using the command:
bit create vue ui/blog-card --env envs/my-vue-env
You’ll see the output:

Next, open up your blog-card.vue Bit component and update its implementation:
<script setup lang="ts">
defineProps<{
  title: string,
  description?: string
}>();
</script>

<template>
  <div>
    <div class="card">
      <h2>{{ title }}</h2>
      <p v-if="description">{{ description }}</p>
    </div>
  </div>
</template>

<style scoped>
.card {
  border: 1px solid #ccc;
  border-radius: 5px;
  padding: 20px;
  margin-bottom: 20px;
}
</style>
As you can see, we’ve defined a simple Card component that renders two props — Title and Description. I’ve also created a few compositions for the Vue component — these define different ways the component can be used. You can check out the code for the compositions here.
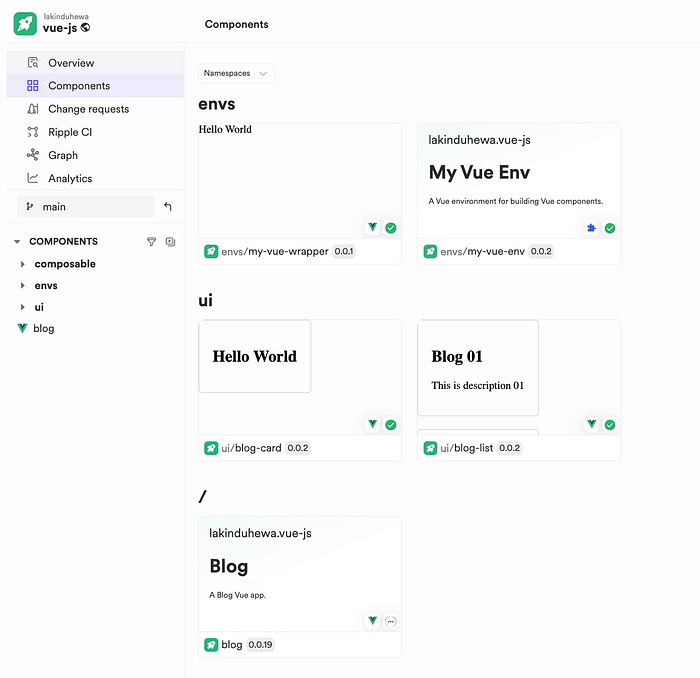
After you update your compositions and head back to the Bit server, you should see the output:

For a full implementation of this component, check this out.
Phase 02: Creating The Blog Hook
Next, let’s create the hook to fetch the data. To do so, we’ll need two things:
- The hook implementation
- An entity component that represents a blog (data shape definition)
To do so, let’s create a Vue Composable. This can be done using the command:
bit create vue-composable composables/blogs
You should see the output:

Next, create a file — blog.type.ts to define an entity for our Blog. Update it with the following code:
export type PlainBlog = {
    title: string;
    description: string
  }

export class Blog {
    private constructor(
      /**
       * title of the blog
       */
      readonly title: string,

/**
       * description of the blog
       */
      readonly description: string
    ) { }

/**
     * serialize a Blog into
     * a serializable object.
     */
    toObject() {
      return {
        title: this.title,
        description: this.description

};
    }

/**
     * create a Blog object from a
     * plain object.
     */
    static from(plainBlog: PlainBlog) {
      return new Blog(
        plainBlog.title,
        plainBlog.description
      );
    }
  }
Next, open up the blogs.ts file and update it as follows:
import { Ref, ref } from 'vue';
import { Blog } from './blog.type';
export function useGetBlogs(): Ref<Blog[] | undefined> {
const blogs = ref<Blog[]>();
const fetchBlogs = () => {
blogs.value = [
Blog.from({ title: 'Blog 01', description: 'This is description 01' }),
Blog.from({ title: 'Blog 02', description: 'This is description 02' }),
Blog.from({ title: 'Blog 03', description: 'This is description 03' }),
Blog.from({ title: 'Blog 04', description: 'This is description 04' }),
Blog.from({ title: 'Blog 05', description: 'This is description 05' }),
Blog.from({ title: 'Blog 06', description: 'This is description 06' }),
];
}
fetchBlogs();
return blogs;
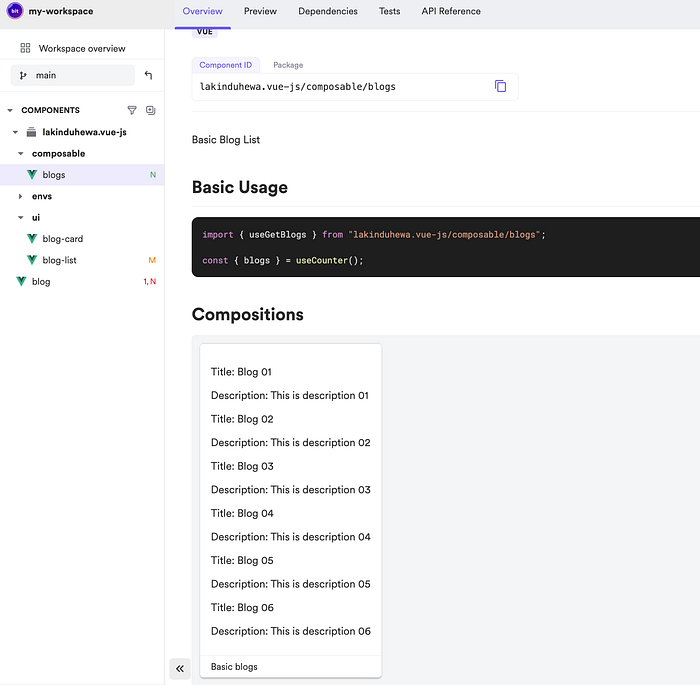
}If you visit your composable on the Bit server, you should see the output:
Phase 03: Creating The Blog List
Next, let’s create a wrapper component that creates our Blog gallery. To do so, let’s create another Vue.js component:
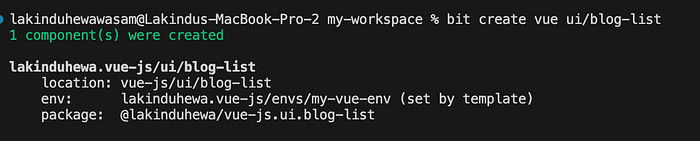
bit create vue ui/blog-list
You should see the output:
Open up your blog-list.vue and update it as follows:
<script setup lang="ts">
import BlogCard from "@lakinduhewa/vue-js.ui.blog-card";
import { useGetBlogs } from "@lakinduhewa/vue-js.composable.blogs";

const blogs = useGetBlogs();
</script>

<template>
  <BlogCard
    v-for="blog in blogs"
    :key="blog.title"
    :title="blog.title"
    :description="blog.description"
  />
</template>

<style scoped></style>
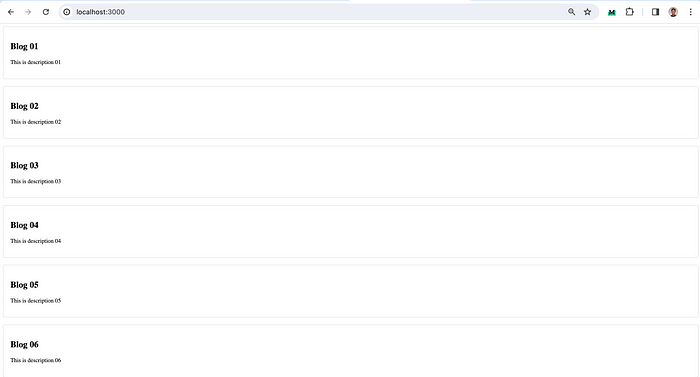
Next, head over to your Bit server and you should see your Blog list:

Phase 04: Creating The Blog App
Alright! We’re almost done building our product. All that’s left is to create the app. To do so, let’s run the command:
bit create vue-app blog
You should see the output:
Next, open up your blog.vue file and update it as follows:
<script setup lang="ts">
import BlogList from "@lakinduhewa/vue-js.ui.blog-list";
</script>

<template>
  <BlogList />
</template>

<style scoped></style>
Next, launch the app outside of your Bit server to test it out, using the command:
bit run blog-app
You should see the blogs rendered:
And that’s your Blog app built using Composable Components!
Step 04 — Deploying a Vue.js app
Next, let’s deploy this site so that everyone can access it. To do so, let’s use a Netlify deployer. To do so, let’s attach the Netlify deployer to the app using the command below:
bit install @teambit/cloud-providers.deployers.netlify
Next, update the file — blog.vue-app.cjs with the following code:
/**
 * Modify this file to change webpack config or add a deployment
 * for your vue application.
 *
 * @see https://bit.dev/docs/apps/vue-app-build#modify-webpack-configuration
 * @see https://bit.dev/docs/apps/vue-app-deployment#use-a-deployer
 */

/** @type {import("@bitdev/vue.app-types.vue-app-type").VueAppOptions} */

const { Netlify } = require("@teambit/cloud-providers.deployers.netlify");
const netlifyConfig = {
  team: '<<TEAM>>',
  accessToken: '<<NETLIFY-TOKEN>>',
  productionSiteName: '<<SITE-NAME>>',
  stagingSiteName: '<<SITE-NAME>>,
};

const deployToNetlify = (context) => {
  const publicDir = `/artifacts/apps/vue-common-js/blog-app/public`;
  return Netlify.deploy({ ...netlifyConfig })({ ...context, publicDir });
};

module.exports = MyApp = {
  name: "blog-app",
  entry: require.resolve("./blog.root"),
  deploy: deployToNetlify,
};
Next, tag and export your app to Bit cloud for it to deploy through Bit’s CI Server — Ripple CI. To do so, run the command:
bit tag && bit export
After you export, you can see a Ripple CI URL generated on your terminal. Visit that link to see your components being built using Ripple CI:
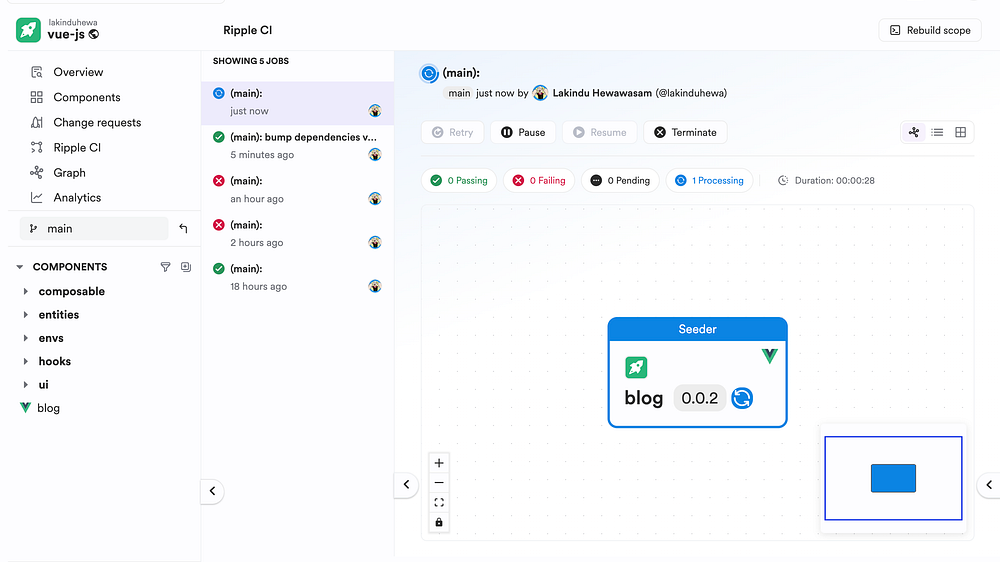
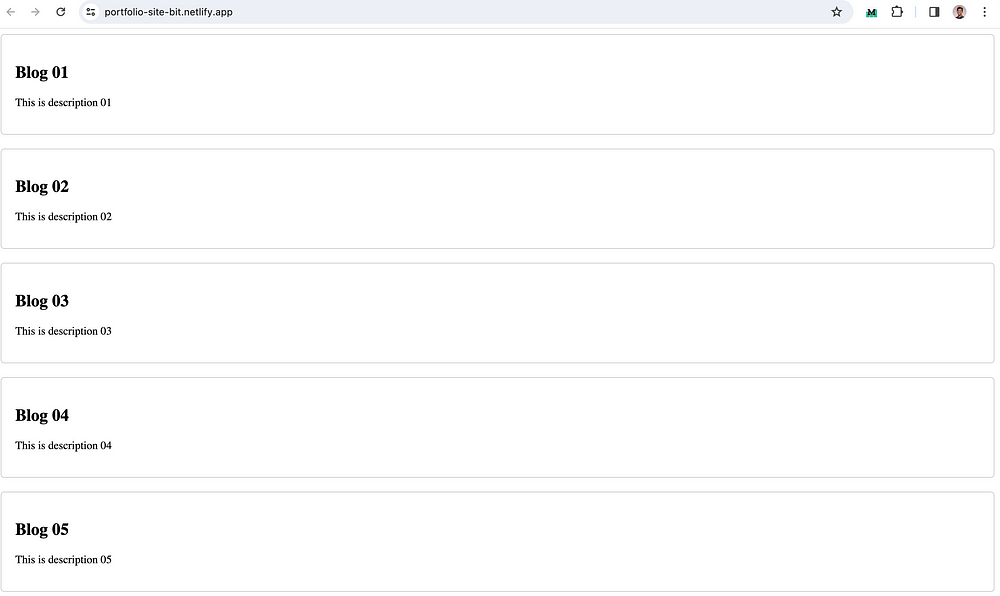
Check out this same site deployed on Netlify — (https://portfolio-site-bit.netlify.app/))
Wrapping Up
And, it’s as simple as that! It didn’t take us 5 minutes to build and deploy a Vue.js app. So, you’ll definitely need tools like Bit to help speed up your software development and maintenance while also improving the scalability and reusability of your codebase to ensure that you deliver features to your end users faster!
If you wish to check out the full code, visit my Bit Scope.
I hope you found this article helpful.
Thank you for reading.
Recommend
About Joyk
Aggregate valuable and interesting links.
Joyk means Joy of geeK