

How to make SwiftUI button with buttonStyle expand to full width
source link: https://sarunw.com/posts/swiftui-button-style-width/
Go to the source link to view the article. You can view the picture content, updated content and better typesetting reading experience. If the link is broken, please click the button below to view the snapshot at that time.

How to make SwiftUI button with buttonStyle expand to full width
Table of Contents
SwiftUI got many beautiful built-in button styles. One problem you might get is it isn't obvious how to control the size of it.
The following are the four built-in button styles.
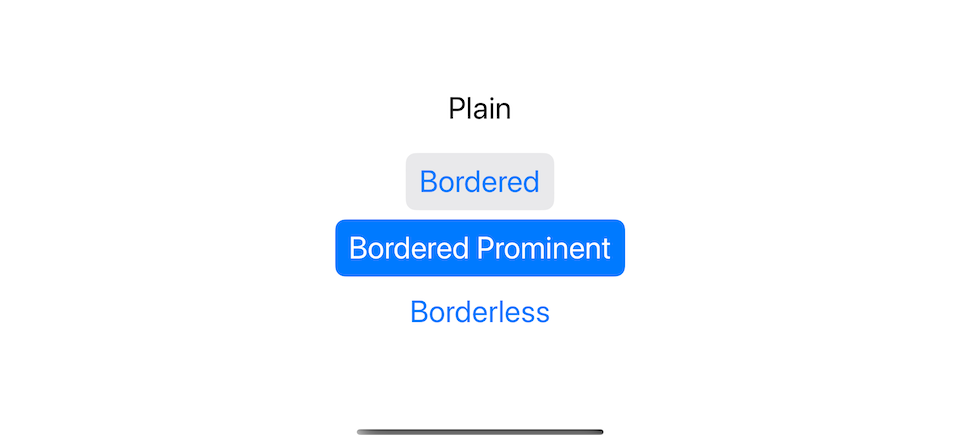
If you try to make a full-width button using .frame(maxWidth: .infinity), you will see that the button styling isn't respecting the new frame and show at its ideal size.
VStack {
    Button("Plain") {}
        .buttonStyle(.plain)
        .frame(maxWidth: .infinity)
        .border(.pink)
    Button("Bordered") {}
        .buttonStyle(.bordered)
        .frame(maxWidth: .infinity)
        .border(.pink)
    Button("Bordered Prominent") {}
        .buttonStyle(.borderedProminent)
        .frame(maxWidth: .infinity)
        .border(.pink)
    Button("Borderless") {}
        .buttonStyle(.borderless)
        .frame(maxWidth: .infinity)
        .border(.pink)
}
.font(.title)
We try to expand a button to the full width with .frame(maxWidth: .infinity), but the button style doesn't follow the frame (pink border).

This is because the frame modifier creates a new frame around the button (as dictated by the pink border), which happens after the button style is applied.
You can learn more about frame in How to make a SwiftUI view to fill its container width and height.
You can easily support sarunw.com by checking out this sponsor.
How to change the width of a button with a button style
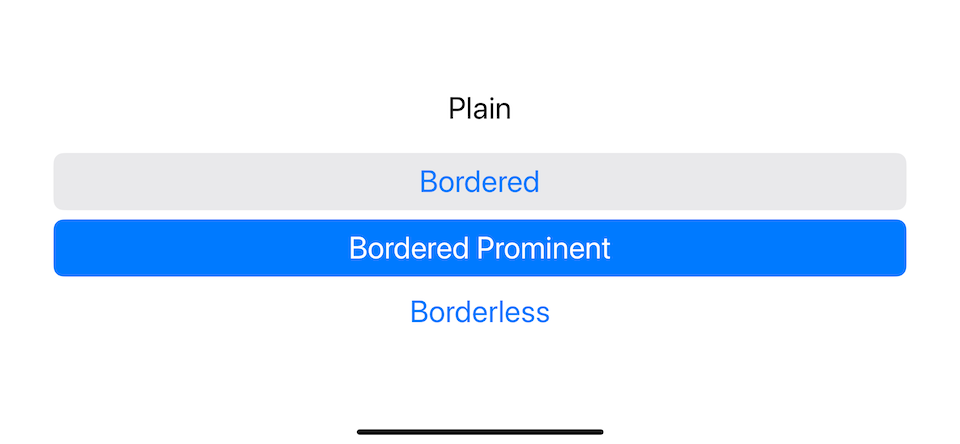
To change a button width, we need to apply .frame(maxWidth: .infinity) before we apply a button style.
To do that
- We create a button with an initializer that allows us to **modify the button's content, **
init(action:label:). - And put
.frame(maxWidth: .infinity)there.
Button {

} label: {
    Text("Bordered Prominent")
        .frame(maxWidth: .infinity)
}
.buttonStyle(.borderedProminent)
Since .frame(maxWidth: .infinity) appllied before the button style, the style will respect the specify frame.
You may also like
We can use a frame modifier to make a view appear to be full width and height, but the result might not be what you expected.
SwiftUIIn Swift 5.5, we can apply button style using leading dot syntax, .buttonStyle(.plain), instead of a full name of a concreate type, .buttonStyle(PlainButtonStyle()). Let's see how we can make our custom button style support this.
SwiftUI ButtonStyleRead more article about SwiftUI, Button, ButtonStyle,
or see all available topic
Enjoy the read?
If you enjoy this article, you can subscribe to the weekly newsletter.
Every Friday, you'll get a quick recap of all articles and tips posted on this site. No strings attached. Unsubscribe anytime.
Feel free to follow me on Twitter and ask your questions related to this post. Thanks for reading and see you next time.
If you enjoy my writing, please check out my Patreon https://www.patreon.com/sarunw and become my supporter. Sharing the article is also greatly appreciated.
Loop n times in Swift
There are many ways to loop in Swift. In this post, I will show you how I do when I want to loop for a specific number of times.
Recommend
-
34
In SwiftUI a button is a control that performs a action when triggered. In this tutorial a button can be clicked to increment a value.SwiftUI requires Xcode 11 and MacOS Catalina, for which the Betas can be
-
9
Posted 1 month ago2021-01-27T17:30:00+01:00 by Peter Steinberger Updated 1 month ago2021-02-03T16:12:59+01:00
-
6
Closed Bug 1531370 Opened 2 years ago Closed 1 month ago...
-
21
The many faces of button in SwiftUI 30 Jun 2021Button is one of the crucial components of any app. We use buttons to provide actions in the user interface of the app. SwiftUI 3 released a bunch of new view modifiers that allow us t...
-
2
How to make a div that is the width of the entire screen? advertisements If a div A is contained inside another div (B) that is 500px wide, ho...
-
12
How to make a custom button style supports leading dot syntax in SwiftUI Table of ContentsYou can easily support sarunw.com by checking out this sponsor.
-
8
How to make a SwiftUI view to fill its container width and height 18 Oct 2021 ⋅ 4 min read ⋅ SwiftUI
-
9
How to limit the number of concurrent events displayed by the monthly calendar and add an "expand" button to access the events.
-
4
Button minimum width A common mistake is to assume that a button width should be as equal to its content plus the horizontal padding. This might work as expected for a one-language website (e.g: E...
-
5
How to change SwiftUI Font Width 04 Oct 2022 ⋅ 2 min read ⋅ SwiftUI
About Joyk
Aggregate valuable and interesting links.
Joyk means Joy of geeK