
4

SpringBoot实现上传存储图片到七牛云服务器 - 靠谱杨
source link: https://www.cnblogs.com/rainbow-1/p/16441467.html
Go to the source link to view the article. You can view the picture content, updated content and better typesetting reading experience. If the link is broken, please click the button below to view the snapshot at that time.
springboot项目上传存储图片到七牛云服务器
问题描述:
当图片存在本地时会出现卡顿的现象。比如一篇图文混排的文章,如果图片没有加载完,可能整个文章都显示不出来,因为它们都是用的同一个服务器。
但是如果把图片单独拿出来放在云服务器上进行加载,这样图片的加载和文字的加载互不干扰,就可以优化这个问题。
- 首先要到七牛云官网注册账号并登陆
这是官网:https://www.qiniu.com/
-
登录之后在右上角找到【控制台】选项,第一次进入的话是没有存储空间的,所以需要新建一个存储空间。
-
创建完毕之后,你可以看到下面这样的界面:
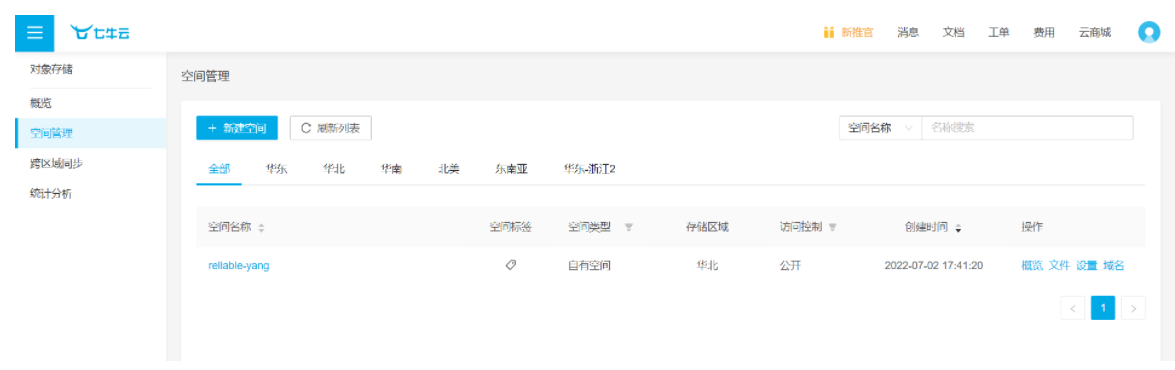
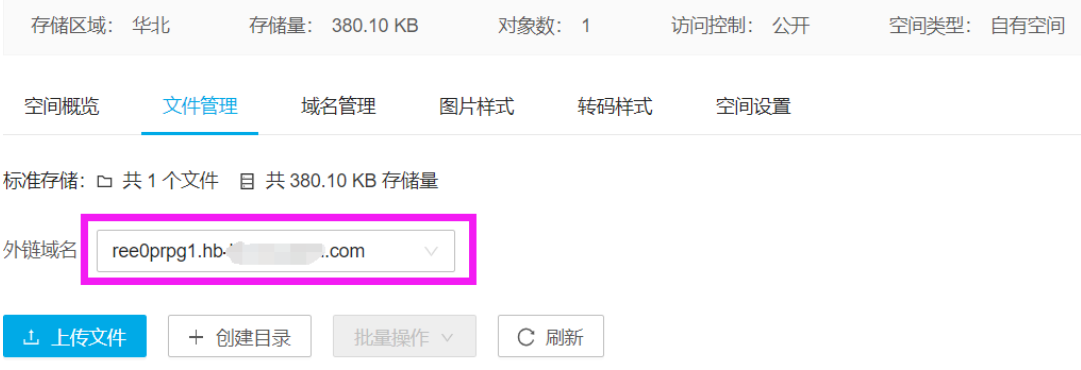
单击空间名称可以进入到空间详情页面,这里面记录了存储空间的详细信息。
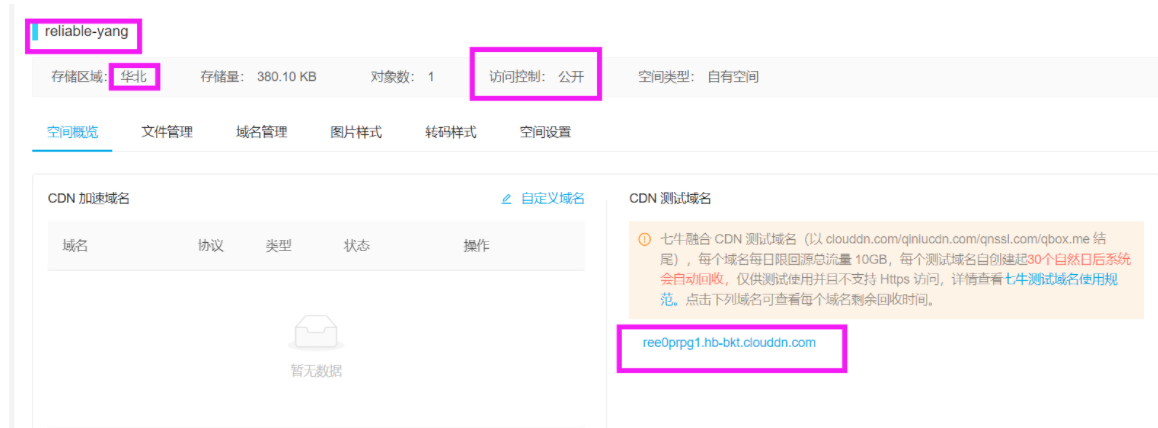
-
要注意如上图所示的这几个地方:- 左上角的名字就是你存储空间的名字【对应下面 utils 代码中的 bucket 变量的值,这个值需要改成你自己设置的存储空间名字】
- 存储区域需要注意,我选择的是华北【在 utils 代码中对应 Configuration cfg = new Configuration(Region.huabei()); 这个部分,需要把Region对象的配置类指定为你选择的区域】
- 访问控制需要设置为公开
- 右下角是公开访问的域名
一、controller
@RestController
@RequestMapping("upload")
public class UploadController {
   @Autowired
   private QiniuUtils qiniuUtils;
   @PostMapping
   public Result upload(@RequestParam("image") MultipartFile file){
      String fileName = UUID.randomUUID().toString() + "." + StringUtils.substringAfterLast(file.getOriginalFilename(), ".");
      boolean upload = qiniuUtils.upload(file, fileName);
      if (upload){
         return Result.success(QiniuUtils.url + fileName);
      }
      return Result.fail(7777,"上传失败");
   }
}
二、utils
@Component
public class QiniuUtils {

   public static  final String url = "【放你自己的网址】";

   @Value("${qiniu.accessKey}")
   private  String accessKey;
   @Value("${qiniu.accessSecretKey}")
   private  String accessSecretKey;

   public  boolean upload(MultipartFile file, String fileName){

      //构造一个带指定 Region 对象的配置类
      Configuration cfg = new Configuration(Region.huabei());
      //...其他参数参考类注释
      UploadManager uploadManager = new UploadManager(cfg);
      //...生成上传凭证,然后准备上传
      String bucket = "【放你自己的存储空间名】";
      //默认不指定key的情况下,以文件内容的hash值作为文件名
      try {
         byte[] uploadBytes = file.getBytes();
         Auth auth = Auth.create(accessKey, accessSecretKey);
         String upToken = auth.uploadToken(bucket);
         Response response = uploadManager.put(uploadBytes, fileName, upToken);
         //解析上传成功的结果
         DefaultPutRet putRet = JSON.parseObject(response.bodyString(), DefaultPutRet.class);
         return true;
      } catch (Exception ex) {
         ex.printStackTrace();
      }
      return false;
   }
}
三、properties
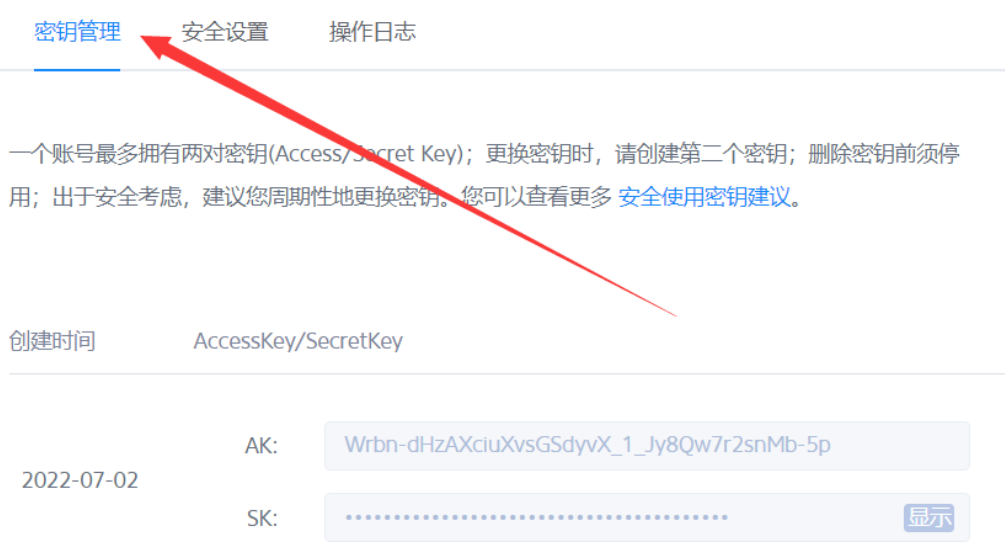
qiniu.accessKey=[填你的密码]
qiniu.accessSecretKey=[填你的秘钥]
# 上面两个的值在七牛云服务器的空间管理那里找得到

## 上传文件总的最大值
spring.servlet.multipart.max-request-size=70MB
## 单个文件的最大值
spring.servlet.multipart.max-file-size=17MB
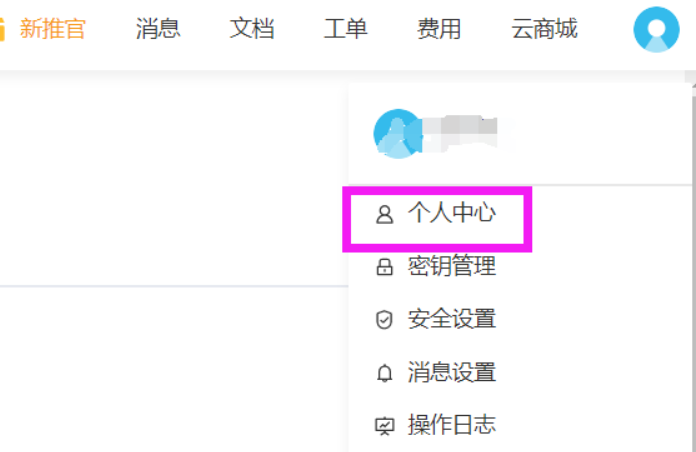
秘钥可以在如下图的位置获取:
三、实现流程
简单说一下实现的过程是怎样的:
首先由客户端向服务器发起一个请求,这个文件的内容被MultipartFile file 作为参数传递到controller中。
然后使用下面的方式生成一个新的文件名
String fileName = UUID.randomUUID().toString() + "." + StringUtils.substringAfterLast(file.getOriginalFilename(), ".");之后把这个文件名和文件作为两个参数传递给工具类QiniuUtils
在工具类中的这段代码需要对应如下图所示的网址【切记末尾一定要带斜杠 / 】
public static final String url = "http://+ [下图所示的那段链接] +/";
utils中的这段代码需要的两个值,一定要在application.properties中配置上,不然识别不到!
  @Value("${qiniu.accessKey}")
  private  String accessKey;
  @Value("${qiniu.accessSecretKey}")
  private  String accessSecretKey;
最后在controller中返回拼接好的图片访问链接就大功告成了!
return Result.success(QiniuUtils.url + fileName);
Recommend
About Joyk
Aggregate valuable and interesting links.
Joyk means Joy of geeK