

Copying your DreamPress site to Staging to test changes – DreamHost Knowledge Ba...
source link: https://help.dreamhost.com/hc/en-us/articles/360001154012-Copying-your-DreamPress-site-to-Staging-to-test-changes
Go to the source link to view the article. You can view the picture content, updated content and better typesetting reading experience. If the link is broken, please click the button below to view the snapshot at that time.

Copying your DreamPress site to Staging to test changes
Overview
This article describes how to copy your primary DreamPress site to a staging website. The staging site allows you to test changes you plan on making on your live site while your live site remains up and running normally.
When you're finished working on your staging site and have it configured the way you like, you can then publish those changes back into your live website.
Notes about copying your DreamPress site to staging
If your site has been previously hacked and then used DreamHost's DreamShield service, you must clean up the files that were hacked/disabled before you are able to enable staging on your site.
- DreamPress Staging uses Git to copy files. If you have your own active Git repository in one of your live site's folders, the folder's contents will not be copied to your staging site. To use staging successfully, you can manually copy the contents of the folder using SFTP or SSH. DreamPress recommends as a best practice to manage your Git repository in a separate development environment instead of your live site.
- When you enable staging for the first time, your DreamPress plan must have at least 5 GB of free space.
- The Uploads folder is not copied to your staging site, in order to use disk space efficiently. Replacing an existing image in your Media Library will modify it for the live site.
Copying your live site to the staging site
The following steps show you how to copy your live DreamPress website to your staging website. You can then test and work on the staging site without affecting the live site.
- Navigate to the Managed WordPress page.

- Click the Manage button to the right of your primary domain.
The Manage DreamPress page opens:
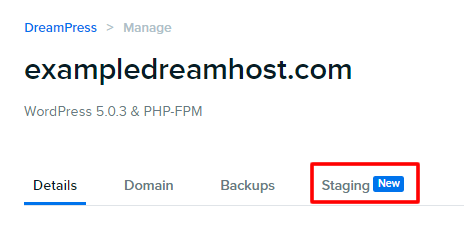
- Click the Staging tab.
The Manage Staging dashboard page opens prompting you to create a staging site:
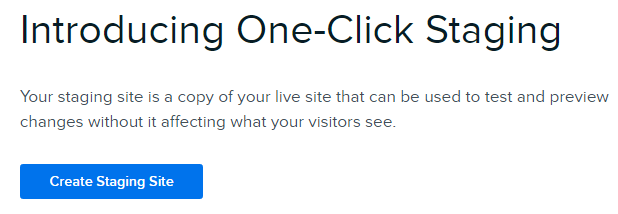
- Click the Create Staging Site button.
A staging site is automatically created with a new name. Please note that it's not possible to give your staging site a custom name.
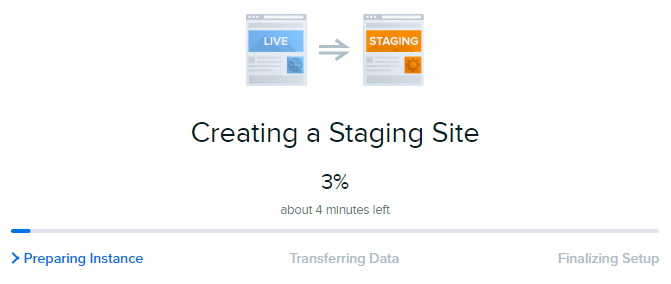
Once your website is finished copying to your staging site, an email confirmation is sent to you.
Managing your Staging website
The staging environment is not included in the DreamPress domain’s daily backups. You are responsible for maintaining your own backups of any content you add in the staging environment.
After your staging website is created, the following page appears in your Manage Staging dashboard:
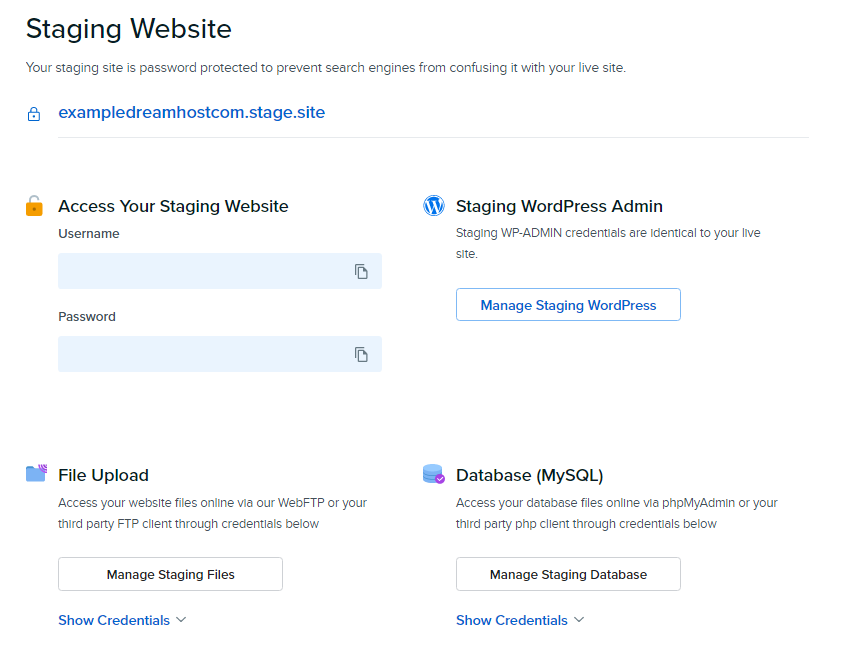
Your Staging Website domain name appears at the top. This example shows "exampledreamhostcom.stage.site".
- Access Your Staging Website — Shows the Username and Password you use to access your login-protected website.
- Staging WordPress Admin — Opens the WP-Admin page where you can make edits to your staging website.
- File Upload — Shows the FTP credentials for your staging website so you can transfer files through DreamHost's file manager or your third-party FTP client.
- Database (MySQL) — Shows your database (MySQL) credentials so you can manage your databases using phpMyAdmin.
- Configure PHP — Allows you to change the PHP version of your staging website when a newer PHP version is available. See the section below for more details.
Testing newer versions of PHP on Staging
The Configure PHP option allows you to test newer versions of PHP on a staging site, without affecting your live DreamPress website.
If your staging site works on a newer version of PHP, you can publish your staging website - and the newer version of PHP - to your live DreamPress website. It is not possible to downgrade PHP on your live DreamPress site using this method.
Before proceeding, ensure that you have published a copy of your live DreamPress website to Staging, using the steps above.
The following steps show you how to change the PHP version of your staging website from the Staging dashboard.
- Find the Configure PHP option at the bottom of the dashboard.
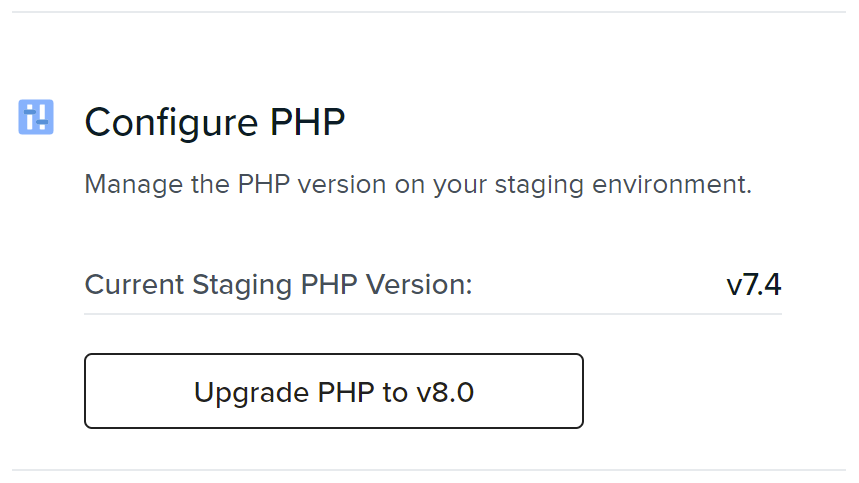
- Click the Upgrade PHP to… button.
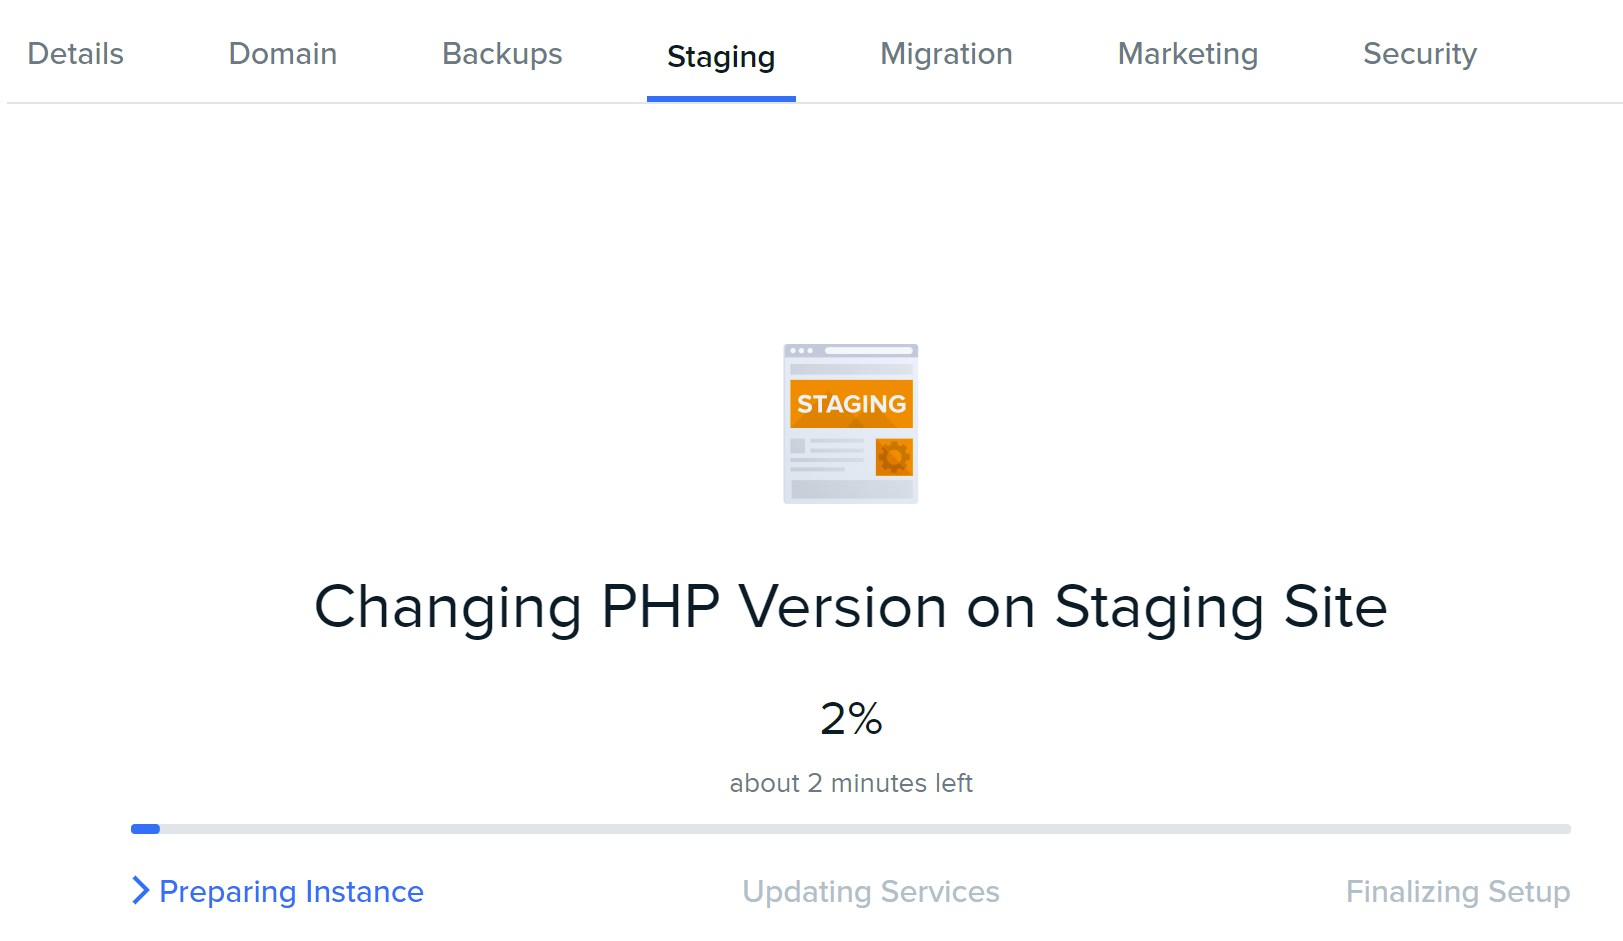
A progress meter shows the status.
- Once the upgrade is complete, the Staging dashboard will show the current version of PHP in use on your staging site under Configure PHP.
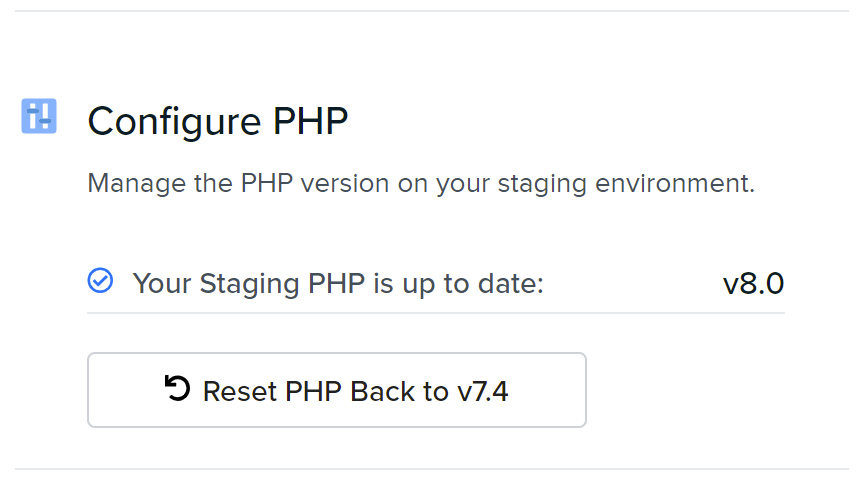
- Once the upgrade is complete, log into your staging website and examine it to ensure it is working as expected. See the Logging into your Staging site section below for more details.
- If your site works on the new version of PHP, you can publish your changes from your staging website to your live DreamPress site. View the following article for instructions:
Logging into your Staging site
You may see the following git status error message, which appears under Tools > Site Health (in the 'Background updates may not be working properly' section under Security in the WP-Admin panel):
The folder /home/wp_xyz/example.com/ was detected as being under version control (.git).
This message will always appear for every DreamPress staging site and you can safely ignore it. Git will not break your site.
If you previously updated your DreamPress admin password, you can use the same username and password from your live site to log into your staging site.
If you did not manually change your password, you can log into your Staging WordPress site from your DreamPress panel. Click the Managing Staging WordPress button to automatically log you into the admin dashboard.

Publishing your changes
When you're ready, you can use the One-Click feature on the Staging dashboard page to publish changes to your live website. See the following article for more information:
Did this article answer your questions?
Recommend
-
6
Overview After creating your DreamPress site, your site is configured in the DreamPress panel. Your site is automatically set up with the following usernames and password. FTP user/pass — You use these credentials to log...
-
10
DreamPress non-profit discount Overview The following information applies to DreamPress plans only. For more information on DreamHost's non-profit program for Shared Hosting...
-
10
How do I add DreamPress to a new domain? Overview The following describes how to add DreamPress to a new domain at DreamHost. If you already have an existing
-
13
How to sign up for a DreamPress account Overview This article describes how to sign up for a new DreamPress hosting plan. This article is for new customers who wish to open an acco...
-
9
Overview This article explains how to view the current DreamPress plan you're using. Viewing your plan Once you have at least one domain on DreamPress, navigate to the
-
8
Downgrading DreamPress to another hosting plan Overview If you no longer wish to run your WordPress site on the DreamPress platform, you can downgrade your WordPress site to a regu...
-
15
DreamPress plans and pricing Overview DreamPress offers several types of payment plans depending on your needs. Payment cycle — Select either an annual pre-...
-
12
How do I upgrade a WordPress site to DreamPress? Overview You can easily transfer any domain to DreamPress that is currently using WordPress as a
-
6
Publishing your changes from Staging to your live DreamPress site Overview After you have
-
10
How to use Staging on DreamPress Overview Staging gives you the freedom and confidence to test changes before you publish without worry. It creates a copy of your site in a "sandbox...
About Joyk
Aggregate valuable and interesting links.
Joyk means Joy of geeK