

Animate with Jetpack Compose: Animate as State and Animation Specs
source link: https://proandroiddev.com/animate-with-jetpack-compose-animate-as-state-and-animation-specs-ffc708bb45f8
Go to the source link to view the article. You can view the picture content, updated content and better typesetting reading experience. If the link is broken, please click the button below to view the snapshot at that time.


Animate with Jetpack Compose: Animate as State and Animation Specs
So Jetpack Compose officially becomes the future of Android Development. Recently Google introduced the beta version of Jetpack Compose and showed different cool features of this promising Google project. This means that this is an excellent time to start learning about Jetpack Compose, trying various features, and re-think your future architecture. In this article, I want to focus on a significant part of the user interface — animations.
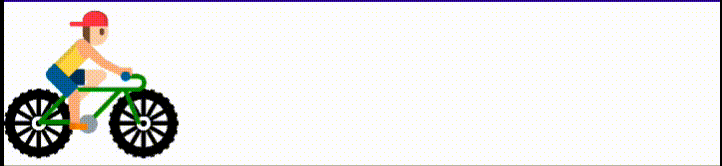
For me, the best way to explore new technologies is by trying them out. Let’s build a small project to examine different animations. My idea is to create a screen with a biker image and animate his movement. The screen will look like this:

The code looks straightforward, it’s easy to build using only the current getting started guide from Google. Here is the code
Now the most straightforward animation will be the biker movement. The question is how to implement it. Basically there some sub-questions we need to answer:
Q: Do we need to animate content change?
A: Content, in our case, is an image. We are not going to change the size or visibility. So the answer is NO
Q: Is our animation state-based?
A: I assume that we will have some states (E.,g Start, and Finish). So the answer is YES
Q: Is our animation infinite?
A: Could be, but as we will have Start and Finish states — I believe that answer is NO
Q: Do we animate multiple values simultaneously?
A: As we have just biker image, then NO
Now I need to explain where these questions are coming from. Google made an awesome scheme for choosing the proper way to make your animation.

As you can see I just followed this simple way, and helped me to choose the proper function for animating my image.
Now I think it’s an implementation time :) I will introduce simple State enum with two states: Start and Finish to let our bike ride. To operate this state, we need to use remember delegate.
enum class BikePosition {
Start, Finish
}var bikeState by remember { mutableStateOf(BikePosition.Start) }
To make this simple movement, I’ll animate the absolute offset of our biker image. And here, we have to use animateDpAsState delegate to receive values in dp. This function has three parameters: targetValue, animationSpec, and finishedListener. Here the only targetValue has no default values. This means that we have to specify this one. For the first try, it looks good.
@Preview
@Composable
fun BikeScreen() {
    var bikeState by remember { mutableStateOf(BikePosition.Start) }

val offsetAnimation: Dp by animateDpAsState(
        if (bikeState == BikePosition.Start) 5.dp else 300.dp,
    )    Box(
       modifier = Modifier
          .fillMaxSize()
    )  {       Image(
          painter = painterResource(R.drawable.bicycle),
          contentDescription = null,
             modifier = Modifier
               .height(90.dp)
               .absoluteOffset(x = offsetAnimation)
       )       Button(
           onClick = {
bikeState = when (bikeState) {
                 BikePosition.Start -> BikePosition.Finish
BikePosition.Finish -> BikePosition.Start
}
}, modifier = Modifier
            .fillMaxSize()
            .wrapContentSize(align = Alignment.Center)
       ) {
Text(text = "Ride")
}    }
}
So here we have a final version of our first animation. As you can see, we replaced x offset value with our offsetAnimation. Let’s hit the “Ride” button
It moves and this is what we expected. So as you can see movement looks ugly. The key for customisation is exactly the animationSpec parameter, so let’s try to customise our animation.
Animations Specs
According to documentation:
AnimationSpec stores the specification of an animation, including 1) the data type to be animated, and 2) the animation configuration (i.e. VectorizedAnimationSpec) that will be used once the data (of type T) has been converted to AnimationVector.
To create animation spec Google made an excellent public API, which includes the following functions:
- tween
- spring
- keyframes
- repeatable
- infiniteRepeatable
I have to say that it’s possible to reach the animation you are looking for using different specs. Here API is flexible. Let’s play with spring() function
- spring()
This function has three parameters: dampingRatio, stiffness, and visibilityThreshold.
The damping ratio is responsible for bouncing of your animation. Here we have some predefined ratios we can use
- Spring.DampingRatioNoBouncy — default
- Spring.DampingRatioLowBouncy
- Spring.DampingRatioMediumBouncy
- Spring.DampingRationHighBouncy
As you already saw the default one, we will try these three. Let’s update our code first:
val offsetAnimation: Dp by animateDpAsState(
            if (bikeState == BikePosition.Start) 5.dp else 300.dp,
spring(dampingRatio = Spring.DampingRatioLowBouncy)
)
I’ll apply different damping ratios one by one
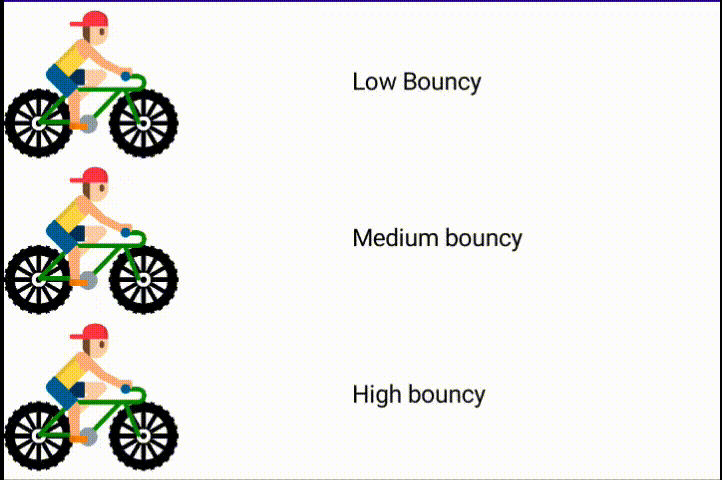
So now we can see this effect. In general, this damping ratio is just a float, where 1f is NoBouncy and 0f is the highest possible bouncy.
The next parameter is stiffness. To explain the animation’s stiffness, I’ll show how some of the provided constants will affect our animation. To have a clear vision, we will use the same NoBouncy damping ratio
val offsetAnimation: Dp by animateDpAsState(
            if (bikeState == BikePosition.Start) 5.dp else 300.dp,
spring(stiffness = Spring.StiffnessLow)
)
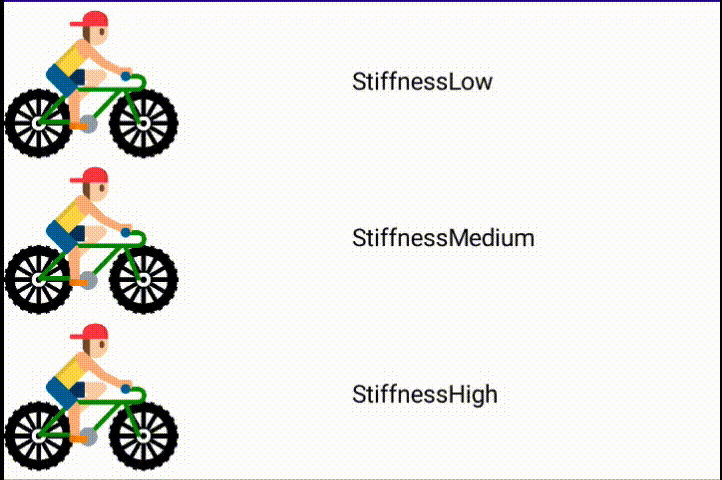
So as you can see, stiffness could be used as duration. Stiffness is also a float that describes the behaviour of animation depending on time. Here the lowest stiffness is 0f.
And the last parameter is visiblityThreshold. This parameter is generic, and it’s responsible for threshold where animation effect has to be stoped.
To summarise, Spring is an animation spec that could be described with three simple parameters. This spec has a low level of customization and we can use it for simple animation or in combination with other specs
2. tween()
Tween() is a function that returns TweenSpec, which is an implementation of DurationBasedAnimationSpec. As you can see, tween gives you the power to apply the duration time directly. So durationTime is the first parameter of the tween() function. The second parameter is delayMillis which is self-explanatory, and the third and the most interesting parameter is Easing. Easing describes an easing curve used to interpolate between the start and end of the animation.
For the first try, we will use default parameters, except duration.
val offsetAnimation: Dp by animateDpAsState(
    if (bikeState == BikePosition.Start) 5.dp else 300.dp,
tween(1000)
)
So as you can see I just replace spring() with tween(). Here is our result

As you can see, the default animation with tween() already looks more attractive compared to the default spring(). Biker is accelerating after the start and decelerating before the finish. The key to this behaviour is the easing parameter.
Let’s try to understand what exactly easing is. This is a simple interface with one function called transform(). There is one argument called Fraction — simple float, which describes the current status of animation. It changes between 0f and 1f, where 0f is an animation start. So on the implementation of this function depends how your animation will behave.
Google provides four pre-defined easing implementations:
- FastOutSlowInEasing — default
- LinearEasing
- FastOutLinearInEasing
- LinearOutSlowInEasing
Let’s compare all of them
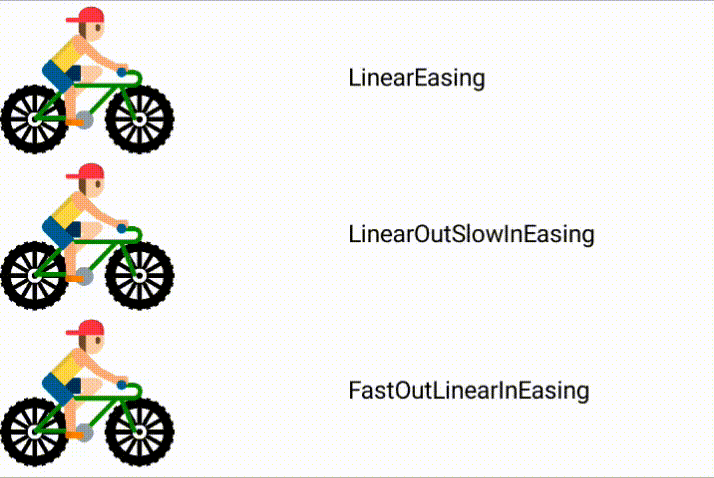
It’s interesting to spot how the easing parameter could change the animation behaviour with the same duration. Well, another question would be if it’s possible to customize this easing parameter. First of all, you can create your implementation of the Easing interface. But we already have some implementations from Google so that we can reuse them. Most default easings are just variables of CubicBezierEasing. Which is an implementation of third-order Bezier curves.
To create your Bezier curve, you need to pass four parameters. These parameters describing the coordinates of the two control points. Let’s try to create custom CubicBezierEasing
val offsetAnimation: Dp by animateDpAsState(
    if (bikeState == BikePosition.Start) 5.dp else 300.dp,
tween(1000, easing = CubicBezierEasing(0.4f, 0.0f, 0.8f, 0.8f))
)
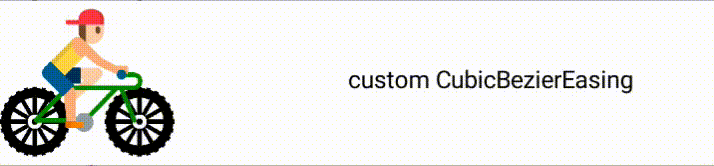
In general, it doesn’t look special, but at the same time, it’s cool that there is an option to customize the easing parameter.
To summarize, tween() is an excellent animation spec that gives you a good customization level. This animation could be already a good start for more complex animations.
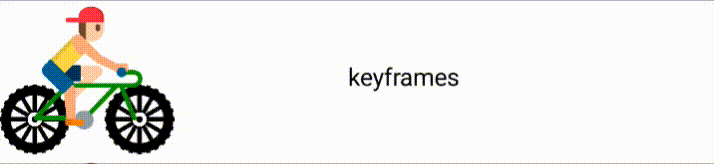
3. keyframes()
keyframes() is a function that returns KeyFramesSpec, which is an implementation of DurationBasedAnimationSpec. The same as for tween() — keyframes() gives you control over the animation duration. But the usage of it is different. There is one parameter — the initialization block of KeyFrameSpecConfig. This config class includes the following variables: durationMillis, delayMillis, keyframes.
So let’s implement animation using keyframes spec.
val offsetAnimation: Dp by animateDpAsState(
    if (bikeState == BikePosition.Start) 5.dp else 300.dp,

keyframes {
durationMillis = 1000
}
)
This animation will look the same as the animation with tween() described above. The most important thing here is customization by adding keyframes. Keyframe is a single point on the animation timeline. To create the Keyframe entity, we have to use the extension function T.at(), where T is dp in our case. As the argument for at() function, we need to pass timeStamp — the exact time when the animation will reach our keyframe:
val offsetAnimation: Dp by animateDpAsState(
    if (bikeState == BikePosition.Start) 5.dp else 300.dp,

keyframes {
durationMillis = 1000
        100.dp.at(800)
}
)
This means that the bike will reach 100dp in 800ms. And from 100dp to 300dp, he needs to be super fast to complete animation in time.

The cool thing about keyframes is that you can add multiple keyframes and add some easing for each interval.
val offsetAnimation: Dp by animateDpAsState(
    if (bikeState == BikePosition.Start) 5.dp else 300.dp,

keyframes {
durationMillis = 1000
        50.dp.at(20).with(LinearEasing)
        200.dp.at(600).with(LinearOutSlowInEasing)
        250.dp.at(700).with(FastOutSlowInEasing)
}
)
To summarize, keyframes gives you a high level of customization for your animations. The question would be, how often do we need such customization level?
4. repeatable()
Repeatable gives you an option to create repeatable animations. Important! All animations I showed before are not repeatable — I pressed the “Ride” button to make the animation run.
In general repeatable is a wrapper on your actual animation. So here is a simple example:
val offsetAnimation: Dp by animateDpAsState(
    if (bikeState == BikePosition.Start) 5.dp else 300.dp,

repeatable(iterations = 5, animation = tween(), repeatMode = RepeatMode.Restart)
)
This means that tween animation is executing five times in Restart Mode. Also, there is animationSpec called infiniteRepeatable() which works almost the same as repeatable(), but has infinite iterations.
5. snap()
This is the simplest animationSpec which immediately changes starting animation value to the last animation value
Summary
Jetpack compose animation framework is enormous. In this article, we covered just a tiny piece of the functionality. In general, API looks simple is straightforward, and I have to say that Google did a great job here. I’ll show you other exciting, vital Jetpack compose animation framework pieces with examples in the following articles.
I wish you happy coding!
Recommend
About Joyk
Aggregate valuable and interesting links.
Joyk means Joy of geeK