
Object Detector Android App Using PyTorch Mobile Neural Network
source link: https://towardsdatascience.com/object-detector-android-app-using-pytorch-mobile-neural-network-407c419b56cd?gi=eab59999e3e7
Go to the source link to view the article. You can view the picture content, updated content and better typesetting reading experience. If the link is broken, please click the button below to view the snapshot at that time.

Tushar Kapoor : ( https://www.tusharck.com/ )
Running Machine Learning code on mobile devices is the next big thing. PyTorch , in the latest release PyTorch 1.3 , added PyTorch Mobile for deploying machine learning models on Android and iOS devices.
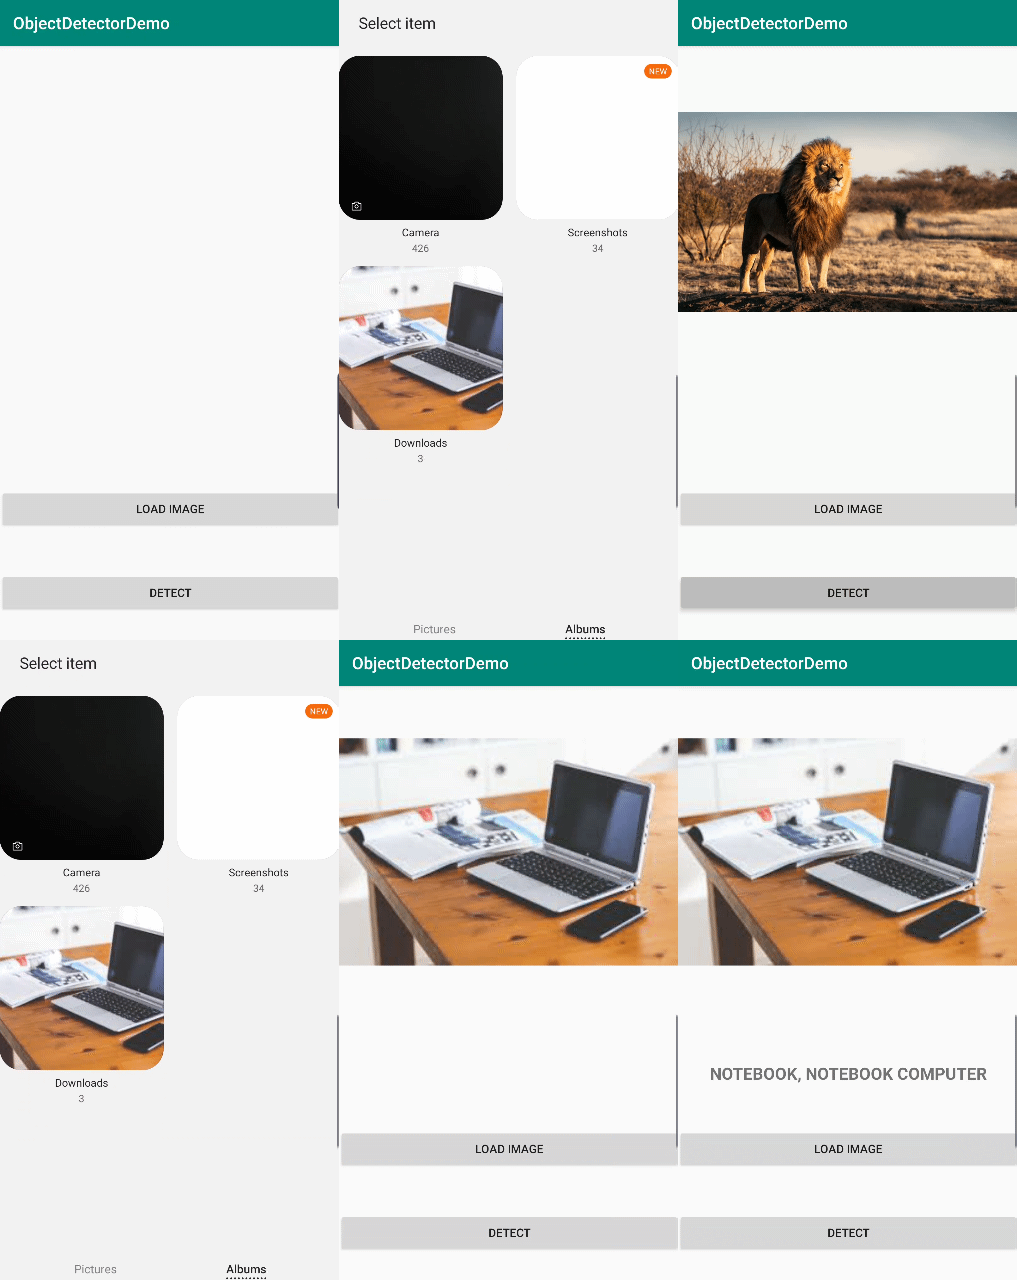
Here we will look into creating an Android Application for object detection inside an image; like the GIF shown below.

Step 1: Preparing the Model
We will be using a pre-trained ResNet18 model for this tutorial. ResNet18 is the state of the art computer vision model with 1000 classes for classification.
- Install Torchvision library
pip install torchvision
2. Download and trace the ResNet18 model.
We trace the model because we need an executable ScriptModule for just-in-time compilation.
import torch
import torchvisionresnet18 = torchvision.models.resnet18(pretrained=True)
resnet18.eval()example_inputs = torch.rand(1, 3, 224, 224)resnet18_traced = torch.jit.trace(resnet18, example_inputs = example_inputs)resnet18_traced.save("resnet18_traced.pt")
Note:
- Store resnet18_traced.pt in a known location we will be requiring this in the later steps of the tutorial.
- In torch.rand we have taken 224,224 sizes because ResNet18 accepts the sizes of 224*224.
Step 2: Making the Android application
-
Download and install Android Studio if you haven’t already while installing say YES
to download and installation of SDK
.
Link: https://developer.android.com/studio -
Open Android Studio and click on:
+ Start a new Android Studio Project - Select the Empty Activity.

4. Enter the application Name: ObjectDetectorDemo. Then Press Finish .

5. Install NDK to run native code inside Android:
- Go to Tools > SDK Manager.
- Click on SDK Tools .
- Check the box next to NDK (Side by side) .

6. Add the dependencies.
- Inside build.gradle(Module:app). Add the following inside the dependencies.
dependencies {
    implementation fileTree(dir: 'libs', include: ['*.jar'])
    implementation 'androidx.appcompat:appcompat:1.0.2'
    implementation 'androidx.constraintlayout:constraintlayout:1.1.3'implementation 'org.pytorch:pytorch_android:1.3.0'
    implementation 'org.pytorch:pytorch_android_torchvision:1.3.0'
}
7. Add a basic layout to load the image and display the results.
- Go to app>res> layout> activity_main.xml and add the code below.
<ImageView
    android:id="@+id/image"
    app:layout_constraintTop_toTopOf="parent"
    android:layout_width="match_parent"
    android:layout_height="400dp"
    android:layout_marginBottom="20dp"
    android:scaleType="fitCenter" />

<TextView
    android:id="@+id/result_text"
    android:layout_width="match_parent"
    android:layout_height="wrap_content"
    android:layout_gravity="top"
    android:text=""
    android:textSize="20dp"
    android:textStyle="bold"
    android:textAllCaps="true"
    android:textAlignment="center"
    app:layout_constraintTop_toTopOf="@id/button"
    app:layout_constraintBottom_toBottomOf="@+id/image" />

<Button
    android:id="@+id/button"
    android:layout_width="match_parent"
    android:layout_height="wrap_content"
    android:text="Load Image"
    app:layout_constraintBottom_toBottomOf="@+id/result_text"
    app:layout_constraintTop_toTopOf="@+id/detect" />

<Button
    android:id="@+id/detect"
    android:layout_width="match_parent"
    android:layout_height="wrap_content"
    android:text="Detect"
    android:layout_marginBottom="50dp"
    app:layout_constraintBottom_toBottomOf="parent" />
Your layout should look like in the image below.

8. We need to set permissions to read the images stores on the device.
- Go to app> manifests> AndroidManifest.xml and add the code below inside the manifest tag .
<uses-permission android:name="android.permission.READ_EXTERNAL_STORAGE"/>
- Get permission on application load (This is only asked until you give the permission).
— Go to MainActivity java. Add the code below inside onCreate() method.
if (Build.VERSION.SDK_INT >= Build.VERSION_CODES.M) {
    requestPermissions(new String[]  {android.Manifest.permission.READ_EXTERNAL_STORAGE}, 1);
}
9. Copy Model.
Now is the time we copy the model we created using the python script.
- Open your application from File Explorer/Finder .
- Go to app > src > main.
- Create a folder the named assets
- Copy your model in this folder.
- When you open you see in your Android Studio you should see like in the image below. (If not right-click on app folder and click on Synchronize App ).

10. We need to list the output classes of the model.
- Go to app > java.
- Inside the first folder make a new Java class name as ModelClasses .
- Define a list of classes as (Full list is 1000 classes so, it possible to copy all here check Json or check Git . for the full list and copy inside the list below):
public static String[] MODEL_CLASSES = new String[]{
        "tench, Tinca tinca",
        "goldfish, Carassius auratus"
        .
        .
        .
}
11. Main Activity Java, here will define the button actions, reading the image and calling the PyTorch model. See the comments inside the code for explanation.
12. Now it is time to test the application. There are two ways two do it:
- Running on Emulator [click here].
- Use an Android Device. ( For this you need to enable USB Debugging [ click here ]).
- After you run your application it should look behave like the GIF on top of the page.
Recommend
About Joyk
Aggregate valuable and interesting links.
Joyk means Joy of geeK