

Connecting ownCloud to DreamObjects
source link: https://help.dreamhost.com/hc/en-us/articles/215987867-Connecting-ownCloud-to-DreamObjects
Go to the source link to view the article. You can view the picture content, updated content and better typesetting reading experience. If the link is broken, please click the button below to view the snapshot at that time.
Overview
ownCloud is a free and open source file hosting application that provides universal file access, synchronization, and sharing of your data (using a single interface), regardless of where the data is located. You can access, sync, and share nearly anything such as contacts, calendars, bookmarks, and backups inside ownCloud via the web, your computer, or mobile devices.
ownCloud allows you to use DreamObjects as an external storage option, which gives you total freedom and control over your data.
This guide describes how to set up ownCloud to connect to DreamHost’s DreamObjects cloud storage service.
How to configure ownCloud to work with DreamObjects
Before you can begin using ownCloud with DreamObjects, you must install ownCloud on your DreamHost server by following this step-by-step guide.
You also must enable DreamObjects on your DreamHost account. If you haven’t enabled DreamObjects nor created the required keys and buckets, please review the following articles:
Configuring ownCloud
After you install ownCloud, you can configure it to sync with your DreamObjects buckets.
To Configure:
- Open ownCloud.
- Log into your ownCloud installation using your ownCloud administrator username and password.

- On the top left, click the
 icon and then select Market.
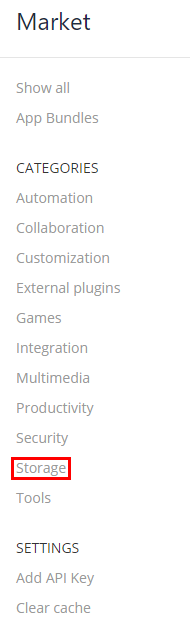
- On the Market page, select Storage from the left sidebar menu.
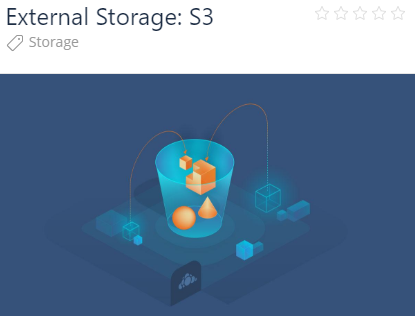
- Look for the External Storage: S3 option on the following page and click it.

- Scroll down and click the Install button.
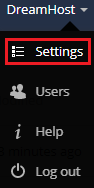
- On the top right, click your username and then select Settings.
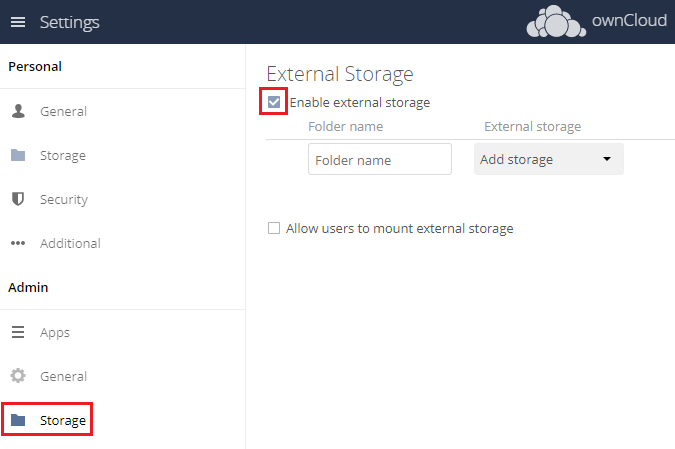
- On the Settings page, make the following selections:
- In the left pane, select Storage.
- Check the box titled Enable external storage to connect to DreamObjects.
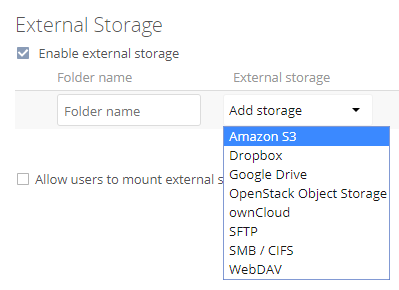
- Click the dropdown titled Add storage and select Amazon S3.
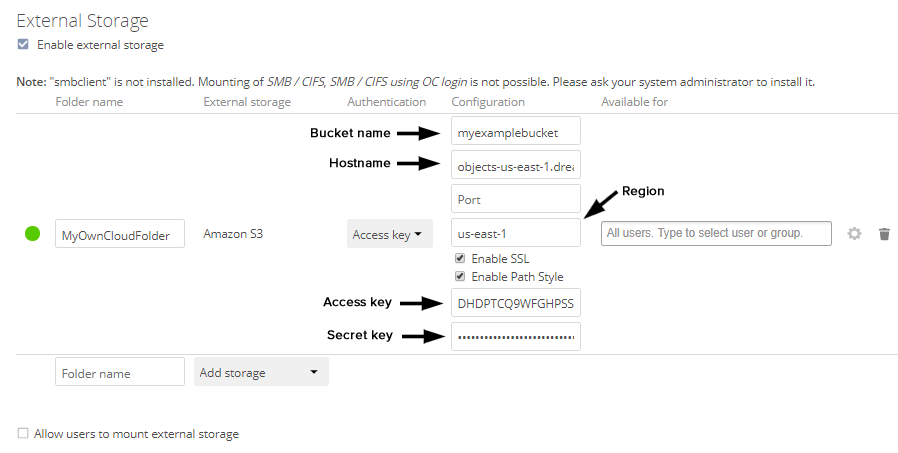
- Configure your storage settings within the following setup sections:
- Folder name
- Configuration
- Available for
Folder name
- Under Folder name, enter the name for your ownCloud folder. This will be the folder name in which you store your data and can be named anything you’d like.
Configuration
- Bucket name — The name of your DreamObjects bucket.
Your bucket name cannot contain an underscore as ownCloud will fail to connect.
- Hostname — objects-us-east-1.dream.io
- Port — Leave blank.
- Region — us-east-1
- Enable SSL — Check this box.
- Enable Path Style — Check this box.
- Access key — Your DreamObjects Access key.
- Secret key — Your DreamObjects Secret key.
Available for
- If you have multiple users of your ownCloud installation, you can limit who has access to the folder by typing users or groups in the Available for box to the right of the configuration information.
If you've entered everything correctly, a green circle appears to the left of your folder name.
View your folder and objects
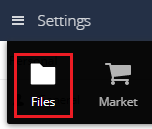
To see your files, Click Settings on the top left, then click Files.
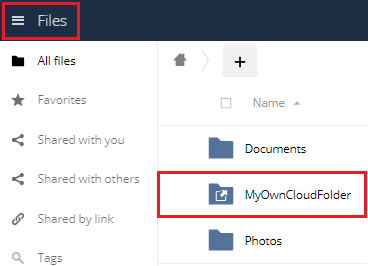
In the center pane, you'll see the name of the folder you created. Anything you keep, upload, or create there is stored in DreamObjects. Deleting an object inside ownCloud removes the object from DreamObjects.
If you wish to connect additional buckets, simply create a new folder and connect this bucket to the folder via the Admin > External Storage section of the ownCloud panel. You can connect as many buckets as you like with ownCloud.
Uploading large files inside ownCloud to DreamObjects
If you plan to upload large files to DreamObjects using ownCloud, you’ll need to be aware of some limitations and make some configuration changes since uploading large files can be very memory intensive.
DreamObjects’ objects are limited to 10TBs in size, but must be uploaded in 5GB chunks. ownCloud does not support multi-part file uploads so you are limited to 5GB file uploads via ownCloud.
Customizing PHP settings
ownCloud uses different PHP configuration files depending on where the PHP command is run.
phprc - The phprc file is the standard DreamHost file used to customize PHP settings. This file adjusts the PHP settings for Shell commands run on the server. This would include services like cron jobs. View the following articles for instructions on how to edit this file.
- .user.ini - The .user.ini file is an ownCloud file that controls PHP settings used within your website dashboard. This would include uploading files and execution time limits when interacting with your website. This file is located in the owncloud folder on the server and sets the following PHP parameters:
upload_max_filesize=513M
post_max_size=513M
memory_limit=512M
mbstring.func_overload=0
always_populate_raw_post_data=-1
default_charset='UTF-8'
output_buffering=0
View the following article if you find your new settings have not updated.
Recommend
About Joyk
Aggregate valuable and interesting links.
Joyk means Joy of geeK