

Uploading a file from the DreamHost panel into DreamObjects
source link: https://help.dreamhost.com/hc/en-us/articles/215253518-Uploading-a-file-from-the-DreamHost-panel-into-DreamObjects
Go to the source link to view the article. You can view the picture content, updated content and better typesetting reading experience. If the link is broken, please click the button below to view the snapshot at that time.
Uploading a file from the DreamHost panel into DreamObjects
Overview
There are a variety of 3rd party applications that allows you to upload and manage your data stored in DreamObjects. The DreamHost panel also provides a built-in 'DreamObject Viewer' that provides a way to upload data to DreamObjects using your browser.
This article explains how to upload data into your DreamObjects account. If you are instead looking for instructions on how to upload your website to your DreamHost web server, visit the following page:
Maximum upload size
Uploads from your browser are limited in size to 64MB. To upload larger files, you must use an S3 client.
Uploading a folder (directory)
It's not possible to upload a folder (directory) on your computer to DreamObjects using the panel uploader. Only files can be uploaded using this tool.
If you need to upload a folder (directory) which includes files, you must use an S3 compatible client.
Uploading a file
The example below shows a .zip file being uploaded, but you can upload any type of file you like.
-
Navigate to the DreamObjects page.
-
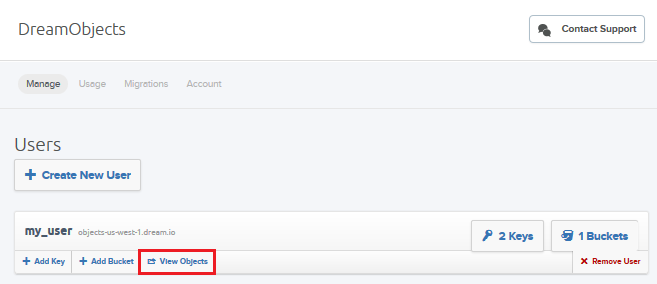
Locate the User that contains the bucket you wish to work with, and then click the View Objects button.
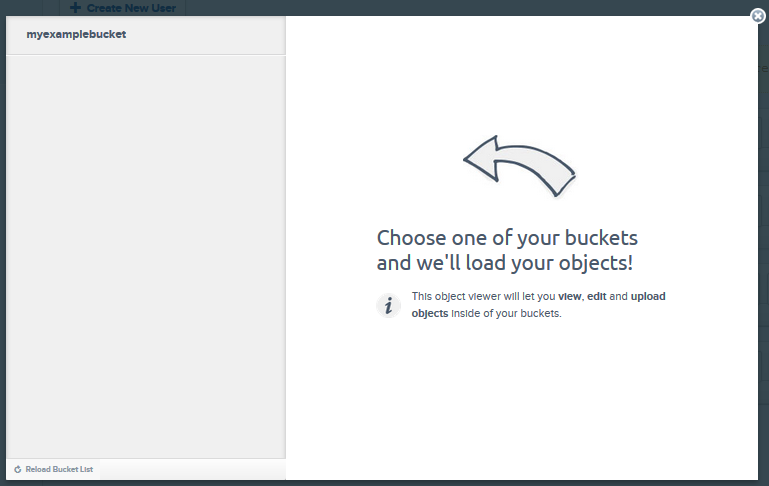
The available buckets appear in the following window:
-
Select the bucket you wish to upload objects to.
You’ll see the objects currently in the bucket in the following window. An Upload Objects button appears at the bottom of the Object Browser.
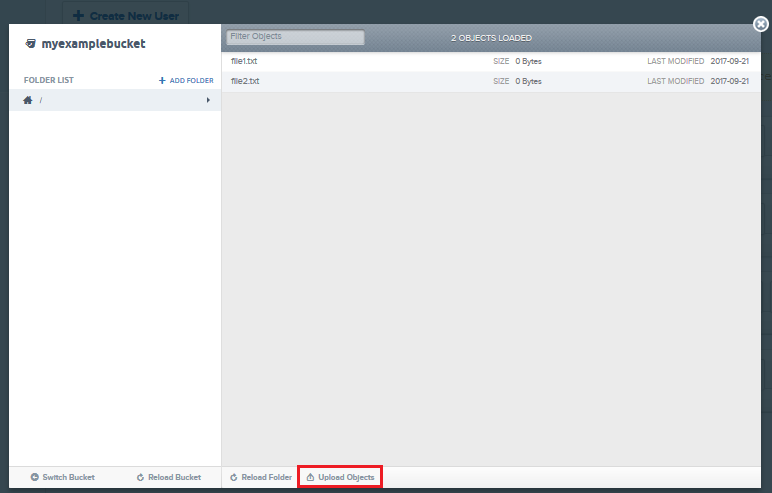
- The Object Browser is now ready for uploading.
-
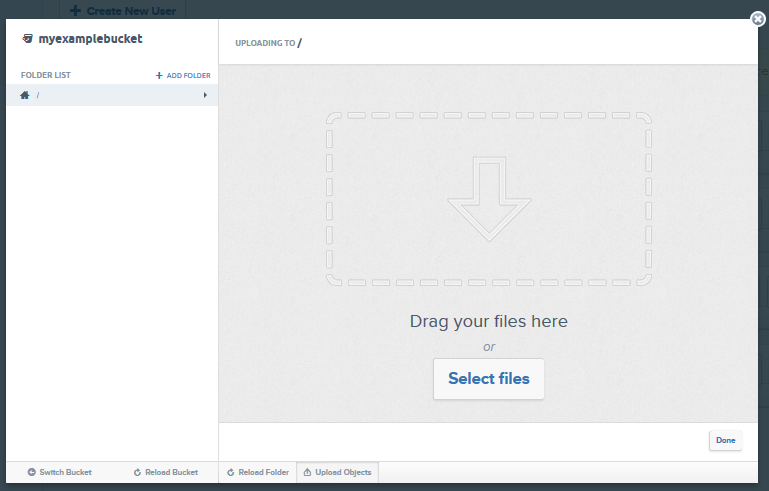
Drag your files into the Object Browser or click Select Files to choose files using the file browser.
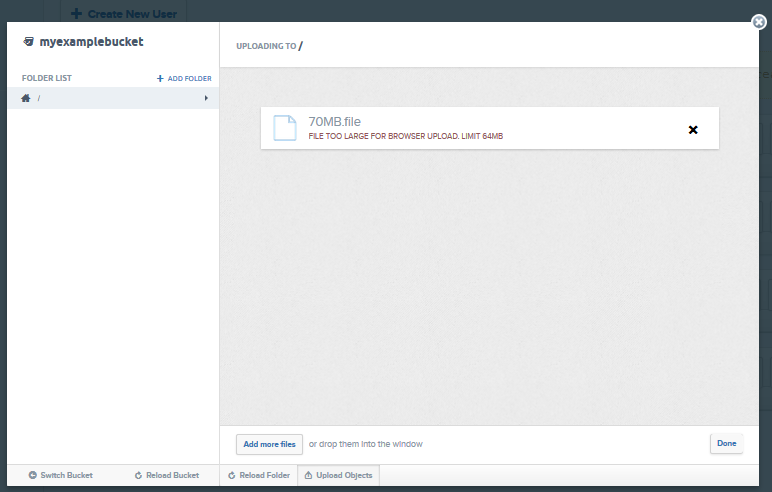
If your file is larger than 64MB, you’ll see a warning message that indicates that the file is too large:
-
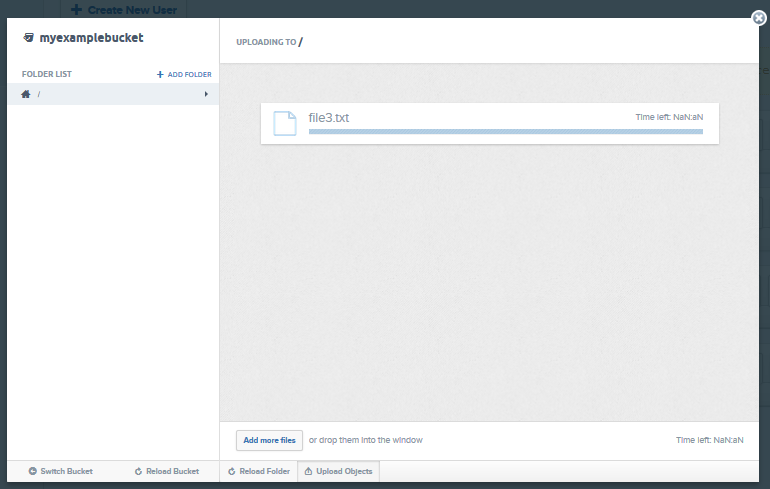
To copy another file, drag it into the window or click the Add more files button at the bottom.
Your upload progress is shown:
- You can upload additional files during the current upload simply by clicking and dragging the files into the window.
-
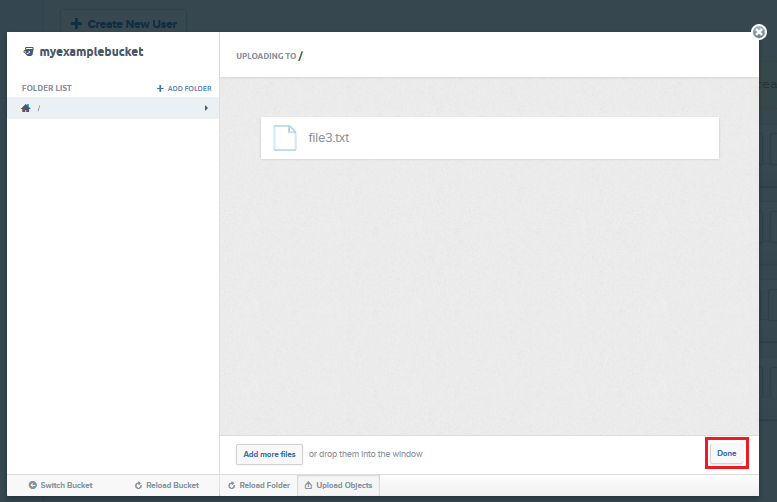
When finished uploading, click the Done button on the bottom right.
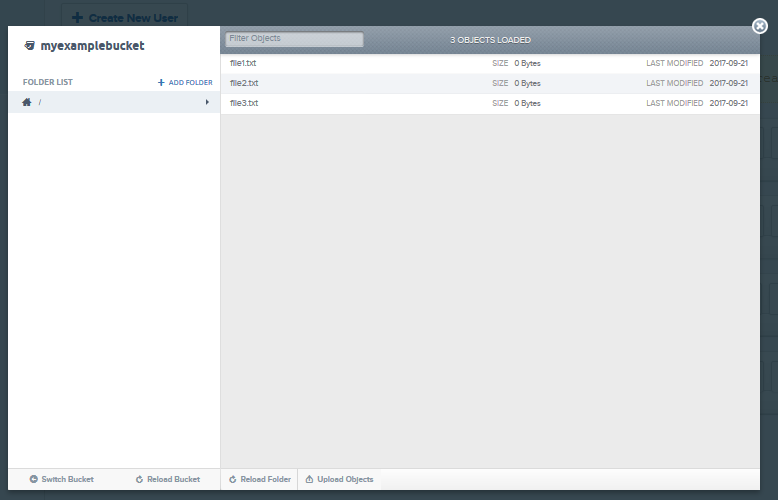
The file now appears in the Object Viewer.
-
Click the Switch Bucket button at the bottom to return to the Object Browser main page.
-
To close the DreamObjects view window when you’re done, click the grey X in the upper right corner.
Start Storing Your Data Today!
Did this article answer your questions?
Recommend
About Joyk
Aggregate valuable and interesting links.
Joyk means Joy of geeK