

Weather Forecast App using MERN Stack
source link: https://www.geeksforgeeks.org/weather-forecast-app-using-mern-stack/
Go to the source link to view the article. You can view the picture content, updated content and better typesetting reading experience. If the link is broken, please click the button below to view the snapshot at that time.
Weather Forecast App using MERN Stack
This project is a simple weather application built using React.js for the frontend and Node.js with Express.js for the backend. It allows users to check the current weather and forecast for a specific city. The backend retrieves weather data from the OpenWeatherMap API and stores it in a MongoDB database. The frontend displays the weather information and forecast in a user-friendly interface.
Output Preview: Let us have a look at how the final output will look like.

Prerequisites
Approach to Create Weather Forecast App
Backend:
- Uses Express.js to set up RESTful API endpoints.
- Utilizes mongoose to connect to a MongoDB database and store weather data.
- Retrieves weather data from the OpenWeatherMap API based on user requests.
Frontend:
- Uses React.js to create a user-friendly interface.
- Provides an input field for users to enter the city name.
- Retrieves weather data from the backend API and displays it to the user.
- Shows both current weather and forecast information.
Steps to Create the Project
Steps to Create the Backend
Project Structure:
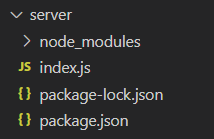
Step 1: Create a directory for project
mkdir server
cd server
Step 2: Initialize npm:
npm init -y
Step 3: Install Dependencies:
npm install express mongoose cors axios
Step 4: Create a file named index.js & write the following code.
Javascript
//server/index.js
const express = require('express');
const mongoose = require('mongoose');
const cors = require('cors');
const axios = require('axios');

const app = express();
const PORT = process.env.PORT || 5000;

// Replace 'YOUR_MONGODB_URI' with your actual MongoDB connection URI
const MONGODB_URI = 'YOUR_MONGODB_URI/weatherforecast';
mongoose.connect(MONGODB_URI, { useNewUrlParser: true, useUnifiedTopology: true });

app.use(cors());
app.use(express.json());

// Create a Mongoose model for weather data
const WeatherData = mongoose.model('WeatherData', {
  city: String,
  country: String,
  temperature: Number,
  description: String,
  icon: String,
});

// Route to handle storing weather data
app.post('/api/weather', async (req, res) => {
  try {
    // Extract weather data from request body
    const { city, country, temperature, description, icon } = req.body;

    // Create a new document using the WeatherData model
    const weatherData = new WeatherData({
      city,
      country,
      temperature,
      description,
      icon,
    });

    // Save the weather data to the database
    await weatherData.save();

    // Respond with success message
    res.json({ message: 'Weather data saved successfully' });
  } catch (error) {
    console.error('Error saving weather data:', error);
    res.status(500).json({ error: 'Internal Server Error' });
  }
});

// Start the server
app.listen(PORT, () => {
  console.log(`Server is running on port ${PORT}`);
});
Run Backend Server:
node index.js
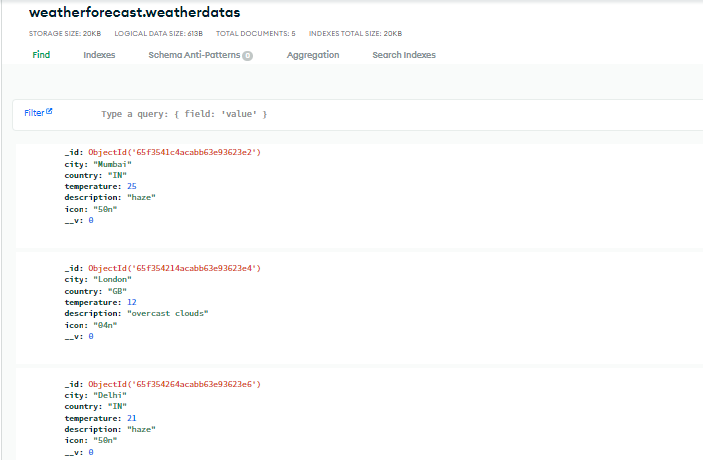
DATABASE OUTPUT:
Steps to Create the Frontend:
Project Structure:
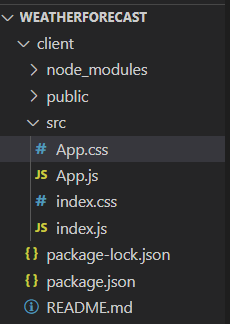
Step 1: Set up React frontend using the command.
npx create-react-app client
cd client
Step 2: Install the required dependencies.
npm install axios
Step 3: Create Frontend Components:
- Modify or replace the src/App.js and src/App.css and other files with code given as below
- In app.js if that API key is not working generate from openweathermap.org and replace it.
CSS
/*App.css*/
@import url('https://fonts.googleapis.com/css2?family=Concert+One:wght@300&display=swap');
@import url('https://fonts.googleapis.com/css2?family=Orbitron:wght@700&display=swap');

html {
    height: 100%;
}

body {
    background: whitesmoke;
    padding: 1rem 5rem;
    font-family: 'Roboto', sans-serif;
    text-transform: capitalize;
    background: linear-gradient(45deg, rgba(183, 204, 248, 0.717), rgba(7, 43, 127, 0.679)), url('https://img.freepik.com/free-photo/blue-sky-with-cloud-closeup_150588-124.jpg?t=st=1710145731~exp=1710149331~hmac=312231e34af28df68a64a9b006a4a627d0f623f0ba6e19eb23e5aceae935e41e&w=360');
    background-repeat: no-repeat;
    background-position: center;
    background-size: cover;
}

.header {
    display: flex;
    justify-content: space-between;
    align-items: center;
}

.header h1 {
    color: rgb(214, 147, 45);
    text-decoration: underline;
    font-family: 'Orbitron', sans-serif;
}

#input {
    font-size: 18px;
    padding: 5px 10px;
    outline: none;
    border: none;
    border-radius: 15px;
    background: aliceblue;
}

#search {
    background: none;
    padding: 5px 20px;
    color: aliceblue;
    outline: none;
    background: cadetblue;
    font-size: 17px;
    border-radius: 15px;
    cursor: pointer;
    border: none;
}

.weather {
    text-align: center;
    color: aliceblue;
}

#city {
    font-size: 30px;
}

.weather img {
    width: 120px;
    height: 120px;
    border-radius: 50%;
    background: rgba(240, 248, 255, 0.408);
}

#temperature {
    font-size: 50px;
    margin: 0;
    margin-left: 30px;
    margin-bottom: 10px;
}

.temp-box {
    display: flex;
    align-items: center;
    justify-content: center;
    margin: 30px 0;
}

#clouds {
    font-size: 20px;
    background: rgba(153, 205, 50, 0.778);
    padding: 2px 20px;
    border-radius: 15px;
}

main {
    display: grid;
    grid-column-gap: 25px;
    grid-template-columns: 1fr 5px 1fr;
    align-items: center;
    margin: 0 50px;
    color: white;
}

.next {
    display: flex;
    justify-content: space-between;
    align-items: center;
    margin: 10px 0;
}

.next p,
.next h3 {
    margin: 3px 0;
}

.forecstD {
    margin: 20px 50px;
    color: aliceblue;
}

.weekF {
    display: grid;
    grid-template-columns: repeat(4, 1fr);
}

.cast-header {
    color: aliceblue;
    background: rgba(254, 189, 132, 0.539);
    width: max-content;
    padding: 5px 15px;
    border-radius: 20px;
    font-size: 18px;
    margin-bottom: 5px;
}

.divider1,
.divider2 {
    background: rgba(254, 189, 132, 0.539);
    height: 200px;
    border-radius: 5px;
}

.divider2 {
    height: 5px;
    width: 30%;
    margin: 0 auto;
}

.time,
.date {
    color: rgb(254, 189, 132);
}

.desc {
    color: rgb(196, 255, 77);
}
Javascript
To start frontend code:
npm start
Output:
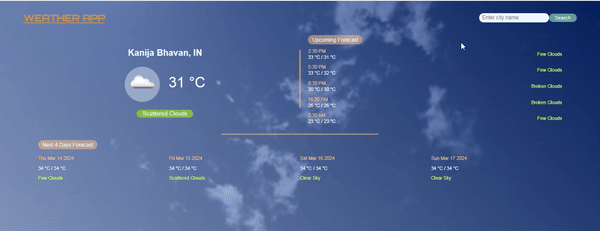
Weather Forecast final output
“This course was packed with amazing and well-organized content! The project-based approach of this course made it even better to understand concepts faster. Also the instructor in the live classes is really good and knowledgeable.”- Tejas | Deutsche Bank
With our revamped Full Stack Development Program: master Node.js and React that enables you to create dynamic web applications.
So get ready for salary hike only with our Full Stack Development Course.
Recommend
About Joyk
Aggregate valuable and interesting links.
Joyk means Joy of geeK