

Crafting interactive reactions similar to Google Meet using HTML, CSS, and Vanil...
source link: https://dev.to/rodrigoantunes/creating-interactive-reactions-like-google-meet-with-html-css-and-vanilla-javascript-5213
Go to the source link to view the article. You can view the picture content, updated content and better typesetting reading experience. If the link is broken, please click the button below to view the snapshot at that time.
Crafting interactive reactions similar to Google Meet using HTML, CSS, and Vanilla JavaScript
TL;DR
Let's build this: https://codepen.io/rodrigoant/full/RwOpeKG
In today's landscape of competing frameworks, where an abundance of dependencies often takes center stage, it's easy to overlook the power and simplicity of pure JavaScript for creating interactive elements. Rather than getting caught up in the search for the "10 Best JavaScript Animation Libraries," let's explore how to implement interactive reactions similar to those in Google Meet using HTML, CSS, and vanilla JavaScript.
The Idea
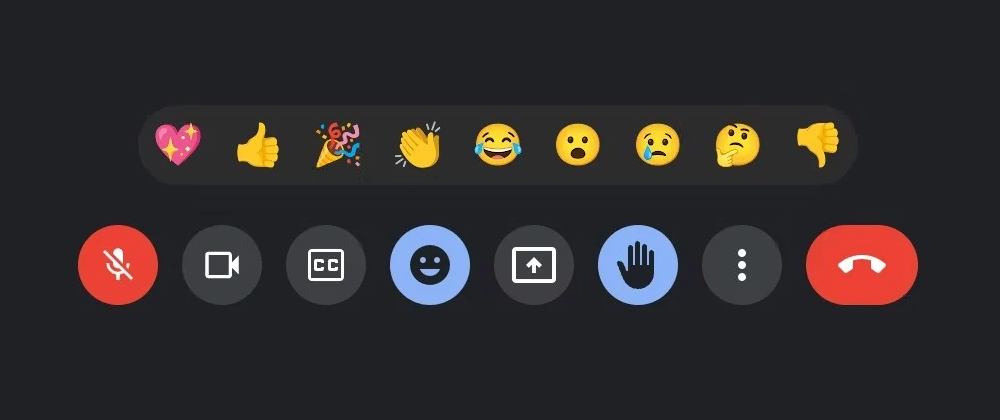
The concept aims to replicate the reactions feature found in Google Meet, allowing users to express their feelings with a single click. The implementation involves presenting a list of emojis and animating them to appear inside a container when clicked.
Only a container and an unordered list of emoji is enough.
edit: Adding buttons is better for accessibility, thanks to @thomasbnt for the indirect suggestion ❤️
<div class="emoji-container"></div>

<div class="emoji-list">
  <ul>
    <li>
      <button aria-label="Heart emoji">
        💖
      </button>
    </li>
    <li>
      <button aria-label="Thumbs up emoji">
        👍
      </button>
    </li>
    <li>
      <button aria-label="Party popper emoji">
        🎉
      </button>
    </li>
    <!-- Other emojis -->
  </ul>
</div>
Regarding the CSS, there's nothing particularly revolutionary, but there's one notable aspect I'd like to mention: the use of will-change. It's important to note that according to the MDN Docs, will-change is typically recommended as a last resort for addressing performance issues. However, in pursuit of achieving the smoothest animation possible, I opted to include it.
Additionally, it's worth mentioning that the element is removed from the DOM after the animation completes, which should help ensure optimal performance.
.emoji-animate {
  /* ... */
  will-change: transform;
}
Javascript
By utilizing a constructor to organize tasks efficiently, along with the Web Animations API, smooth animations are achieved without the need of requestAnimationFrame or external dependencies. This approach enhances code organization and simplifies the animation process.
class EmojiAnimate {
  constructor() {
    this.emojis = document.querySelectorAll(".emoji-list button");
    this.container = document.querySelector('.emoji-container');
    this.handleEmojiClick = this.handleEmojiClick.bind(this);
    this.addEventListeners();
  }

  addEventListeners() {
    this.emojis.forEach(emoji => emoji.addEventListener('click', this.handleEmojiClick));
  }

  handleEmojiClick(e) {
    // Logic for handling emoji click and animation is below
  }
}

new EmojiAnimate();
Animating the Emojis
When an emoji is clicked, I dynamically create a new element to hold the emoji, position it inside the container, and animate its movement up towards the middle of the screen, while also adjusting its opacity.
  handleEmojiClick(e) {

    // create new element to hold emoji
    const emojiEl = document.createElement('div');
    emojiEl.classList.add('emoji-animate');

    // get emoji from clicked element
    const { innerHTML } = e.target;
    emojiEl.innerHTML = innerHTML;

    // place the element inside the container
    this.container.appendChild(emojiEl);

    // get dynamic positions
    const {height, left} = e.target.getBoundingClientRect();
    const {bottom, top, width} = this.container.getBoundingClientRect();

   // animation 🍃
    const animation = emojiEl.animate([
      { opacity: 1, transform: `translate(${left}px, ${bottom}px)`},
      { opacity: 0, transform: `translate(${width / 2}px, ${top - height}px)`},
    ], {
      duration: 2000,
      easing: 'cubic-bezier(.47,.48,.44,.86)'
    });

    // remove element once has finished animating
    animation.onfinish = () => emojiEl.remove();
  }
That's it
By leveraging the fundamentals of HTML, CSS, and JavaScript, that's how to create interactive reactions without relying on external dependencies. This approach not only enhances the understanding of web development but also offers a lightweight and customizable solution for adding interactive elements to web applications. It serves as a proof of concept, reflecting the methodology likely employed in the development process before approving such functionality.
Feel free to experiment with the code provided and customize it further to suit your specific needs.
Happy coding!
Recommend
About Joyk
Aggregate valuable and interesting links.
Joyk means Joy of geeK