

Mastering the Right Panel: Great Figma Tips and Tricks | UX Planet
source link: https://uxplanet.org/figma-tips-a7598138bea6
Go to the source link to view the article. You can view the picture content, updated content and better typesetting reading experience. If the link is broken, please click the button below to view the snapshot at that time.
Mastering the Right Panel: Great Figma Tips and Tricks for Every Product Designer
Take Control of Figma’s Right Panel and streamline Your Design Process with These Essential Techniques
Mastering the Right Panel: Must-Know Figma Tips for Every Product Designer
One of the most joyful things I like to do when working in Figma is to discover various options to work more effectively with it.
In this article, I will share some Figma tips that every product designer should know to work more efficiently with the Figma right menu (the formal name is the properties menu) and enhance their Figma design skills using this powerful design tool.
These tips are easy to learn and implement, requiring minimal effort and time while significantly enhancing your Figma workflow. So let’s dive in and explore how to unlock your full potential with Figma’s right panel.
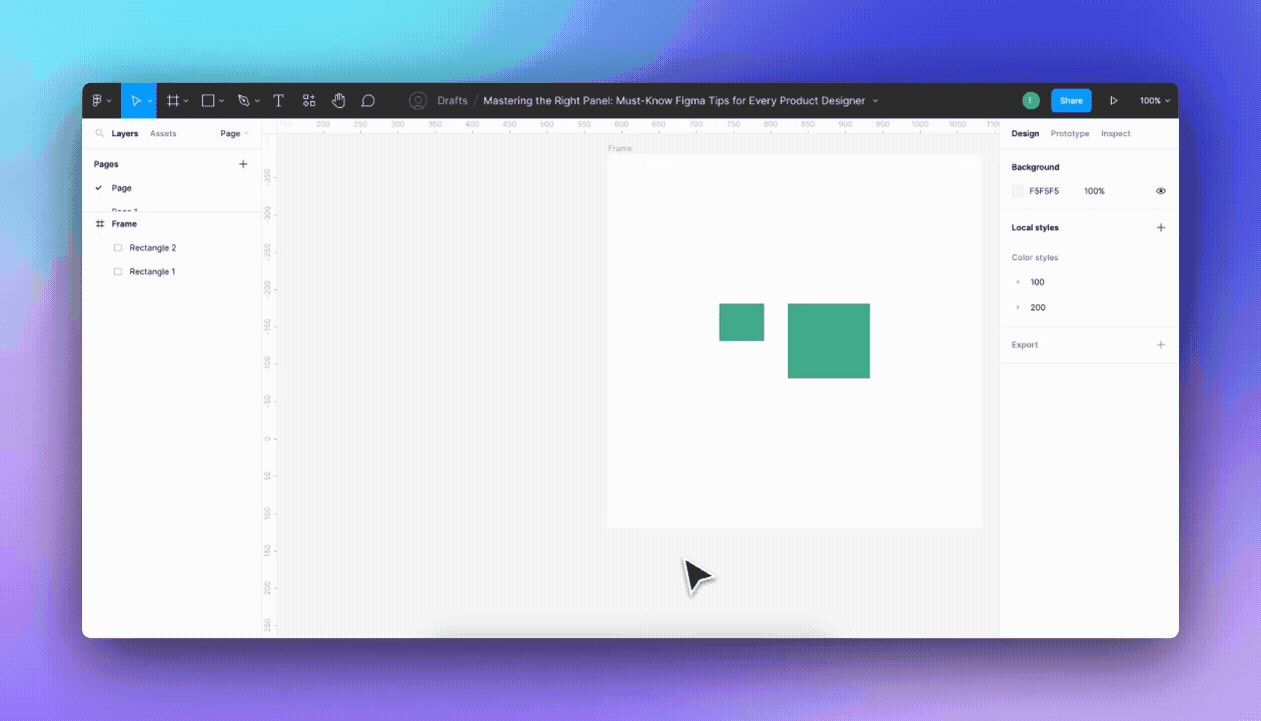
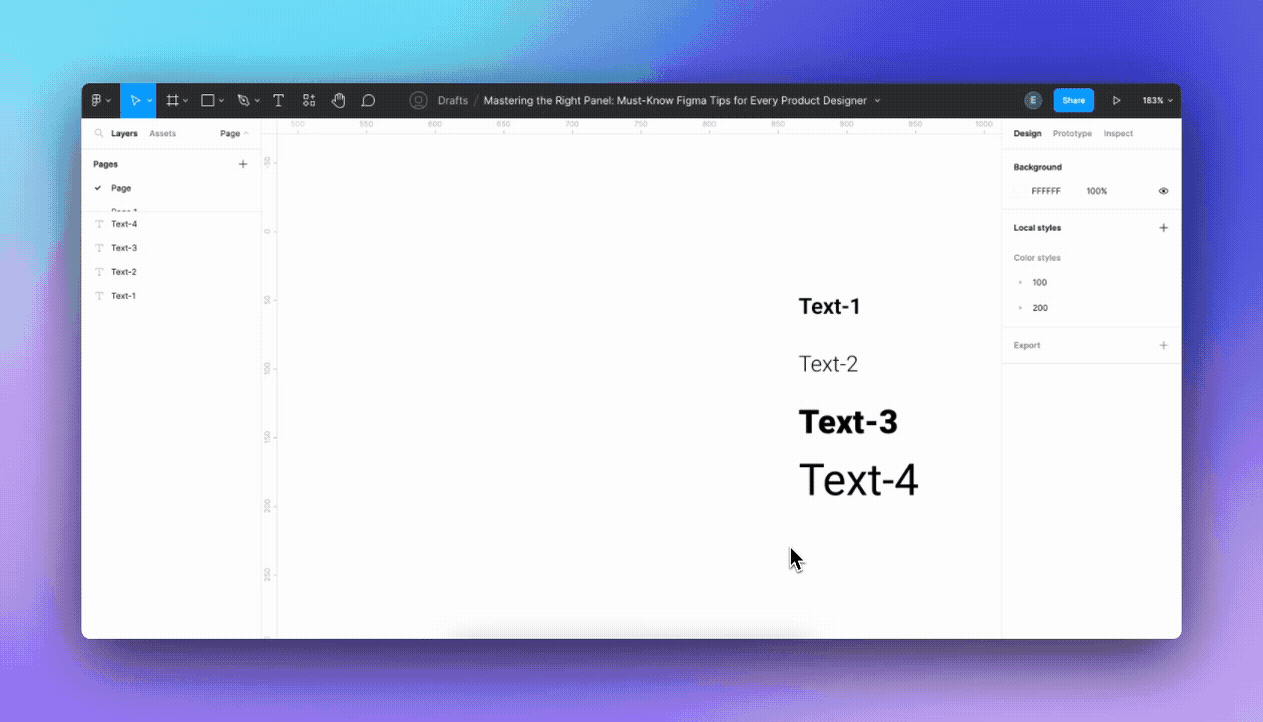
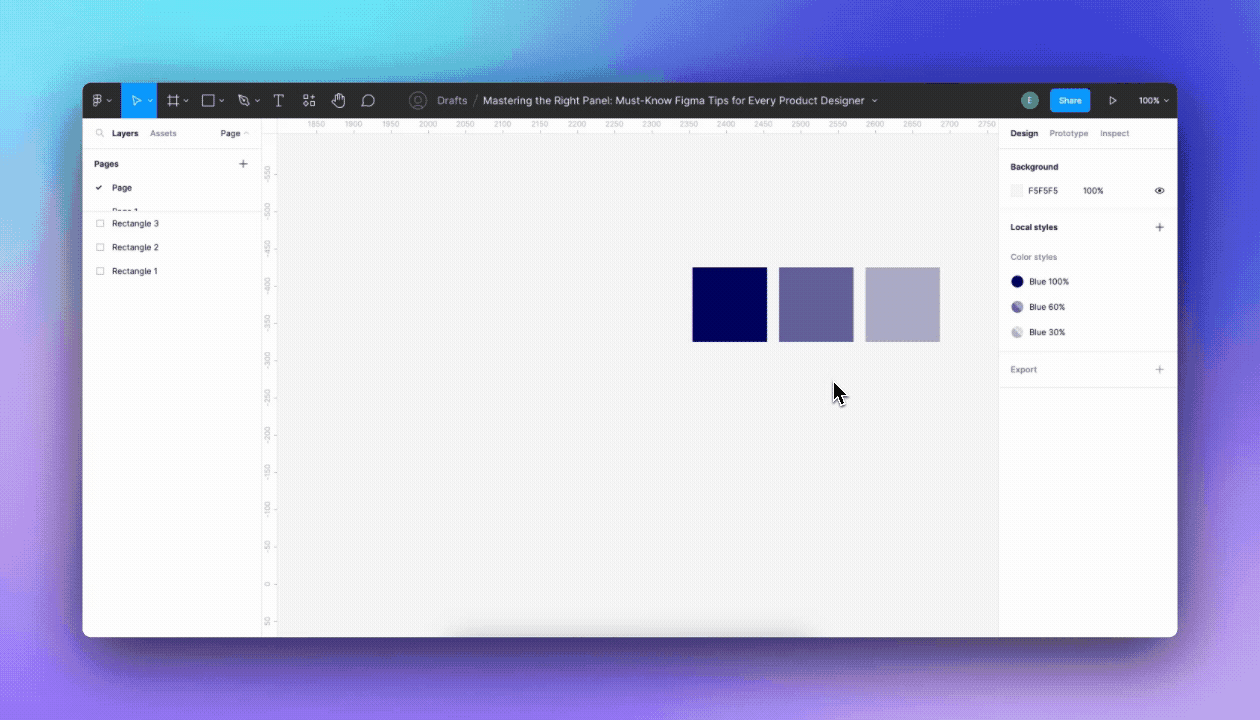
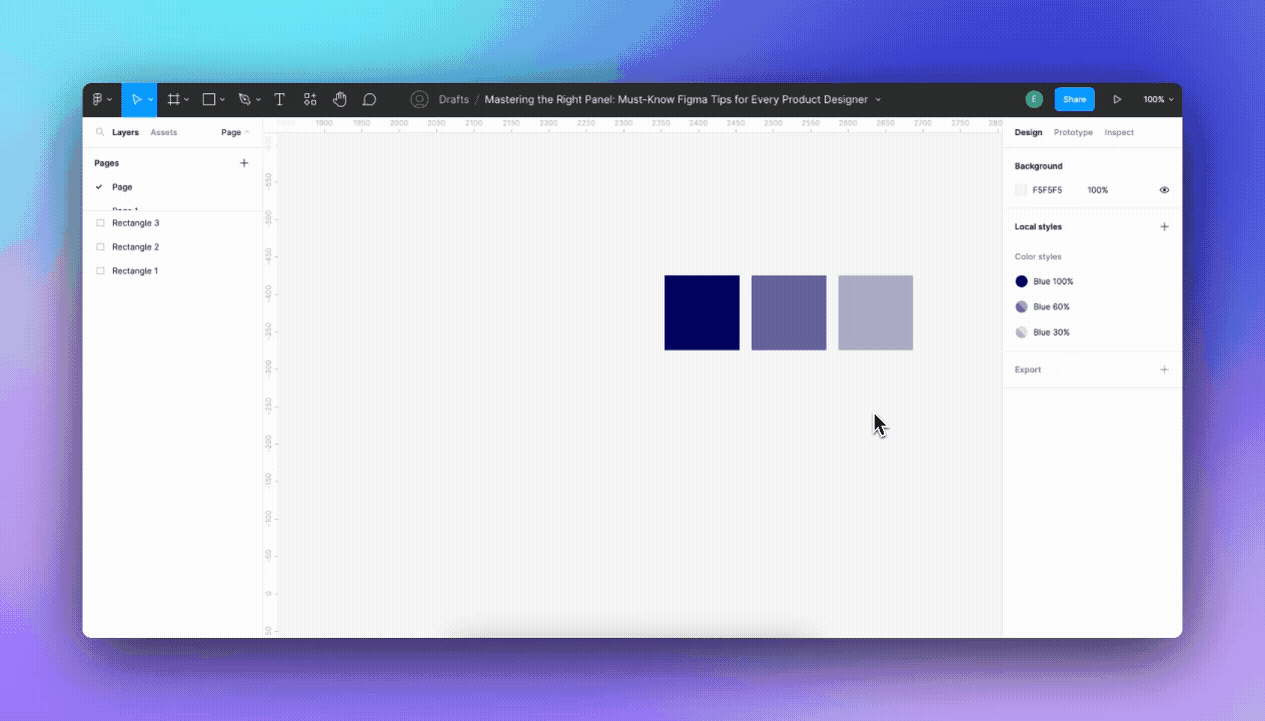
1. Relative calculation sizes
I believe you know that you can select an object and change its size using addition, subtraction, multiplication, or division. (The input also serves as a calculator).
The great thing is that they will change relatively if you select two objects and change their sizes using addition, subtraction, multiplication, or division.
Let’s say you have a square with a 50px size and another square that is 100px size.
If you select both squares and add 10px to their widths, the first square would now have a width of 60px (50+10), and the second square would have 110px (100+10).
As you can see, the size change was relative between the two objects.
These relative calculation sizes can be helpful for UI design tasks when working with objects of different sizes.

Relative calculation sizes
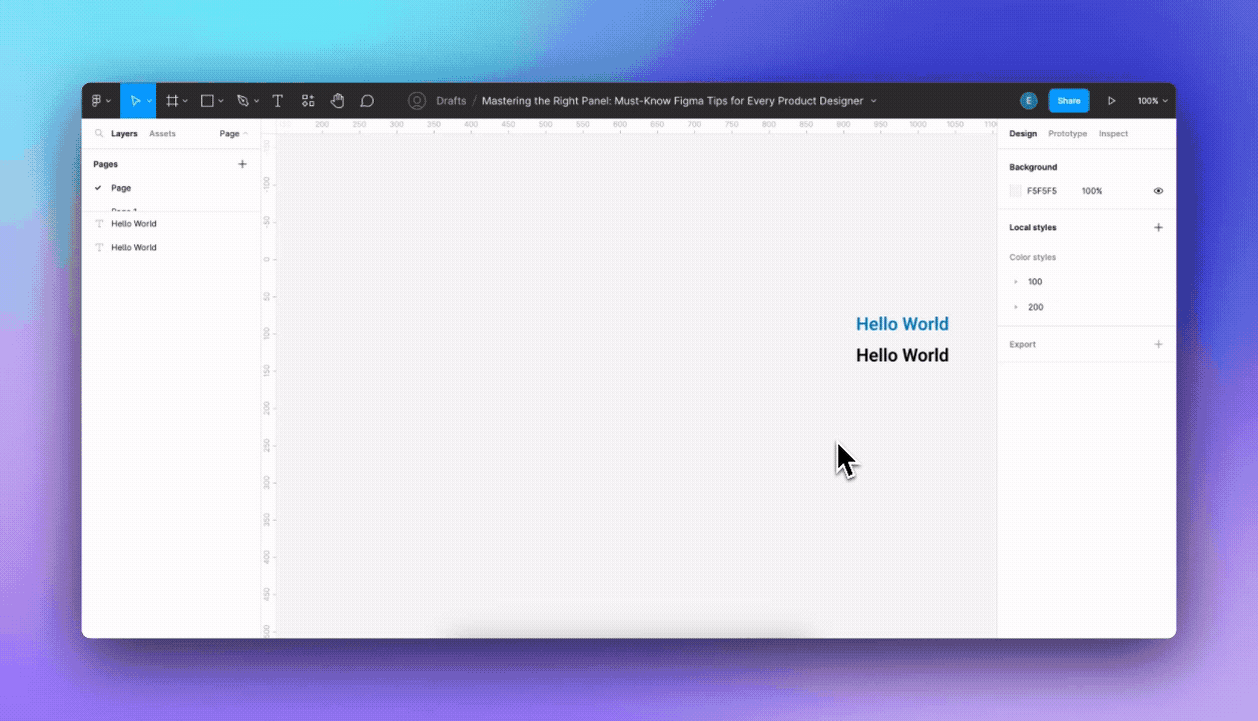
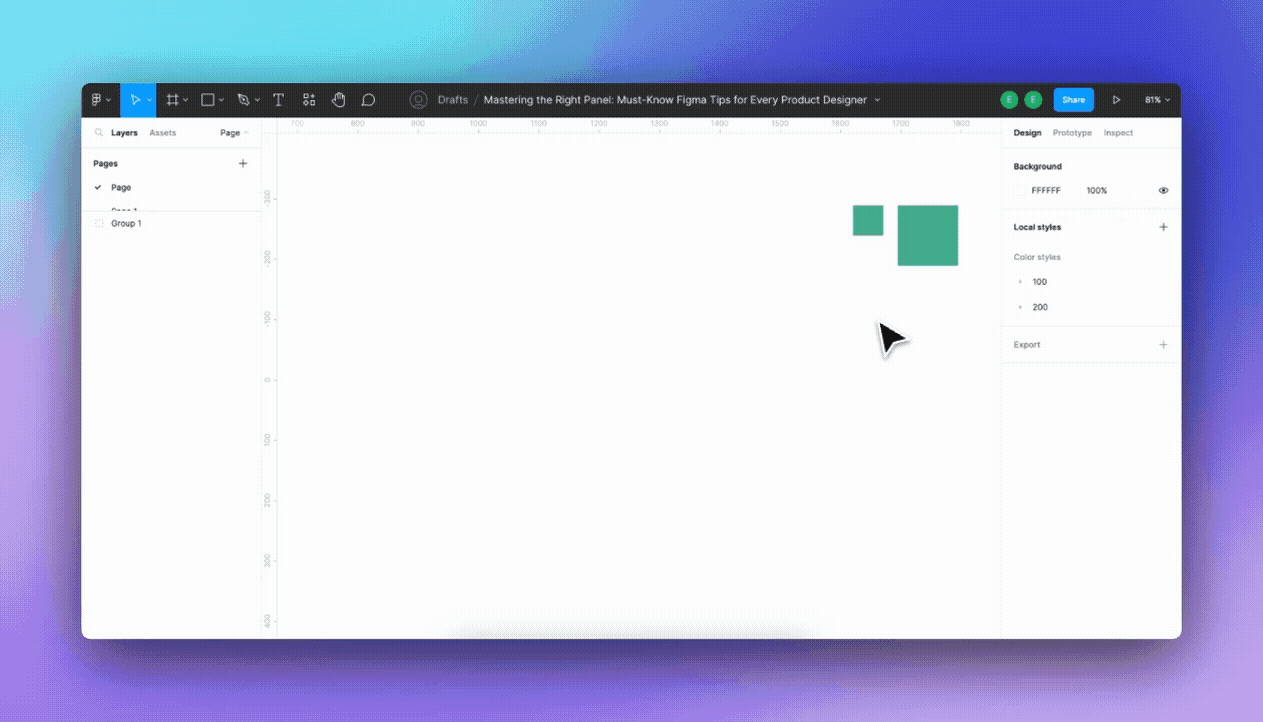
2. Align multiple objects
When you have two objects on the screen that you want to align to a certain place (let’s say on a frame), you can select both and hold Shift. The align menu will change while hovering above it, and you can align both as a group. In other words, it will not convert them into a group, just move them like a group.
For example, if you have two elements in a frame and want them to be perfectly aligned to the bottom of the frame, you can select both and use the “Align Bottom” command in the Align menu.
Align multiple objects
3. Layers styles can be copied
Figma’s right panel has a handy feature that allows you to copy and apply styles from one object to another quickly.
To utilize this time-saving tip, click on the desired style in the right panel, copy it (Cmd/Ctrl + C), select the target object, and paste it (Cmd/Ctrl + V). The style will be applied to the selected object instantly.
For example: If you have a text layer with a specific color, you can copy it and apply it to another layer.
Layers styles can be copied
4. Preview before exporting a frame
This feature lets you view a small thumbnail of the frame you intend to export in the right panel.
To access this preview, click the arrow in the right panel, and the preview will open.
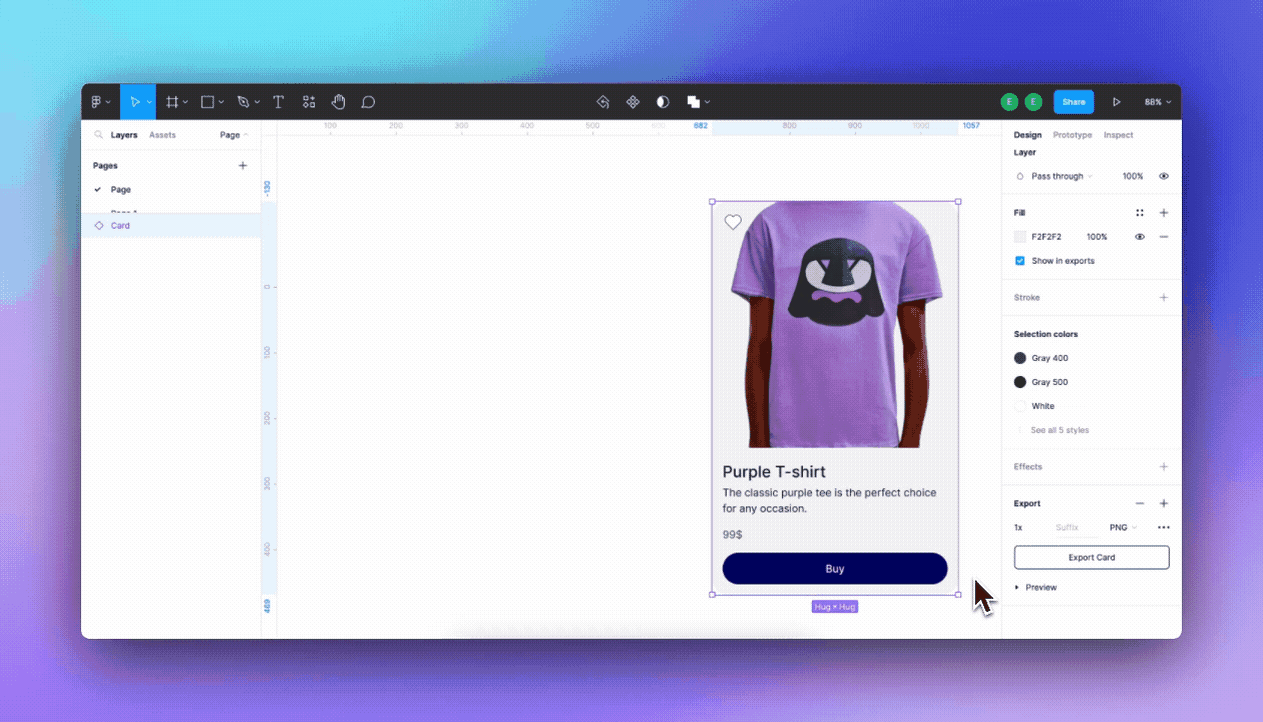
Preview Before Exporting a frame
5. The power of bulk actions
Once you know bulk actions exist in Figma, it will be a game-changer for you. This powerful option allows you to select multiple objects on the canvas and modify their styles or sizes simultaneously, streamlining your design process.
Bulk actions will save you time if you need to adjust color, text style, size, or component properties for many UI components within the Figma file or your design system UI kit.
For example, imagine you have several text elements with different font sizes but want to change their style. Simply select all the text layers and apply the required style with one click. No need to spend hours manually changing each element one by one!
The power of bulk actions
6. Swap the start and end points of a line quickly
You’ll often work with lines in your designs. One trick in Figma that saves time and effort is swapping a line’s start and end points with just one click.
When you have a line with start or/and endpoints, hover your cursor over the space between the selectors, and you’ll see a swap icon appear. Click on it to swap your start and end points.
This functionality is particularly useful when working on complex diagrams or flowcharts, as it helps to manage the arrows easily.
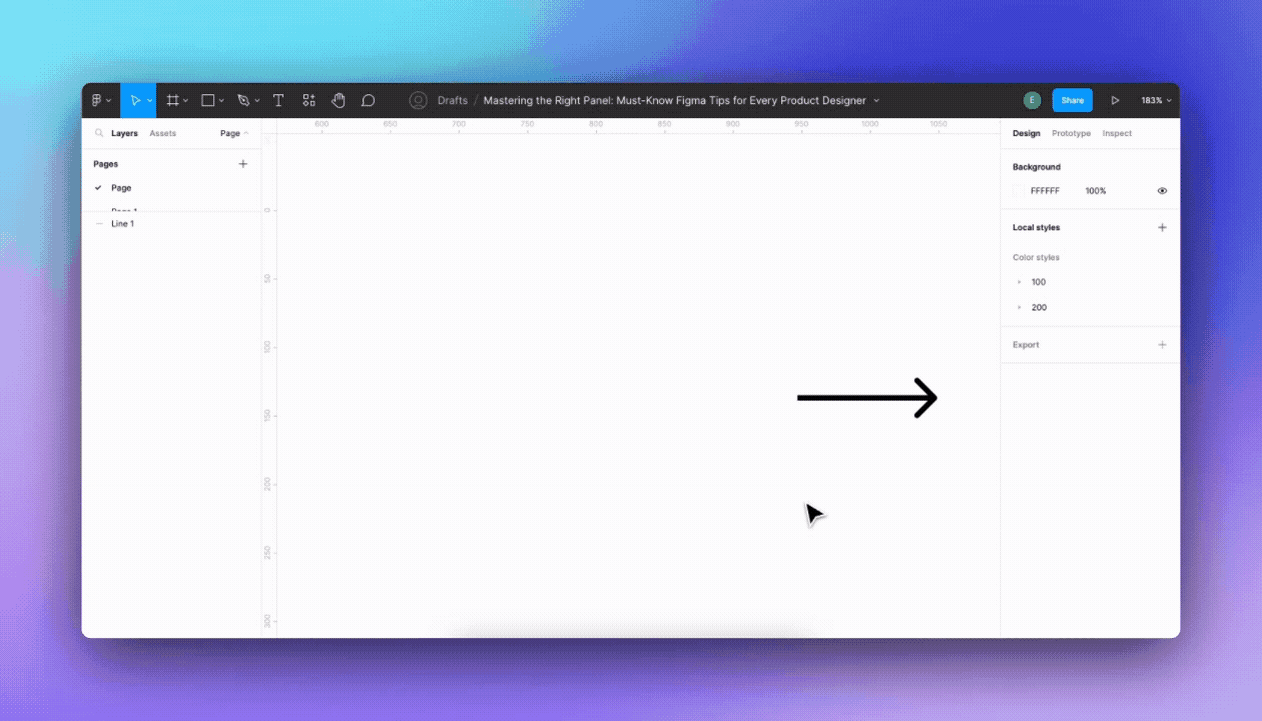
Swap the start and end points of a line quickly
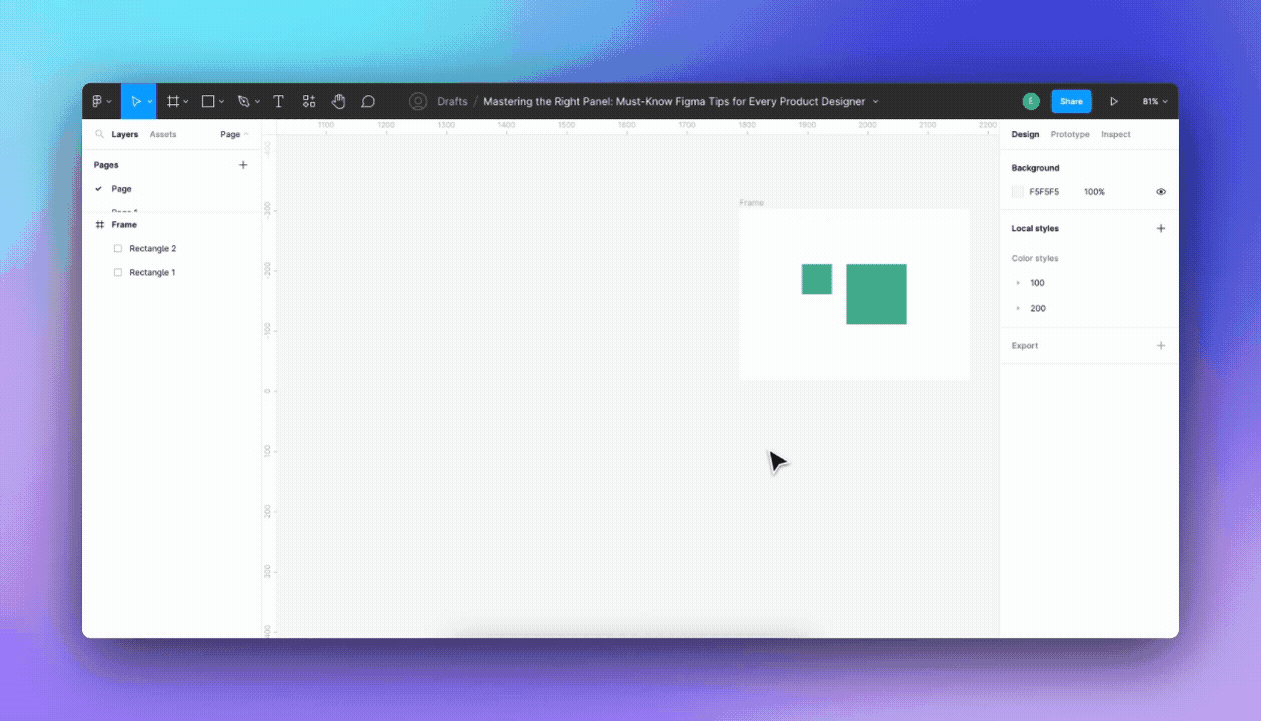
7. Change group to frame
Many product designers know that working with Frames is better than working with groups. However, if you work on a file where another designer worked with groups, You have a solution.
With one click, you can change a group to a frame directly from the right panel.
To do this, select the group you want to change. At the top of the right menu, you’ll find a select component that enables you to switch.
This powerful functionality also applies to changing frames to sections, groups to sections, and even adjusting the canvas size to predefined device dimensions, such as an iPhone or MacBook.
Change group to frame
8. Frame resizing to minimum needs
An often useful feature in Figma is the ‘Resize to Fit’ function. This convenient tool allows you to quickly adjust a frame to its minimum dimensions without compromising the integrity of the content within.
For example, if you’re creating a component and want to reduce its size to the minimum, this will help you reduce it in one click.
Frame resizing to minimum needs
9. Customizing strokes
Figma allows you to set custom strokes on specific sides of an object, providing more control and precision in your designs.
Select the object, add a stroke, and click the “Strokes per side” icon in the right panel. This will reveal options to apply strokes to the top, bottom, right, and left sides individually or in combination.
For example, if you have a footer of a modal and you want a stroke on the top only, you can easily apply this change using the “Strokes per sides” feature.
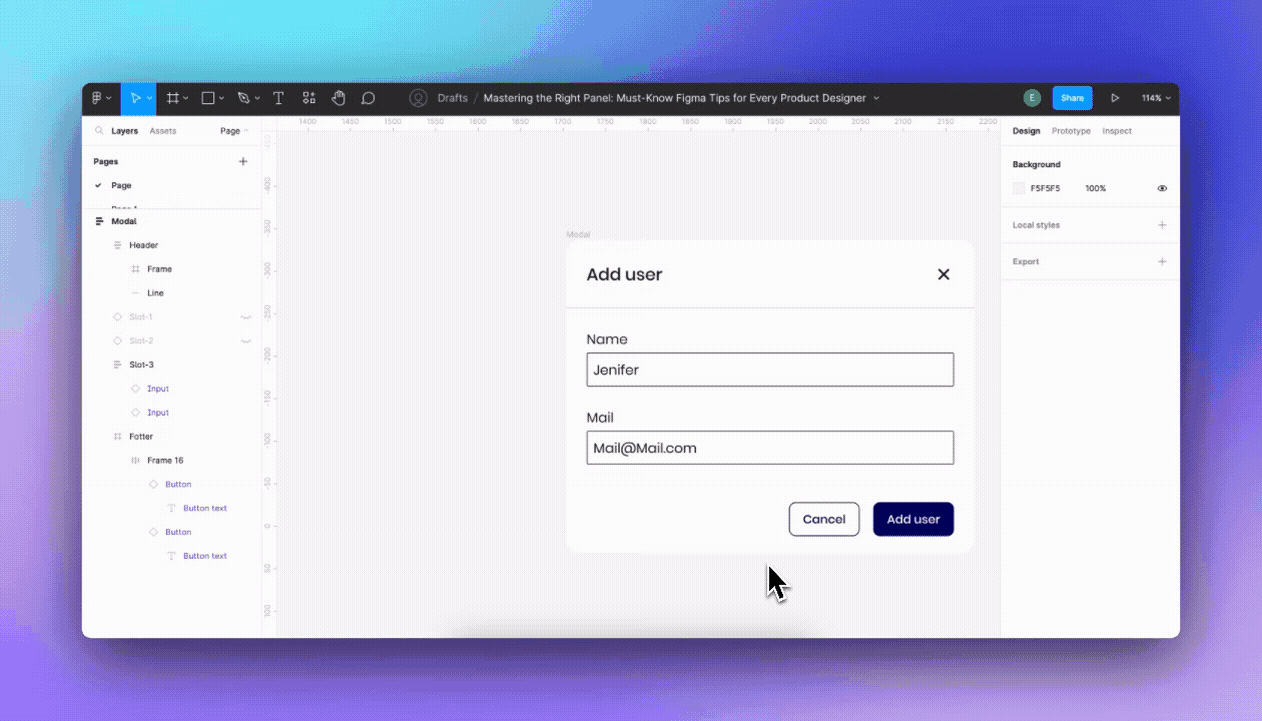
Customizing strokes
10. Organize your styles with groups for efficient workflow
Maintaining a clean and organized workspace is crucial for efficient design execution. Figma offers a practical feature that lets you group colors or text styles for easy organization and accessibility.
There are two ways to use this option:
- Begin by selecting a style and changing its name by adding a ‘/’ followed by the desired group name. This action will automatically create a group and place the style within it. Next, select any additional styles you want to include in the group and drag and drop them into the newly created group.
Organize your styles with groups for efficient workflow
- Alternatively, you can select all the styles you want to group and press CMD+G (or CTRL+G for Windows users) to form a group. Afterward, you can rename the group by double-clicking on it and entering your preferred name.
Organize your styles with groups for efficient workflow
Organizing styles in Figma in this way is the most advanced native way, and I hope that in Config 2023, Figma will introduce an even more advanced feature using design tokens.
11. Subscript and superscript numbers
You might encounter situations where you need to include subscript or superscript numbers in your text. For example, when adding mathematical notations or scientific expressions.
Figma makes it simple to apply these formatting options. First, select the character you want to modify to set a subscript or superscript number in a text layer.
Then, click on the three dots icon in the text section of the right panel to open additional options. Navigate to the “Details” tab and locate the “Numbers” section. Within the “Position,” you can select Subscript, Superscript, or Normal.
Subscript and superscript numbers
To summarize
In this post, I shared tips to help you work more efficiently with the right panel in Figma.
Here is a summary of all the tips.
- Relative calculation sizes
- Align multiple objects
- Layers styles can be copied
- Preview before exporting a frame
- The power of bulk actions
- Swap the start and end points of a line quickly
- Change group to frame
- Frame resizing to minimum needs
- Customizing strokes
- Organize your styles with groups for efficient workflow
- Subscript and superscript numbers
Would you like more tips?
Look at the other articles I’ve shared with tips for Figma.
Recommend
About Joyk
Aggregate valuable and interesting links.
Joyk means Joy of geeK