

Svelte框架结合SpreadJS实现表格协同文档 - 葡萄城技术团队
source link: https://www.cnblogs.com/powertoolsteam/p/17120273.html
Go to the source link to view the article. You can view the picture content, updated content and better typesetting reading experience. If the link is broken, please click the button below to view the snapshot at that time.

Svelte框架结合SpreadJS实现表格协同文档
SpreadJS是葡萄城结合 40 余年专业控件技术和在电子表格应用领域的经验而推出的纯前端表格控件。作为一个类Excel控件,SpreadJS如何实现当前比较流行的表格协同呢?本篇文章将简单介绍一下。
首先,从框架搭建上,本篇示例采用当下流行的前后端分离的开发方式,前端使用npm作为脚手架搭建Svelte框架。 后端使用Java的SpringBoot作为后端框架。前端使用SpreadJS V15.2.5以及SpreadJS在线表格编辑器Designer为前端操作的平台后端使用GCExcel作为文档的终端处理,随时提供备份与恢复。
首先,介绍下在前端Svelte框架下搭建SpreadJS在线表格编辑器。
1、在pageage.json文件中引入相关SpreadJS资源
 "@grapecity/spread-excelio": "15.2.5",
    "@grapecity/spread-sheets": "15.2.5",
    "@grapecity/spread-sheets-barcode": "15.2.5",
    "@grapecity/spread-sheets-charts": "15.2.5",
    "@grapecity/spread-sheets-designer": "15.2.5",
    "@grapecity/spread-sheets-designer-resources-cn": "15.2.5",
    "@grapecity/spread-sheets-languagepackages": "15.2.5",
    "@grapecity/spread-sheets-pdf": "15.2.5",
    "@grapecity/spread-sheets-pivot-addon": "15.2.5",
    "@grapecity/spread-sheets-pivots": "^14.0.0",
    "@grapecity/spread-sheets-print": "15.2.5",
    "@grapecity/spread-sheets-resources-zh": "15.2.5",
    "@grapecity/spread-sheets-shapes": "15.2.5",
    "@grapecity/spread-sheets-tablesheet": "15.2.5",
2、然后,集成在线表格编辑器Svelte组件版。在上一篇文章中,我们介绍了如何在Svelte框架中实现在线表格编辑器。
我们按照此思路新建一个SpreadSheet.svelte文件,写入基础在线表格编辑器。
<script>
import {onMount} from 'svelte';
import '@grapecity/spread-sheets-print';
import "@grapecity/spread-sheets-charts";
import '@grapecity/spread-sheets-shapes';
import '@grapecity/spread-sheets-pivot-addon';
import '@grapecity/spread-sheets-tablesheet';
import '@grapecity/spread-sheets-designer-resources-cn';
import '@grapecity/spread-sheets-designer';
import * as GC from '@grapecity/spread-sheets';
import * as GCDesigner from '@grapecity/spread-sheets-designer';

let designer = null;
onMount(async () => {
designer = new GCDesigner.Spread.Sheets.Designer.Designer(document.getElementById("designerHost"));
let spread = designer.getWorkbook();
});

</script>
<div id="designerHost" class="designer-host"></div>

<style scoped>
@import "@grapecity/spread-sheets-designer/styles/gc.spread.sheets.designer.min.css";
@import '@grapecity/spread-sheets/styles/gc.spread.sheets.excel2013white.css';

.designer-host {
width: 100%;
height: 100vh;
}

</style>
3、协同文档可能不止一个,我们需要在页面上创建一个文档列表,来允许用户选择编辑哪个文档,所以我们需要创建一个文档列表页面OnlineSheets.svelte。在此页面中,我们要实现路由跳转,和加载文档数据。
这里我们用了svelte-spa-router进行路由跳转 与isomorphic-fetch进行前后端数据传输。
<script>
    import {onMount} from 'svelte';
    import { link } from "svelte-spa-router";
    import {Utility} from "../utility.js";

    let docList = [];
    onMount(async () => {
        Utility.getDocList().then(result => {
            docList  = result.map((item,index)=>{
                return {
                    path:'/Spreadsheet/' + item.substring(0, item.lastIndexOf('.')),
                    index,
                    fileName:item
                }
            })
        });
    });
</script>
<main class="main">
    <table className='table' aria-labelledby="tabelLabel">
        <thead>
        <tr>
            <th>Document</th>
            <th></th>
        </tr>
        </thead>
        <tbody>
        {#each docList as docItem}
            <tr>
                <td>{docItem.index}</td>
                <td>{docItem.fileName}</td>
                <td className='row'>
                    <a use:link={docItem.path}> Open</a>
                </td>
            </tr>
        {/each}
        </tbody>
    </table>
</main>
以上代码实现了文档列表查看与文档跳转,使用 Open将跳转至前面设计好的在线表格编辑器中。
至此,前端的相关内容就准备好了,接下来搭建下后端工作。
后端的准备工作,首先安装gradle作为包管理器。当然,这里也可以用其他工具来代替,例如maven,或者源生引入jar包的方式将需要用到的jar包引入进来。之后创建springboot工程配合搭建gradle引用GCExcel以及后面协同需要用到的websocket。
<dependencies>
<dependency>
<groupId>org.springframework.boot</groupId>
<artifactId>spring-boot-starter-web</artifactId>
</dependency>

<dependency>
<groupId>org.springframework.boot</groupId>
<artifactId>spring-boot-starter-test</artifactId>
<scope>test</scope>
</dependency>

<dependency>
<groupId>org.springframework.boot</groupId>
<artifactId>spring-boot-starter-tomcat</artifactId>
<version>2.4.3</version>
</dependency>

<dependency>
<groupId>org.springframework.boot</groupId>
<artifactId>spring-boot-starter-websocket</artifactId>
<version>2.4.3</version>
</dependency>

<dependency>
<groupId>com.grapecity.documents</groupId>
<artifactId>gcexcel</artifactId>
<version>4.0.3</version>
</dependency>

<dependency>
<groupId>com.google.code.gson</groupId>
<artifactId>gson</artifactId>
<version>2.8.6</version>
</dependency>

<dependency>
<groupId>javax.servlet</groupId>
<artifactId>jstl</artifactId>
<version>1.2</version>
</dependency>

<dependency>
<groupId>org.apache.tomcat.embed</groupId>
<artifactId>tomcat-embed-jasper</artifactId>
<version>10.0.2</version>
</dependency>

<dependency>
<groupId>com.jayway.jsonpath</groupId>
<artifactId>json-path</artifactId>
<version>2.5.0</version>
</dependency>
</dependencies>
这样子,我们做了框架的基本环境搭建,接下来我们介绍下如何搭建webSocket。
在SpreadSheet.svelte文件中写入如下代码建立webSocket链接:
   function connectDocument(docName) {
        if (webSocket != null) {
            return;
        }
        var ws = new WebSocket(Utility.webSocketUrl);  //'ws://localhost:8090/spreadjs'
        ws.onopen = function () {
            var data = {
                cmd: "connect",
                docID: docName
            }
            ws.send(JSON.stringify(data));
        }
        ws.onmessage = onmessage;
        webSocket = ws;
    }
接下来我们访问下文档列表页,从文档列表页跳转进入文档,进行编辑。


接下来我们需要监听前端发出的操作。这里因为在线表格编辑器本身将所有用户可能做的操作全部做了封装,所以省下了很多的功夫。
 onMount(async () => {
        //初始化Designer
        designer = new GCDesigner.Spread.Sheets.Designer.Designer(document.getElementById("designerHost"));
        let spread = designer.getWorkbook();
        //fromJSON
        openDocument(docName);
        //建立webSocket
        connectDocument(docName);
        var cm = spread.commandManager();
        cm.addListener('myListener', onCommandExecute)
    });
根据cmd去判断并且对命令再做一些简单封装,之后将封装过的命令发到服务端,之后通过websocket发同步指令:
function onCommandExecute(args) {
        console.log(args.command);
        var command = args.command;
        var ServerCommand = null;

        switch (command.cmd) {
            case Utility.ServerCommands.EditCell:
                ServerCommand = {
                    sheetName: command.sheetName,
                    row: command.row,
                    column: command.col,
                    newValue: command.newValue
                }
                break;
            case Utility.ServerCommands.ResizeRow:
                ServerCommand = {
                    sheetName: command.sheetName,
                    rows: command.rows,
                    size: command.size
                };
                break;
            case Utility.ServerCommands.ResizeColumn:
                ServerCommand = {
                    sheetName: command.sheetName,
                    columns: command.columns,
                    size: command.size
                };
                break;
            case 'Designer.' + Utility.ServerCommands.SetFontFamily:
            case 'Designer.' + Utility.ServerCommands.SetFontSize:
            case 'Designer.' + Utility.ServerCommands.SetBackColor:
            case 'Designer.' + Utility.ServerCommands.SetForeColor:
            case 'Designer.' + Utility.ServerCommands.SetFontWeight:
            case 'Designer.' + Utility.ServerCommands.SetFontStyle:
            case 'Designer.' + Utility.ServerCommands.SetUnderline:
            case 'Designer.' + Utility.ServerCommands.SetDoubleUnderline:
                if (command.value && command.value.indexOf('undefined') === -1) {
                    ServerCommand = {
                        sheetName: command.sheetName,
                        selections: command.selections,
                        value: command.value
                    }
                }
                break;
            case Utility.ServerCommands.MoveFloatingObjects:
                ServerCommand = {
                    sheetName: command.sheetName,
                    floatingObjects: command.floatingObjects,
                    offsetX: command.offsetX,
                    offsetY: command.offsetY
                };
                break;
            case Utility.ServerCommands.ResizeFloatingObjects:
                ServerCommand = {
                    sheetName: command.sheetName,
                    floatingObjects: command.floatingObjects,
                    offsetX: command.offsetX,
                    offsetY: command.offsetY,
                    offsetWidth: command.offsetWidth,
                    offsetHeight: command.offsetHeight
                };
                break;
            case Utility.ServerCommands.InsertColumns:
            case Utility.ServerCommands.InsertRows:
                ServerCommand = {
                    sheetName: command.sheetName,
                    selections: command.selections
                };
                break;
            default:
        }

        if (ServerCommand != null) {

            var cmd = command.cmd;
            var dotIndex = cmd.lastIndexOf('.');
            if (dotIndex !== -1) {
                cmd = cmd.substring(dotIndex + 1);
            }
            ServerCommand.cmd = cmd;
            ServerCommand.docID = params.fileName;

            Utility.ExecuteCommandAtServer(ServerCommand);

            command.docID = ServerCommand.docID;
            webSocket.send(JSON.stringify(command))
        }
    }
当协同端通过websocket接收到请求的时候,使用onmessage方法做同步命令。这里在协同端执行command之前需要先撤销之前的监听,避免再发送websocket导致死循环。在执行之后,再次添加监听。
 function onmessage(message) {
        var command = JSON.parse(message.data);
        command._styles = null;
        let spread = designer.getWorkbook()
        var cm = spread.commandManager();
        cm.removeListener('myListener');

        spread.commandManager().execute(command);

        cm.addListener('myListener', onCommandExecute);
    }
至此,协同基础内容搭建结束,我们来看看编辑单元格内容后,发生了什么吧。
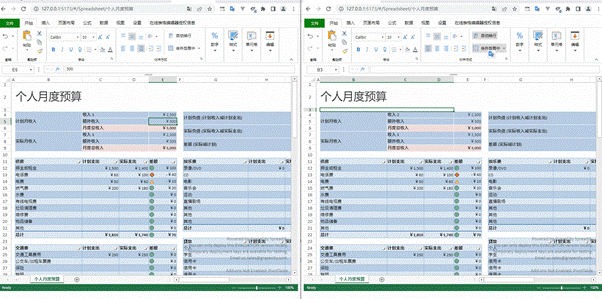
如下图所示,修改E4单元格内容,同时打开控制台网络tab。
将E4单元格数值2500改为2000,此时触发了EditCell事件,同时发出了交互指令:

此时新建一个窗口,复制链接,查看文档内容已经变为了2000。
如下动图所示:
以上就是Svelte框架结合SpreadJS实现表格协同文档的方法,如果您想体验更多功能或免费下载试用SpreadJS,欢迎访问葡萄城官网。Recommend
-
47
JavaScript是一个涵盖多种框架、直译式、可以轻松自定义客户端的脚本语言,在 Web 应用程序中,更加易于编码和维护。而Excel 作为一款深受用户喜爱的电子表格工具,借助其直观的界面、出色的计算性能和图表工具,已经成为数据统计领域不可...
-
18
转载请注明出处: 葡萄城官网 ,葡萄城为开发者提供专业的开发工具、解决方案和服务,赋能开发者。 表格作为数据呈现的一种基本方式,在各类软件系统都发挥着重要的作用。在移动...
-
12
Vue 3 组件开发:搭建基于SpreadJS的表格编辑系统(环境搭建)发布于 4 月 12 日...
-
4
文章目录 二、报表可视化难点2. 对 Excel 操作和兼容性要求较高3. 报表格式灵活多变4. 支持公式计算5. 工作流中的数据文档
-
7
使用VUE组件创建SpreadJS自定义单元格(一) - 葡萄城技术团队博客 - OSCHINA - 中文开源技术交流社区 作为近五年都冲在热门框架排行榜首的Vue,大家一定会学到的一部分就是组件的使用。前端开发的模块化,可以让代码逻辑更加简单清晰,项目的扩展性大大...
-
7
使用VUE组件创建SpreadJS自定义单元格(二)在上篇中,我们介绍了如何通过设置runtimeCompiler为true,在Vue中实现了动态创建电子表格组件。想了解具体内容可看点击查看
-
4
在服务端生成Excel电子表格,除了使用 Node.js + SpreadJS 外,葡萄城官方推荐使用 SpreadJS + GcExcel。该方案不仅能够解决批量绑定数据源并导出Excel、批量修改大量Excel内容及样式、服务端批量打印以及生成PDF文档等需求,还提供了远超行业标准的组件性能。
-
5
JavaScript在前端领域占据着绝对的统治地位,目前更是从浏览器到服务端,移动端,嵌入式,几乎所有的所有的应用领域都可以使用它。技术圈有一句很经典的话“凡是能用JavaScript实现的东西,最后都会用JavaScript实现”。 Excel 电子表格自 1980 年代以来一直为各...
-
9
在之前的文章中,我们为大家分别详细介绍了在JavaScript、React中使用SpreadJS导入和导出Excel文件的方法,作为带给广大前端开发者的“三部曲”,本文我们将为大家介绍该问题在Angular中的实现。 Excel 电子表格自 1980 年代以来一直为各行业所广泛使用,至今已...
-
3
Svelte框架实现表格协同文档 首先,从框架搭建...
About Joyk
Aggregate valuable and interesting links.
Joyk means Joy of geeK