

python3.7+Django2.0.4配合vue.js2.0实现又拍云(upyun.cm)存储的异步拖拽文件上传功能
source link: https://v3u.cn/a_id_140
Go to the source link to view the article. You can view the picture content, updated content and better typesetting reading experience. If the link is broken, please click the button below to view the snapshot at that time.

python3.7+Django2.0.4配合vue.js2.0实现又拍云(upyun.cm)存储的异步拖拽文件上传功能

在之前的几篇文章里阐述过关于七牛云云存储文件上传的一些操作:python3.7+Vue.js2.0+Django2.0.4异步前端通过api上传文件到七牛云云端存储;使用Tornado配合七牛云存储api来异步切分上传文件,得益于七牛云完备的文档体系,没遇到什么大坑,现在来介绍一下业内和七牛云齐名的云服务平台又拍云,本站的全球cdn服务就是使用又拍云:关于又拍云免费cdn全网加速服务的长期评测(各种踩坑),因为又拍云的免费流量比七牛云多出大概5g左右,当然了得加入一个所谓的又拍云联盟:https://www.upyun.com/league,本次文章记录一下使用python3.7+Django2.0.4配合vue.js2.0实现又拍云(upyun.cm)存储的异步拖拽文件上传功能。
首先注册又拍云 upyun.com
其后在云存储服务中点选,新建一个云空间服务
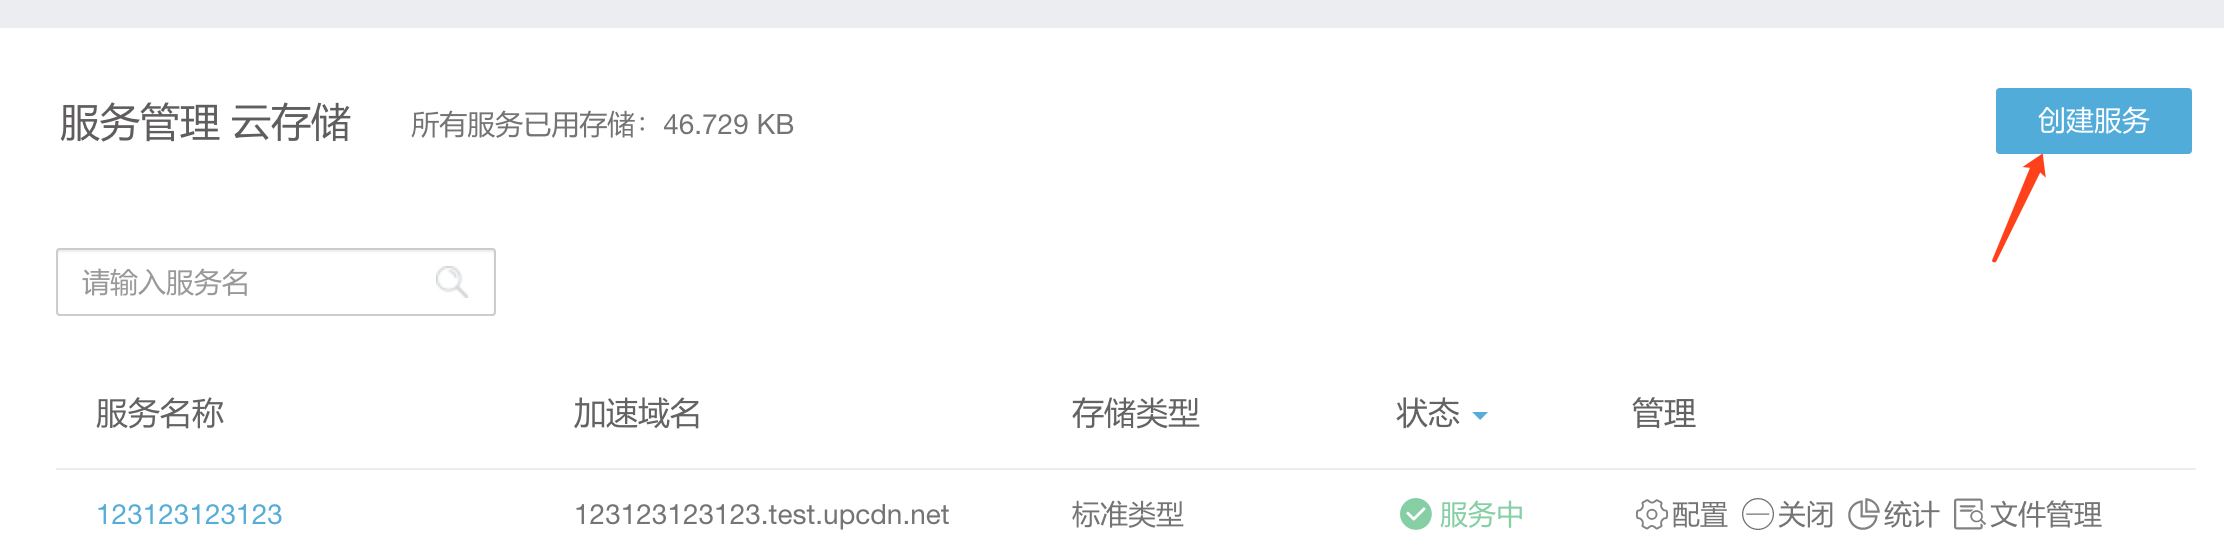
记录一下服务名称,如果手里有备案域名的话,可以分一个二级域名出来绑定一下加速域名
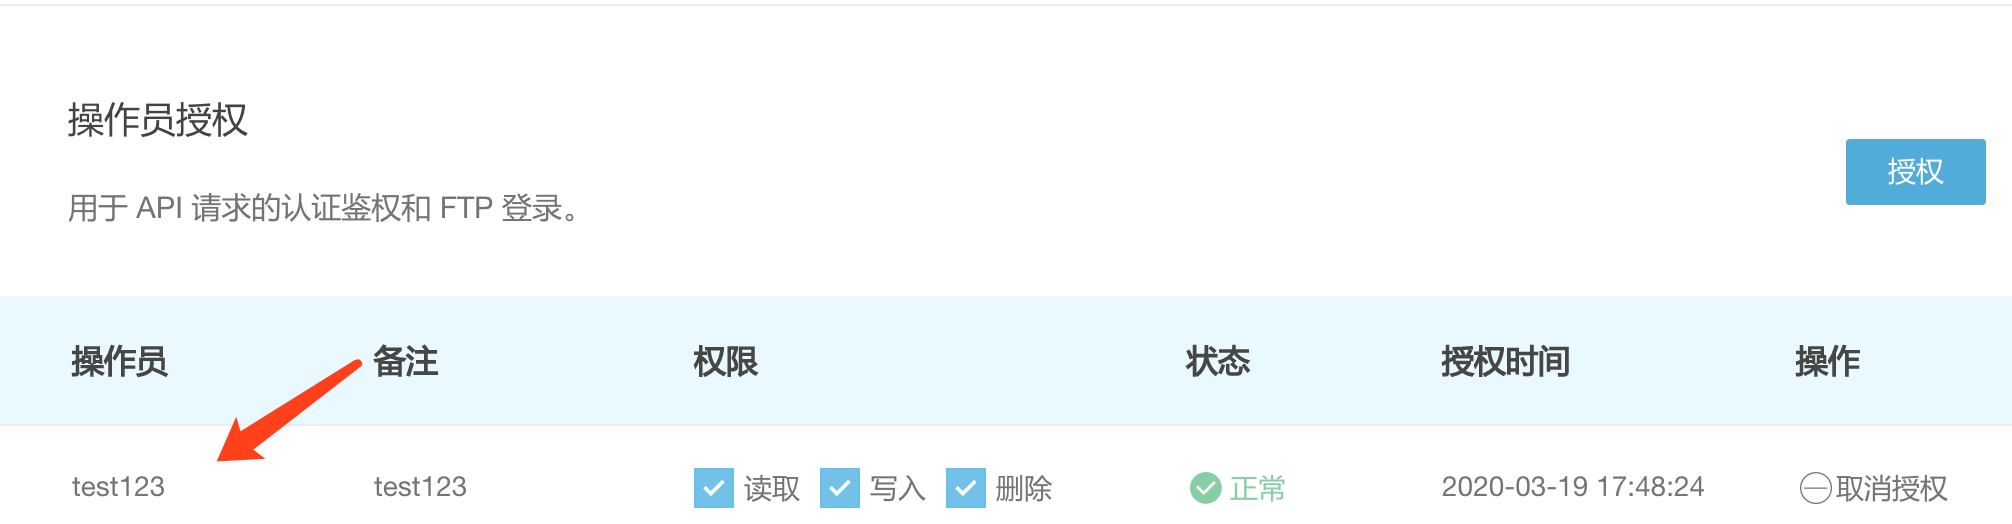
随后点击配置-》存储管理,新建一个操作员,这里新建的时候会分配给你一个用户名和密码,其中密码只能系统生成,这里一定要保存好。
ok,现在又拍云的云存储服务已经配置好。
我们现在新建一个upload.vue用来配置上传页面
<template>
<div>

<input type="file" @change="upload_upyun" />

<div class="upload">
					拖拽上传
				      </div>

</div>
</template>

<script>

export default{

data(){

return{

}
		},
		//监听属性
		watch:{


		},
		//计算属性
		computed:{


		},
		mounted () {
			let upload = document.querySelector('.upload');
    upload.addEventListener('dragenter', this.onDrag, false);
    upload.addEventListener('dragover', this.onDrag, false);
    upload.addEventListener('drop', this.onDrop, false);
		},
		//自定义方法
		methods:{

onDrag (e) {
      e.stopPropagation();
      e.preventDefault();
    },
    onDrop (e) {
      e.stopPropagation();
      e.preventDefault();
      this.upload_upyun(e.dataTransfer.files);
    },
			//上传又拍云
			upload_upyun:function(files){


				//获取文件对象
				//let file = e.target.files[0];
				let file = files[0];

//声明参数
				let param = new FormData();
				param.append('file',file);

const config = {

headers: { 'Content-Type': 'multipart/form-data' }

}

this.axios.post('http://localhost:8000/uploadfile/', param, config)// 上传图片

.then(function(response) {

console.log(response)

});

}


		}


	}

</script>

<style>


.upload {
  margin: 100px auto;
  width: 300px;
  height: 150px;
  border: 2px dashed #f00;
}

</style>
值得一提的是,vue页面我们使用拖拽上传的方式。
前端页面搞定了,此时我们利用Django做一个上传接口,理论上可以绕过服务端进行上传,但是考虑到安全性,比如签名容易泄露,所以我们采用曲线救国的方式,后台接口虽然中转一下文件,但是并不对文件进行存储,使用chunks的方式分块读取立刻上传又拍云
首先安装又拍云sdk
pip install upyun然后建立一个视图文件views.py
import upyun

#定义文件上传类
class UploadFile(View):

def post(self,request):

img = request.FILES.get('file')

up = upyun.UpYun('你的空间名称', username='操作员账号', password='操作员密码')

headers = { 'x-gmkerl-rotate': '180' }

for chunk in img.chunks():
            res = up.put('/touxiang1.jpg', chunk, checksum=True, headers=headers)

#返回结果
        return HttpResponse(json.dumps({'filename':img.name}),content_type='application/json')
测试一下:
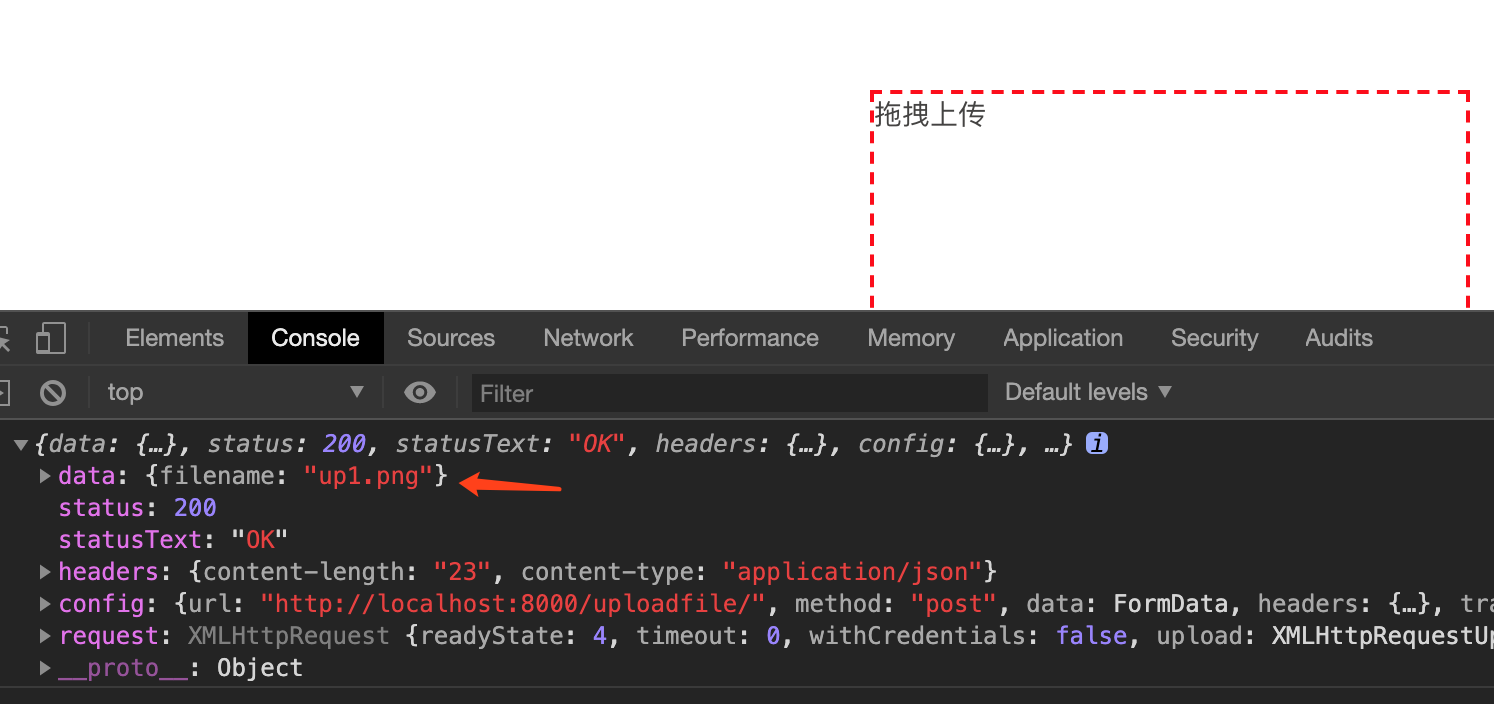
可以看到成功上传,那么如何访问呢,可以通过分配的域名或者自己绑定的域名直接拼接文件地址即可以访问
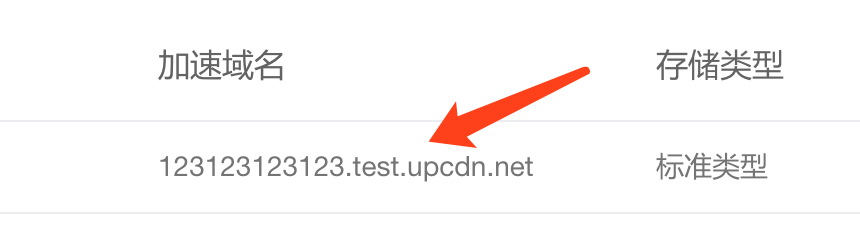
访问地址:http://123123123123.test.upcdn.net/你的图片.jpg
Recommend
-
7
Python3+Django2.0.4三方社交账号接入Gitee.com(码云)首页 - Python/2020-06-01 码云大家都耳熟能详了,...
-
8
Django2.0.4+Uploadify3.0(h5版) 实现多文件异步上传和删除首页 - Python/2019-03-25 已经9012年了,如果你的...
-
6
Python3+Django2集成PayPal(贝宝)跨境支付三方接口以及订单查询和退款业务首页 - Python/2020-06-14
-
9
Win10系统下使用Django2.0.4+Celery4.4.2+Redis来实现异步任务队列以及定时(周期)任务(2020年最新攻略)首页 - Python/...
-
6
使用Python3.7+Django2.0.4配合vue.js2.0的组件递归来实现无限级分类(递归层级结构)首页 - Python/2020-03-03
-
7
Python3.7配合Django2.0来调用钉钉(dingding)在线api实时监测员工考勤打卡情况首页 - Python/2020-04-12
-
4
Python3.7+Django2.0.4配合Mongodb打造高性能高扩展标签云存储方案首页 - Python/2020-03-23
-
7
mpvue1.0+python3.7+Django2.0.4实现微信小程序的支付功能首页 - Python/2019-09-15
-
9
使用python3.7+Vue.js2.0+Django2.0.4异步前端通过api上传文件到七牛云云端存储首页 - Python/2020-02-24
-
10
python3.7.2+Django2.0.4 使用django-celery遇到的那些坑首页 - Python/2019-03-20 1 首先为啥要用celery
About Joyk
Aggregate valuable and interesting links.
Joyk means Joy of geeK