

ArkUI eTS实践开发一个管家服务系统(二)
source link: https://os.51cto.com/article/713475.html
Go to the source link to view the article. You can view the picture content, updated content and better typesetting reading experience. If the link is broken, please click the button below to view the snapshot at that time.

实现的一些效果展示
1、我的通知
- 使用了Column布局、Flex流式布局、时间格式化工具类等。
- Badge (消息气泡)的使用。
Column() {
  Badge({
    count: this.nCounts,  //消息数量
    maxCount: 99,
    position: BadgePosition.RightTop, //位置
    style: {        //样式设置
      color: '#CCFFBB', fontSize: 16,
      badgeSize: 20, badgeColor: Color.Red }
  })
RDB数据的使用。
参考以前写过的一篇:
https://ost.51cto.com/posts/12975#1modelBookDataModelts__138。
效果展示:
Badge效果 | 通知详情页 | |
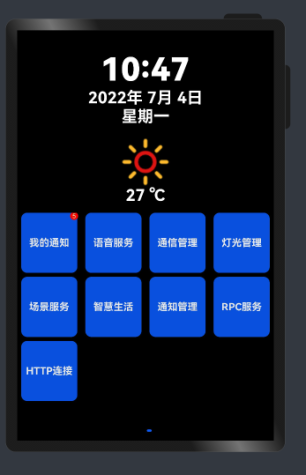 | 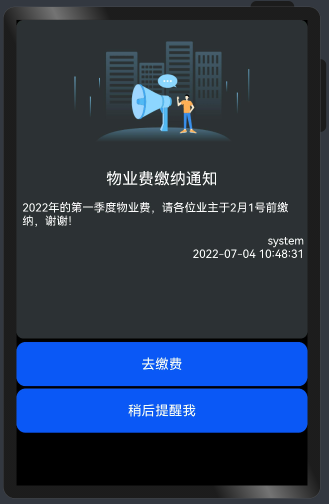 |  |
更多内容参考:
https://developer.harmonyos.com/cn/docs/documentation/doc-references/ts-container-badge-0000001196785703。
2、语音服务
- Flex流式布局。
- Lottie 动画的使用。
//导入lottieEts组件库
import lottieEts from '@ohos/lottieETS'
@State listening: boolean = true
@State answer: string = '您好,有什么吩咐!'
private listeningWord: string = '我正在聆听..'
private doneWord: string = '好的,\n已经帮您搞定啦!'
//Lottie动画
private settings: RenderingContextSettings = new RenderingContextSettings(true)
private context: CanvasRenderingContext2D = new CanvasRenderingContext2D(this.settings)
private animateItem: any = null
private animateName: string = "grunt";
private path: string = "common/balls.json"
//动画Canvas
Row() {
Canvas(this.context)
.width('100%')
//.height(90)
.border({ style: BorderStyle.Dashed })
.onAppear(() => {
this.animateItem = lottieEts.loadAnimation({
container: this.context,
renderer: 'canvas',
loop: 1,
autoplay: true,
name: this.animateName,
path: this.path
})
Animator('__lottie_ets')
//监听播放完成
this.animateItem.addEventListener('loopComplete', () => {
logger.getInstance(this).debug(`loopComplete...`)
this.answer = this.listeningWord;
})
})
.onDisAppear(() => {
logger.getInstance(this).debug(`destroy lottie...`)
lottieEts.destroy(this.animateName);
})
}
.align(Alignment.Center)
.alignItems(VerticalAlign.Center)
.alignSelf(ItemAlign.Center)
.height('40%')
.onClick(() => {
//播放动画
this.playing()
this.answer = '我想想看啊...';
})
//播放lottie动画
playing() {
logger.getInstance(this).debug(`player...`)
if (this.animateItem !== null) {
//从250帧开始播放
//this.animateItem.goToAndPlay(50, true);
//延迟到下轮循环播放再生效
this.animateItem.resetSegments(false)
lottieEts.play(this.animateName)
}
}RPC服务调用,模拟AI翻译功能。
封装了ServiceModel.ts 对Ability的建立连接、断开连接、以及连接后的回调进行了一层封装,sendRequest 还是在page中进行调用。
//模拟翻译功能
translateWord() {
  logger.getInstance(this).debug(`translateWord begin`)
  //获取RPC代理对象
  let mRemote = this.serviceModel.getRemoteObject()
  if (mRemote === null) {
    prompt.showToast({
      message: 'please connect service'
    })
  }
  //发送请求数据封装
  let option: rpc.MessageOption = new rpc.MessageOption()
  //入参
  let data: rpc.MessageParcel = rpc.MessageParcel.create()
  data.writeString(this.beforeSortString)
  //返回数据
  let reply: rpc.MessageParcel = rpc.MessageParcel.create()
  //发送请求
  mRemote.sendRequest(1, data, reply, option, () => {
    this.afterSortString = reply.readString()
    this.answer = '翻译好啦!'
  })

}
Lottie动画 | ||
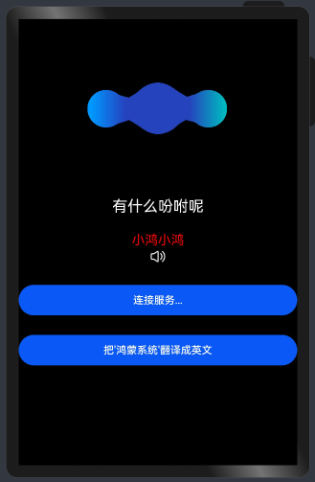 |  | 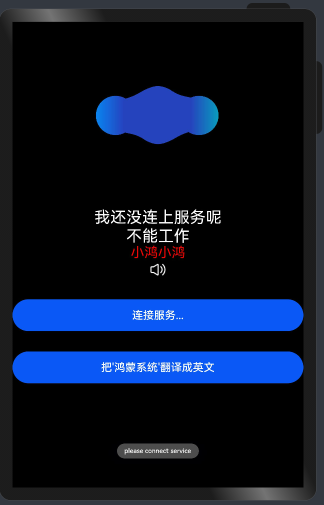 |
Lottie更多内容参考:https://gitee.com/openharmony/app_samples/tree/master/ETSUI/Lottie。
如果要下载Lottie动画json文件,可以去去搜索LottieFiles。
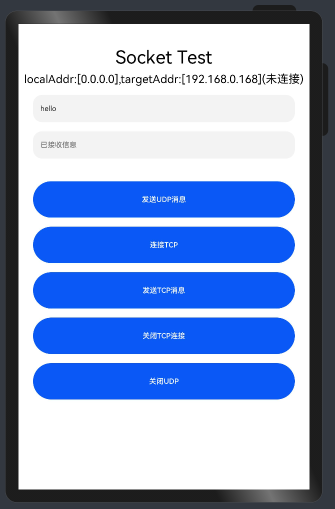
3、通信管理
- Column基础布局,使用了TextInput、Button等组件。
- Socket 通信的使用。
之前已经写过一篇,介绍了UDP、TCP的使用,去参考:https://ost.51cto.com/posts/13151。 - 效果展示:
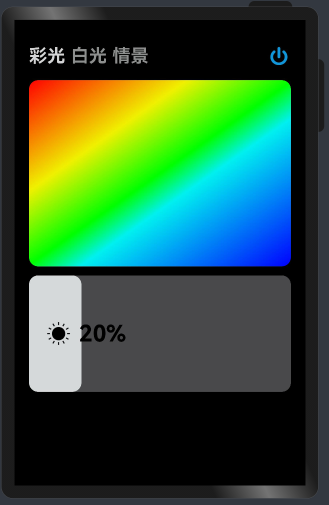
4、灯光管理
- Column基础布局,希望实现一个可以选择颜色的拾色板和一个可以控制灯光亮度的滑块。
- linearGradient渐变色的使用,实现拾色板。
Row() {
  Canvas()
    .linearGradient({
      angle: 145,
      colors: [
        [0xFF0000, 0.0],
        [0xF0F000, 0.3],
        [0x00FF00, 0.5],
        [0x00F0F0, 0.6],
        [0x0000FF, 1.1]
      ]
    })
    .borderRadius(20) //圆角设置
    .height('40%')
    .width('90%')
    .onClick(() => {
      logger.getInstance(this).debug(`you choice color is  ${this.lightcolor}`)
    })
}
实现一个可以滑块,用于控制灯光亮度。
Row() {
    Row() {
        Image(this.imageMap.get('light_sun'))
            .width(50)
            .height(50)
            .margin({ left: 40 })
        Text(this.lightpercent)
            .fontSize(50)
            .margin({ left: 20 })
            .width('200')
            .fontWeight(FontWeight.Bold)
            .textAlign(TextAlign.Start)
        //.backgroundColor(Color.Gray)
    }
    .width(this.lightpercent) //亮度进度条百分比
        .height('100%')
        .borderRadius(20) //圆角设置
        .backgroundColor('#ffd5d9d9')
        .align(Alignment.Start)
}
.onTouch((e) => {
    switch (e.type) {
            //TouchType.Down 手指按下时触发
        case TouchType.Down:
            //记录手指按下时的X、Y坐标
            this.touchX = e.touches[0].screenX;
            this.touchY = e.touches[0].screenY;
            this.lightvolumn = this.touchX
            if (this.lightvolumn > 325) {
                this.lightvolumn = 325
            }
            if (this.lightvolumn < 10) {
                this.lightvolumn = 10
            }
            let tmp = this.lightvolumn / 325 * 100
            logger.getInstance(this).debug(` tmp: ${tmp}`)

            this.lightpercent = tmp.toFixed(0) + '%'
            logger.getInstance(this).debug(` lightpercent: ${this.lightpercent}`)
            break
            //TouchType.Move 手指按压移动时触发
        case TouchType.Move:
            //记录手指移动时的X、Y移动值
            let moveX = this.touchX - e.touches[0].screenX;
            let moveY = this.touchY - e.touches[0].screenY;
            //当手指移动方向:X为正(手指往左边移动)且Y方向上下不超30时,拉出删除按钮
            logger.getInstance(this).debug(`you touch moveX: ${moveX},moveY:${moveY}`)
            this.lightvolumn -= moveX
            if (this.lightvolumn > 325) {
                this.lightvolumn = 325
            }
            if (this.lightvolumn < 10) {
                this.lightvolumn = 10
            }
            logger.getInstance(this).debug(` lightvolumn2: ${this.lightvolumn}`)
            let tmp2 = this.lightvolumn / 325 * 100
            logger.getInstance(this).debug(` tmp: ${tmp2}`)
            this.lightpercent = tmp2.toFixed(0) + '%'
            logger.getInstance(this).debug(` lightpercent: ${this.lightpercent}`)
            break
            //TouchType.Up 手指抬起时触发
        case TouchType.Up:
            break
    }
})
    .width('90%')
    .height('25%')
    .margin({ top: 20 })
    .borderRadius(20) //圆角设置
    .backgroundColor('#cb5c5c5f')
}
效果展示:
滑动调节亮度 | ||
 |  |
5、场景服务
场景服务,预期是想实现对接入设备的自动化控制,并且可以进行定制。
- Column、Row基础布局。
- animateTo结合rotate实现动画。
//四个场景颜色块的角度
@State angle: Array<number> = [0, 0, 0, 0]
//切换效果
@State toggle: Array<boolean> = [false,false,false,false]
//动画控制
animateTo({ duration: 1000 }, () => {
    this.toggle[0] = !this.toggle[0]
    if (this.toggle[0]) {
        this.bg = Color.Pink
        this.angle[0] = 45
    } else {
        this.bg = Color.White
        this.angle[0] = 360
    }
})
效果展示:
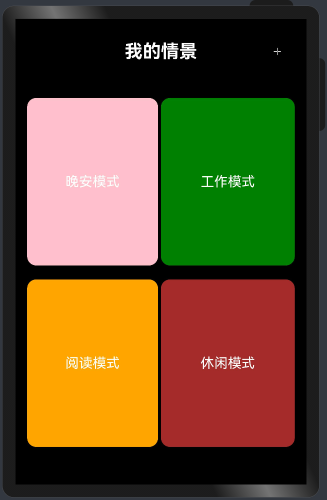 | 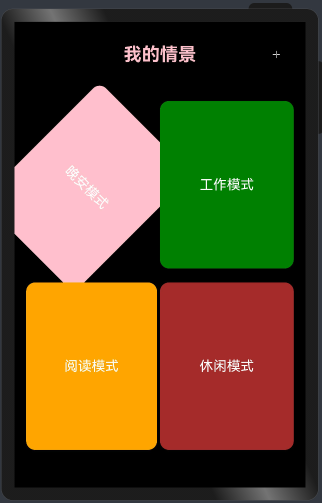 | 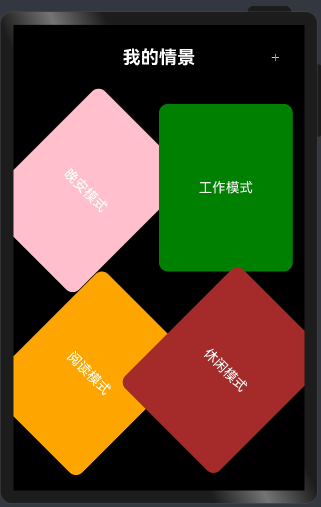 |
后期可以添加场景,并结合设备的使用场景实现场景内容的配置。
6、智慧生活
Stack布局、Flex、Tabs组件 实现华为标准app的Tab页切换效果,初级模拟了华为的智慧生活app效果。
查看官方示例学习到原来底部自定义的Tab要和展示区Tabs组件建立关联的原理是通过TabsController 来实现的!
//Tabs控制器
private controller: TabsController = new TabsController()
build() {
  Stack({ alignContent: Alignment.BottomStart }) {
    Flex({ direction: FlexDirection.Column, alignItems: ItemAlign.End, justifyContent: FlexAlign.End }) {
      Tabs({ barPosition: BarPosition.End, index: 0, controller: this.controller//注意这里 }) {
        TabContent() {
          LifePage({ is_landscape: $is_landscape })
        }
        TabContent() {
          this.buildLoading(new CanvasRenderingContext2D( new RenderingContextSettings(true)))
        }
        TabContent() {
          this.buildLoading(new CanvasRenderingContext2D( new RenderingContextSettings(true)))
        }
        TabContent() {
          this.buildLoading(new CanvasRenderingContext2D( new RenderingContextSettings(true)))
        }
        TabContent() {
          this.buildLoading(new CanvasRenderingContext2D( new RenderingContextSettings(true)))
        }
      }
      .onChange((index: number) => {
        //更改当前选中的Tab索引
        this.bottomTabIndex = index
      })
      .vertical(false)
      .barHeight(0)
      .width('100%')
      .scrollable(false)
      BottomTabs({
        controller: this.controller, //注意这里
        bottomTabIndex: $bottomTabIndex,
        is_landscape:$is_landscape
      })
    }
    .width('100%')
    .layoutWeight(1)
    .backgroundColor(this.backgroundColor)
  }
  .width('100%').height('100%')
}
@Builder
buildLoading(context: any) {
Column() {
Canvas(context)
.width('100%')
.height('50%')
.onAppear(() => {
try {
this.animateItem = lottieEts.loadAnimation({
container: context,
renderer: 'canvas',
loop: true,
autoplay: true,
name: this.animateName,
path: this.path
})
} catch (e) {
console.error(`error:${e}`)
}
})
.onDisAppear(() => {
lottieEts.destroy(this.animateName)
})
Text('开发中...').fontSize(30).fontColor(Color.White)
}
.width('100%')
.height('100%')
.backgroundColor(Color.Brown)
}页面底部Tab页面实现代码(bottomTabs.ets)。
let tabs = [
  $rawfile('tabs/ic_public_home.png'),
  $rawfile('tabs/ic_public_appstore.png'),
  $rawfile('tabs/ic_public_search_things.png'),
  $rawfile('tabs/ic_public_video.png'),
  $rawfile('tabs/ic_user_portrait.png'),
]
let tabs_selected = [
  $rawfile('tabs/ic_public_home_filled.png'),
  $rawfile('tabs/ic_public_appstore_filled.png'),
  $rawfile('tabs/ic_public_search_things_filled.png'),
  $rawfile('tabs/ic_public_video_filled.png'),
  $rawfile('tabs/ic_user_portrait_filled.png'),
]
let tabs_text = [
  '家居', '商城', '发现', '视频', '我的'
]
function getTabSrc(tabIndex: number, index: number) {
  let imgSrc = tabs[index]
  if (tabIndex === index) {
    imgSrc = tabs_selected[tabIndex]
  }
  return imgSrc
}
function getTabTextColor(tabIndex: number, index: number) {
  let color = '#000000'
  if (tabIndex === index) {
    color = '#0091FF'
  }
  return color
}
function getTabText(index: number) {
  let text = tabs_text[index]
  return text
}
@Component
export struct BottomTabs {
  private tabSrc: number[] = [0, 1, 2, 3, 4]
  private backgroundColor: string = '#cbcdd0'
  //Tab页控制器
  private controller: TabsController = new TabsController()
  @Link bottomTabIndex: number
  @Link is_landscape:boolean
  build() {
    Flex({ direction: FlexDirection.Row, alignItems: ItemAlign.Center, justifyContent: FlexAlign.SpaceEvenly }) {
      ForEach(this.tabSrc, item => {
        Column() {
          Image(getTabSrc(this.bottomTabIndex, item))
            .objectFit(ImageFit.Contain)
            .width('60%').height('60%')
          Text(getTabText(item))
            .fontSize(15)
            .fontWeight(FontWeight.Bolder)
            .fontColor(getTabTextColor(this.bottomTabIndex, item))
        }
        .onClick(() => {
          //改变Tab页控制器的索引
          if (item != this.bottomTabIndex) {
            this.controller.changeIndex(item)
          }
        })
      }, item => item.toString())
    }
    .width('100%').height(this.is_landscape? 60:90)
    .padding(5)
    .backgroundColor(this.backgroundColor)
  }
}
媒体查询控制横竖屏显示。
//媒体查询
import mediaquery from '@ohos.mediaquery'
//初始化媒体查询监听
listener = mediaquery.matchMediaSync('screen and (1500 < width) and (orientation: landscape)')
//是否横屏
@State is_landscape: boolean = false;aboutToAppear() {
//开启监听
this.listener.on("change", landscapeFunc)
//对横屏进行额外处理
var landscapeFunc = this.onLandscape.bind(this) //bind current js instance
}
//横屏时执行的回调
onLandscape(mediaQueryResult) {
if (mediaQueryResult.matches) {
this.is_landscape = true
} else {
this.is_landscape = false
}
}效果展示:
切换TAB | ||
 | 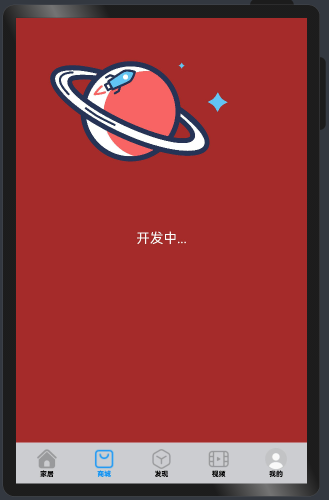 |
|

更详细的内容可以参考:https://gitee.com/openharmony/app_samples/tree/master/AppSample/Shopping。
媒体查询可以参考:
https://developer.harmonyos.com/cn/docs/documentation/doc-references/ts-methods-media-query-0000001211727455#ZH-CN_TOPIC_0000001211727455__li16426122219256。
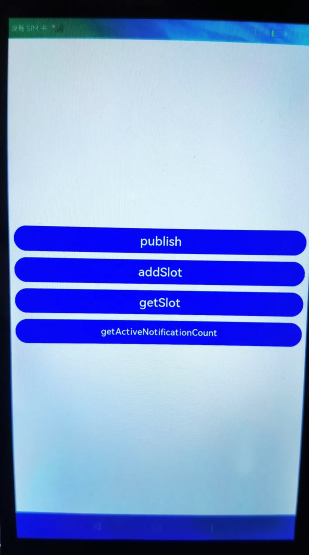
7、通知管理
notification通知组件的使用,创建系统通知,显示在通知栏,用户可以通过SystemUI查看所有通知消息。
发布wantAgent通知。
预期的效果:发布通知----在通知栏查看,点击通知 ----显示一个 “查看详情” 按钮,点击按钮,跳转到通知详情页。
/**
 * 发布通知
 * @param data
 */
publish() {
  logger.getInstance(this).debug(`publish...`)
  try {
    //WantAgentInfo对象
    var wantAgentInfo = {
      wants: [
        {
          deviceId: "",
          bundleName: 'com.example.lanls',
          abilityName: 'com.example.lanls.NoticePageAbility',
          action: "",
          entities: [],
          uri: "",
          parameters: {'routeSource':10}
        }
      ],
      operationType: wantAgent.OperationType.START_ABILITY,
      requestCode: 0,
      wantAgentFlags: [wantAgent.WantAgentFlags.UPDATE_PRESENT_FLAG]
    }
    // 获取wantAgent对象
    wantAgent.getWantAgent(wantAgentInfo)
      .then((data) => {
        this.noticeWantAgent = data
        //构造NotificationRequest对象
        var notificationRequest = {
          content: {
            contentType: notification.ContentType.NOTIFICATION_CONTENT_BASIC_TEXT,
            normal: {
              title: "您有一条物业缴费通知",
              text: "2022年的第一季度物业费,请各位业主于2月1号前缴纳,谢谢!",
              additionalText: "12312312312"
            },
          },
          actionButtons: [
            {
              title: '查看详情',
              wantAgent: this.noticeWantAgent,
            }
          ],
          id: 1,
          label: 'TEST666',
          slotType: notification.SlotType.CONTENT_INFORMATION,
          //deliveryTime: new Date().getTime()
        }

        //request: NotificationRequest, userId: number
        notification.publish(notificationRequest)
          .then((data) => {
            logger.getInstance(this).debug('publish success data : ' + JSON.stringify(data))
          }).catch((err) => {
          logger.getInstance(this).error('publish failed because ' + JSON.stringify(err));
        });
      })
      .catch((reason) => {
        logger.getInstance(this).error(`publish error:${reason}`)
      })
  } catch (err) {
    logger.getInstance(this).error(`publish err:${err}`)
  }
}
如何从一个PageAbility 路由到另外一个PageAbility ?
例如,从MainAbility 到 NoticePageAbility,用下面的方式无法实现:
router.push({
  uri: '../../NoticePageAbility/pages/notice_page'
})
需要通过打开一个Ability的方式。
//通知Ability意图
private noticeAbilityWant = {
    want: {
        bundleName: 'com.example.lanls',
        abilityName: 'com.example.lanls.NoticePageAbility',
        //测试传递参数
        parameters:{noticeId:10000}
    }
}
featureAbility.startAbility(this.noticeAbilityWant)
    .then((result) => {
      console.info('Operation successful. result: ' + result);
      //结束自己
      featureAbility.terminateSelf()
    }).catch((error) => {
    console.error('Operation failed. Cause: ' + JSON.stringify(error));
  })
})
更详细的内容参考:
https://developer.harmonyos.com/cn/docs/documentation/doc-references/js-apis-notification-0000001162964175。
https://gitee.com/openharmony/app_samples/tree/master/common/Notification。
效果展示:
通知栏效果 | ||
 | 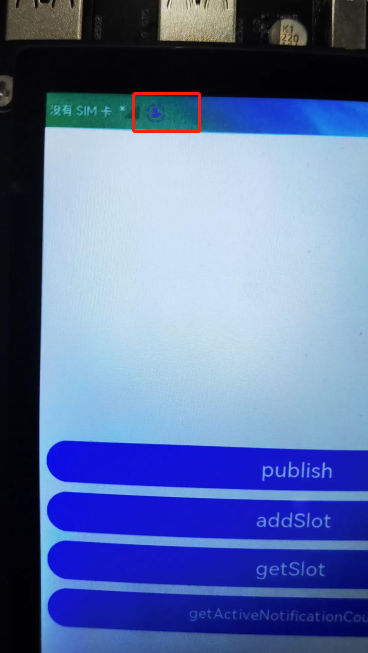 | 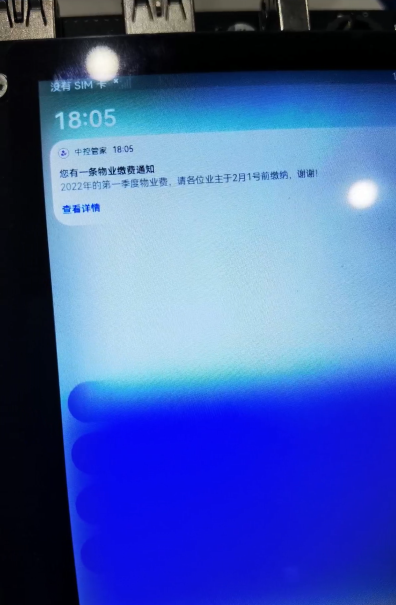 |
发现问题:
a.DAYU200的通知栏,有时候不停的闪动不知是什么原因?
b.如果希望打开一个PageAbility非默认的页面ets方式该如何操作?
8、RPC服务
- Column基础布局,OperateView自定义组件及@Link语法糖的使用;ForEach的使用;prompt组件的使用。
- ets调用rpc 服务,实现字符串排序功能。
导入rpc模块 和 ServiceModel模块(提供了连接ability的封装)。
import rpc from "@ohos.rpc"
import { ServiceModel } from '../model/ServiceModel'
连接Ability:
this.serviceModel.connectService(this.want)发送请求:
//发送请求数据封装
let option: rpc.MessageOption = new rpc.MessageOption()
//入参
let data: rpc.MessageParcel = rpc.MessageParcel.create()
data.writeString(this.beforeSortString)
//返回数据
let reply: rpc.MessageParcel = rpc.MessageParcel.create()
//await
mRemote.sendRequest(1, data, reply, option, () => {
  this.afterSortString = reply.readString()
})
ServiceModel.ts 实现:
import prompt from '@ohos.prompt'
import featureAbility from '@ohos.ability.featureAbility'
import rpc from "@ohos.rpc"
//代理对象
let mRemote: rpc.IRemoteObject = null
//连接状态码
let connection: number = -1
let TAG: string = '[LANLS.ServiceModel]'
export class ServiceModel {
    private sendMessage: string = ''
    public getRemoteObject() {
        return mRemote
    }
    /**
     * 连接服务
     * @param deviceId
     */
    connectService(want: any): number {
        console.log(`${TAG} connectService begin`)
        //回调处理,The remote object instance
        let options = {
            onConnect: function (elementName, proxy) {
                mRemote = proxy
                console.log(`${TAG} onConnect:${elementName},proxy:${proxy}`)

                prompt.showToast({
                    message: 'connect service success',
                })
            },
            onDisconnect: function (elementName) {
                console.log(`${TAG} onDisconnect element:${elementName}`)
                prompt.showToast({
                    message: `disconnect service success`
                })
            },
            onFailed: function (e) {
                console.log(`${TAG} onFailed errCode:${e}`)

                prompt.showToast({
                    message: `connect onFailed:${e}`
                })
            }
        }
        //开始连接,Returns the number code of the ability connected
        connection = featureAbility.connectAbility(want, options)
        console.log(`${TAG} connection:${connection}`)
        return connection
    }
    /**
     * 断开连接
     */
    disconnectService() {
        console.log(`${TAG} onDisconnectService begin`)
        mRemote = null
        if (connection === -1) {
            prompt.showToast({
                message: 'onDisconnectService not connected yet'
            })
            return
        }
        //开始断开连接
        featureAbility.disconnectAbility(connection).then(() => {
            connection = -1
            prompt.showToast({
                message: 'onDisconnectService disconnect done'
            })
        }).catch((error) => {
            console.error(`${TAG} onDisconnectService error:${error}`)
        })

    }
}
AIServiceAbility是一个 ServiceAbility,代码实现如下:
import rpc from "@ohos.rpc"
const TAG: string = '[AIServiceAbilityStub]'
class AIServiceAbilityStub extends rpc.RemoteObject {
    constructor(des: any) {
        if (typeof des === 'string') {
            super(des)
        }
    }
    onRemoteRequest(code: number, data: rpc.MessageParcel, reply: rpc.MessageParcel) {
        console.log(`${TAG} onRemoteRequest called...`)
        //字符串排序服务
        if (code === 1) {
            let string = data.readString()
            console.log(`${TAG} sort string=${string}`)
            let result = Array.from(string).sort().join('')
            console.log(`${TAG} sort result=${result}`)
            reply.writeString(result)
        }
        //翻译服务
        else if (code === 2) {
            let string = data.readString()
            console.log(`${TAG} translate string=${string}`)
            //模拟翻译功能
            let result = ''
            if (string == '鸿蒙系统') {
                result = 'HarmonyOS'
            } else {
                result = 'sorry'
            }
            console.log(`${TAG} sort result=${result}`)
            reply.writeString(result)
        } else {
            console.log(`${TAG} unknown request code`)
        }
        return true;
    }
}
export default {
    onStart() {
        console.info(`${TAG} onStart...`)
    },
    onStop() {
        console.info(`${TAG} onStop`)
    },
    onConnect(want) {
        console.log(`${TAG} onConnect, want:${JSON.stringify(want)}`)
        return new AIServiceAbilityStub("first ts service stub")
    },
    onDisconnect(want) {
        console.log(`${TAG} onDisconnect, want:${JSON.stringify(want)}`)
    },
    onCommand(want, startId) {
        console.log(`${TAG} onCommand, want:${JSON.stringify(want)},startId:${startId}`)
    }
}
效果展示:
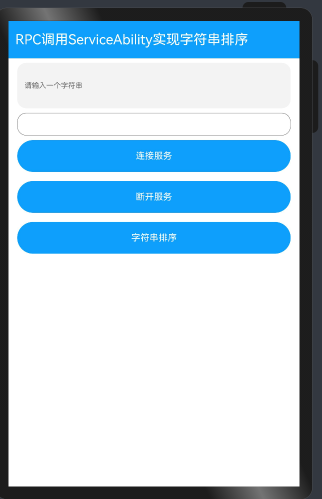 | 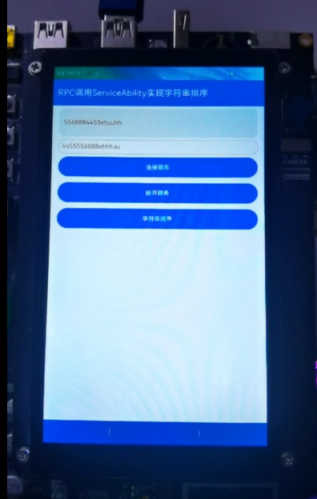 |
视频效果展示
https://ost.51cto.com/show/14380。
文章相关附件可以点击下面的原文链接前往下载:
https://ost.51cto.com/resource/2147。
Recommend
-
0
HarmonyOS ArkUI-eTS常用控制-51CTO.COM HarmonyOS ArkUI-eTS常用控制 作者:清风彬彬 2022-02-23 15:07:22 本篇带给大家ArkUI-eTS常用控制的相关知识,希望能够帮助到你!
-
1
OpenHarmony——浅析ETS开发状态管理 推荐 原创 作者:杨保斌 本文主要是对于鸿蒙开发文档 ETS 开发中的 UI状态管...
-
6
ArkUI(ETS) 自定义图片查看组件-51CTO.COM OpenHarmony - ArkUI(ETS) 自定义图片查看组件 作者:王国菊 2022-05-26 14:50:15 今日分享的组件由subsampling-scale-image-view+swipe...
-
3
鸿蒙开发ArkUI优秀实践—Rating组件-51CTO.COM 鸿蒙开发ArkUI优秀实践—Rating组件 作者:鸿蒙开发之南拳北腿 2022-06-30 13:56:05 本节讲解评分条组件Rating的两种基本使用方法:用作...
-
2
4、组件介绍组件包含了UI布局,组件属性定义,组件默认值,组件代码有详细说明,可以直接看代码@Component export struct StreamerButton { // 旋转角度 @State private angle:number = 0; // 旋转速度...
-
1
#DAYU200体验官# ArkUI eTS实践开发一个管家服务系统(二) 推荐 原创 DAYU200开发板...
-
1
ArkUI eTS PA计算十二生肖--Service Ability-51CTO.COM ArkUI eTS PA计算十二生肖--Service Ability 作者:狼哥Army 2022-07-11 16:26:37 计算生肖由Service Ability负责,eTS只负责...
-
3
作者:张呈 WIFI是大家日常必不可少需求,在OpenHarmony的开发中,系统提供了一系列完整的API,在万物互联的这个概念下,相信涉及到wifi功能操作的需求会越来越多,今日分享的是用ets来实现简单的wifi连接操作,可以实现扫描设备附近的wifi并进行连接,结合...
-
0
HarmonyOS- 基于ArkUI(eTs)实现猫头鹰动画 作者:范颖 2022-09-05 15:22:27 我决定用Ets来画一只猫头鹰,看看Ets跟我之前掌握的知识有何不同,在什么地方需要值得注意。
-
0
HarmonyOS - 基于ArkUI(ETS) 实现心电图组件 作者:杨尚晓 2022-10-24 14:49:54 绘制这个心电图没有用到重绘机制,动画效果是每次绘制的时候覆盖在原有的波形线上的,但是这样会比重绘整个画布性能更好一些。
About Joyk
Aggregate valuable and interesting links.
Joyk means Joy of geeK