

Java开发学习(八)----IOC/DI配置管理第三方bean、加载properties文件 - |旧市拾荒|
source link: https://www.cnblogs.com/xiaoyh/p/16324396.html
Go to the source link to view the article. You can view the picture content, updated content and better typesetting reading experience. If the link is broken, please click the button below to view the snapshot at that time.
前面的博客都是基于我们自己写的类,现在如果有需求让我们去管理第三方jar包中的类,该如何管理?
一、案例:数据源对象管理
本次案例将使用数据源Druid和C3P0来配置学习下。
1.1 环境准备
学习之前,先来准备下案例环境:
-
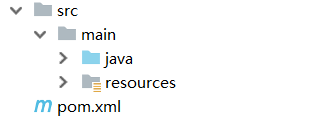
创建一个Maven项目
-
pom.xml添加依赖
<dependencies> <dependency> <groupId>org.springframework</groupId> <artifactId>spring-context</artifactId> <version>5.2.10.RELEASE</version> </dependency> </dependencies> -
resources下添加spring的配置文件applicationContext.xml
<?xml version="1.0" encoding="UTF-8"?> <beans xmlns="http://www.springframework.org/schema/beans" xmlns:xsi="http://www.w3.org/2001/XMLSchema-instance" xsi:schemaLocation=" http://www.springframework.org/schema/beans http://www.springframework.org/schema/beans/spring-beans.xsd"> </beans> -
编写一个运行类App
public class App {
    public static void main(String[] args) {
        ApplicationContext ctx = new ClassPathXmlApplicationContext("applicationContext.xml");
    }
}
1.2 思路分析
在上述环境下,我们来对数据源进行配置管理,先来分析下思路:
需求:使用Spring的IOC容器来管理Druid连接池对象
1.使用第三方的技术,需要在pom.xml添加依赖
2.在配置文件中将【第三方的类】制作成一个bean,让IOC容器进行管理
3.数据库连接需要基础的四要素
驱动、连接、用户名和密码,【如何注入】到对应的bean中4.从IOC容器中获取对应的bean对象,将其打印到控制台查看结果
思考:
-
第三方的类指的是什么?
-
如何注入数据库连接四要素?
1.3 实现Druid管理
步骤1:导入druid的依赖
pom.xml中添加依赖
<dependency>
    <groupId>com.alibaba</groupId>
    <artifactId>druid</artifactId>
    <version>1.1.16</version>
</dependency>
步骤2:配置第三方bean
在applicationContext.xml配置文件中添加DruidDataSource的配置
<?xml version="1.0" encoding="UTF-8"?>
<beans xmlns="http://www.springframework.org/schema/beans"
       xmlns:xsi="http://www.w3.org/2001/XMLSchema-instance"
       xsi:schemaLocation="
            http://www.springframework.org/schema/beans
            http://www.springframework.org/schema/beans/spring-beans.xsd">
    <!--管理DruidDataSource对象-->
    <bean id="dataSource" class="com.alibaba.druid.pool.DruidDataSource">
        <property name="driverClassName" value="com.mysql.jdbc.Driver"/>
        <property name="url" value="jdbc:mysql://localhost:3306/spring_db"/>
        <property name="username" value="root"/>
        <property name="password" value="root"/>
    </bean>
</beans>
说明:
-
driverClassName:数据库驱动
-
url:数据库连接地址
-
username:数据库连接用户名
-
password:数据库连接密码
-
数据库连接的四要素要和自己使用的数据库信息一致。
步骤3:从IOC容器中获取对应的bean对象
public class App {
public static void main(String[] args) {
ApplicationContext ctx = new ClassPathXmlApplicationContext("applicationContext.xml");
DataSource dataSource = (DataSource) ctx.getBean("dataSource");
System.out.println(dataSource);
}
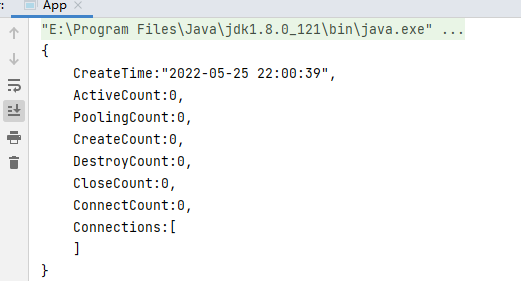
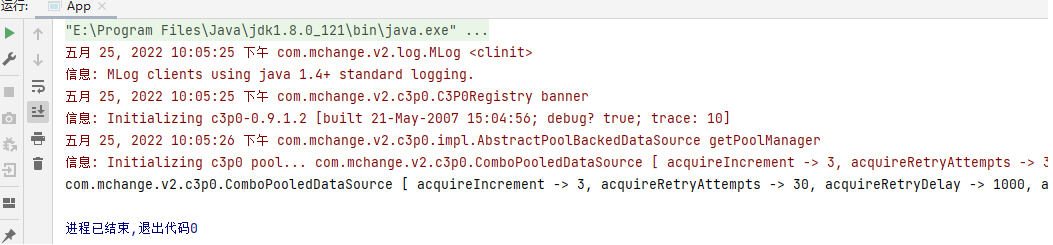
}步骤4:运行程序
打印如下结果: 说明第三方bean对象已经被spring的IOC容器进行管理
做完案例后,我们可以将刚才思考的两个问题答案说下:
-
第三方的类指的是什么?
DruidDataSource -
如何注入数据库连接四要素?
setter注入
1.4 实现C3P0管理
完成了DruidDataSource的管理,接下来我们再来加深下,这次我们来管理C3P0数据源,具体的实现步骤是什么呢?
需求:使用Spring的IOC容器来管理C3P0连接池对象
实现方案和上面基本一致,重点要关注管理的是哪个bean对象`?
步骤1:导入C3P0的依赖
pom.xml中添加依赖
<dependency>
    <groupId>c3p0</groupId>
    <artifactId>c3p0</artifactId>
    <version>0.9.1.2</version>
</dependency>
对于新的技术,不知道具体的坐标该如何查找?
-
直接百度搜索
-
从mvn的仓库
https://mvnrepository.com/中进行搜索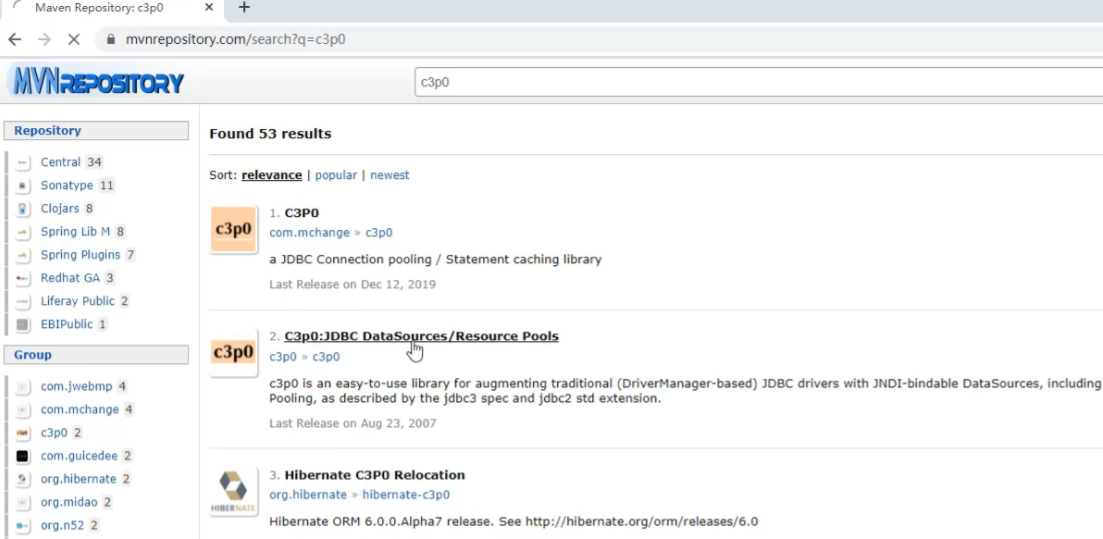
步骤2:配置第三方bean
在applicationContext.xml配置文件中添加配置
<bean id="dataSource" class="com.mchange.v2.c3p0.ComboPooledDataSource">
    <property name="driverClass" value="com.mysql.jdbc.Driver"/>
    <property name="jdbcUrl" value="jdbc:mysql://localhost:3306/spring_db"/>
    <property name="user" value="root"/>
    <property name="password" value="root"/>
    <property name="maxPoolSize" value="1000"/>
</bean>
注意:
-
ComboPooledDataSource的属性是通过setter方式进行注入
-
想注入属性就需要在ComboPooledDataSource类或其上层类中有提供属性对应的setter方法
-
C3P0的四个属性和Druid的四个属性是不一样的
步骤3:运行程序
程序会报错,错误如下
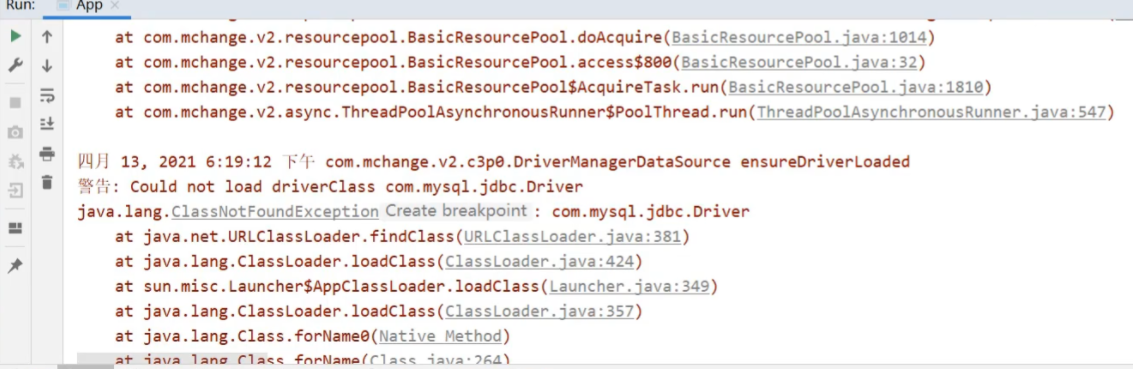
报的错为ClassNotFoundException,翻译出来是类没有发现的异常,具体的类为com.mysql.jdbc.Driver。错误的原因是缺少mysql的驱动包。
分析出错误的原因,具体的解决方案就比较简单,只需要在pom.xml把驱动包引入即可。
<dependency>
    <groupId>mysql</groupId>
    <artifactId>mysql-connector-java</artifactId>
    <version>5.1.47</version>
</dependency>
添加完mysql的驱动包以后,再次运行App,就可以打印出结果:
注意:
-
数据连接池在配置属性的时候,除了可以注入数据库连接四要素外还可以配置很多其他的属性,具体都有哪些属性用到的时候再去查,一般配置基础的四个,其他都有自己的默认值
-
Druid和C3P0在没有导入mysql驱动包的前提下,一个没报错一个报错,说明Druid在初始化的时候没有去加载驱动,而C3P0刚好相反
-
Druid程序运行虽然没有报错,但是当调用DruidDataSource的getConnection()方法获取连接的时候,也会报找不到驱动类的错误
二、加载properties文件
我们已经完成两个数据源druid和C3P0的配置,但是其中包含了一些问题,我们来分析下:
-
这两个数据源中都使用到了一些固定的常量如数据库连接四要素,把这些值写在Spring的配置文件中不利于后期维护
-
需要将这些值提取到一个外部的properties配置文件中
-
Spring框架如何从配置文件中读取属性值来配置就是接下来要解决的问题。
问题提出来后,具体该如何实现?
2.1 第三方bean属性优化
2.1.1 实现思路
需求:将数据库连接四要素提取到properties配置文件,spring来加载配置信息并使用这些信息来完成属性注入。
1.在resources下创建一个jdbc.properties(文件的名称可以任意)
2.将数据库连接四要素配置到配置文件中
3.在Spring的配置文件中加载properties文件
4.使用加载到的值实现属性注入
其中第3,4步骤是重点,具体如何实现?
2.1.2 实现步骤
步骤1:准备properties配置文件
resources下创建一个jdbc.properties文件,并添加对应的属性键值对
jdbc.driver=com.mysql.jdbc.Driver
jdbc.url=jdbc:mysql://127.0.0.1:3306/spring_db
jdbc.username=root
jdbc.password=root步骤2:开启context命名空间
在applicationContext.xml中开context命名空间
<?xml version="1.0" encoding="UTF-8"?>
<beans xmlns="http://www.springframework.org/schema/beans"
       xmlns:xsi="http://www.w3.org/2001/XMLSchema-instance"
       xmlns:context="http://www.springframework.org/schema/context"
       xsi:schemaLocation="
            http://www.springframework.org/schema/beans
            http://www.springframework.org/schema/beans/spring-beans.xsd
            http://www.springframework.org/schema/context
            http://www.springframework.org/schema/context/spring-context.xsd">
</beans>
步骤3:加载properties配置文件
在配置文件中使用context命名空间下的标签来加载properties配置文件
<context:property-placeholder location="jdbc.properties"/>步骤4:完成属性注入
使用${key}来读取properties配置文件中的内容并完成属性注入
<?xml version="1.0" encoding="UTF-8"?>
<beans xmlns="http://www.springframework.org/schema/beans"
       xmlns:xsi="http://www.w3.org/2001/XMLSchema-instance"
       xmlns:context="http://www.springframework.org/schema/context"
       xsi:schemaLocation="
            http://www.springframework.org/schema/beans
            http://www.springframework.org/schema/beans/spring-beans.xsd
            http://www.springframework.org/schema/context
            http://www.springframework.org/schema/context/spring-context.xsd">

    <context:property-placeholder location="jdbc.properties"/>
    <bean id="dataSource" class="com.alibaba.druid.pool.DruidDataSource">
        <property name="driverClassName" value="${jdbc.driver}"/>
        <property name="url" value="${jdbc.url}"/>
        <property name="username" value="${jdbc.username}"/>
        <property name="password" value="${jdbc.password}"/>
    </bean>
</beans>
至此,读取外部properties配置文件中的内容就已经完成。
2.2 读取单个属性
2.2.1 实现思路
对于上面的案例,效果不是很明显,我们可以换个案例来演示下:
需求:从properties配置文件中读取key为name的值,并将其注入到BookDao中并在save方法中进行打印。
1.在项目中添加BookDao和BookDaoImpl类
2.为BookDaoImpl添加一个name属性并提供setter方法
3.在jdbc.properties中添加数据注入到bookDao中打印方便查询结果
4.在applicationContext.xml添加配置完成配置文件加载、属性注入(${key})
2.2.2 实现步骤
步骤1:在项目中添对应的类
BookDao和BookDaoImpl类,并在BookDaoImpl类中添加name属性与setter方法
public interface BookDao {
public void save();
}
public class BookDaoImpl implements BookDao {
private String name;
public void setName(String name) {
this.name = name;
}
public void save() {
System.out.println("book dao save ..." + name);
}
}步骤2:完成配置文件的读取与注入
在applicationContext.xml添加配置,bean的配置管理、读取外部properties、依赖注入:
<?xml version="1.0" encoding="UTF-8"?>
<beans xmlns="http://www.springframework.org/schema/beans"
xmlns:xsi="http://www.w3.org/2001/XMLSchema-instance"
xmlns:context="http://www.springframework.org/schema/context"
xsi:schemaLocation="
http://www.springframework.org/schema/beans
http://www.springframework.org/schema/beans/spring-beans.xsd
http://www.springframework.org/schema/context
http://www.springframework.org/schema/context/spring-context.xsd">
<context:property-placeholder location="jdbc.properties"/>
<bean id="bookDao" class="com.itheima.dao.impl.BookDaoImpl">
<property name="name" value="${jdbc.driver}"/>
</bean>
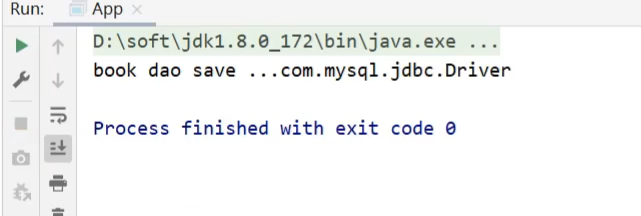
</beans>步骤3:运行程序
在App类中,从IOC容器中获取bookDao对象,调用方法,查看值是否已经被获取到并打印控制台
public class App {
public static void main(String[] args) throws Exception{
ApplicationContext ctx = new ClassPathXmlApplicationContext("applicationContext.xml");
BookDao bookDao = (BookDao) ctx.getBean("bookDao");
bookDao.save();
}
}
2.2.3 注意事项
至此,读取properties配置文件中的内容就已经完成,但是在使用的时候,有些注意事项:
-
问题一:键值对的key为
username引发的问题1.在properties中配置键值对的时候,如果key设置为
usernameusername=root6662.在applicationContext.xml注入该属性
<?xml version="1.0" encoding="UTF-8"?>
<beans xmlns="http://www.springframework.org/schema/beans"
       xmlns:xsi="http://www.w3.org/2001/XMLSchema-instance"
       xmlns:context="http://www.springframework.org/schema/context"
       xsi:schemaLocation="
            http://www.springframework.org/schema/beans
            http://www.springframework.org/schema/beans/spring-beans.xsd
            http://www.springframework.org/schema/context
            http://www.springframework.org/schema/context/spring-context.xsd">

    <context:property-placeholder location="jdbc.properties"/>

    <bean id="bookDao" class="com.itheima.dao.impl.BookDaoImpl">
        <property name="name" value="${username}"/>
    </bean>
</beans>
3.运行后,在控制台打印的却不是
root666,而是自己电脑的用户名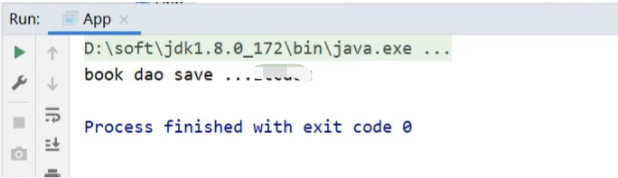
4.出现问题的原因是
<context:property-placeholder/>标签会加载系统的环境变量,而且环境变量的值会被优先加载,如何查看系统的环境变量?public static void main(String[] args) throws Exception{ Map<String, String> env = System.getenv(); System.out.println(env); }大家可以自行运行,在打印出来的结果中会有一个USERNAME=XXX[自己电脑的用户名称]
5.解决方案
<?xml version="1.0" encoding="UTF-8"?>
<beans xmlns="http://www.springframework.org/schema/beans"
       xmlns:xsi="http://www.w3.org/2001/XMLSchema-instance"
       xmlns:context="http://www.springframework.org/schema/context"
       xsi:schemaLocation="
            http://www.springframework.org/schema/beans
            http://www.springframework.org/schema/beans/spring-beans.xsd
            http://www.springframework.org/schema/context
            http://www.springframework.org/schema/context/spring-context.xsd">

    <context:property-placeholder location="jdbc.properties" system-properties-mode="NEVER"/>
</beans>
system-properties-mode:设置为NEVER,表示不加载系统属性,就可以解决上述问题。
当然还有一个解决方案就是避免使用
username作为属性的key。 -
问题二:当有多个properties配置文件需要被加载,该如何配置?
1.调整下配置文件的内容,在resources下添加
jdbc.properties,jdbc2.properties,内容如下:jdbc.properties
jdbc.driver=com.mysql.jdbc.Driver
jdbc.url=jdbc:mysql://127.0.0.1:3306/spring_db
jdbc.username=root
jdbc.password=root
jdbc2.properties
username=root6662.修改applicationContext.xml
<?xml version="1.0" encoding="UTF-8"?>
<beans xmlns="http://www.springframework.org/schema/beans"
       xmlns:xsi="http://www.w3.org/2001/XMLSchema-instance"
       xmlns:context="http://www.springframework.org/schema/context"
       xsi:schemaLocation="
            http://www.springframework.org/schema/beans
            http://www.springframework.org/schema/beans/spring-beans.xsd
            http://www.springframework.org/schema/context
            http://www.springframework.org/schema/context/spring-context.xsd">
    <!--方式一 -->
    <context:property-placeholder location="jdbc.properties,jdbc2.properties" system-properties-mode="NEVER"/>
    <!--方式二-->
    <context:property-placeholder location="*.properties" system-properties-mode="NEVER"/>
    <!--方式三 -->
    <context:property-placeholder location="classpath:*.properties" system-properties-mode="NEVER"/>
    <!--方式四-->
    <context:property-placeholder location="classpath*:*.properties" system-properties-mode="NEVER"/>
</beans>
说明:
-
方式一:可以实现,如果配置文件多的话,每个都需要配置
-
方式二:
*.properties代表所有以properties结尾的文件都会被加载,可以解决方式一的问题,但是不标准 -
方式三:标准的写法,
classpath:代表的是从根路径下开始查找,但是只能查询当前项目的根路径 -
方式四:不仅可以加载当前项目还可以加载当前项目所依赖的所有项目的根路径下的properties配置文件
-
2.3 加载properties文件小结
-
如何开启
context命名空间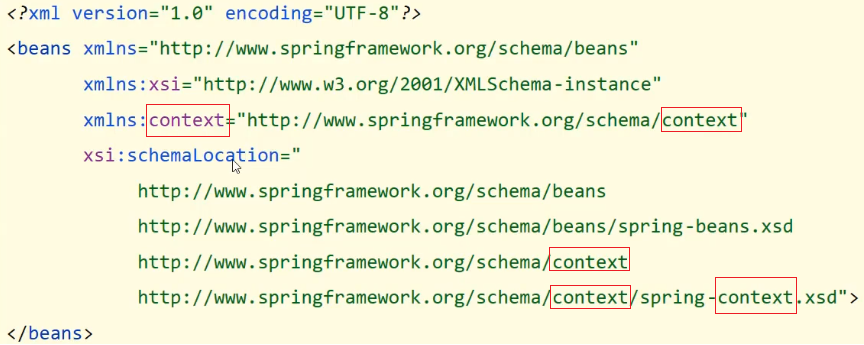
-
如何加载properties配置文件
<context:property-placeholder location="" system-properties-mode="NEVER"/> -
如何在applicationContext.xml引入properties配置文件中的值
${key}
如果您觉得阅读本文对您有帮助,请点一下“推荐”按钮,您的“推荐”将是我最大的写作动力!欢迎各位转载,但是未经作者本人同意,转载文章之后必须在文章页面明显位置给出作者和原文连接,否则保留追究法律责任的权利。
Recommend
About Joyk
Aggregate valuable and interesting links.
Joyk means Joy of geeK