
3

Visual Studio 2019配置OpenCV开发环境
source link: https://xugaoxiang.com/2019/12/10/visual-studio-2019-opencv/
Go to the source link to view the article. You can view the picture content, updated content and better typesetting reading experience. If the link is broken, please click the button below to view the snapshot at that time.
软硬件环境
- Visual Studio 2019
- OpenCV 4.1.2
- Windows 10
视频看这里
Visual Studio 2019
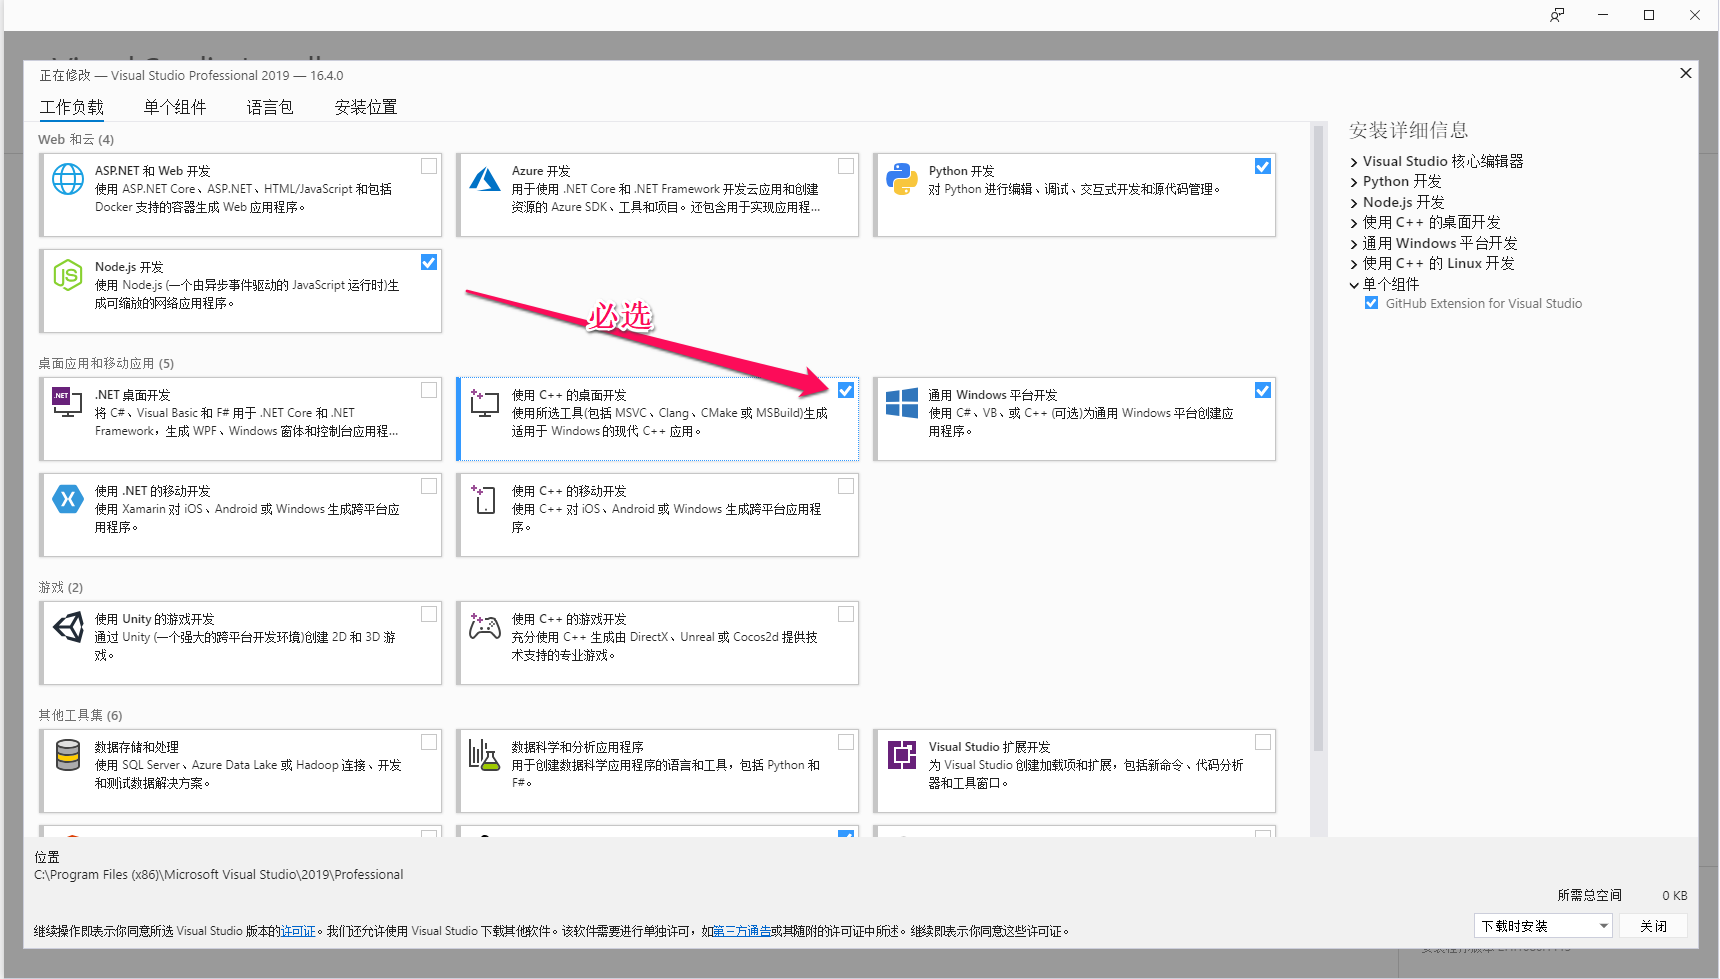
到官方链接下载安装文件,安装完Visual studio 2019后,再选择安装相应组件,这里需要安装c++桌面应用组件,见下图
配置opencv环境
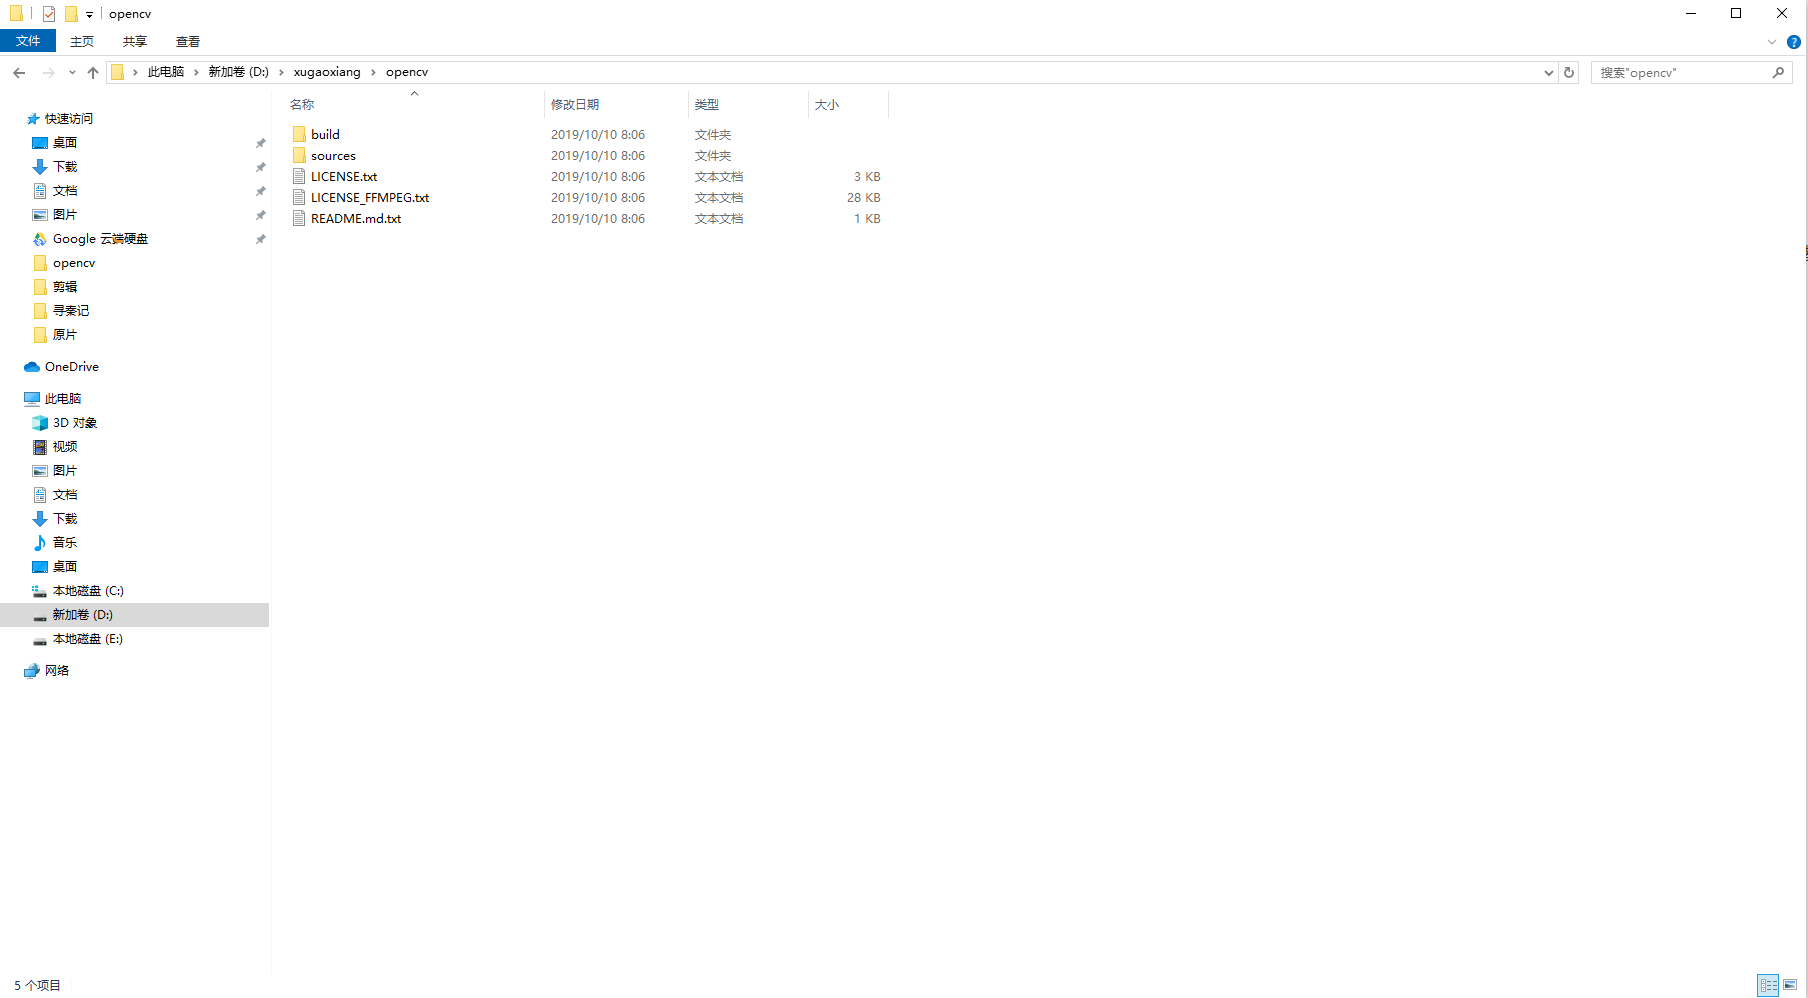
opencv下载地址,最新版本4.1.2,https://github.com/opencv/opencv/releases/tag/4.1.2,下载下来后是一个exe文件,双击选择安装目录,比如这里我是D:\xugaoxiang,最后目录结构是这样的
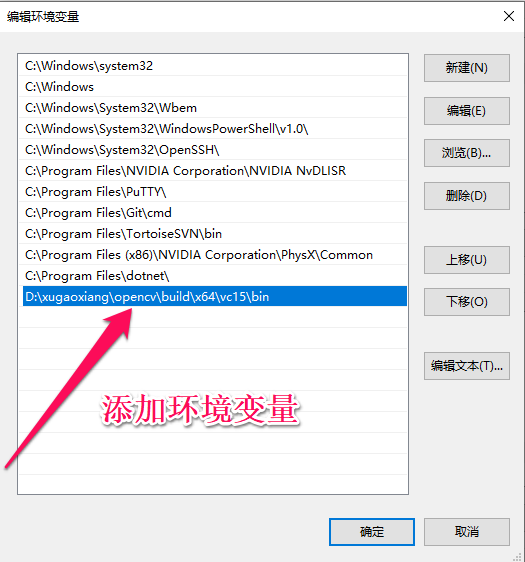
接下来设置环境变量PATH,鼠标右键点击我的电脑 --> 属性 --> 高级 --> 环境变量
在Visual studio中使用opencv
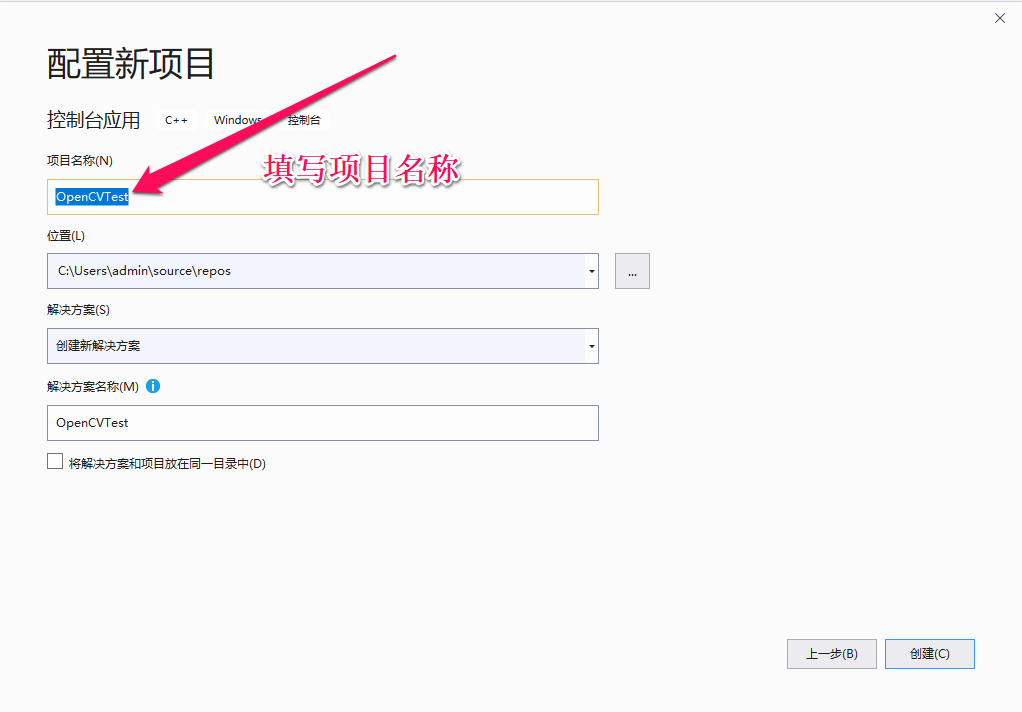
在准备工作完成后,就可以打开visual studio 2019了,我们来新建一个项目,类型选择c++控制台应用

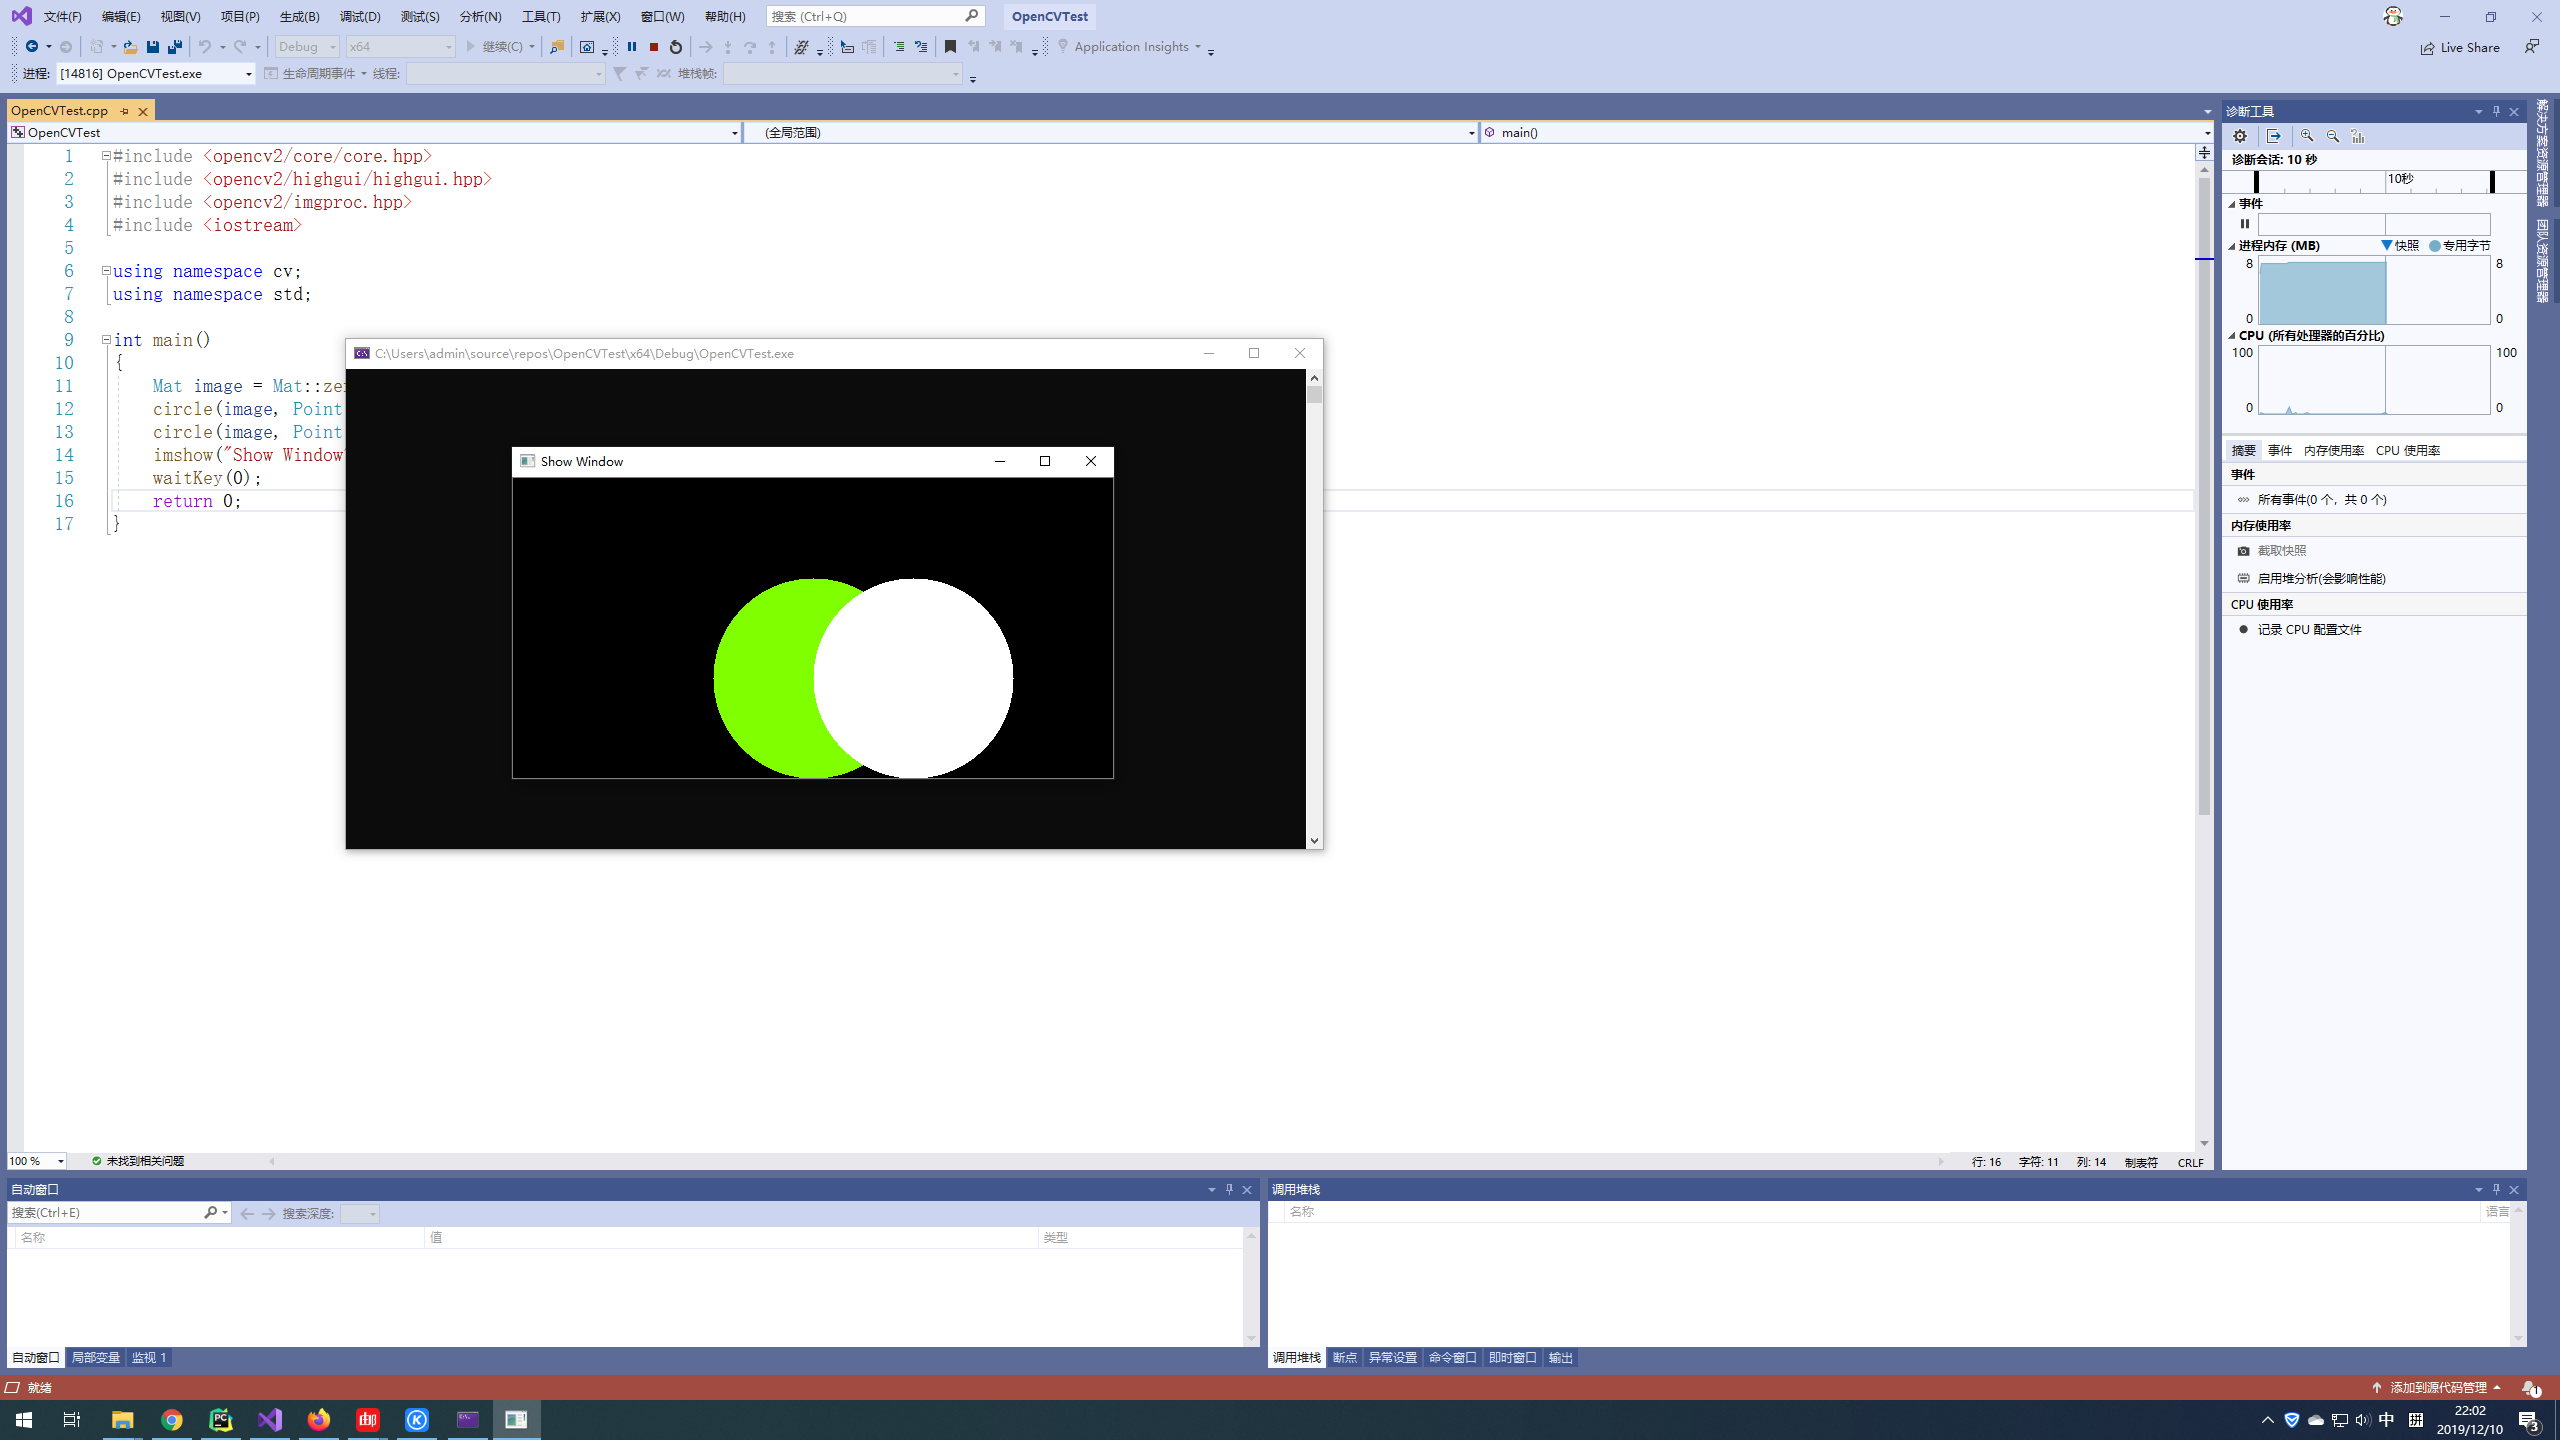
在工程创建成功后,在源文件OpenCVTest.cpp中加入代码
#include <opencv2/core/core.hpp>
#include <opencv2/highgui/highgui.hpp>
#include <opencv2/imgproc.hpp>
#include <iostream>

using namespace cv;
using namespace std;

int main()
{
    Mat image = Mat::zeros(300, 600, CV_8UC3);
    circle(image, Point(300, 200), 100, Scalar(0, 255, 128), -100);
    circle(image, Point(400, 200), 100, Scalar(255, 255, 255), -100);
    imshow("Show Window", image);
    waitKey(0);
    return 0;
}
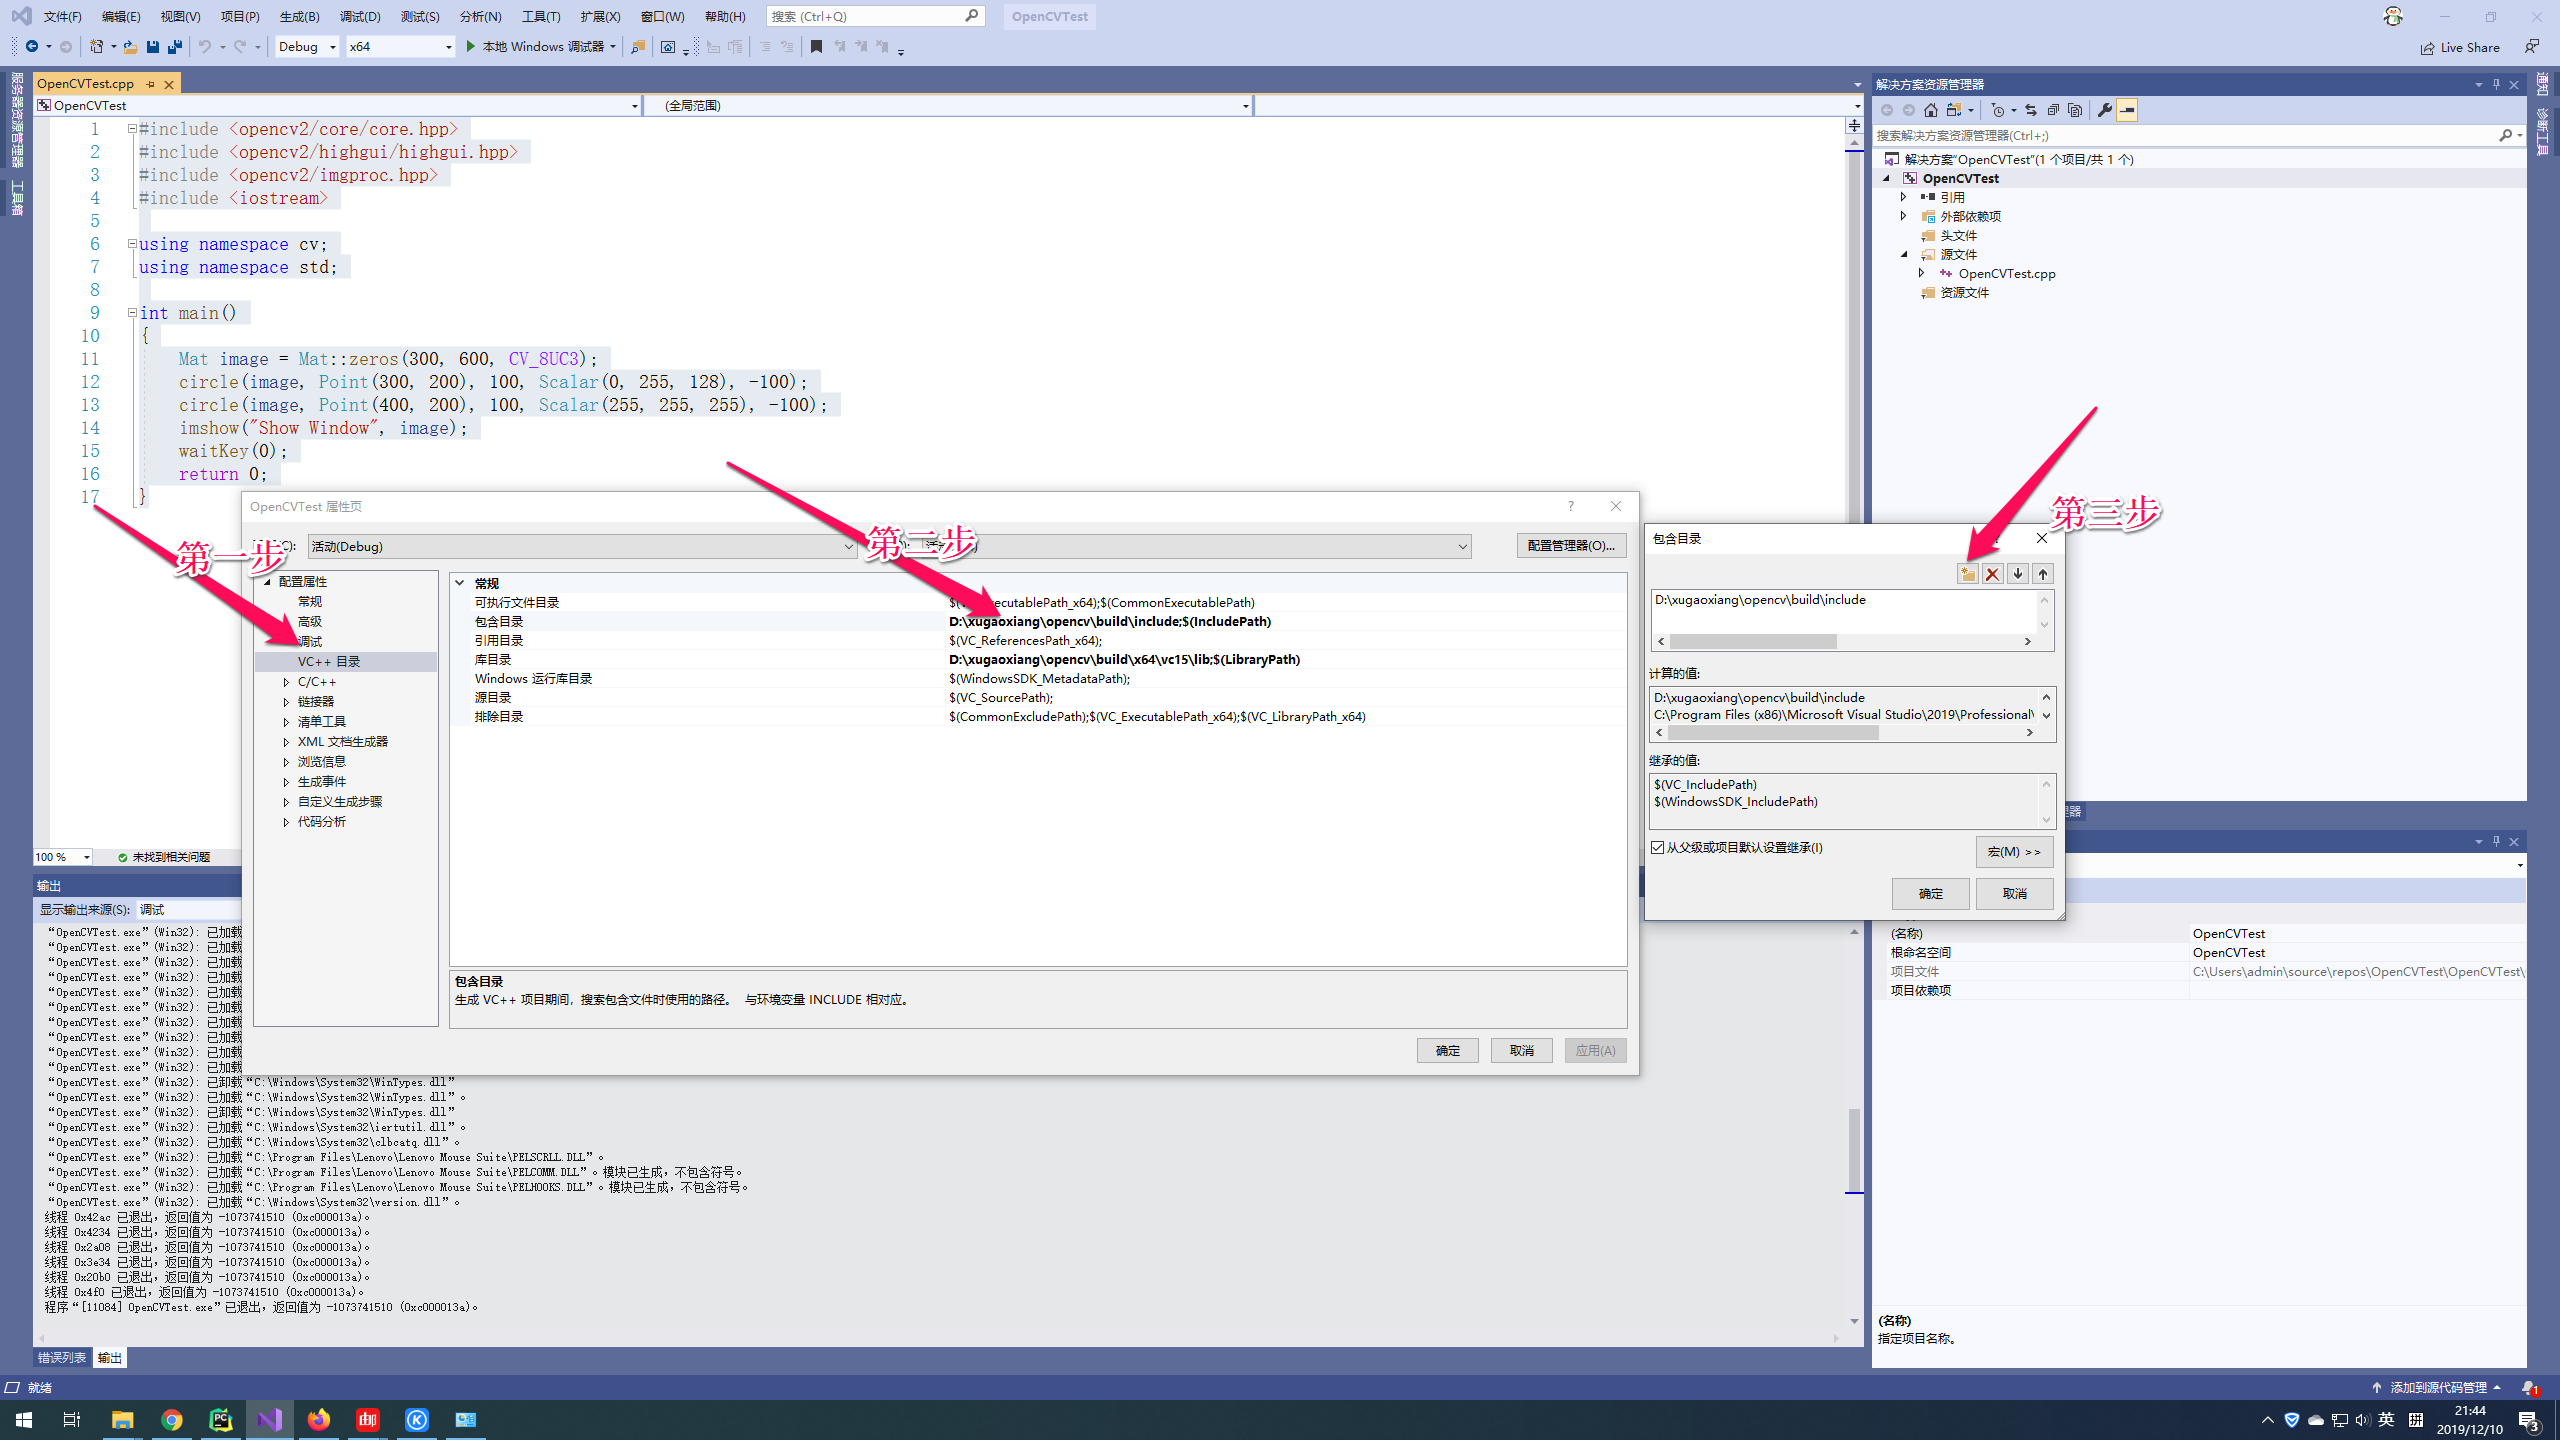
然后依次点击项目 --> OpenCVTest项目属性

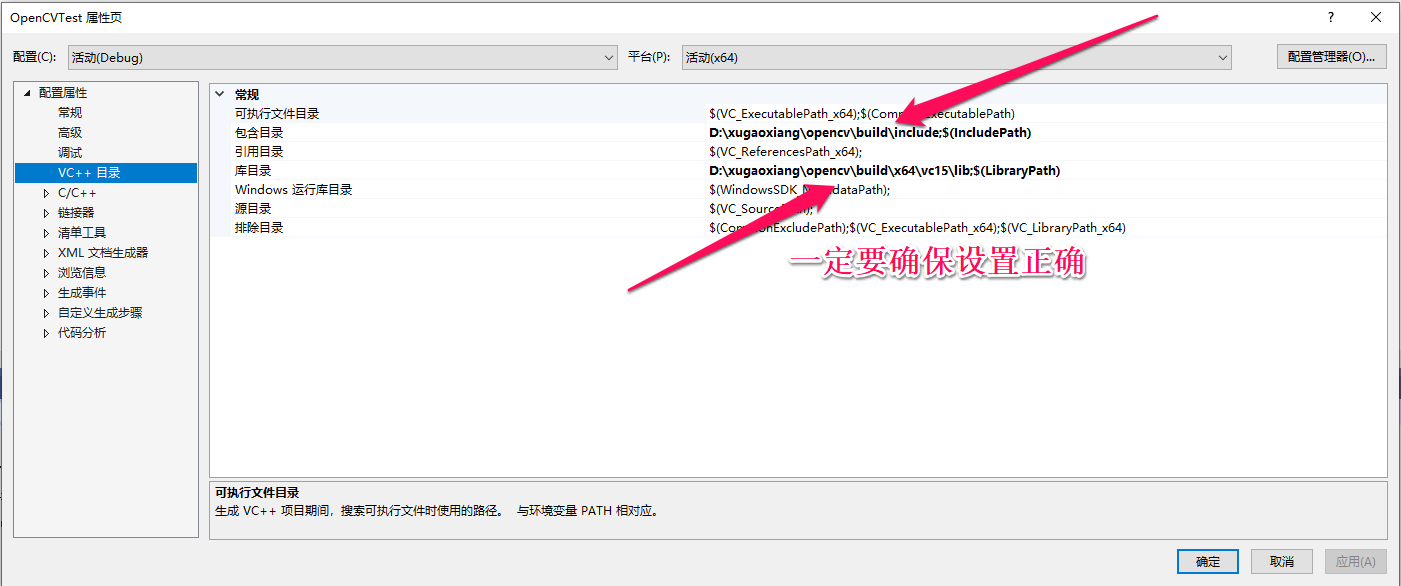
接下来设置opencv头文件及库的路径
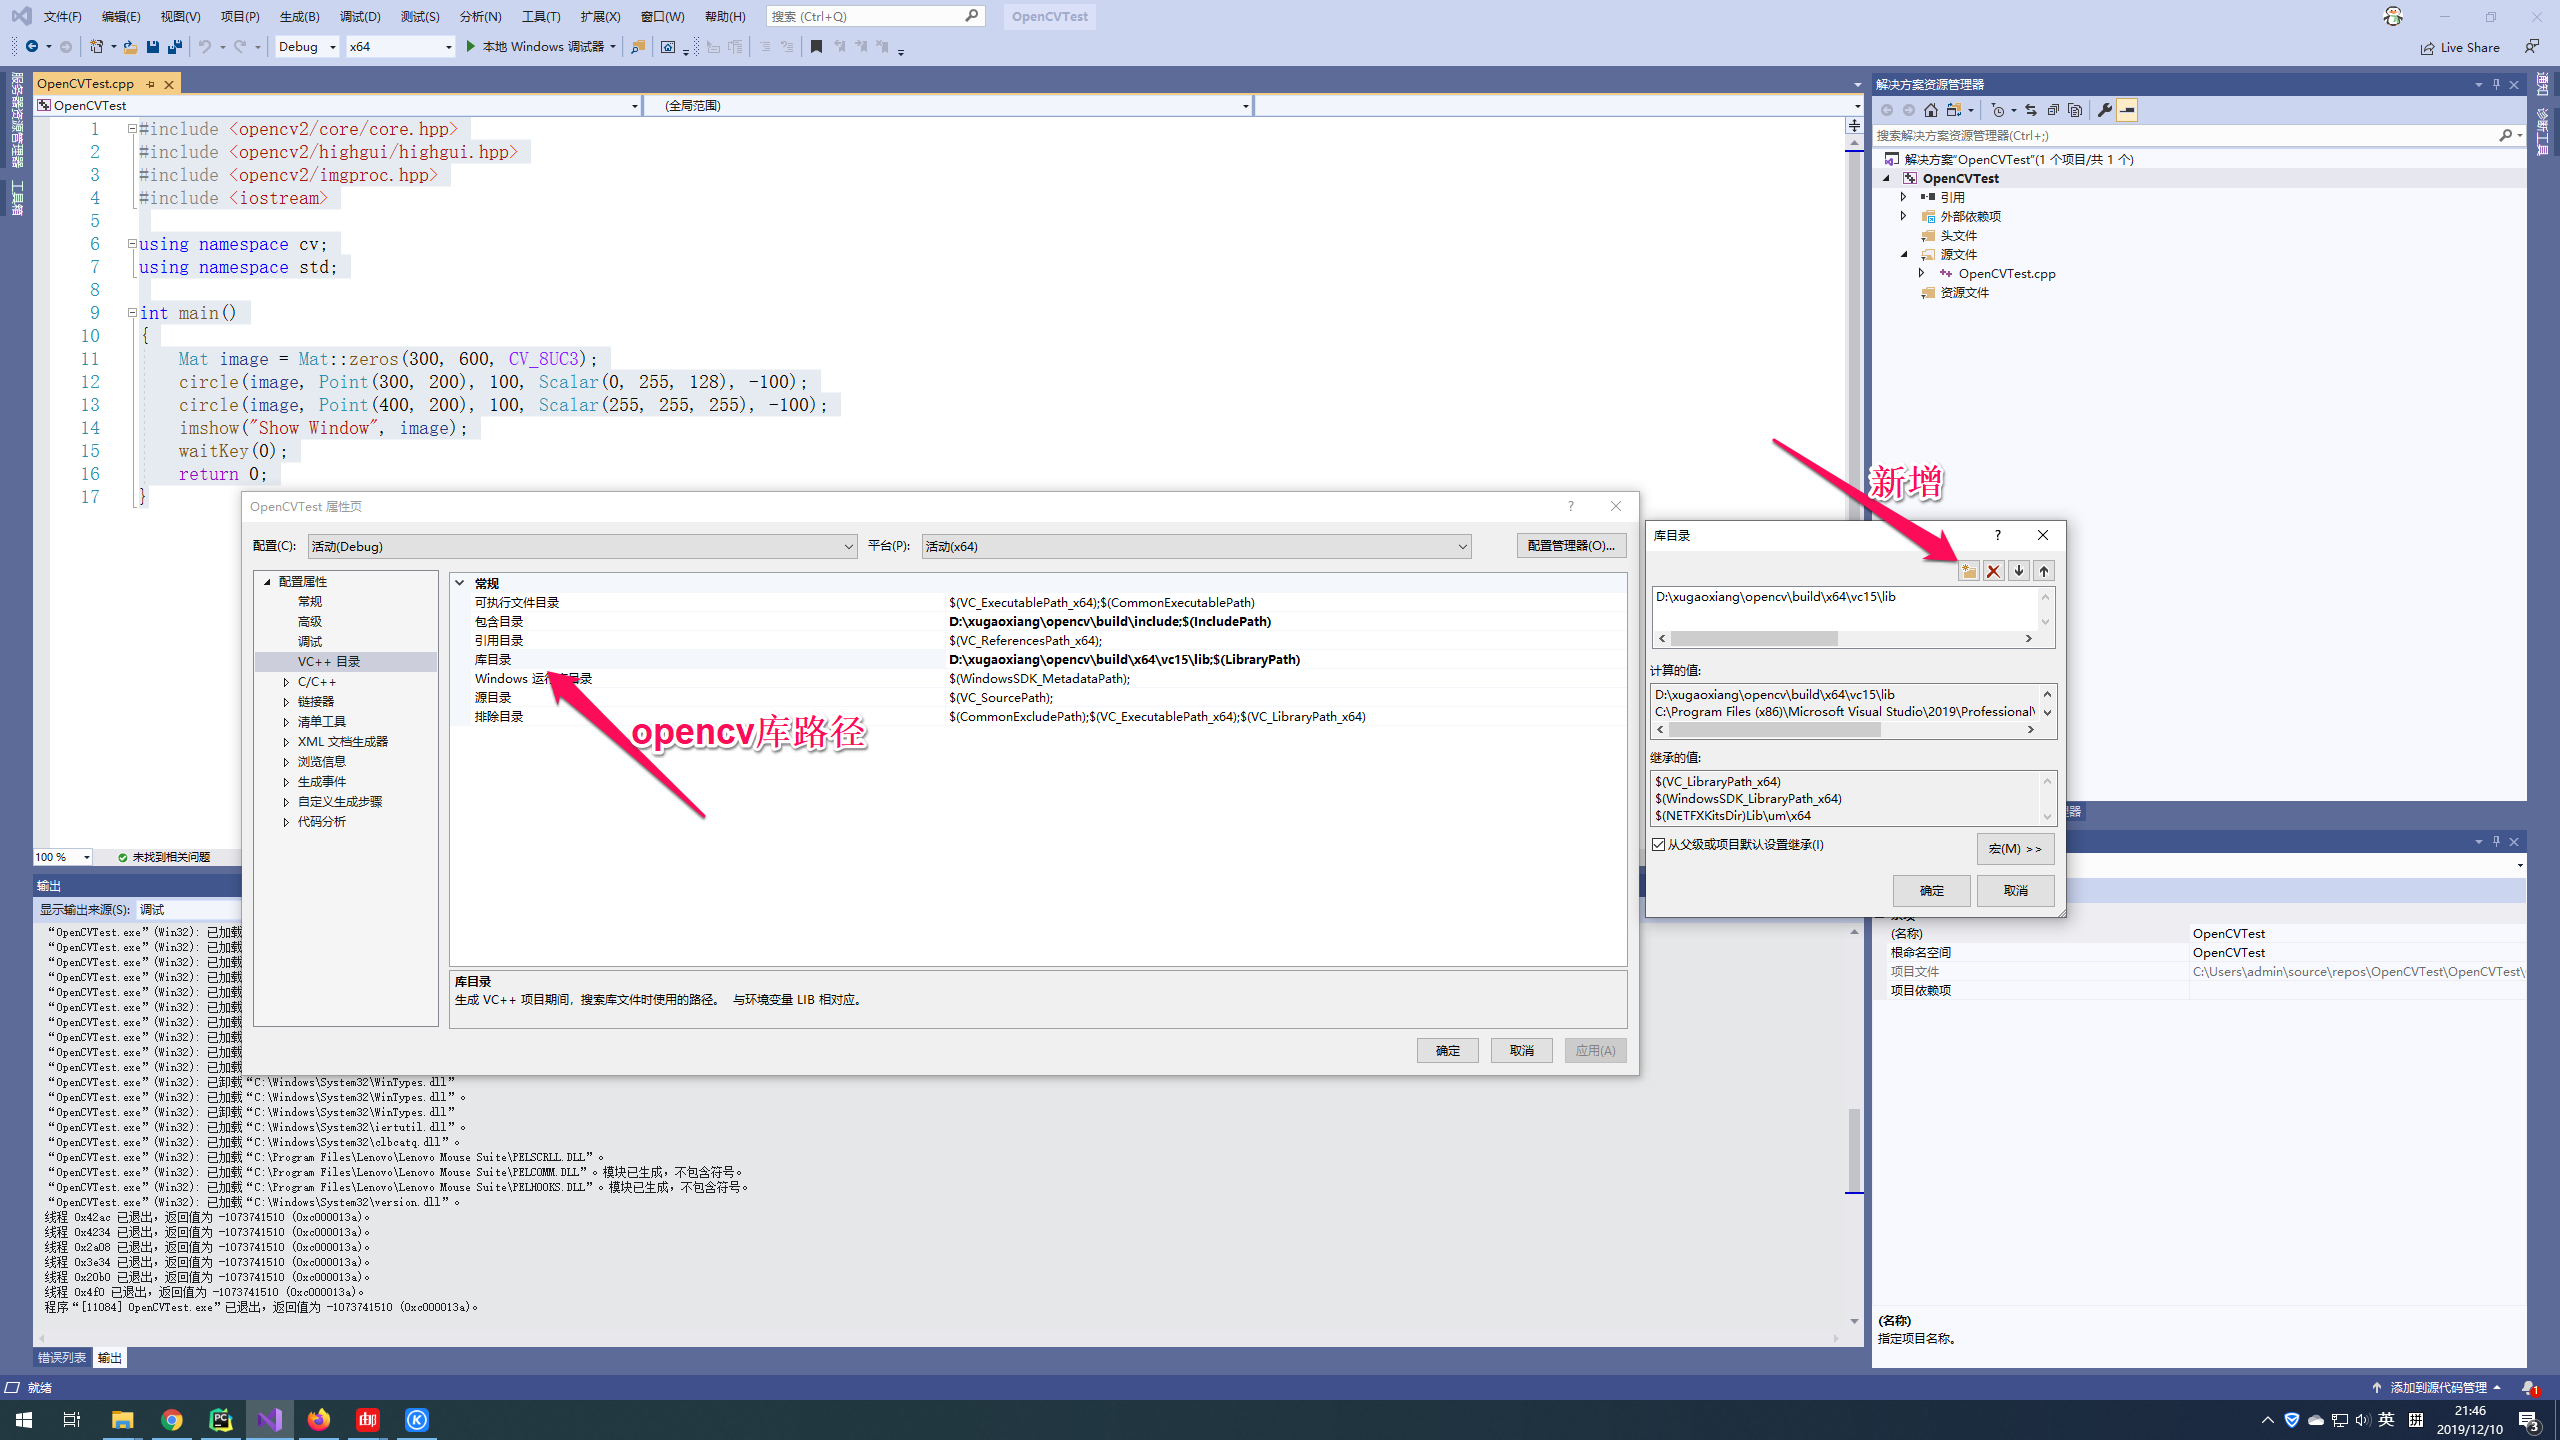
一定要确保新增成功了
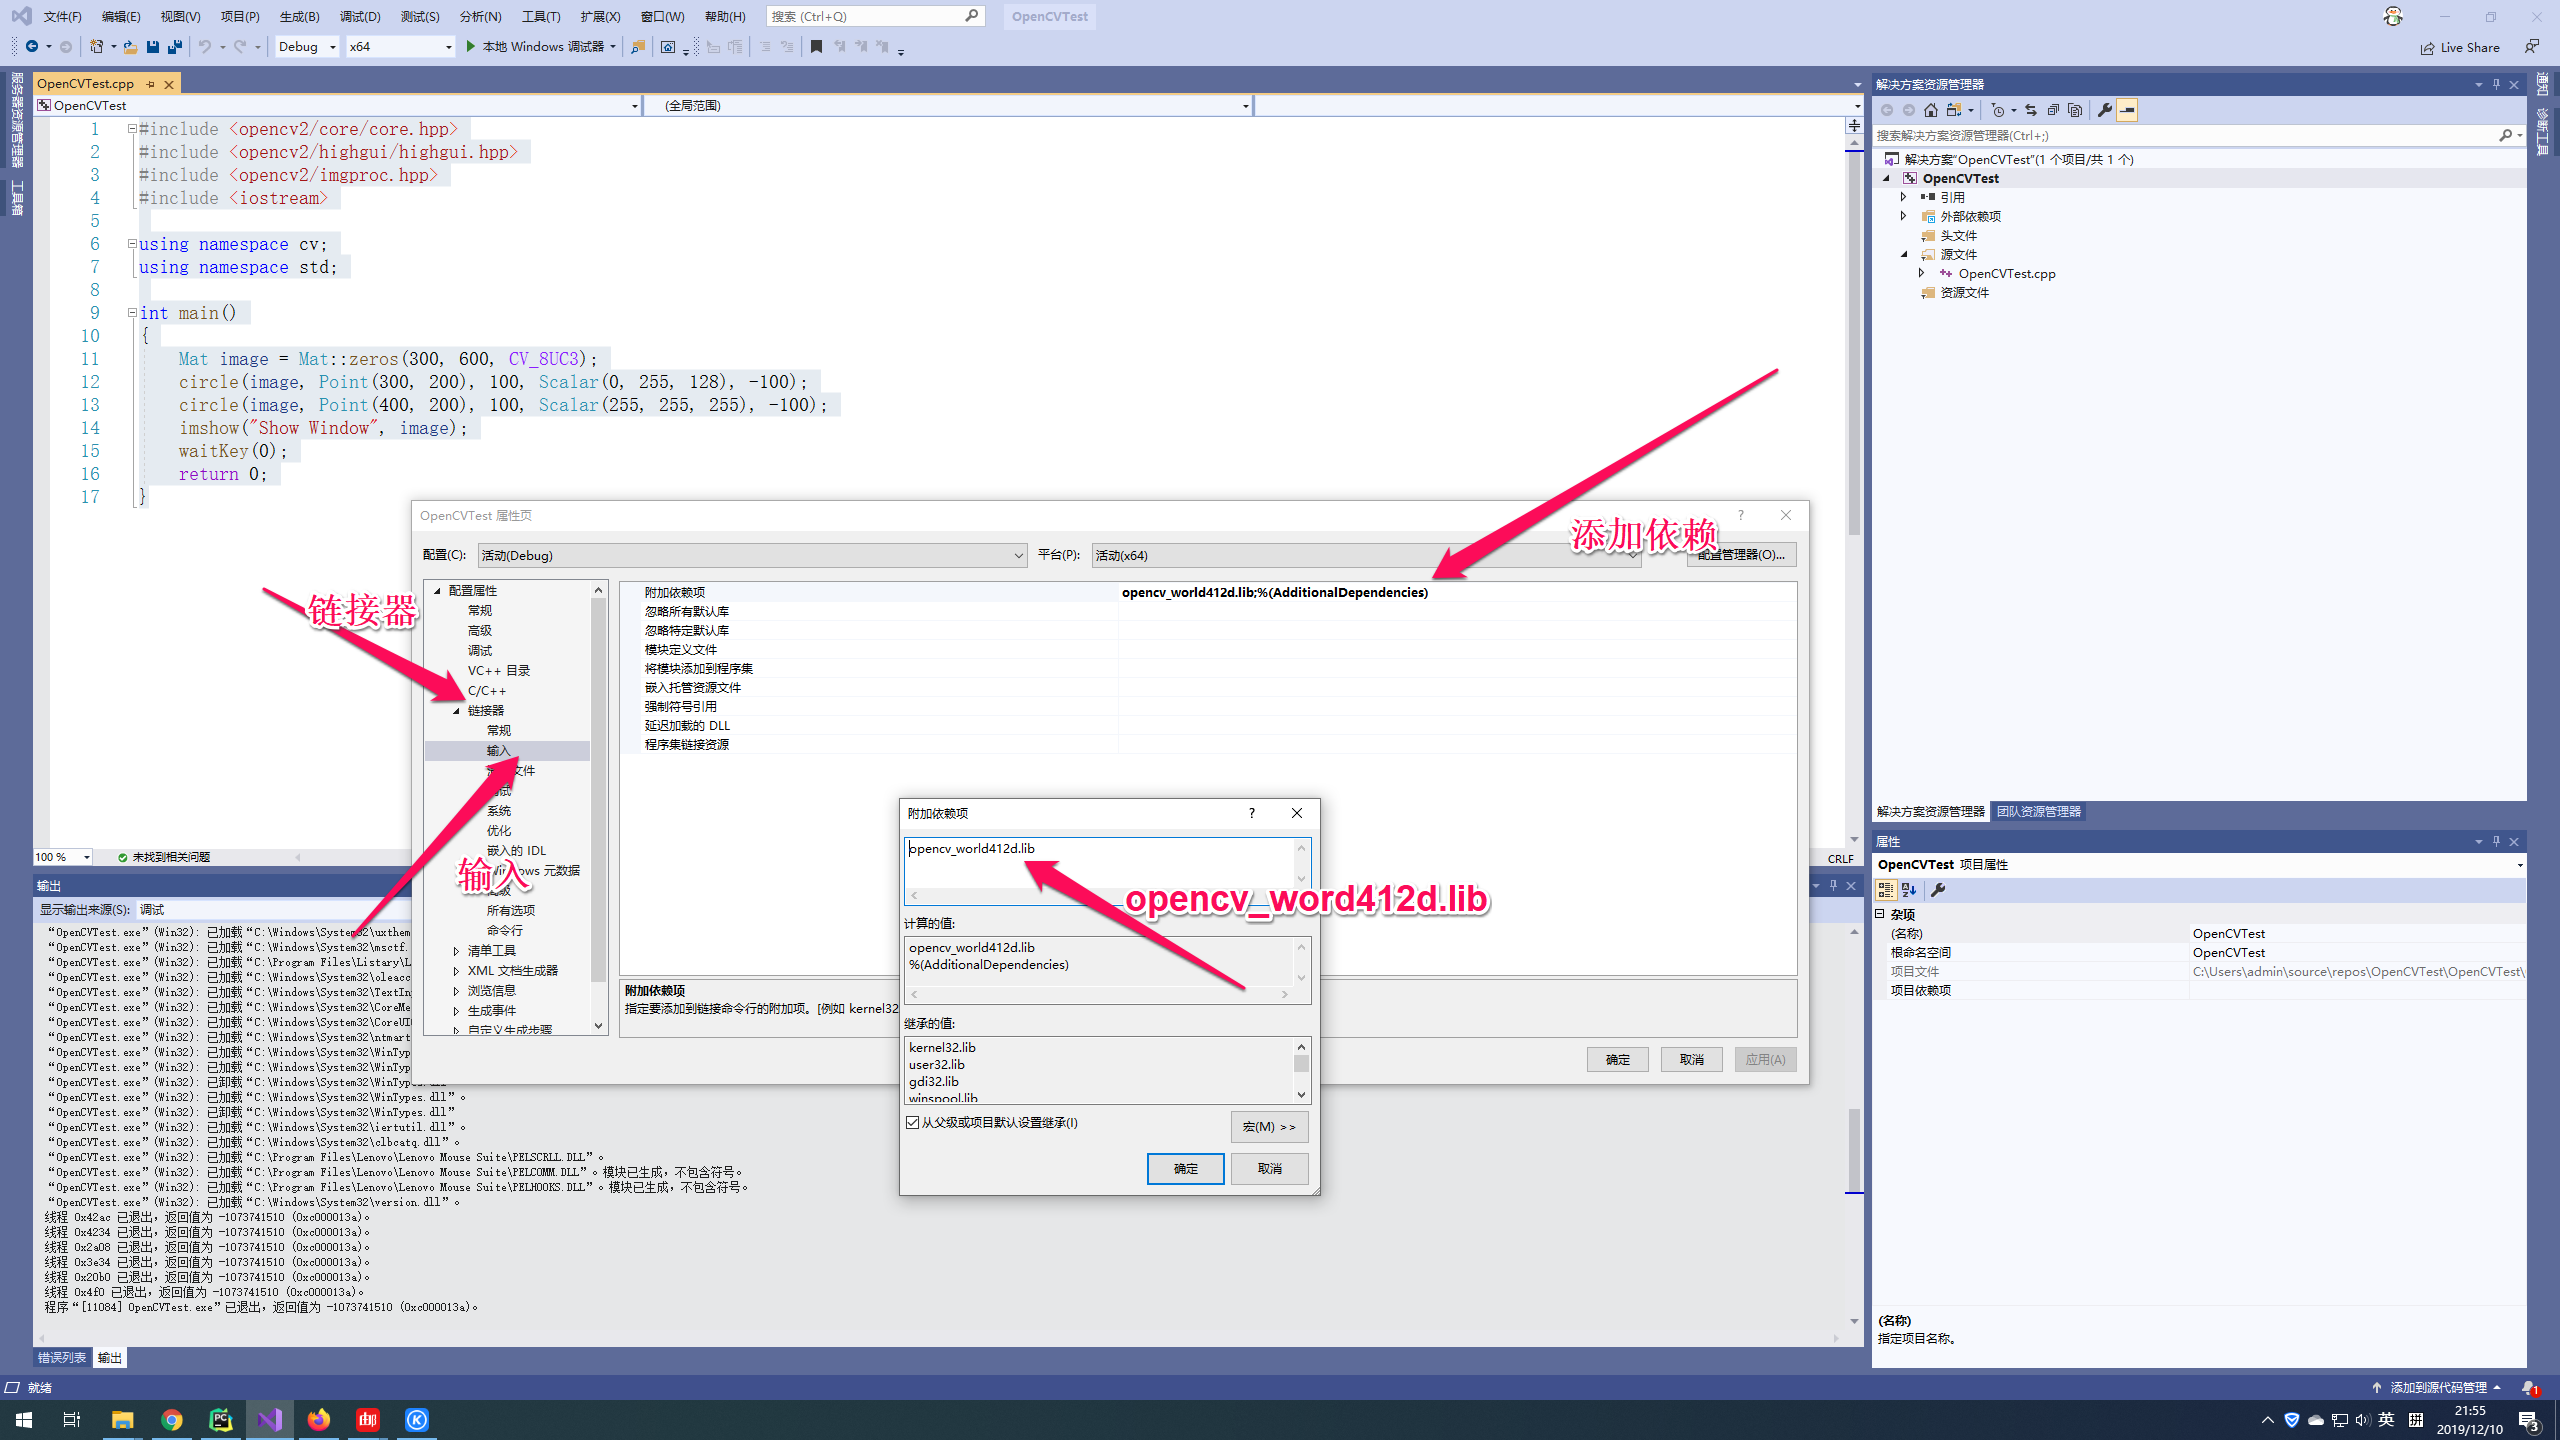
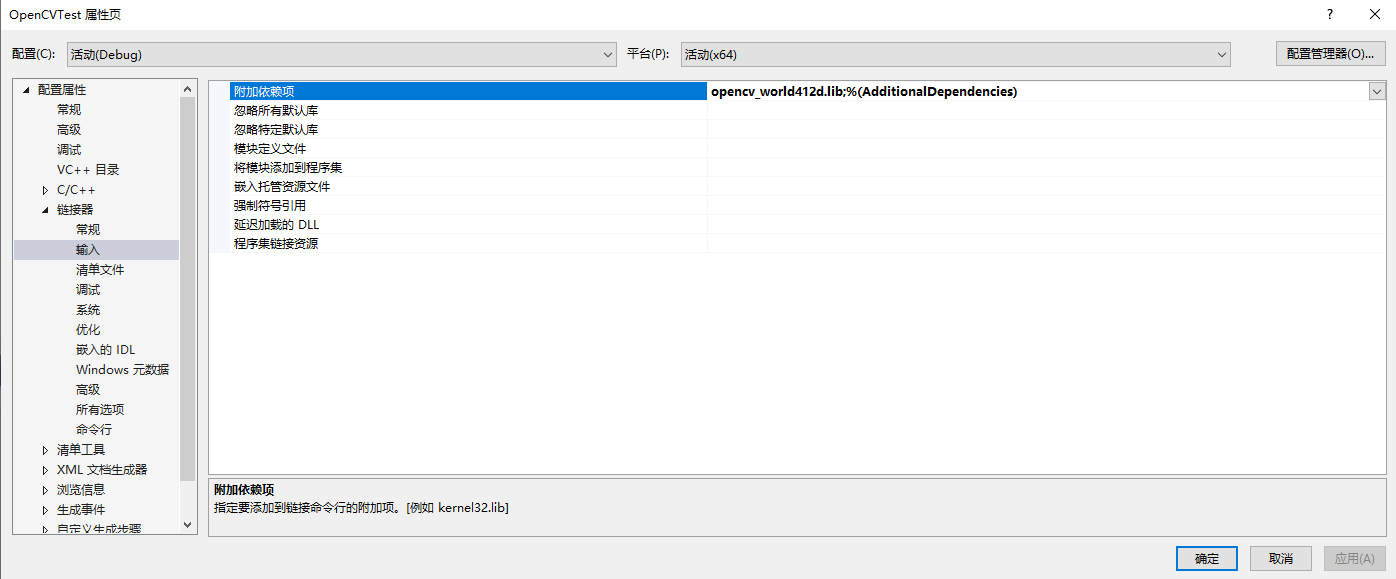
接下来设置模块依赖
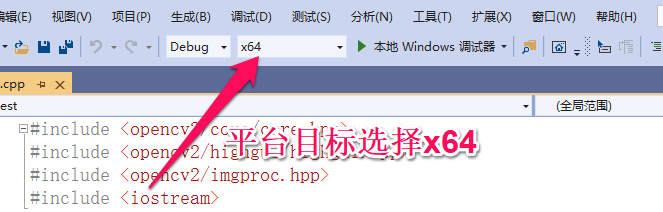
最后设置解决方案平台为x64
到这里,一切就都准备好了,按下F5键运行工程
Recommend
About Joyk
Aggregate valuable and interesting links.
Joyk means Joy of geeK