

webpack代理配置
source link: https://icodex.me/2022/01/03/webpack%E4%BB%A3%E7%90%86%E9%85%8D%E7%BD%AE/
Go to the source link to view the article. You can view the picture content, updated content and better typesetting reading experience. If the link is broken, please click the button below to view the snapshot at that time.
webpack代理配置
devServer
webpack-devServer,一般简称WDS,是 webpack 内置的用于开发环境的服务器配置。webpack本身提供三种方式用于开发环境修改代码以后自动编译,以提高开发效率:
总体来说,WDS 配置最容易,并且提供 HMR 的功能,只需要配置devServer.hot: true就直接启用,方便到了极致!下面就重点看一下 WDS 的proxy配置。
http-proxy-middleware
webpack的 WDS 内置的proxy功能来自于http-proxy-middleware这个第三方工具,正如我以前看到的一句话所说,开源最重要的不是贡献自己的代码,而是把别人的拿过来用,从开源社区的发展角度来看,这的确是核心,只有开源带动开源,才能让社区氛围更好。
废话不多说了,来看一下http-proxy-middleware都有哪些配置吧。
配置
URL
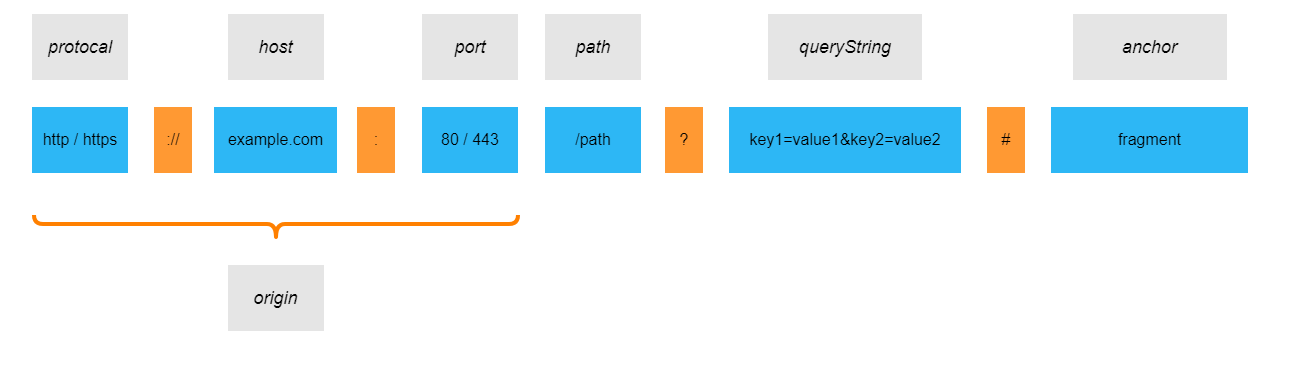
在了解详细配置之前,先来回顾一下 HTTP 协议下 URL 的构成:
http-proxy-middleware本身融合了http-proxy的一些配置,但是文档配置写的比较抽象,并且多数配置实际开发的时候根本用不到,这里重点关注几个比较重要的属性。
target | string
target用于指定代理转发的目标域名,在 WDS 中可以按照如下设置,这样当本地请求localhost:3000/api的时候,就会被 WDS 转发请求https://xxx.com/api去
devServer: {
  proxy: {
    "/api": {
      target: "https://xxx.com"
    },
  },
}
router | object/function
router和target有点类似,也是重定向转发域名的,区别是target只能设置一个string类型的域名,router可以指定多个域名转发的映射对象或者函数,并且会覆盖target
router: {
    'integration.localhost:3000' : 'http://localhost:8001',  // host only
    'staging.localhost:3000'     : 'http://localhost:8002',  // host only
    'localhost:3000/api'         : 'http://localhost:8003',  // host + path
    '/rest'                      : 'http://localhost:8004'   // path only
}

router: function(req) {
    return 'http://localhost:8004';
}
pathRewrite | object/function
重写本地请求的 URL 中的path部分,设置的key字符串会被构造成一个正则表达式来匹配请求的 URL,需要注意的是只会重写path部分,前面的host以及后面的queryString都会保留下来和重写后的域名进行拼接。
devServer: {
  proxy: {
    "/api": {
      pathRewrite: {
        "^/api": "/newApi", // rewrite path
      },
    },
  },
}

pathRewrite: async function (path, req) {
  const should_add_something = await httpRequestToDecideSomething(path);
  if (should_add_something) path += "something";
  return path;
}
changeOrigin | boolean
因为http-proxy-middleware依赖于node-http-proxy实现的,changeOrigin这个参数是从http-proxy中直接拿过来的,找到node-http-proxy的源码部分,可以发现如下有关changeOrigin的实现 —— changeOrigin,用到的地方在这里 —— Request initalization
// requires-port是判断指定端口在当前协议下是否要求添加在 host 后面,如果是协议默认的端口就不用添加,例如HTTP默认80,会返回false
var required = require('requires-port');

if (options.changeOrigin) {
  outgoing.headers.host =
    required(outgoing.port, options[forward || 'target'].protocol) &&
    !hasPort(outgoing.host)
      ? outgoing.host + ':' + outgoing.port
      : outgoing.host;
}
设置request.header.host到底有啥用呢?首先在 HTTP 1.1 的时候要求必须设置这个请求头参数,因为部分网站的部署是基于域名的部署方案,也就是一个后台服务器的 IP 地址绑定多个域名,这很容器做到,只需要在域名管理机构的 DNS 解析处添加域名解析规则即可。
基于域名的部署方案取决于支持 HTTP 1.1 的浏览器能够在请求域名绑定的 IP 地址的时候发送host这个请求头参数,以标识当前请求的是什么域名,不然即使是不同域名,服务器接收到的都是相同的 IP 地址,仍然无法区分。
但是基于域名部署的方案最大问题是难以托管多个 HTTPS 的网站,因为在建立正式的 TCP 连接前,需要通过 TCP 进行一段 SSL/TLS 的握手过程,来验证双方身份,这边还没发送host呢,SSL/TLS 已经开始了。TLS 提供了一种拓展方法 SNI 来保证握手开始前将请求域名发送到服务器,这样就可以让服务器明确知道对方是谁,发送什么样的证书给它。
所以在请求https协议的网站时,一定要配置changeOrigin这个请求头,不然就会出现以下错误:

实践
比如现在本地我要把知乎专栏《阿里妈妈前端快爆》的内容抓取下来,首先看一下请求是啥,大致是这个地址:
Request URL: https://www.zhihu.com/api/v4/columns/mm-fe/items?limit=10&offset=10
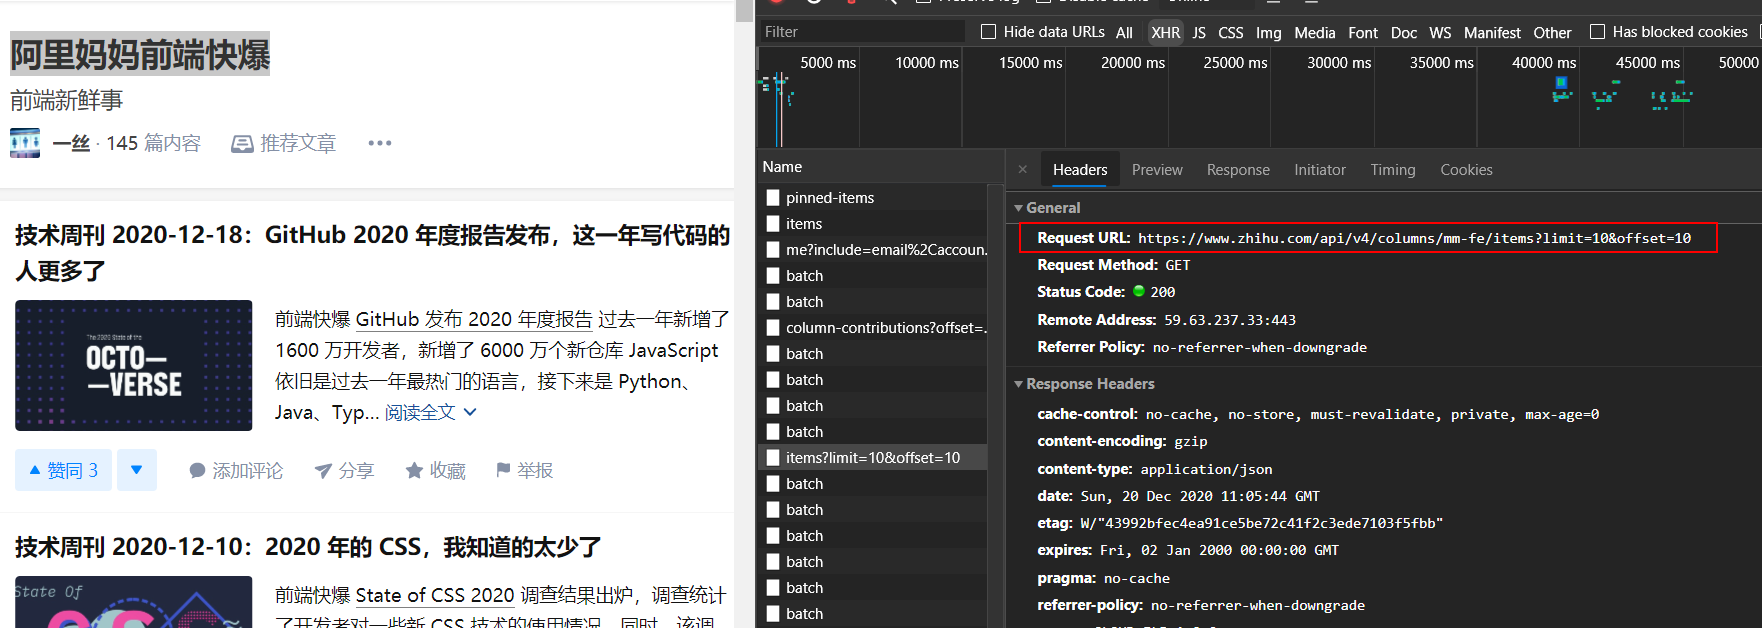
那么我本地webpack的 WDS 可以这样配置:
    proxy: {
      "/api": {
        target: "https://www.zhihu.com",
        changeOrigin: true,
        pathRewrite: {
          "^/api": "/api/v4/columns/mm-fe/items", // rewrite path
        },
      },
    },
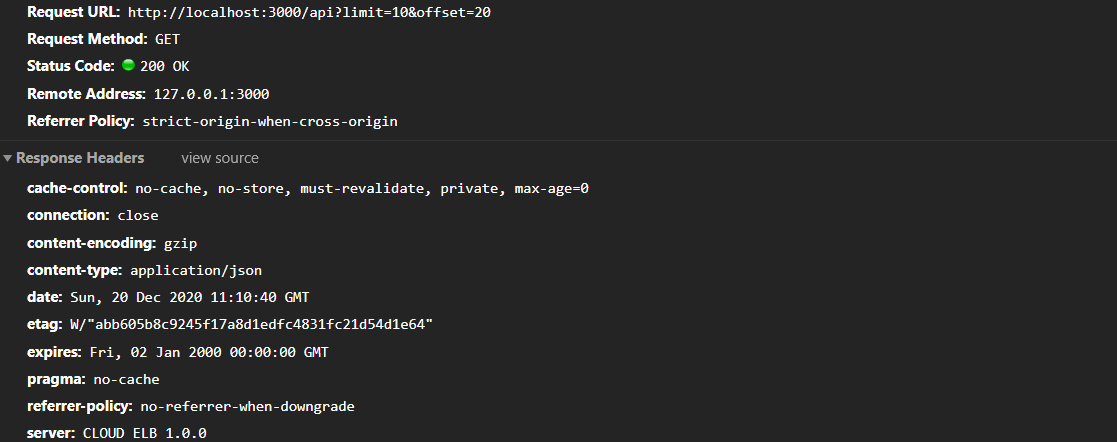
请求的地址是/api?limit=10&offset=20:
fetch('/api?limit=10&offset=20')
  .then(function(response) {
    return response.json();
  })
  .then(function(myJson) {
    console.log(myJson);
  });
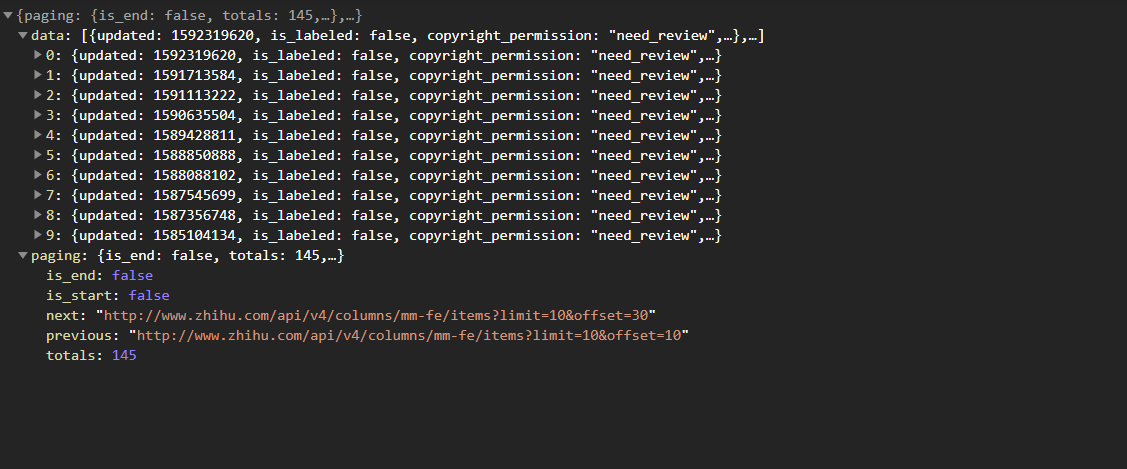
这样就可以成功转发请求获取数据了,可以看到这样一种重写 URL 的方式首先根据/api匹配请求 URL,如果包含则使用target定义的路径重写host,最后根据pathRewrite重写 URL 中的path部分,得到最后的 URL 为:
URL = target + pathRewrite + queryString + hash
通用配置
在实际使用过程中,针对pathRewrite这样配置:
    proxy: {
      '/api': {
        target: 'http://localhost:3000',
        changeOrigin: true,
        pathRewrite: {
          '^/api': '/',
        },
      },
    },
这样在项目中请求的 URL 都是这种形式,以达到通用性:
fetch('/api/xxx?name=xxx')
  .then(res => res.json())
  .then(res => console.log(res));
Recommend
About Joyk
Aggregate valuable and interesting links.
Joyk means Joy of geeK