

How to Move Containers to IBM App Connect - DZone Integration
source link: https://dzone.com/articles/how-to-move-containers-to-ibm-app-connect
Go to the source link to view the article. You can view the picture content, updated content and better typesetting reading experience. If the link is broken, please click the button below to view the snapshot at that time.
How to Move Containers to IBM App Connect Enterprise
Learn how to move to containers running App Connect Enterprise by utilizing a simple flow within a Docker container environment.
Join the DZone community and get the full member experience.
Join For FreeMany enterprises have IBM Integration Bus environments running hundreds of integration flows in production. You have likely read about the benefits of moving to containers, perhaps even more generally of agile integration, and you’d like to explore that. You’d also like to move to a more recent version of the product (now named IBM App Connect Enterprise). However, it is likely you have no, or at least a very limited background in container technology. How do you take the first steps to explore these new platforms and product versions?
In this series, we are going to describe how you move to containers running IBM App Connect Enterprise. We’ll build up to more complex examples, but for this first one we’ll take the simplest possible flow, and we’ll use a Docker container environment that can easily be run on a laptop.
It is worth noting that you are not forced to move containers to IBM App Connect Enterprise, but hopefully through these articles we will give you some practical insight into the benefits you might gain if you do.
Introducing a Simple Integration Flow
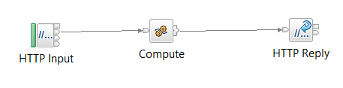
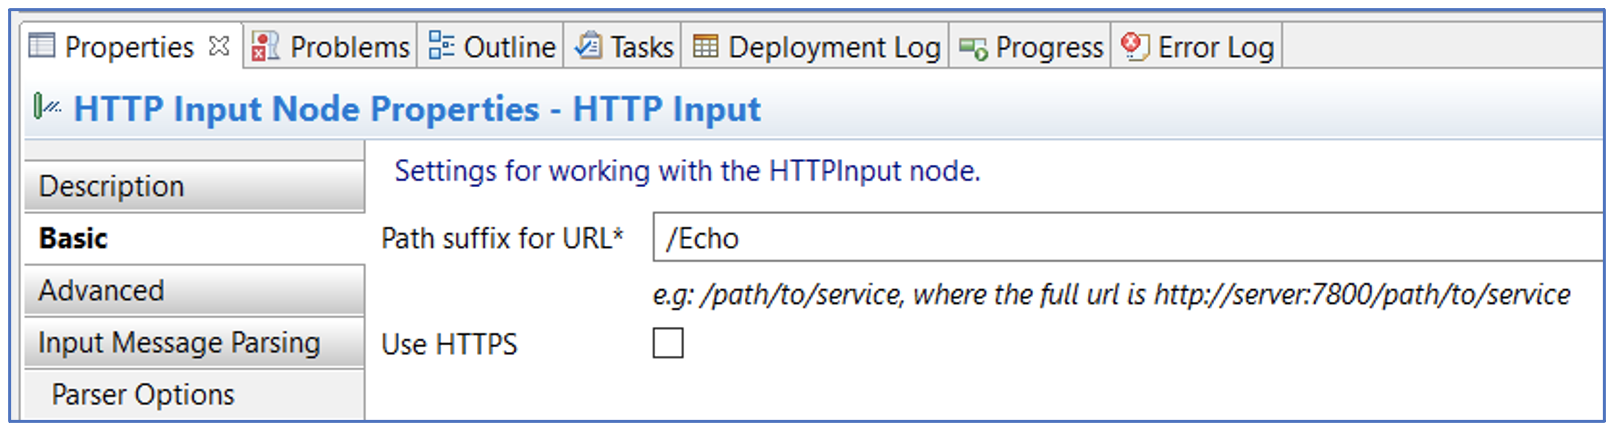
We take a simple example of an HTTP-based flow as shown in the figure below, that presents an echo service (we’ll call it HttpEcho) over an HTTP endpoint on port 7800. This returns the current date-stamp in response. Clearly, this example flow doesn’t do much, but this article isn’t about writing integration flows, it is about moving them to containers, and we’ll come to more complex ones in future articles.
You can call this by going to http://localhost:7800/Echo or running curl command as
curl -k http://localhost:7800/Echo
The BAR file generated using IIB v10 Toolkit containing the above message flow is attached here.
We have deliberately supplied just the BAR file in this example to show that it is possible to run a BAR file from IBM Integration Bus (v9 or v10) directly on later versions such as IBM App Connect Enterprise (v11 onwards). However, as we get to the more complex examples we’ll explore situations where you would also need to have the source code of the message flow available.
In this scenario, we will see how to deploy this BAR file into a Docker container running IBM App Connect Enterprise using simple steps.
Installing Docker
Docker provides us a simple container platform that can be easily used on a laptop or within a VM.
We have used a Linux environment setup with the Docker Engine, but the commands would be largely identical if running on MacOS or Windows.
If you do not have Docker Engine already set up, you can follow the instructions on the following website to install it: https://docs.docker.com/engine/install/
Obtaining the ACEcc Image from the IBM Cloud Container Registry
IBM provides a pre-built container image for IBM App Connect Enterprise, available at a range of fix pack levels including, of course, the very latest. You can think of this as a pre-installed, stand-alone Integration Server wrapped up on a container image. It is a production-ready image, and this is the exact same image the IBM Cloud Pak for Integration platform uses, as we will show in later scenarios.
The ACE Certified Container image (ACEcc) is downloaded from the IBM Cloud Container Registry. To obtain images from this registry, you require an IBM entitlement key. You need to obtain this key once only.
Obtain an IBM Entitlement Key
Obtain an IBM entitlement key by visiting the following site:
https://myibm.ibm.com/products-services/containerlibrary
You will need to log in with an IBM ID. It is free to register for an ID if you do not have one.
Pull the ACEcc Image From IBM Container Registry
Log in to the IBM Cloud Container Registry by running this command, using cp as the user name, cp.icr.io as the Docker server, and your entitlement key as the password:
docker login cp.icr.io -u cp -p myEntitlementKeyUse Docker to pull the required version of the ACEcc image,
docker pull imageLocationwhere imageLocation represents one of the listed image locations in the table shown in the following link:
In this demonstration, we will use ACEcc image version 12.0.1.0-r4

Here is the command we will use to pull the image from the IBM Container registry
$ docker pull cp.icr.io/cp/appc/ace-server-
prod@sha256:f7a74de7e5cd3d1d56cabde1c11b174b1be643f48c3bce63ab5f344495877052

$ docker images

REPOSITORY                           TAG     IMAGE ID      CREATED

cp.icr.io/cp/appc/ace-server-prod   <none>  c4eb0ab3fb44  5 weeks ago
After the image is pulled /downloaded, tag it so that it is easy to recall.
For example :
$ docker tag c4eb0ab3fb44 ace-server-prod:12.0.1.0-r4

$ docker images

REPOSITORY                    TAG          IMAGE ID      CREATED

localhost/ace-server-prod   12.0.1.0-r4  c4eb0ab3fb44   5 weeks ago
Create Initial-Config Directory
To enable dynamic configuration of the ACE Integration Server, ACEcc supports configuration injected into the image as files. As the Integration Server starts, it checks for the folder /home/aceuser/initial-configwithin the container.
Under this folder, different types of configuration can be injected including BAR files. In this example, we only need to inject the BAR file itself.
We will create this directory structure on our host machine including a sub-directory called ‘bars’ under the initial-config directory.
$ mkdir -p /root/initial-config/bars
We will then copy the bar file to the bars folder
$ cp HttpEchoApp.bar /root/initial-config/bars
We will mount this file structure at /home/aceuser/initial-config when we launch the ACEcc using Docker.
Note: The details about what configuration can be dynamically passed to the container are available at https://github.com/ot4i/ace-docker
Run the ACEcc Image Using Docker
Now that we have copied the BAR file to the desired directory structure, we will launch the Integration Server in the Docker container by using the command,
docker run --name aceapp -p 7600:7600 -p 7800:7800 -p 7843:7843 --env LICENSE=accept --env ACE_SERVER_NAME=ACESERVER --mount type=bind,src=/root/initial-config,dst=/home/aceuser/initial-config localhost/ace-server-prod:12.0.1.0-r4
Let us look at the various command line options that we have passed to the docker run command.
- --name : Name assigned to the Docker container
- -p :This option maps the container's port(s) to the host. The Integration Server by default enables ports 7600, 7800, 7843 during start-up and they serve the following purposes:
- 7600 – An administrative listener port. Also used by the WebUI.
- 7800 – To listen to http traffic
- 7843 – To listen to https traffic
These ports are exposed to the VM host so that external applications can invoke the services hosted by message flows over these ports.
- --env : To pass on an ENV variable to the container. You must accept the license to be able to launch the ACE Integration Server. You can optionally provide a name to your Integration Server using env var
ACE_SERVER_NAME - --mount : Attach a filesystem mount to the container. In the example command above,
src=/root/initial-configis local filesystem (indicated by ‘src’) that is being mounted on directory path /home/aceuser/initial-config (indicated by ‘dst’) inside the container - localhost/ace-server-prod:12.0.1.0-r4 : The ACE image that is being launched.
Observe the console output. An example is shown below:
2021-10-14T07:00:26.025Z Image created: 2021-09-02T11:12:32+00:00
2021-10-14T07:00:26.206Z ACE version: 12010
2021-10-14T07:00:26.206Z ACE level: S000-L210520.10620
2021-10-14T07:00:26.206Z ACE build type: Production, 64 bit, amd64_linux_2
…
2021-10-14T07:00:27.184Z Processing running flows in folder /home/aceuser/ace-server/run
2021-10-14T07:00:27.184Z Starting integration server
2021-10-14T07:00:27.184Z No default application name supplied. Using the integration server name
instead.
2021-10-14T07:00:27.188Z Waiting for integration server to be ready
2021-10-14T07:00:27.203Z Integration server not ready yet
2021-10-14 07:00:27.494870: BIP1990I: Integration server 'ACESERVER' starting initialization;
version '12.0.1.0' (64-bit)


2021-10-14 07:00:27.508716: BIP9905I: Initializing resource managers.
2021-10-14 07:00:32.049656: BIP9906I: Reading deployed resources.
2021-10-14 07:00:32.052868: BIP9907I: Initializing deployed resources.
2021-10-14 07:00:32.054524: BIP2155I: About to 'Initialize' the deployed resource 'HTTPEcho' of type 'Application'.
2021-10-14T07:00:32.208Z Integration server not ready yet
2021-10-14 07:00:32.281242: BIP2155I: About to 'Start' the deployed resource 'HTTPEcho' of type
'Application'.
An http endpoint was registered on port '7800', path '/Echo'.
2021-10-14 07:00:32.293656: BIP3132I: The HTTP Listener has started listening on port '7800' for
'http' connections.
2021-10-14 07:00:32.293796: BIP1996I: Listening on HTTP URL '/Echo'.
Started native listener for HTTP input node on port 7800 for URL /Echo


2021-10-14 07:00:32.293988: BIP2269I: Deployed resource 'Echo' (uuid='Echo',type='MessageFlow')
started successfully.
2021-10-14 07:00:33.050416: BIP2866I: IBM App Connect Enterprise administration security is
inactive.

2021-10-14 07:00:33.065014: BIP3132I: The HTTP Listener has started listening on port '7600' for
'RestAdmin http' connections.


2021-10-14 07:00:33.066482: BIP1991I: Integration server has finished initialization.
2021-10-14T07:00:37.217Z Integration server is ready
2021-10-14T07:00:37.217Z Metrics are disabled
2021-10-14T07:00:37.217Z Starting integration server commands API server
2021-10-14T07:00:37.217Z Integration API started
It is worth noting that in a single step, starting from a completely generic container platform, the container started within just a few seconds with a fully installed and configured Integration Server, and the BAR file is already deployed and running. Compare this to the time (and indeed the many steps) it would take in a traditional environment to install, configure and start up an Integration Server, and then deploy a BAR file to it.
You can begin to see just how different this container-based approach is, and what opportunities this offers in terms of new ways of working. We can imagine how much easier it would be, for example, to build a CI/CD pipeline, and how that pipeline could effectively include not just the code, but the full server configuration. It might also lead us to think differently about how we manage high availability and scalability.
We’ll cover more on this and the broader cloud-native approach in future posts.
Execute and Test the Message Flow
Let’s just check that we really do have a running integration application. As seen in the console output, the HTTP listener is listening on port 7800 and service endpoint is /Echo. You can verify the message flow execution by invoking the service via a web browser or curl command.
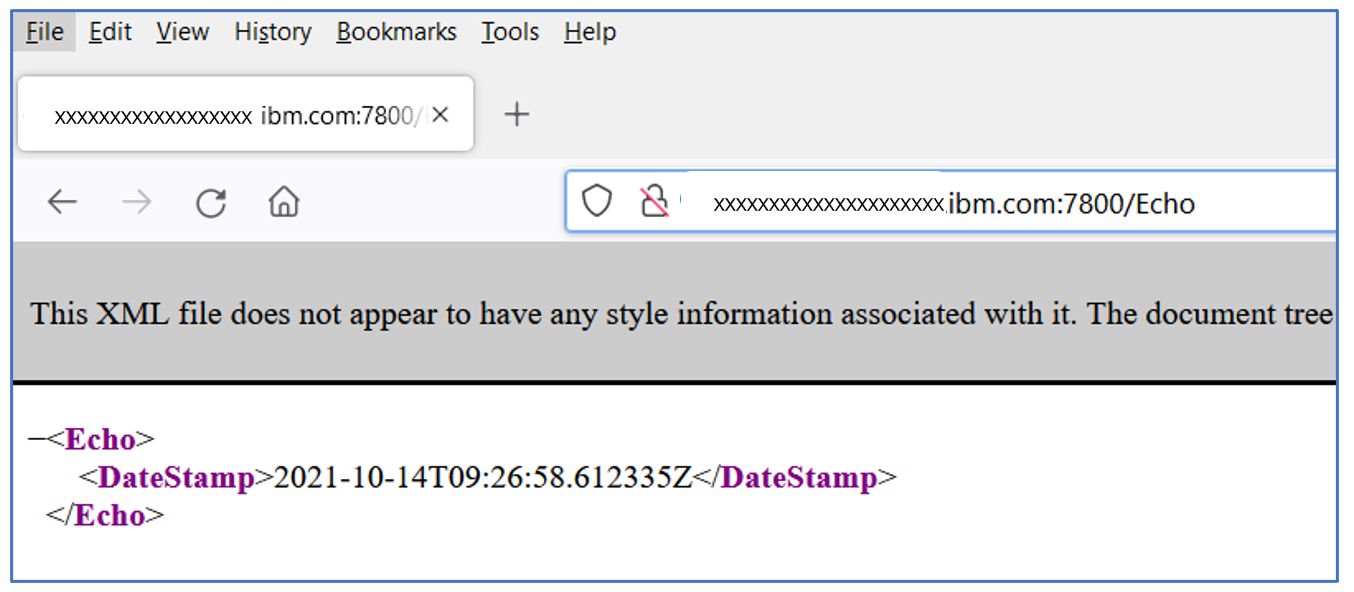
curl http://<hostname>:7800/Echo
Output :
<Echo>
<DateStamp>2021-10-14T09:25:46.352934Z</DateStamp>
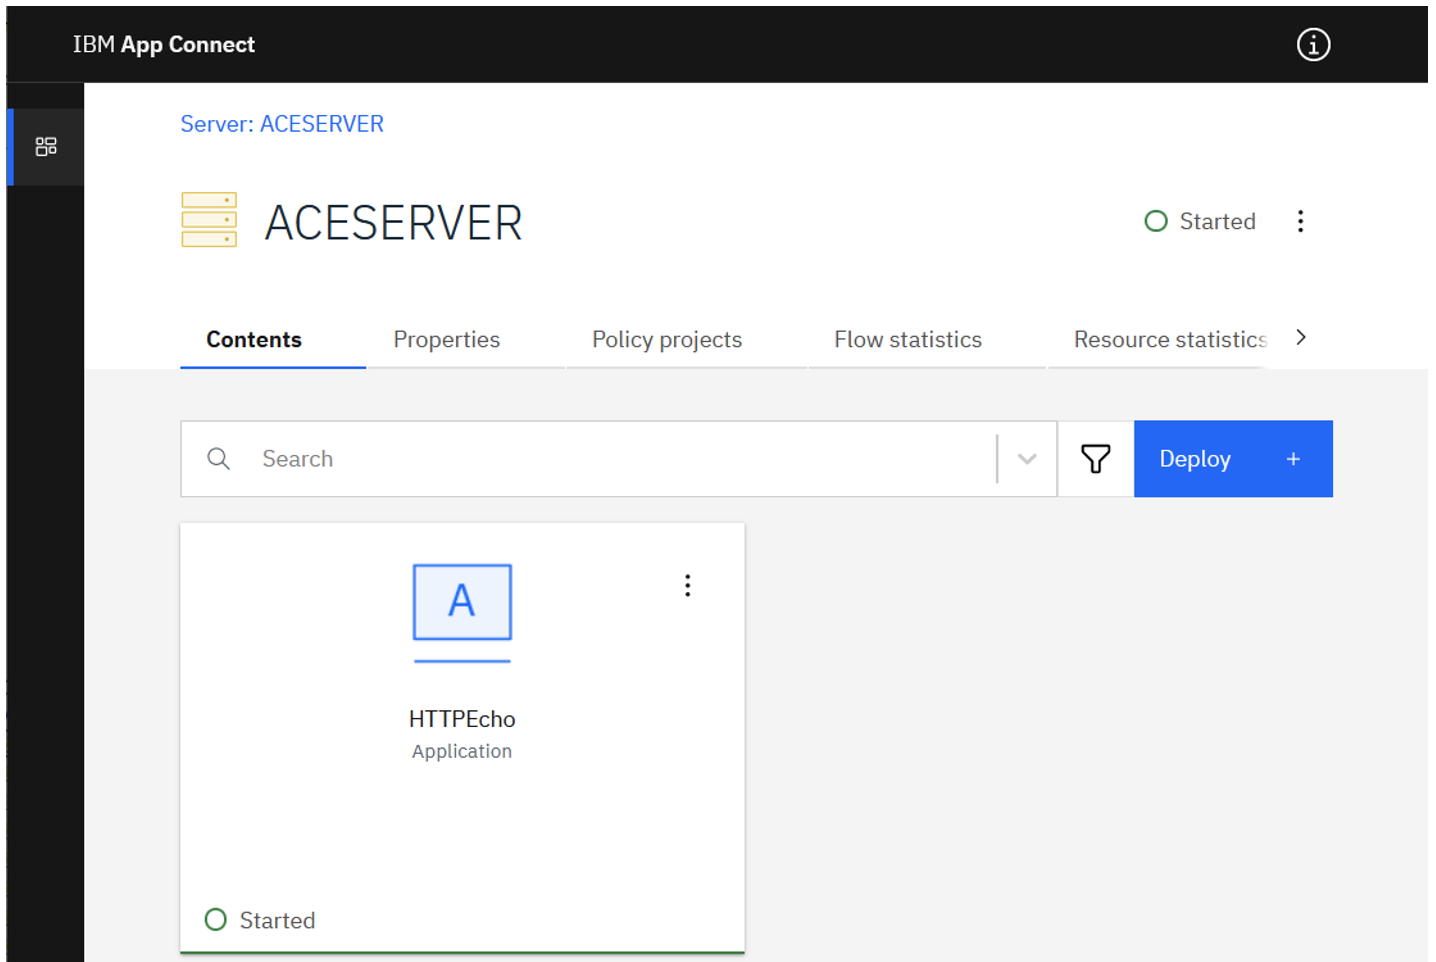
</Echo>Connecting to the WebUI of the Integration Server
In our start-up command, we chose to expose the web user interface via 7600.
However, it’s worth noting that in a true cloud-native deployment we would avoid viewing and administering containers directly like this. A cloud-native approach encourages administrative changes to be made by creating a new container rather than administering the one that is running (“immutable deployment”), and monitoring is generally done by viewing log files or using a visualization tool on them (“observability”).
Recommend
About Joyk
Aggregate valuable and interesting links.
Joyk means Joy of geeK