

How I switched from macOS to Linux after 15 years of Apple
source link: https://markosaric.com/linux/
Go to the source link to view the article. You can view the picture content, updated content and better typesetting reading experience. If the link is broken, please click the button below to view the snapshot at that time.

How I switched from macOS to Linux after 15 years of Apple
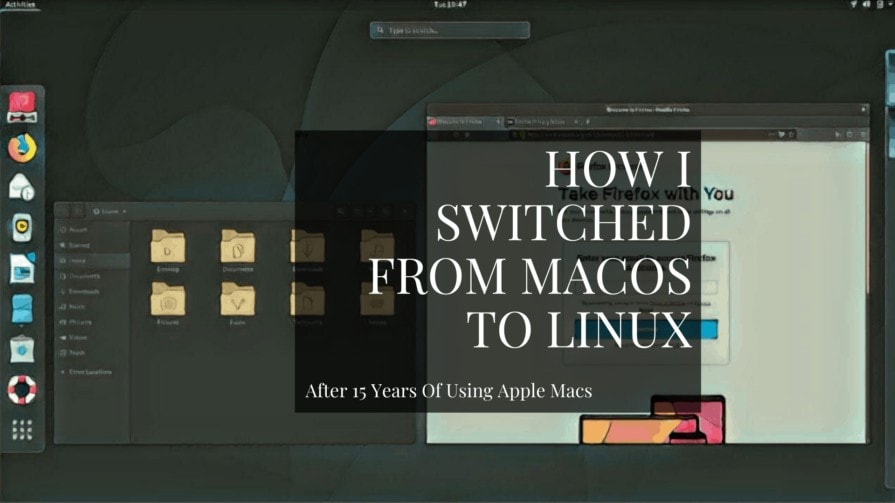
After using Macs for about fifteen years, I switched to Linux as my main operating system in July of 2018 and I’m enjoying it. Here’s an introduction to Linux that may help you if you too are looking for a change.
Why switch from Mac to Linux?
My latest MacBook was four years old and was starting to feel a bit bloated and slow. It felt like a time to get a new one.
My previous three laptop purchases were all MacBooks but somehow this time it wasn’t that tempting. I felt ready for a change, something different and something more aligned with my current needs.
I wasn’t too locked into the Apple ecosystem. I don’t have an iPhone so the integrations were not necessary for me. I didn’t use iCloud, FaceTime or Siri either. If all of these are key to you, switching to Linux may not be worth it.
I used Windows before purchasing my first MacBook but returning was not in my considerations due to the state of that OS with inbuilt ads, bloat and privacy concerns.
I’ve never used Linux but the open source world is close to my heart. One of the tools I spend most of my time on for content publishing is WordPress and I love the passionate ecosystem it has. Linux seems very similar.
My old MacBook wasn’t too compatible with Linux so I purchased a mid-range Windows machine to give Linux a try (you can even get a Linux laptop). And I got hooked fast.
The idea was to take baby steps and split my time between Mac and Linux but I quickly stopped turning on my MacBook. So it got handed down and I turned to Linux full time. I’ve now been running Linux exclusively for just over a year.
What are Linux distros and desktop environments?
Linux is a world of abundant choice. This can give you the freedom to do whatever you wish but it can be paralyzing to a newbie.
Linux distros
When you start learning about Linux you quickly hear all these different names that people recommend and rave about. MX, Manjaro, Mint, Ubuntu, elementary, Solus and so many more.
These all are Linux distributions (distros) or in other words, they are the different Linux operating systems. Linux, unlike Windows and Macs, doesn’t only have one single OS.
There are hundreds of distros and many of them have very vocal fans explaining why such and such distro is the right one for your situation. It’s amazing to have access to such a passionate community and ecosystem.
I’m here to save you some time and energy by telling you that the distro you pick doesn’t matter that much. The differences are overblown, are more technical and not something you as a newbie should worry too much about.
You simply want to get your feet wet and start using Linux rather than worrying about which of the hundreds of options is the optimal one.
Linux desktop environments
A more practical difference to think about are the different desktop environments (DE) or in other words graphical user interfaces. These differ a lot in terms of aesthetics, usability, workflow and the apps they are integrated with.
There are many desktop environments too. You may hear people recommending KDE Plasma, XFCE, Cinnamon or window managers such as i3.
This means that the most important choice you have at the start of your Linux journey is to determine the desktop environment you want to try rather than what distros to run.
A look into Linux Gnome desktop environment
I’ve tried several desktop environments (and several distros too) and in my opinion, the Linux desktop environment people coming from macOS are most likely to enjoy and feel comfortable in is Gnome.
There are other macOS like Linux desktop environments such as Pantheon and Deepin but Gnome is the most used one and with the most resources behind it.
Gnome is the most popular Linux desktop environment and it is the default choice in most of the big distributions such as Ubuntu, Debian and Fedora.
The individual distros may do some minor alterations to Gnome. The screenshots in this post are from Debian but it will look close to this in Ubuntu, Fedora or Arch too with the only visible exceptions being the default background image and the preinstalled apps.
Here’s a look at Gnome and how it works. This is pretty much how Gnome looks like after you log in:
Linux Gnome welcome screenSo what do I like about Gnome coming from macOS?
It’s very clean, minimal and modern. There are no distractions. There are no desktop icons. There’s no visible dock. The top panel is the only thing visible other than the background image.
The panel consists of “Activities” on the left, time and date at the center which at the same time is your notifications center and the tray icons for the network, Bluetooth, VPN, sound, brightness, battery and such on the right-hand side.
Gnome gets out of your way, it’s very keyboard-centric and it just works. You’ll notice some similarities with macOS such as window snapping and seeing previews of documents by hitting the space bar (exactly like Quick Look).
Gnome Activities Overview is like Mission Control and Spotlight Search in one
Dragging your mouse icon to the top left, or clicking on the “Activities” in the top panel or pressing the “Super key” on your keyboard (Apple key or Windows key) presents you with the “Activities Overview”.
Activities Overview is kind of like having the macOS Mission Control and Spotlight Search on one screen.
Gnome Activities Overview screenActivities Overview gives you an overview of all the open applications and windows at the center.
On the left-hand side, you see the dock which features all your favorite applications. The dock gives you the indicator under all the open applications.
On the right-hand side, you see the different spaces.
At the top center, you see the search box. As soon as you start typing the focus is on that search box. It searches applications installed, it searches the contents of the different files you have on your computer, it does calculations and so much more. Pretty much like Spotlight.
You simply start typing what you’re looking for and then press enter to open the application or the file.
Preinstalled Linux applications
You can also see the list of all the installed applications (pretty much like Launchpad on Mac). Click on the “Show Applications” icon in the dock or press Super key + A.

What can you expect in terms of applications available? You’ll have a file manager (like Finder on a Mac), you’ll have a text editor, you’ll have a document viewer and you’ll have a music player.
The default browser in most Linux distros is Firefox. The default office suite for documents, spreadsheets and presentations is LibreOffice.
Some apps may differ from distro to distro. Debian, for instance, installs some games by default as you can see in the screenshot above.
In general, Linux is very lightweight and takes very little disk space compared to macOS. Unlike macOS, it’s also possible to delete any of the preinstalled apps that you don’t want or need.
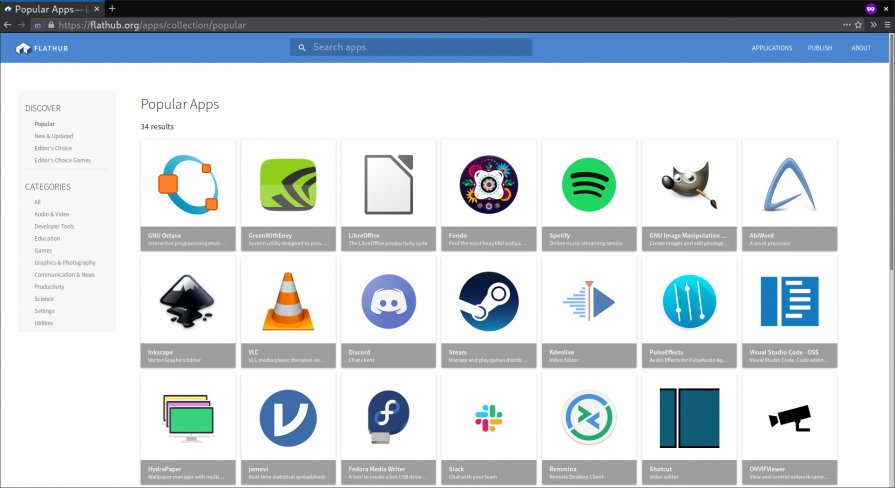
You’ll have access to a software center too.
Gnome software center for additional apps
To update the operating system or to update, delete and install applications, you use the Software Center. There are thousands of applications available in the Software Center of your Gnome install.
For instance, there’s Deja Dup which is like Time Machine and can do easy backups.
There’s the Artha dictionary which allows you to quickly lookup words within apps the same way you can on a Mac.
There’s GUFW which is a simple and easy to setup firewall.
You may be familiar with VLC from Mac already and it’s one of the most popular media players on Linux too.

Flatpak for proprietary apps
Note that many Linux distros care about free and open-source software (see for instance Debian’s Social Contract and Fedora’s Mission and Foundations) so if you cannot find some of your favorite closed source tools in the software center by default, I recommend you add Flatpak.
It’s a quick process to add it to your software center. It will allow you to search for and install proprietary applications such as Spotify, Slack, Zoom, Skype, Steam and others directly from the software center.
Pro Tip: It’s a good idea to double check if your must-have apps are available on Linux or if there are adequate or better alternatives. Search for options on your favorite search engine or search here for applications available in Debian by default and search here for applications you can add using Flatpak.
Things you can change using Gnome settings and tweaks
Gnome preferences are split into two different sections. The main options are in “Settings” and you have some additional options in the “Tweaks” tool.
You get the majority of the same options as you have on macOS. It’s simple to decide what notifications get to be shown on your screen, energy saver options are pretty much equal, and it’s simple to turn off things such as location services. There’s also a section for keyboard shortcuts that are easy to create and edit.
Here’s a look at some of the settings you have access to such as to automatically empty trash, set the Night Light to make the screen warmer at specific points in a day and trackpad where you can enable things such as tap to click:


“Tweaks” tool allows you to change the look of Gnome from the default light mode to the dark mode. It also allows you to change the fonts and add any application to be launched at the startup.

There’s also a world of Gnome extensions to add additional features and more customization options to your Gnome. There’s, for instance, an extension to auto-hide the top panel when not in use.
Download a Linux ISO and give it a try on your hardware
My advice to you coming from macOS is to explore Gnome using either Debian or Fedora. They are large and community run distros. Either of them is a good starting point and a great introduction to the world of Linux for a Mac user.
Simply download the ISO image file from the official website. Here are the exact links for Fedora and Debian (look for the debian-live-10.X.0-amd64-gnome+nonfree.iso file in the Debian list).
Flash the ISO image file on a USB drive using Etcher (free tool available on macOS) and boot from it to try it on your computer.
On a Mac, you press the “Option” key when the computer starts to boot using a USB. On most Windows PCs such as those from Dell, Lenovo or Acer, you press the F12 button at startup. Then you select the USB device from the boot menu.
Pro Tip: Your MacBook’s hardware may not be compatible with Linux. Do try and run Linux using the USB on your hardware and see if things such as the trackpad, sound, network and webcam work before actually installing Linux. Like me, you might need to try it on a non-Apple machine.

How to install Linux Gnome using a USB
If everything works well and you’re happy to go all-in Linux, the installation process is quick. Here’s how to install Gnome on Debian but you will have a similar process on Ubuntu, Fedora and other distributions too:
In your “Activities Overview”, launch “Install Debian”.

This will get you to the “Welcome” page of the Calamares installer for Debian. Select your language and click on the “Next” button.

On the “Location” step, you can select your region and zone.

On the “Keyboard” step, you can select your keyboard model.

On the “Partitions” step, you should encrypt your new system to make it more secure.
Pro Tip: Note that by choosing the “erase disk” option Gnome will be installed and whatever OS you used to have on your computer will be completely removed. Do not do this unless you’re sure Linux is something you want to use as your daily driver.

On the “Users” step, you can create your user account and password. There’s also the option to log in automatically without asking for a password.

You can now review the “Summary” page and if you’re happy with everything and want to go ahead, click on “Install”.
The install process will take few minutes and you will then be asked to remove your USB stick and restart your computer into the brand new world of Linux Gnome.

When you get more comfortable with Gnome or if you want to explore further, there’s a big world of additional desktop environments and window manager opportunities out there for you. Most distros can actually run any of the desktop environments available.
Or you may just stick to Gnome if it fits your workflow, works the way you want and does what you need. It does for me. Have fun!
Recommend
About Joyk
Aggregate valuable and interesting links.
Joyk means Joy of geeK