
0

【笨問題】Word 使用非細明體時行距過大
source link: https://blog.darkthread.net/blog/word-line-spacing-issue/
Go to the source link to view the article. You can view the picture content, updated content and better typesetting reading experience. If the link is broken, please click the button below to view the snapshot at that time.
【笨問題】Word 使用非細明體時行距過大
 2018-06-27 09:59 PM
  14
14  26,197
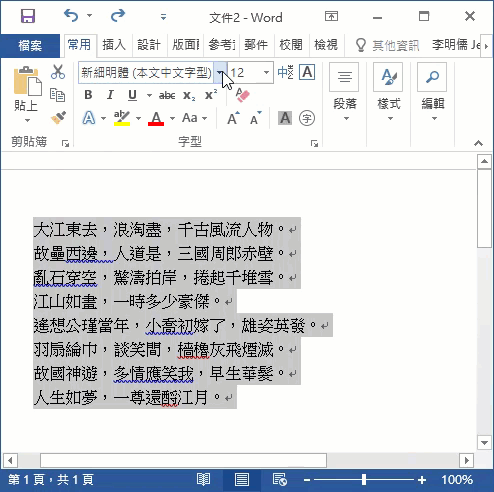
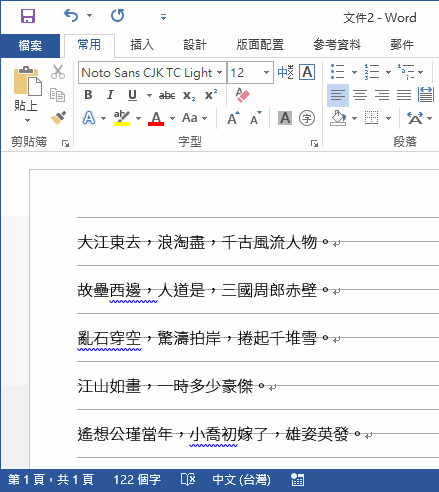
 我有個困擾多時的 Word 問題,每回將細明體、標楷體換改成微軟正黑體或其他字體時,行距會變成超大(例如以下示範):
之前我的鴕鳥做法是修改行距為固定行距,但一直不知其所以然,最近花了點時間研究才理解問題所在與正確解法。
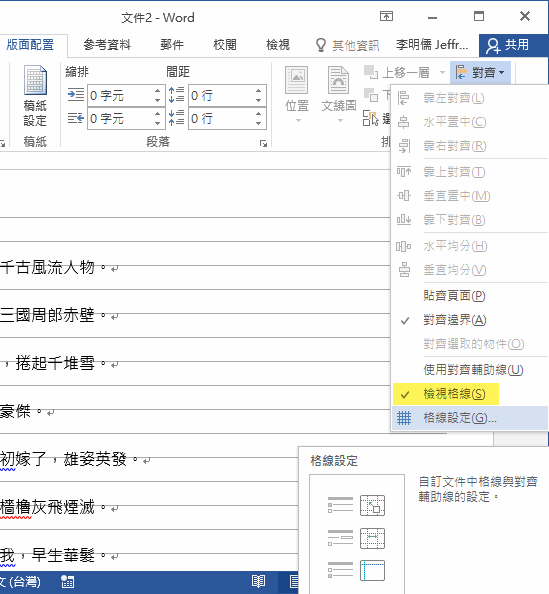
關鍵在於 Word 預設啟用了「文件格線被設定時,貼齊格線」,勾選「檢視格線」後便可一目膫然。
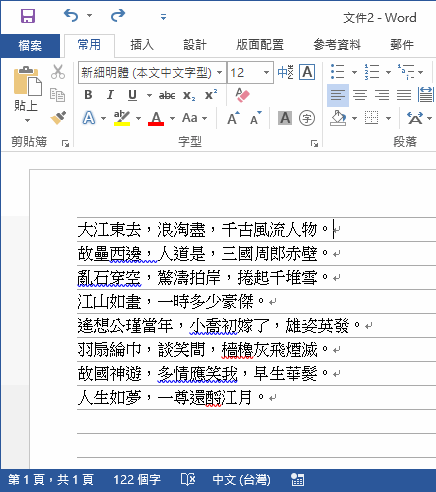
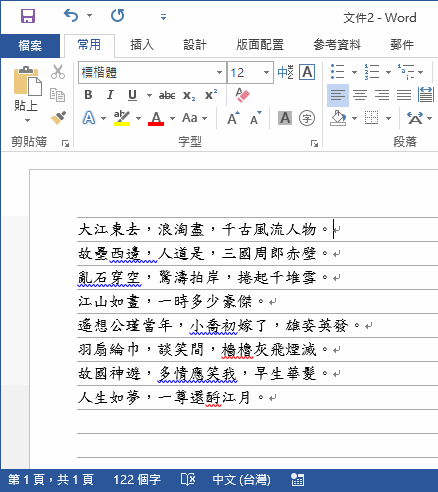
平平是 12 號字,細明體及標楷體尺寸較小,恰好可以塞入兩條格線之間:
當選用微軟正黑體、Google 思源黑體等其他字型,同樣是 12 號字,尺寸卻超過兩條格線的高度,於是 Word 選擇三條格線放一行字並垂直置中,造成行距變得超大:
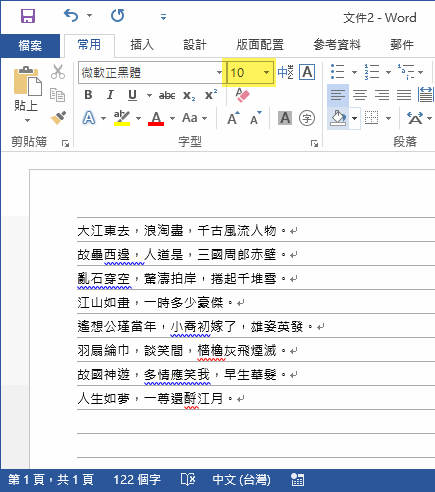
實測將字型縮小,微軟正黑體縮到 10 號,Google 思源黑體縮到 9 號,行距便與細明體或標楷體一致:
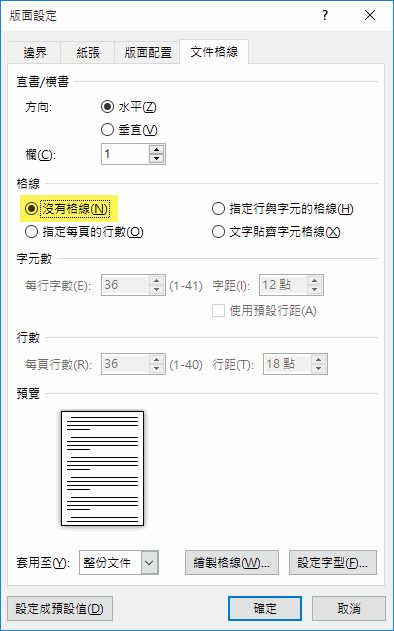
既然與貼齊格線有關,解法有二:
- 修改版面設定,設成「沒有格線」
- 修改段落設定,取消「文件格線被設定時,貼齊格線」
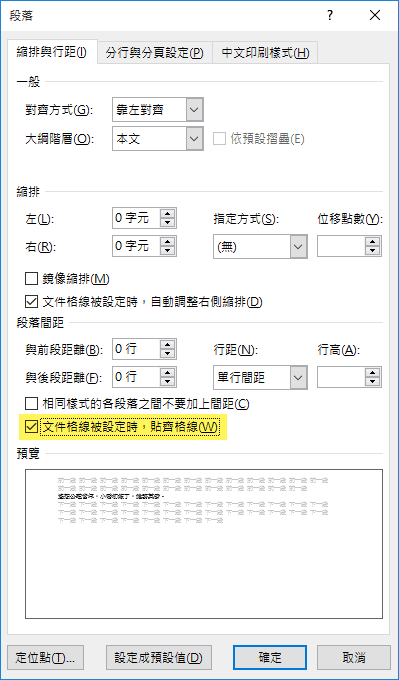
第一種做法範圍為整份文件,第二種做法需要逐段設定,實務上則可使用「設定成預設值」套用到預設範本,如此就不用每次開新文件都需調整囉~
- Posted in
- Tips
Comments
Post a comment
Comment Name Captcha 91 - 23 =
Recommend
About Joyk
Aggregate valuable and interesting links.
Joyk means Joy of geeK