

CSS布局—溢出(清晰易懂)
source link: https://blog.csdn.net/qqshenbaobao/article/details/115784352
Go to the source link to view the article. You can view the picture content, updated content and better typesetting reading experience. If the link is broken, please click the button below to view the snapshot at that time.
CSS overflow 属性控制对太大而区域无法容纳的内容的处理方式。
CSS Overflow
overflow 属性指定在元素的内容太大而无法放入指定区域时是剪裁内容还是添加滚动条。
overflow 属性可设置以下值:
visible - 默认。溢出没有被剪裁。内容在元素框外渲染
hidden - 溢出被剪裁,其余内容将不可见
scroll - 溢出被剪裁,同时添加滚动条以查看其余内容
auto - 与 scroll 类似,但仅在必要时添加滚动条
注释: overflow 属性仅适用于具有指定高度的块元素。
注释: 在 OS X Lion(在 Mac 上)中,滚动条默认情况下是隐藏的,并且仅在使用时显示(即使设置了 “overflow:scroll”)。
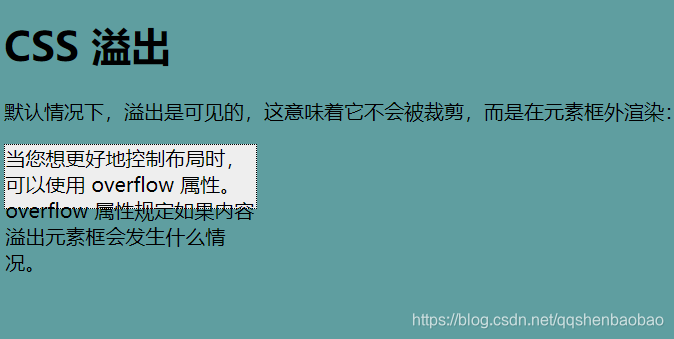
overflow: visible
默认情况下,溢出是可见的(visible),这意味着它不会被裁剪,而是在元素框外渲染:
当您希望更好地控制布局时,可以使用 overflow 属性。overflow 属性指定如果内容溢出元素框会发生什么。
<!DOCTYPE html>
<html>
<head>
<style>
body{
background-color:cadetblue;
}
div {
  background-color: #eee;
  width: 200px;
  height: 50px;
  border: 1px dotted black;
  overflow: visible;
}
</style>
</head>
<body>

<h1>CSS 溢出</h1>
<p>默认情况下,溢出是可见的,这意味着它不会被裁剪,而是在元素框外渲染:</p>

<div>当您想更好地控制布局时,可以使用 overflow 属性。overflow 属性规定如果内容溢出元素框会发生什么情况。</div>

</body>
</html>
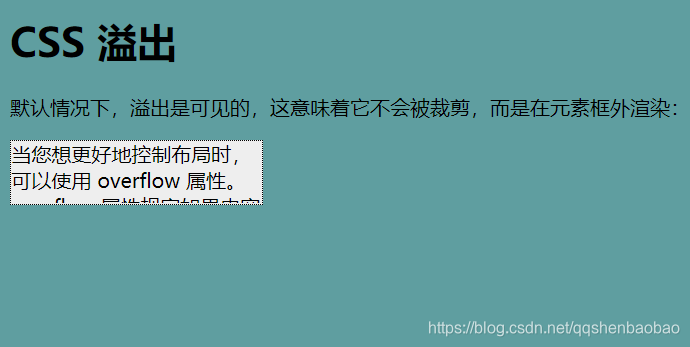
overflow: hidden
如果使用 hidden 值,溢出会被裁剪,其余内容被隐藏:
当您希望更好地控制布局时,可以使用 overflow 属性。overflow 属性指定如果内容溢出元素框会发生什么。
<!DOCTYPE html>
<html>
<head>
<style>
body{
  background-color: cadetblue;
}
div {
  background-color: #eee;
  width: 200px;
  height: 50px;
  border: 1px dotted black;
  overflow: hidden;
}
</style>
</head>
<body>

<h1>CSS 溢出</h1>
<p>默认情况下,溢出是可见的,这意味着它不会被裁剪,而是在元素框外渲染:</p>

<div>当您想更好地控制布局时,可以使用 overflow 属性。overflow 属性规定如果内容溢出元素框会发生什么情况。</div>

</body>
</html>
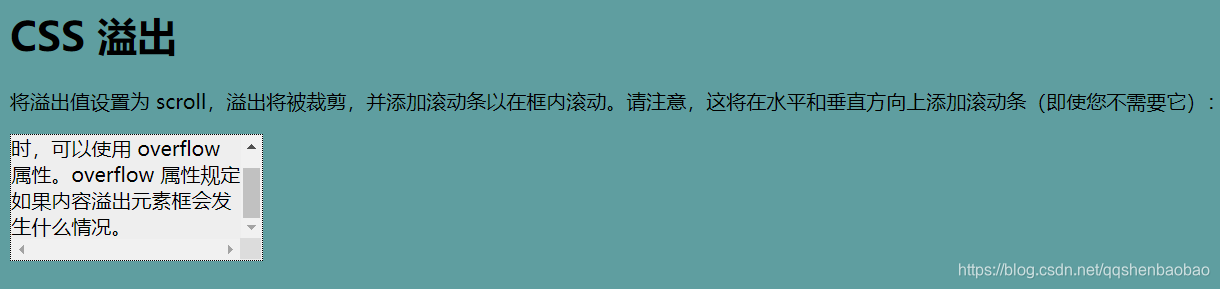
overflow: scroll
如果将值设置为 scroll,溢出将被裁剪,并添加滚动条以便在框内滚动。请注意,这将在水平和垂直方向上添加一个滚动条(即使您不需要它):
当您希望更好地控制布局时,可以使用 overflow 属性。overflow 属性指定如果内容溢出元素框会发生什么。
<!DOCTYPE html>
<html>
<head>
<style>
.body{
background-color:cadetblue;
}
div {
background-color: #eee;
width: 200px;
height: 100px;
border: 1px dotted black;
overflow: scroll;
}
</style>
</head>
<body>
<h1>CSS 溢出</h1>
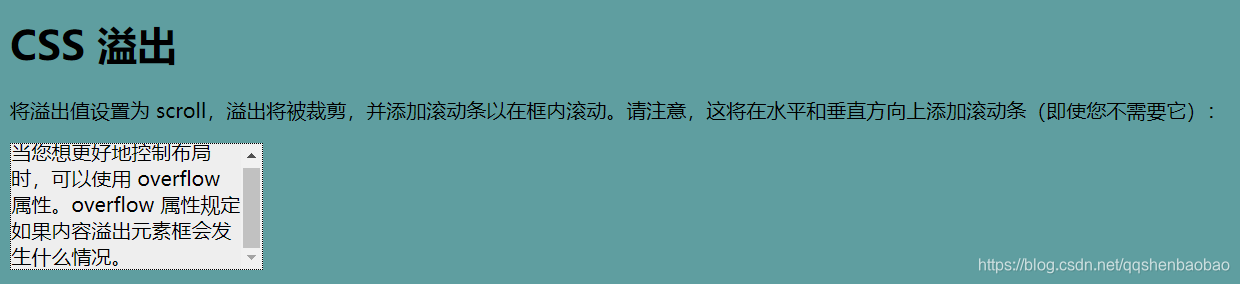
<p>将溢出值设置为 scroll,溢出将被裁剪,并添加滚动条以在框内滚动。请注意,这将在水平和垂直方向上添加滚动条(即使您不需要它):</p>
<div>当您想更好地控制布局时,可以使用 overflow 属性。overflow 属性规定如果内容溢出元素框会发生什么情况。</div>
</body>
</html>
overflow: auto
auto 值类似于 scroll,但是它仅在必要时添加滚动条:
当您希望更好地控制布局时,可以使用 overflow 属性。overflow 属性指定如果内容溢出元素框会发生什么。
<!DOCTYPE html>
<html>

<head>
  <style>
    body {
      background-color: cadetblue;
    }

    div {
      background-color: #eee;
      width: 200px;
      height: 100px;
      border: 1px dotted black;
      overflow: auto;
    }
  </style>
</head>

<body>

  <h1>CSS 溢出</h1>
  <p>将溢出值设置为 scroll,溢出将被裁剪,并添加滚动条以在框内滚动。请注意,这将在水平和垂直方向上添加滚动条(即使您不需要它):</p>

  <div>当您想更好地控制布局时,可以使用 overflow 属性。overflow 属性规定如果内容溢出元素框会发生什么情况。</div>

</body>

</html>
overflow-x 和 overflow-y
overflow-x 和 overflow-y 属性规定是仅水平还是垂直地(或同时)更改内容的溢出:
overflow-x 指定如何处理内容的左/右边缘。
overflow-y 指定如何处理内容的上/下边缘。
当您希望更好地控制布局时,可以使用 overflow 属性。overflow 属性指定如果内容溢出元素框会发生什么。
div {
overflow-x: hidden; /* 隐藏水平滚动栏 /
overflow-y: scroll; / 添加垂直滚动栏 */
}
你可以亲自试一试!
创作不易,请动动你的小手赞一赞吧!!
Recommend
About Joyk
Aggregate valuable and interesting links.
Joyk means Joy of geeK