

TinyML的Hello World代码分析
source link: https://www.taterli.com/7649/
Go to the source link to view the article. You can view the picture content, updated content and better typesetting reading experience. If the link is broken, please click the button below to view the snapshot at that time.
TinyML的Hello World代码分析
虽然之前有用过CMSIS-NN框架进行一些归类问题的学习,但是其实也没系统地分析过主流一些框架的具体做法,越来越多的人找到我希望能写点什么,终于拖到现在打算写一下.
截至发这篇博客,我检出的版本是:8855f56500ff8efa449662a95fe69f24bb78c0a6
主要例子的起始文件是hello_world_test.cc,具体找到tensorflow源码工程中以下代码:
一开始就引入了大量头文件:
//一个允许解释器加载我们的模型所需要使用的操作的类
#include "tensorflow/lite/micro/all_ops_resolver.h"
//我们转换后得到的模型,Flat的,二进制存在数组里的.
#include "tensorflow/lite/micro/examples/hello_world/model.h"
//一个日志用的调试类.
#include "tensorflow/lite/micro/micro_error_reporter.h"
//TensorFlow Lite for Microcontrollers解释器,他会运行我们的模型.
#include "tensorflow/lite/micro/micro_interpreter.h"
//测试框架
#include "tensorflow/lite/micro/testing/micro_test.h"
//定义数据结构schema用,用于理解model数据.
#include "tensorflow/lite/schema/schema_generated.h"
代码下一部分由测试框架代替,即上面引入的头文件中,其中由这么包裹着.
TF_LITE_MICRO_TESTS_BEGIN
TF_LITE_MICRO_TEST(LoadModelAndPerformInference) {
 ......
}
TF_LITE_MICRO_TESTS_END
其中TF_LITE_MICRO_TEST传入的参数LoadModelAndPerformInference是测试的名称,他会喝测试结果一起输出,以便查看测试是通过还是失败,先不看具体代码,运行试试.
make -f tensorflow/lite/micro/tools/make/Makefile test_hello_world_test最终可以看到,测试成功.
tensorflow/lite/micro/tools/make/downloads/flatbuffers already exists, skipping the download.
tensorflow/lite/micro/tools/make/downloads/pigweed already exists, skipping the download.
g++ -std=c++11 -fno-rtti -fno-exceptions -fno-threadsafe-statics -fno-unwind-tables -ffunction-sections -fdata-sections -fmessage-length=0 -DTF_LITE_STATIC_MEMORY -DTF_LITE_DISABLE_X86_NEON -O3 -Werror -Wsign-compare -Wdouble-promotion -Wshadow -Wunused-variable -Wmissing-field-initializers -Wunused-function -Wswitch -Wvla -Wall -Wextra -Wstrict-aliasing -Wno-unused-parameter -DLINUX -DTF_LITE_USE_CTIME -I. -Itensorflow/lite/micro/tools/make/downloads/gemmlowp -Itensorflow/lite/micro/tools/make/downloads/flatbuffers/include -Itensorflow/lite/micro/tools/make/downloads/ruy -Itensorflow/lite/micro/tools/make/downloads/kissfft -c tensorflow/lite/micro/examples/hello_world/hello_world_test.cc -o tensorflow/lite/micro/tools/make/gen/linux_x86_64_default/obj/tensorflow/lite/micro/examples/hello_world/hello_world_test.o
g++ -std=c++11 -fno-rtti -fno-exceptions -fno-threadsafe-statics -fno-unwind-tables -ffunction-sections -fdata-sections -fmessage-length=0 -DTF_LITE_STATIC_MEMORY -DTF_LITE_DISABLE_X86_NEON -O3 -Werror -Wsign-compare -Wdouble-promotion -Wshadow -Wunused-variable -Wmissing-field-initializers -Wunused-function -Wswitch -Wvla -Wall -Wextra -Wstrict-aliasing -Wno-unused-parameter -DLINUX -DTF_LITE_USE_CTIME -I. -Itensorflow/lite/micro/tools/make/downloads/gemmlowp -Itensorflow/lite/micro/tools/make/downloads/flatbuffers/include -Itensorflow/lite/micro/tools/make/downloads/ruy -Itensorflow/lite/micro/tools/make/downloads/kissfft -o tensorflow/lite/micro/tools/make/gen/linux_x86_64_default/bin/hello_world_test tensorflow/lite/micro/tools/make/gen/linux_x86_64_default/obj/tensorflow/lite/micro/examples/hello_world/hello_world_test.o tensorflow/lite/micro/tools/make/gen/linux_x86_64_default/obj/tensorflow/lite/micro/examples/hello_world/model.o tensorflow/lite/micro/tools/make/gen/linux_x86_64_default/lib/libtensorflow-microlite.a -Wl,--fatal-warnings -Wl,--gc-sections -lm
tensorflow/lite/micro/tools/make/gen/linux_x86_64_default/bin/hello_world_test '~~~ALL TESTS PASSED~~~' linux
Testing LoadModelAndPerformInference
1/1 tests passed
~~~ALL TESTS PASSED~~~
代码一开始先设置了一个logger,这个logger用起来和printf差不多,紧接着的下面就有一个例子,我们可以试试修改这个逻辑,让他直接打印或者自己模仿写一个来试试.
// Set up logging
tflite::MicroErrorReporter micro_error_reporter;
if (model->version() != TFLITE_SCHEMA_VERSION) {
TF_LITE_REPORT_ERROR(µ_error_reporter,
"Model provided is schema version %d not equal "
"to supported version %d.\n",
model->version(), TFLITE_SCHEMA_VERSION);
}他大致会输出这些内容(实际上由于版本相等,他不会输出!):
Model provided is schema version X not equal to supported version X.在这个打印之前有一个GetModel的操作,就是从我们的数组里面读取Model,然后生成一个TF Lite的Model的对象,这个Model是从示例代码里面的create_sine_model.ipynb创建的.
接下来代码创建定义各种东西,首先是创建一个主要的操作类,然后tensor_arena是TF Lite的工作内存,在单片机中应该用mallloc之类管理,他应该多大这个很难确定,一般就是先设定一个较大的数,然后逐步缩小,确定一个稳定且较为节约的数值,最后把这些东西连接起来成为一个interpreter,即字面意思:解释器.
// This pulls in all the operation implementations we need
tflite::AllOpsResolver resolver;
constexpr int kTensorArenaSize = 2000;
uint8_t tensor_arena[kTensorArenaSize];
// Build an interpreter to run the model with
tflite::MicroInterpreter interpreter(model, resolver, tensor_arena,
kTensorArenaSize, µ_error_reporter);
// Allocate memory from the tensor_arena for the model's tensors
TF_LITE_MICRO_EXPECT_EQ(interpreter.AllocateTensors(), kTfLiteOk);接下来要把一些输入的内容放进去,先申请一个输入空间,然后确定申请到的不是NULL(就像内存分配一样,能分配到空间才行啊),一旦申请成功后,模型就已经成功加载(因为之前声明解释器时候已经确定了模型),而后面几个EQ是断言这个模型的大小规格,也就是说,实际上整个申请只有interpreter.input(0)这么一句.
  // Obtain a pointer to the model's input tensor
  TfLiteTensor* input = interpreter.input(0);

  // Make sure the input has the properties we expect
  TF_LITE_MICRO_EXPECT_NE(nullptr, input);
  // The property "dims" tells us the tensor's shape. It has one element for
  // each dimension. Our input is a 2D tensor containing 1 element, so "dims"
  // should have size 2.
  TF_LITE_MICRO_EXPECT_EQ(2, input->dims->size);
  // The value of each element gives the length of the corresponding tensor.
  // We should expect two single element tensors (one is contained within the
  // other).
  TF_LITE_MICRO_EXPECT_EQ(1, input->dims->data[0]);
  TF_LITE_MICRO_EXPECT_EQ(1, input->dims->data[1]);
  // The input is an 8 bit integer value
  TF_LITE_MICRO_EXPECT_EQ(kTfLiteInt8, input->type);
这么就可以开始进行推断了,这里分别三段是获取输入的量化参数,将输入的浮点数量化为整数(为了优化速度),将量化的输入放在模型的输入张量中,然后运行模型.
  // Get the input quantization parameters
  float input_scale = input->params.scale;
  int input_zero_point = input->params.zero_point;

  // Quantize the input from floating-point to integer
  int8_t x_quantized = x / input_scale + input_zero_point;
  // Place the quantized input in the model's input tensor
  input->data.int8[0] = x_quantized;

  // Run the model and check that it succeeds
  TfLiteStatus invoke_status = interpreter.Invoke();
  TF_LITE_MICRO_EXPECT_EQ(kTfLiteOk, invoke_status);
然后读取其输出,然后断言其数据正确性,再把输出还原成float类型.
  // Obtain a pointer to the output tensor and make sure it has the
  // properties we expect. It should be the same as the input tensor.
  TfLiteTensor* output = interpreter.output(0);
  TF_LITE_MICRO_EXPECT_EQ(2, output->dims->size);
  TF_LITE_MICRO_EXPECT_EQ(1, output->dims->data[0]);
  TF_LITE_MICRO_EXPECT_EQ(1, output->dims->data[1]);
  TF_LITE_MICRO_EXPECT_EQ(kTfLiteInt8, output->type);

  // Get the output quantization parameters
  float output_scale = output->params.scale;
  int output_zero_point = output->params.zero_point;

  // Obtain the quantized output from model's output tensor
  int8_t y_pred_quantized = output->data.int8[0];
  // Dequantize the output from integer to floating-point
  float y_pred = (y_pred_quantized - output_zero_point) * output_scale;
然后测试误差在不在范围内,后续几个测试都是这个意思.
  float epsilon = 0.05f;
  TF_LITE_MICRO_EXPECT_NEAR(y_true, y_pred, epsilon);

  // Run inference on several more values and confirm the expected outputs
  x = 1.f;
  y_true = sin(x);
  input->data.int8[0] = x / input_scale + input_zero_point;
  interpreter.Invoke();
  y_pred = (output->data.int8[0] - output_zero_point) * output_scale;
  TF_LITE_MICRO_EXPECT_NEAR(y_true, y_pred, epsilon);
这里Invoke有很多个用途,模型输入用了他(输入就会产生输出,所以输出部分看不到~),用来推断数据也用了他.
如果修改输入模型的参数,或者让误差变得更严格(超过模型本身能力),就会出现错误.
除了这个代码,还有很多其他文件夹里面包含了不同微控制器用的代码.
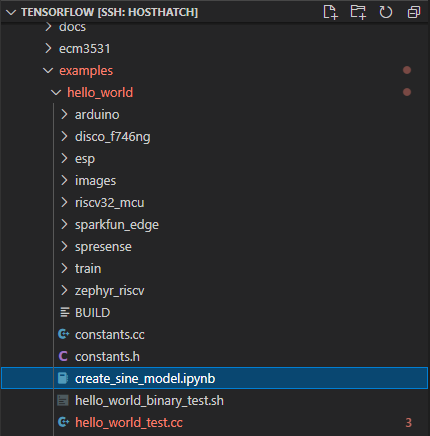
比如看到ESP的代码里只有这些.
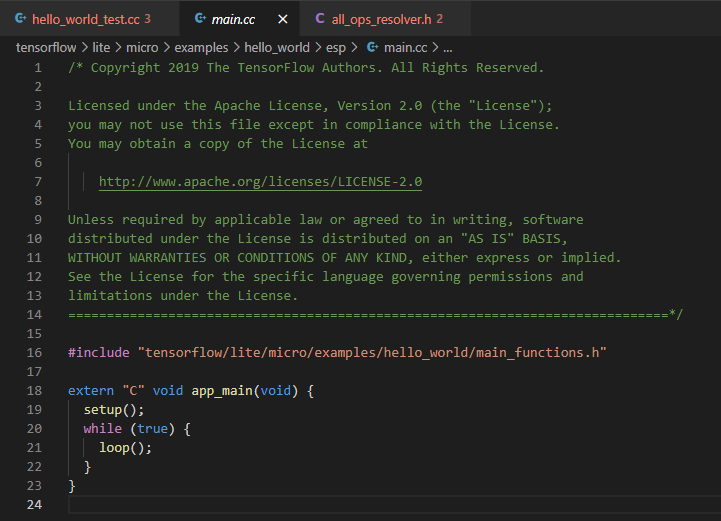
从头文件能看出来,其他内容从main_functions.cc开始,这个文件一开始有很多熟悉的include,不用展开应该都能猜到具体意思了.
#include "tensorflow/lite/micro/examples/hello_world/main_functions.h"

#include "tensorflow/lite/micro/all_ops_resolver.h"
#include "tensorflow/lite/micro/examples/hello_world/constants.h"
#include "tensorflow/lite/micro/examples/hello_world/model.h"
#include "tensorflow/lite/micro/examples/hello_world/output_handler.h"
#include "tensorflow/lite/micro/micro_error_reporter.h"
#include "tensorflow/lite/micro/micro_interpreter.h"
#include "tensorflow/lite/micro/system_setup.h"
#include "tensorflow/lite/schema/schema_generated.h"
然后定义了全局使用的一些变量,这些变量名应该都很熟悉,在我们的测试例子里就是同样的名字,唯一的新鲜事物是inference_count,他指示这个程序进行了多少次推断.
// Globals, used for compatibility with Arduino-style sketches.
namespace {
tflite::ErrorReporter* error_reporter = nullptr;
const tflite::Model* model = nullptr;
tflite::MicroInterpreter* interpreter = nullptr;
TfLiteTensor* input = nullptr;
TfLiteTensor* output = nullptr;
int inference_count = 0;

constexpr int kTensorArenaSize = 2000;
uint8_t tensor_arena[kTensorArenaSize];
}  // namespace
玩过Arduino应该都不陌生,一开始有个setup函数,然后有个loop函数.setup函数只执行一次,loop函数一直执行.
setup还是熟悉的代码,有点疑惑的是他在setup过程就访问了输出?不是的,其实只是给output这个ptr分配一下内存~
// The name of this function is important for Arduino compatibility.
void setup() {
tflite::InitializeTarget();
// Set up logging. Google style is to avoid globals or statics because of
// lifetime uncertainty, but since this has a trivial destructor it's okay.
// NOLINTNEXTLINE(runtime-global-variables)
static tflite::MicroErrorReporter micro_error_reporter;
error_reporter = µ_error_reporter;
// Map the model into a usable data structure. This doesn't involve any
// copying or parsing, it's a very lightweight operation.
model = tflite::GetModel(g_model);
if (model->version() != TFLITE_SCHEMA_VERSION) {
TF_LITE_REPORT_ERROR(error_reporter,
"Model provided is schema version %d not equal "
"to supported version %d.",
model->version(), TFLITE_SCHEMA_VERSION);
return;
}
// This pulls in all the operation implementations we need.
// NOLINTNEXTLINE(runtime-global-variables)
static tflite::AllOpsResolver resolver;
// Build an interpreter to run the model with.
static tflite::MicroInterpreter static_interpreter(
model, resolver, tensor_arena, kTensorArenaSize, error_reporter);
interpreter = &static_interpreter;
// Allocate memory from the tensor_arena for the model's tensors.
TfLiteStatus allocate_status = interpreter->AllocateTensors();
if (allocate_status != kTfLiteOk) {
TF_LITE_REPORT_ERROR(error_reporter, "AllocateTensors() failed");
return;
}
// Obtain pointers to the model's input and output tensors.
input = interpreter->input(0);
output = interpreter->output(0);
// Keep track of how many inferences we have performed.
inference_count = 0;
}loop代码里也相对的熟悉,其中kXrange,kInferencesPerCycle是定义在常量里的,kXrange是2pi,kInferencesPerCycle是限制inference_count的每个周期的最大推理次数,一旦到达整个周期,将会回到0继续推理(因为这是个周期正弦),要记住,这里依然是x输入得到y,代码和测试样例里差不多,除了HandleOutput这个额外的.
// The name of this function is important for Arduino compatibility.
void loop() {
  // Calculate an x value to feed into the model. We compare the current
  // inference_count to the number of inferences per cycle to determine
  // our position within the range of possible x values the model was
  // trained on, and use this to calculate a value.
  float position = static_cast<float>(inference_count) /
                   static_cast<float>(kInferencesPerCycle);
  float x = position * kXrange;

  // Quantize the input from floating-point to integer
  int8_t x_quantized = x / input->params.scale + input->params.zero_point;
  // Place the quantized input in the model's input tensor
  input->data.int8[0] = x_quantized;

  // Run inference, and report any error
  TfLiteStatus invoke_status = interpreter->Invoke();
  if (invoke_status != kTfLiteOk) {
    TF_LITE_REPORT_ERROR(error_reporter, "Invoke failed on x: %f\n",
                         static_cast<double>(x));
    return;
  }

  // Obtain the quantized output from model's output tensor
  int8_t y_quantized = output->data.int8[0];
  // Dequantize the output from integer to floating-point
  float y = (y_quantized - output->params.zero_point) * output->params.scale;

  // Output the results. A custom HandleOutput function can be implemented
  // for each supported hardware target.
  HandleOutput(error_reporter, x, y);

  // Increment the inference_counter, and reset it if we have reached
  // the total number per cycle
  inference_count += 1;
  if (inference_count >= kInferencesPerCycle) inference_count = 0;
}
HandleOutput即关联到硬件上的输出,看看Arduino例子的Handle是这么实现的.
// Animates a dot across the screen to represent the current x and y values
void HandleOutput(tflite::ErrorReporter* error_reporter, float x_value,
                  float y_value) {
  // Do this only once
  if (!initialized) {
    // Set the LED pin to output
    pinMode(led, OUTPUT);
    initialized = true;
  }

  // Calculate the brightness of the LED such that y=-1 is fully off
  // and y=1 is fully on. The LED's brightness can range from 0-255.
  int brightness = (int)(127.5f * (y_value + 1));

  // Set the brightness of the LED. If the specified pin does not support PWM,
  // this will result in the LED being on when y > 127, off otherwise.
  analogWrite(led, brightness);

  // Log the current brightness value for display in the Arduino plotter
  TF_LITE_REPORT_ERROR(error_reporter, "%d\n", brightness);
}
OK,这样有一个基于机器学习(逼格高)的呼吸灯,现在还没说怎么让他在实际硬件中跑,所以,我们可以这么测试.
make -f tensorflow/lite/micro/tools/make/Makefile hello_world执行其生成的文件即可,但是输出的数据是以2的幂形式输出的,具体自己手动换算一下就得了.
Recommend
About Joyk
Aggregate valuable and interesting links.
Joyk means Joy of geeK