两个月前,我曾写过一篇名为《从封装 Nginx NJS 工具镜像聊起》的文章,简单介绍了 Nginx 官方团队推出的 NJS 以及我为他定制的 Docker 镜像。
这篇文章,我将介绍如何使用 Nginx NJS 用精简的代码行数编写一套 API 聚合工具,并如何使用 Docker 将其封装为可用服务。
本篇内容涉及到几块内容,如果你不熟悉,可以翻阅我之前的相关文章加深理解和掌握:
为了能够模拟和演示接近真实的聚合服务功能,我在经常使用的开源软件的官网随便找了两个接口:
- MySQL:
https://www.mysql.com/common/chat/chat-translation-data.json - Redis:
https://redislabs.com/wp-content/themes/wpx/proxy/signup_proxy.php
好了,万事俱备,我们开始进行实践。
编写 Nginx NJS 脚本
万丈高楼平地起,先从最简单的部分开始。
使用 NJS 编写 Nginx 基础接口
在我们尝试聚合接口前,先试着写一个最基础的版本,让 Nginx 能够模拟输出一个类似 { code: 200, desc: "这是描述内容"} 的接口。
如果你熟悉 Node 或者其他后端语言,下面代码要做的事情,就一目了然了:首先定义了一个名为 simple 的函数 ,接着定义了我们要展示的接口数据,然后设置 Nginx 响应内容类型为 UTF8 编码的 JSON,以及接口 HTTP Code 为 200,最后声明模块中的 simple 是可被公开调用的。
function simple(req) {
var result = { code: 200, desc: "这是描述内容" };
req.headersOut["Content-Type"] = "application/json;charset=UTF-8";
req.return(200, JSON.stringify(result));
export default { simple };
将上面的内容保存为 app.js,并放置于一个名为 script 目录中,我们稍后使用。接着我们声明一份可以让 Nginx 调用 NJS 的配置文件:
load_module modules/ngx_http_js_module.so;
user nginx;
worker_processes auto;
error_log /var/log/nginx/error.log warn;
pid /var/run/nginx.pid;
events {
worker_connections 1024;
http {
include /etc/nginx/mime.types;
default_type application/octet-stream;
js_import app from script/app.js;
log_format main '$remote_addr - $remote_user [$time_local] "$request" '
'$status $body_bytes_sent "$http_referer" '
'"$http_user_agent" "$http_x_forwarded_for"';
access_log /var/log/nginx/access.log main;
sendfile on;
keepalive_timeout 65;
server {
listen 80;
server_name localhost;
charset utf-8;
gzip on;
location / {
js_content app.simple;
将上述内容保存为 nginx.conf,我们同样稍后使用。
可以看到这份配置文件和以往的配置文件看起来差别不大,但是确实又有一些“不同”,将所有和 NJS 无关的内容去掉,就可以清晰的看到 NJS 是如何和 Nginx 联动的。
load_module modules/ngx_http_js_module.so;
http {
js_import app from script/app.js;
server {
location / {
js_content app.simple;
首先是全局显式声明加载 ngx_http_js_module.so 模块,然后是将我们编写的脚本引入 Nginx HTTP 块作用域内,最后则是调用脚本具体的方法提供服务。
为了方便的验证服务,我们还需要编写一个简单的 compose 编排文件:
version: '3'
services:
nginx-api-demo:
image: nginx:1.19.8-alpine
restart: always
ports:
- 8080:80
volumes:
- ./nginx.conf:/etc/nginx/nginx.conf
- ./script:/etc/nginx/script
上一篇文章提过,目前 NJS 已经是 Nginx 官方模块,并默认附带在官方 Docker 镜像中,所以我们这里直接使用最新的官方镜像 nginx:1.19.8-alpine 就可以了。
将上面的文件保存为 docker-compose.yml ,适当调整下上面文件的目录结构,并使用 docker-compose up 启动服务,访问 localhost:8080,可以看到我们得到了我们想要的结果,浏览器中出现了接口内容。
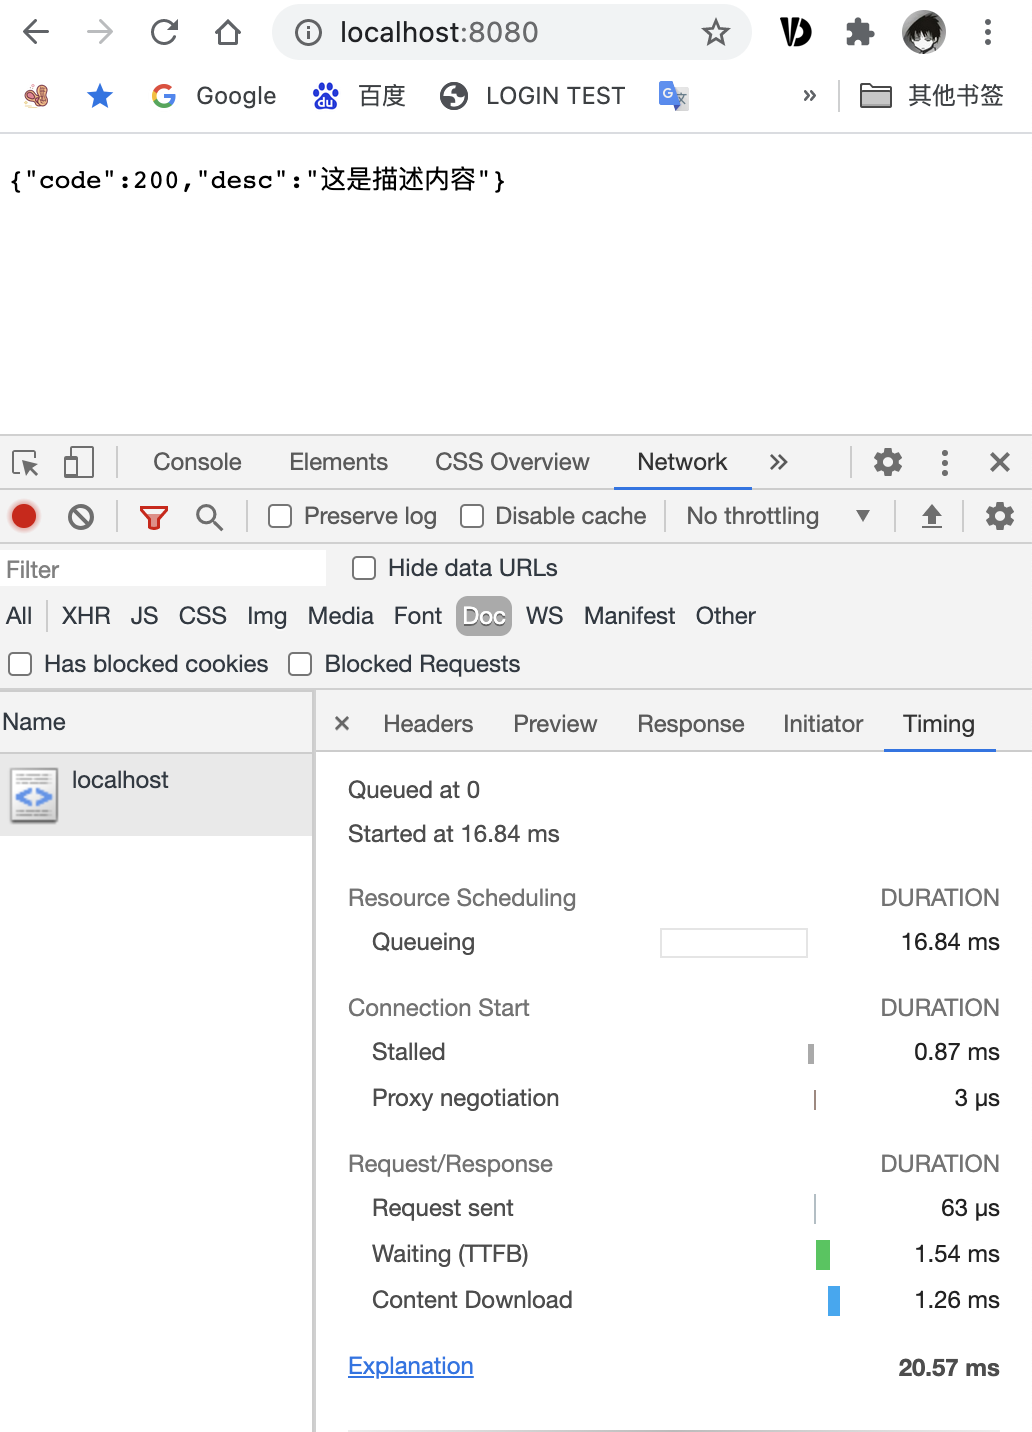
浏览器中展示接口结果
和我们使用 Nginx 调用 CGI 程序不同,可以看到接口处理时间只花费了 1ms ,虽然这和我们实现的代码复杂度非常低有关系,但是通常网络开销导致我们得到的结果会远大于这个数值。从某个角度说明不需要“外部程序”计算参与时, Nginx 直接参与结果计算在性能方面是有潜力的。
尝试编写获取远端数据的接口
接着我们来编写一个能够获取远端数据的接口,和之前编写的方式类似,只需要将我们定义的接口返回数据替换为使用 subrequest 方法请求的数据接口结果即可。
function fetchRemote(req) {
req.subrequest("https://www.mysql.com/common/chat/chat-translation-data.json").then((response) => {
req.headersOut["Content-Type"] = "application/json;charset=UTF-8";
req.return(200, JSON.stringify(response));
export default { fetchRemote };
为了便于区分,我们这里将函数名改为更贴切的“fetchRemote”,接着将 nginx.conf 文件中的调用方法也进行更新:
location / {
js_content app.fetchRemote;
随后使用 docker-compose up 重新启动服务,再次访问 localhost:8080 来验证程序的结果是否符合预期。
然而页面返回了类似下面的结果:
{"status":404,"args":{},"httpVersion":"1.1","remoteAddress":"172.21.0.1","headersOut":{"Content-Type":"text/html","Content-Length":"555"},"method":"GET","uri":"https://www.mysql.com/common/chat/chat-translation-data.json","responseText":"<html>\r\n<head><title>404 Not Found</title></head>\r\n<body>\r\n<center><h1>404 Not Found</h1></center>\r\n<hr><center>nginx/1.19.8</center>\r\n</body>\r\n</html>\r\n<!-- a padding to disable MSIE and Chrome friendly error page -->\r\n<!-- a padding to disable MSIE and Chrome friendly error page -->\r\n<!-- a padding to disable MSIE and Chrome friendly error page -->\r\n<!-- a padding to disable MSIE and Chrome friendly error page -->\r\n<!-- a padding to disable MSIE and Chrome friendly error page -->\r\n<!-- a padding to disable MSIE and Chrome friendly error page -->\r\n","headersIn":{"Host":"localhost:8080","Connection":"keep-alive","Cache-Control":"max-age=0","sec-ch-ua":"\"Google Chrome\";v=\"89\", \"Chromium\";v=\"89\", \";Not A Brand\";v=\"99\"","sec-ch-ua-mobile":"?0","DNT":"1","Upgrade-Insecure-Requests":"1","User-Agent":"Mozilla/5.0 (Macintosh; Intel Mac OS X 11_2_3) AppleWebKit/537.36 (KHTML, like Gecko) Chrome/89.0.4389.90 Safari/537.36","Accept":"text/html,application/xhtml+xml,application/xml;q=0.9,image/avif,image/webp,image/apng,*/*;q=0.8,application/signed-exchange;v=b3;q=0.9","Sec-Fetch-Site":"none","Sec-Fetch-Mode":"navigate","Sec-Fetch-User":"?1","Sec-Fetch-Dest":"document","Accept-Encoding":"gzip, deflate, br","Accept-Language":"zh-CN,zh;q=0.9,en;q=0.8,ja;q=0.7"}}
页面虽然返回了数据,但是显然不是我们想要的结果。
检查 Nginx 日志,可以进一步了解这个错误发生的原因。
[error] 33#33: *1 open() "/etc/nginx/htmlhttps://www.mysql.com/common/chat/chat-translation-data.json" failed (2: No such file or directory), client: 172.21.0.1, server: localhost, request: "GET / HTTP/1.1", subrequest: "https://www.mysql.com/common/chat/chat-translation-data.json", host: "localhost:8080"
不卖关子了,来聊聊“正确答案”。
正确的获取远程数据
这里会发生错误因为 NJS 的 subrequest 方法仅支持将请求使用异步方式发送给反向代理。
将要请求地址改为由 Nginx 反向代理,这里因为这个接口我们仅用作 NJS 调用,不需要提供开放访问,所以可以添加 internal 指令,来进行外部访问限制处理,避免 NJS 之外调用过程访问我们的远端接口:
location /proxy/api-mysql {
internal;
proxy_pass https://www.mysql.com/;
proxy_set_header Host www.mysql.com;
接着修改之前代码中的请求地址:
function fetchRemote(req) {
req.subrequest("/proxy/api-mysql/common/chat/chat-translation-data.json").then((response) => {
req.headersOut["Content-Type"] = "application/json;charset=UTF-8";
req.return(200, JSON.stringify(response));
export default { fetchRemote };
再次启动服务,可以看到我们已经能够获取远端数据,但是结果看起来有一些问题:
{"status":200,"args":{},"httpVersion":"1.1","remoteAddress":"172.27.0.1","headersOut":{"Content-Type":"application/json","Content-Length":"1863","X-Frame-Options":"SAMEORIGIN","Strict-Transport-Security":"max-age=15768000","Last-Modified":"Tue, 27 Nov 2018 20:34:52 GMT","Accept-Ranges":"bytes","Vary":"Accept-Encoding","Content-Encoding":"gzip","X-XSS-Protection":"1; mode=block","X-Content-Type-Options":"nosniff"},"method":"GET","uri":"/proxy/api-mysql/common/chat/chat-translation-data.json","responseText":"\u001f�\b\u0000\u0000\u0000\u0000\u0000\u0000\u0003�Z[o\u0013G\u0014~G�?��W(\u0002�J�R�\u0014���Bk�JT}\u0018{��$�]3��4��|!j�i�4��&$��P(��;qA��}�\u001b\u0016\u0007'1�_�\u0019�\u001d��c�(�M\"9^9����sf��\u0006\u0019+!\u0003���p\u0016}�\b����\u0017B\rD���?ᄆ�e�98�B�D�\u0010�o�q\u0003���c[lh@U\u00022�xk��\u0004
出现这个问题的原因是因为远端服务器给我们返回了 GZip 后的数据,所以这里我们有两个选择,告诉服务器我们不支持 GZip,或者让 Nginx 对取回的数据进行解压缩。
因为存在即是我们告诉远程服务器,我们不支持 GZip,远程服务器还是会发送压缩后的数据(常见于CDN),所以这里建议使用方案二,再次修改 Nginx 配置,让 Nginx 能够自动解压缩远端数据。
location /proxy/api-mysql {
internal;
gunzip on;
proxy_pass https://www.mysql.com/;
proxy_set_header Host www.mysql.com;
但是当我们重新启动服务进行测试的时候会发生另外一个问题:
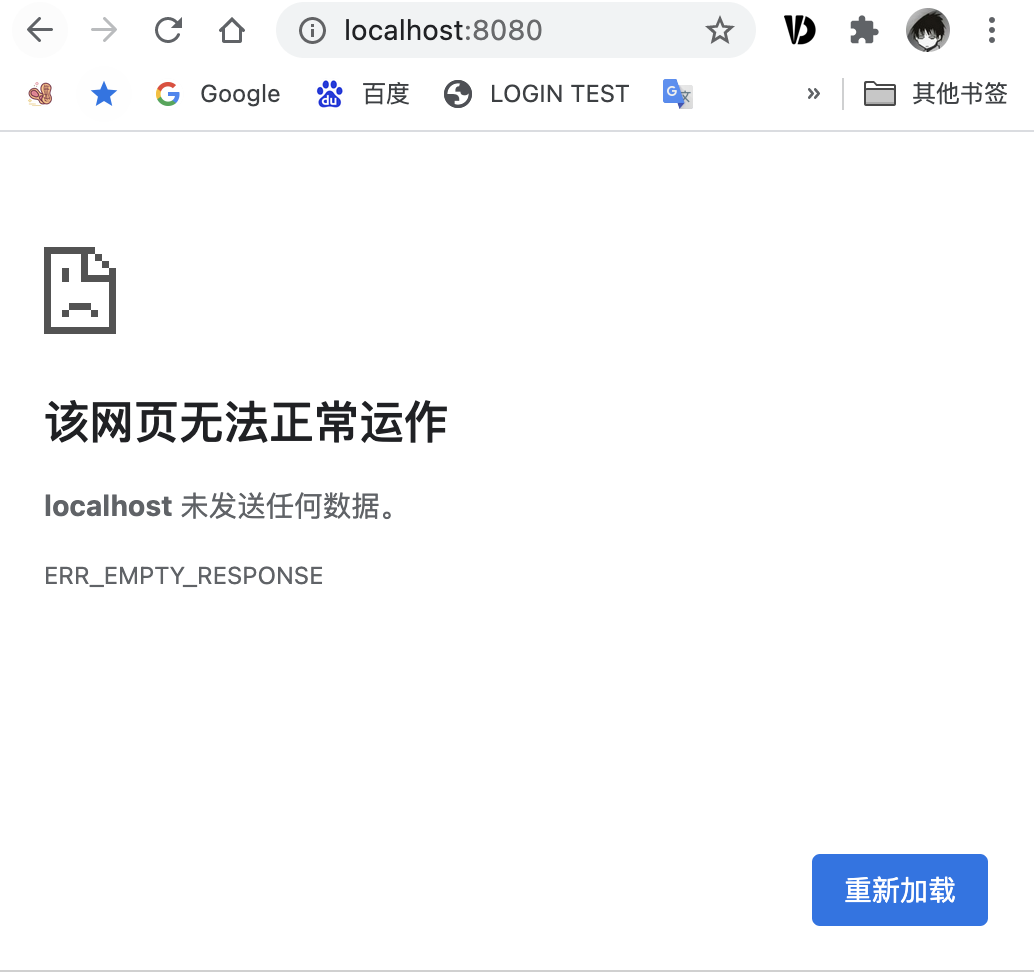
距离成功很近的时的错误
[error] 33#33: *4 pending events while closing request, client: 172.28.0.1, server: 0.0.0.0:80
[error] 33#33: *8 too big subrequest response while sending to client, client: 172.28.0.1, server: localhost, request: "GET / HTTP/1.1", subrequest: "/proxy/api-mysql/common/chat/chat-translation-data.json", upstream: "https://137.254.60.6:443//common/chat/chat-translation-data.json", host: "localhost:8080"
检查日志可以看到上面的错误提示,这是因为 GZip 解压缩之后,数据量远大于 Nginx 默认处理临时数据的 Buffer 容量,所以我们要进一步对此进行调整:
subrequest_output_buffer_size 200k;
location /proxy/api-mysql {
internal;
gunzip on;
proxy_pass https://www.mysql.com/;
proxy_set_header Host www.mysql.com;
这里的subrequest_output_buffer_size 配置数值根据自己的场景需求进行调整即可。再次重启服务,会看到我们已经能够获取正确的远程接口数据内容了。
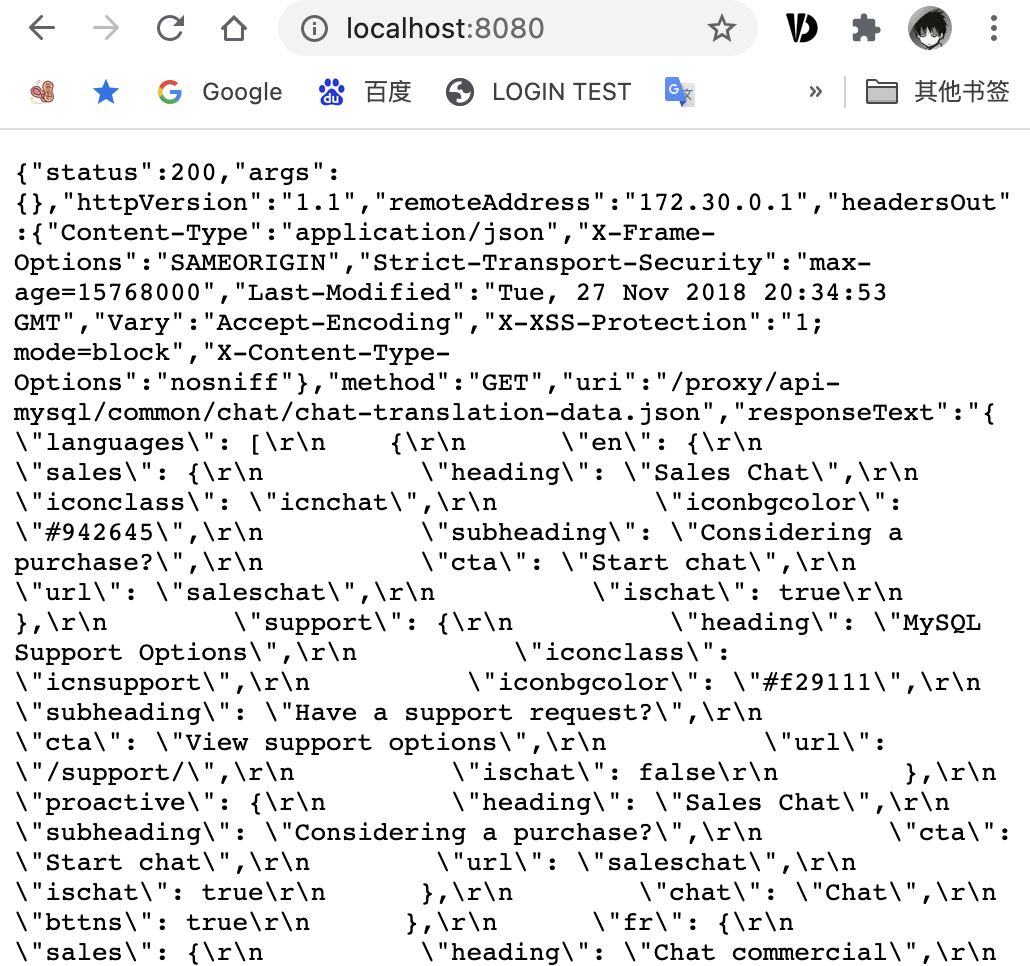
从远端获取的数据内容
编写具备聚合功能的程序
因为我们要聚合多个接口,所以我们将 NJS 代码和 Nginx 配置同时进行一些调整。
我在这里就不演示很挫的顺序执行模式了,因为对于这些无上下文依赖的接口,使用异步并发获取的方式可以消耗尽可能少的时间来提供结果。当然,串行请求也是有场景的,我会在后面的文章中提到如何灵活使用 NJS 控制请求流程。
// https://github.com/nginx/njs/issues/352#issuecomment-721126632
function resolveAll(promises) {
return new Promise((resolve, reject) => {
var n = promises.length;
var rs = Array(n);
var done = () => {
if (--n === 0) {
resolve(rs);
promises.forEach((p, i) => {
p.then((x) => {
rs[i] = x;
}, reject).then(done);
function aggregation(req) {
var apis = ["/proxy/api-mysql/common/chat/chat-translation-data.json", "/proxy/api-redis/wp-content/themes/wpx/proxy/signup_proxy.php"];
resolveAll(apis.map((api) => req.subrequest(api)))
.then((responses) => {
var result = responses.reduce((prev, response) => {
var uri = response.uri;
var prop = uri.split("/proxy/api-")[1].split("/")[0];
var parsed = JSON.parse(response.responseText);
if (response.status === 200) {
prev[prop] = parsed;
} catch (err) {
req.error(`Parse ${uri} failed.`);
return prev;
}, {});
req.headersOut["Content-Type"] = "application/json;charset=UTF-8";
req.return(200, JSON.stringify(result));
.catch((e) => req.return(501, e.message));
export default { aggregation };
接着对 Nginx 配置文件中的部分进行调整:
location / {
js_content app.aggregation;
subrequest_output_buffer_size 200k;
location /proxy/api-mysql {
internal;
gunzip on;
proxy_pass https://www.mysql.com/;
proxy_set_header Host www.mysql.com;
location /proxy/api-redis {
internal;
gunzip on;
proxy_pass https://redislabs.com/;
proxy_set_header Host redislabs.com;
最后再次启动服务,来验证我们能否拿到正确的远程数据,并将数据们进行聚合。
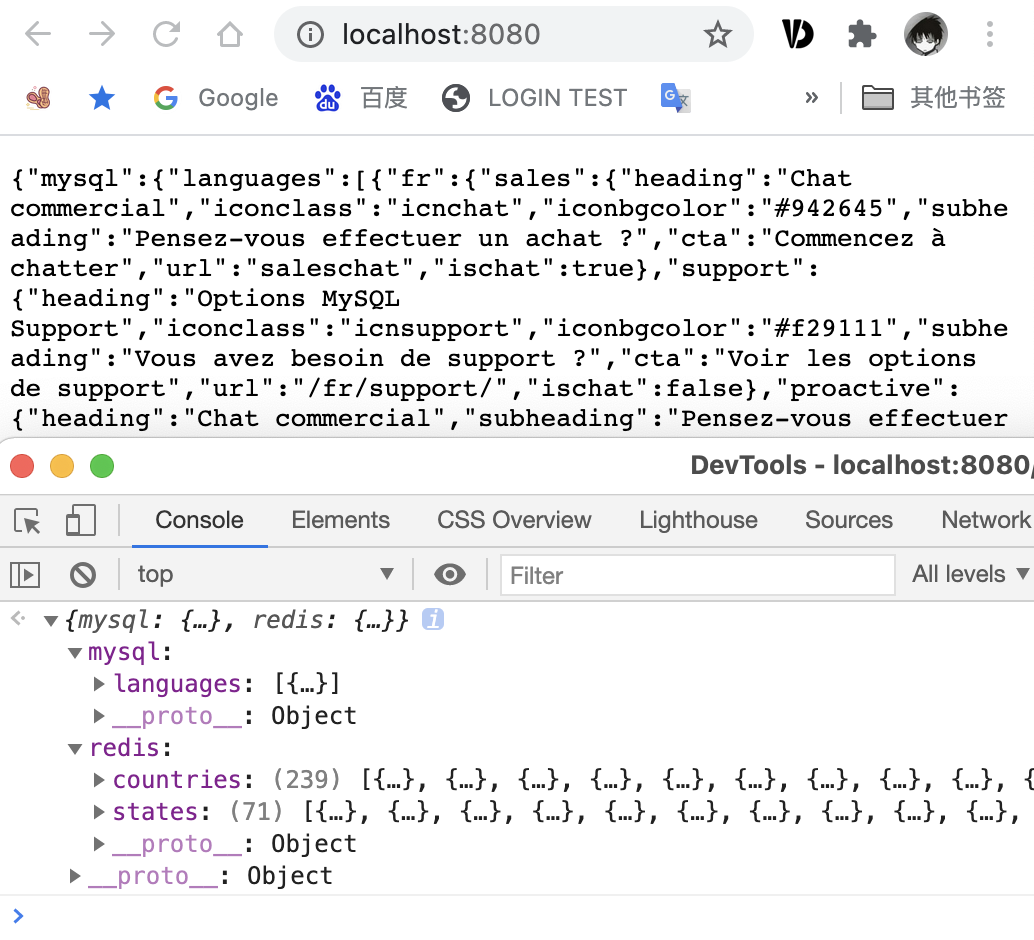
It works
看样子,我们已经拿到了我们想要的结果,接着来简单聊聊容器封装。
使用容器对 NJS 应用进行封装
前文提到,NJS 模块由 Nginx 官方镜像默认支持,我们可以直接使用 nginx:1.19.8-alpine 为基础来进行镜像构建。
镜像文件非常简单,只需要三行:
FROM nginx:1.19.8-alpine
COPY nginx.conf /etc/nginx/nginx.conf
COPY app.js /etc/nginx/script/app.js
将上面的内容保存为 Dockerfile,然后使用 docker build -t njs-api . 构建出我们的镜像。
如果你选择使用 docker images 查看镜像,你会发现我们构建的镜像非常小巧,几乎能够和 Nginx 官方镜像尺寸保持一致,所以在公网分发的时候,会有非常大的优势,根据 docker 增量分发的特性,我们其实只会分发上面那三行配置中的后两行构建结果(layers),差不多几 KB。
njs-api latest f4b6de5dacb8 3 minutes ago 22.6MB
nginx 1.19.8-alpine 5fd75c905b52 7 days ago 22.6MB
在构建镜像之后,使用 docker run --rm -it -p 8090:80 njs-api 可以进一步验证服务是否能够正常运行,不出意外,会得到上一小节图片中的结果。
好了,来总结一下。
本篇文章中,因为我们没有使用任何非 Nginx 镜像外的 Runtime ,所以得到的镜像结果非常小巧,十分利于进行网络分发。
同时因为 NJS 和 Nginx 简单清晰的设计理念,NJS 程序伴随请求生命周期结束而释放,NJS 引擎执行效率比较高,以及NJS 引擎本身只是实现了 ECMA 的一个子集(整体复杂度低),加之子请求的生命周期非常短暂,所以我们的服务可以使用非常低的资源(接近于 Nginx 原生资源占用)提供一个接近 Nginx 原生服务的性能。
如果你经常写业务代码,你会发现本文留下了一些明显可以改进性能的话题没有诉诸笔墨:如何提聚合接口的性能,如何在定制过的 Nginx 镜像、环境中和三方模块一起工作,以及 NJS 到底能够干哪些更复杂的活?
下一篇 NJS 内容,我将展开聊聊这些。

