

Telerik Scheduler Blazor (Part 1): Setting Up Scheduler
source link: https://www.telerik.com/blogs/telerik-scheduler-blazor-part-1-setting-up-scheduler
Go to the source link to view the article. You can view the picture content, updated content and better typesetting reading experience. If the link is broken, please click the button below to view the snapshot at that time.

Telerik Scheduler for Blazor (Part 1): Setting Up the Scheduler
In the first post of a four post series, we're going to dive into the Scheduler in Telerik UI for Blazor and see how you can use it in your web apps. We'll start off learning how to set up a project to take advantage of the Telerik Blazor Scheduler and all of its views (plus: Why you need all those views).
The UI design pattern users expect for recording and displaying time-based information (either appointments or events) is a calendar. Not surprisingly, a Scheduler was one of Telerik UI for Blazor's most voted requests when it was introduced.
And the Telerik Scheduler for Blazor does give you a dead-easy way to add calendaring to your Blazor application for date-related data.
If you’re new to using the Telerik components in a project, this article will give you a quick intro on how to create a project that can use the Scheduler (or, really, any of the Telerik components).
Quick Overview
It’s easy to have the Telerik Scheduler display events or appointments (Telerik UI for Blazor refers to them just as “appointments"): Just pass the Scheduler a collection of objects where each object has two DateTime properties called Start and End.
It’s helpful to also have a property called Title because the Scheduler will display that property by default in the UI for any appointment. In addition, having a property called IsAllDay will let you set up all-day events. However, there’s no harm/no foul in not having those last two properties on your class (and the Scheduler will let you take advantage of whatever other properties or methods you might want to add to your class).
An object like this, for example, could be used to record temperature changes and then have them displayed in the Scheduler:
public class TempChange
{
  public Int Id {get; set; }
  public DateTime Start { get; set; }
  public DateTime End { get; set; }
  public string Title { get; set; }
  public bool IsAllDay { get; set; }
  public double TemperatureC { get; set; }
  public double ConvertToF()
  {
     return Math.Round(TemperatureC * 1.8 + 32, 0);
  }
}
A collection of objects like this is all you really need to support all of the features of the Scheduler in your project.
A Scheduler Project
To create a sample project with the Scheduler, I used Visual Studio 2019 Community Edition 16.7.2. In Visual Studio, I selected New | Project | Blazor App, picked the Blazor WebAssembly App in .NET Core 3.1 with the ASP.NET Core–hosted option selected (I also unchecked the HTTPS option). That gave me a solution with three projects: one whose name ends with .Client, one whose name ends with .Server and one whose name ends in .Shared (a good project to hold the class because it’s accessible to both the *.Client and *.Server projects).
I then used NuGet to add the Telerik.UI.for.Blazor package to the *.Client project in my solution, downloading the package from the Telerik site set up when I got my license. To support using the Telerik controls, I added this link tag to the <head> element of the page hosting my Blazor app (by default, that’s the index.html page in the *.Client project’s wwwroot folder):
<link rel="stylesheet" href="_content/Telerik.UI.for.Blazor/css/kendo-theme-default/all.css" />
Also in the index.html file, I added this script tag just before the page’s closing <body> tag:
<script src="_content/Telerik.UI.for.Blazor/js/telerik-blazor.js" defer></script>
In the _import.razor file for my project, I added these namespace directives:
@using Telerik.Blazor
@using Telerik.Blazor.Components
The default Visual Studio application uses a layout page called MainLayout.razor (in the client project’s Shared folder). Telerik components depend upon the TelerikRootComponent so I created a new Razor component called TelerikLayout.razor in my project’s Shared folder and, in that new layout file, wrapped its @Body statement with the TelerikRootComponent:
<TelerikRootComponent>
    @Body
</TelerikRootComponent>
I don’t have to add the @using statements for the Telerik components to this file because I’d added them to the project’s _imports.razor file. I did, however, have to go to the MainLayout file and add this line to it:
@layout TelerikLayout
Effectively, I’ve wrapped my existing layout view in a “TelerikRootComponent-ized.” This means I don’t have to change any existing code in my components (and also positions me to add Telerik components to my original layout page).
The Importance of Views
With that all in place, I added the Scheduler to my component’s Razor file using markup that tied the Scheduler to a collection called Events (a collection presumably defined in the component’s code section). The start of my markup looked like this:
<TelerikScheduler Data="@Events" >
But to really take advantage of the Scheduler, you need to leverage the Scheduler’s views. Multiple views matter in a scheduler because people use calendars in two different modes.
In one mode, users value views that show all of a full week or month—views that give the user an “at a glance” view of a long period of time. These views let users determine how busy they are (or, if you’re recording other kinds of date-related data, when things are occurring “frequently”). Detail isn’t important here—essentially days (or weeks) are treated as buckets, and users are trying to distinguish between full and empty (“busy” and “free”) days.
In this week view, for example, it’s pretty obvious that Thursday isn’t a good day to add new tasks but most other days have available time:
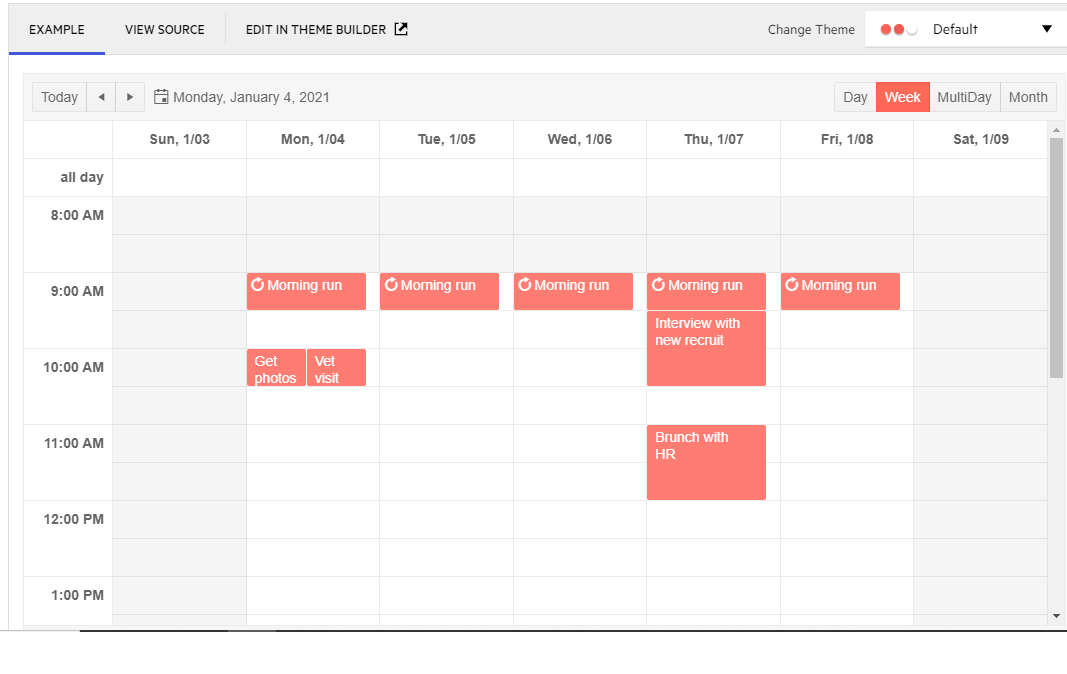
However, users operate in a different mode when they’re dealing with their immediate future. In this mode, it’s details in the short term that matter—a day view that gives users the information they need to answer questions like “what do I do next?” or “what should I be doing now?” (with other kinds of date-related information, the related questions are “what’s coming up next?” and “what’s happening now?”).
When the user from my previous example wakes up Thursday morning, for example, they’ll be using this day view to navigate their morning:
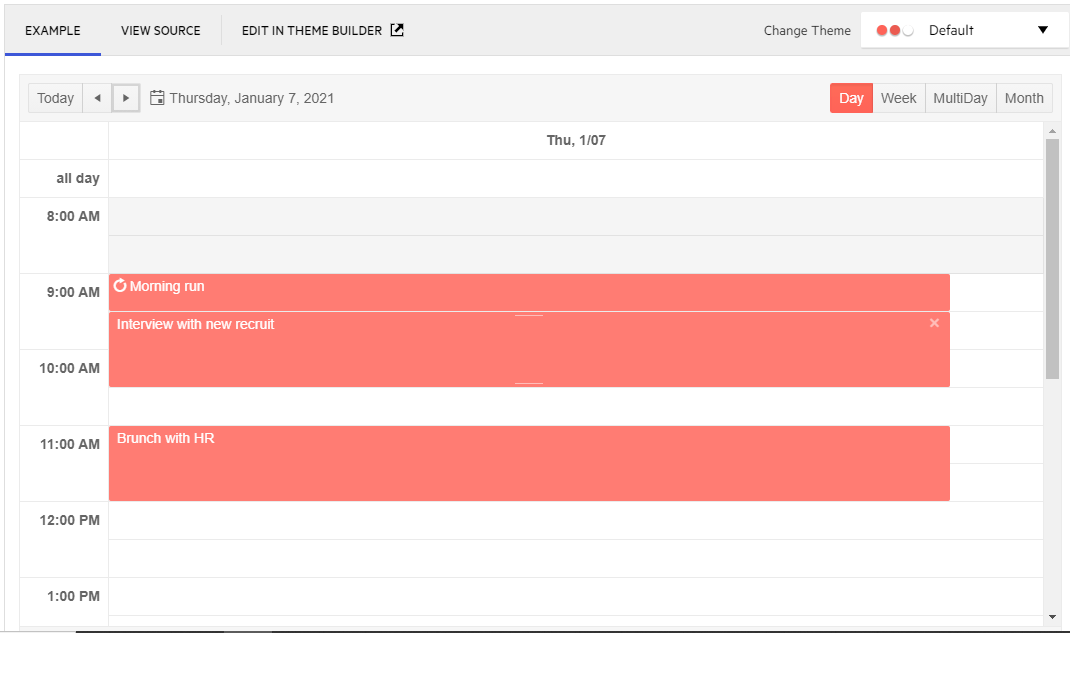
Since most users switch back and forth between both modes, any good scheduler/calendar requires multiple views. And the good news is that the Telerik Scheduler provides views that support both modes. All I had to do in order to add those views to my Scheduler was extend my markup with a list of the built-in views I wanted (in my case, I wanted all of them):
<TelerikScheduler Data="@Events" >
    <SchedulerViews>
         <SchedulerMonthView />
         <SchedulerDayView />
         <SchedulerWeekView  />
         <SchedulerMultiDayView />
    </SchedulerViews>
</TelerikScheduler>
Conclusion
This was an introduction to the Telerik Scheduler for Blazor, making sure we've got the groundwork all set. In the next post, we'll get into the views even further.
Recommend
-
51
I am happy to be able to announce Telerik UI for Blazor is officially out of the preview and experimental stage and now enters a new era: official RTM! Telerik UI for Blazor 1.0.0 is here!
-
31
In the latest release of Telerik UI for Blazor, we've got new controls for you as well as major upgrades to the Grid, Preview 8 compatibility and more. Check it out to see what's new. With the version 1.6.0 rele...
-
8
The second release for April of Telerik UI for Blazor is here and brings multiple new Blazor Grid features, Scheduler enhancements, WebAssembly 3.2.0 Preview 4 compatibilit...
-
21
.NET Report Designers Visual Studio Report Designer Developer-centric WYSIWYG report generation The Visual Studio report designer is specially created for developers that...
-
10
Blazor UI Components Key Features Find truly native Blazor components for every use caseCut development time and cost in half with the Telerik high-performing Grid...
-
10
Editing and Creating Appointments in Telerik Scheduler for Blazor The Telerik Scheduler provides all the hooks you need to manage what happens wh...
-
40
Telerik UI Blazor—Wizard, Stepper, StackLayout, GridLayoutFour brand-new components, new features to existing ones and enhancements to our Grid and TreeList—release 2.25.0 of Telerik UI for Blazor has a lot to offer. Hey Blazor and Tel...
-
6
Introducing Telerik REPL for Blazor The team here at Progress is proud to announce the Progress Telerik REPL for Blazor—a new web-based tool for...
-
7
Manage Forms Data with Telerik UI for Blazor and EF Core See how to quickly build a Blazor app that performs Data Grid CRUD operations with T...
-
6
Telerik UI for Blazor Is Heading on a Responsive Journey
About Joyk
Aggregate valuable and interesting links.
Joyk means Joy of geeK