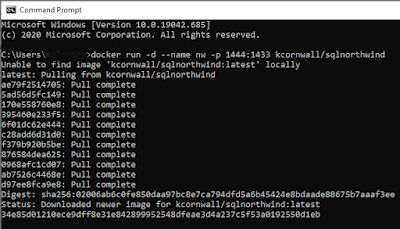
Let us make sure that the container is running. Execute this command to ensure that the container is running OK.
Setup our application
At the time of writing this article, I was using .NET version 5.0.101 on a Windows 10 computer running version 1909
Let us create an ASP.NET server-side Blazor app named ElectronServerBlazorEf with the following terminal window commands:
mkdir ElectronServerBlazorEf
cd ElectronServerBlazorEf
dotnet new blazorserver
We need two .NET tools. Run the following commands from within a terminal window to install ElectronNET.CLI and the dotnet-ef:
dotnet tool install -g ElectronNET.CLI
dotnet tool install –g dotnet-ef
Continue by adding these packages to your project:
dotnet add package Microsoft.EntityFrameworkCore.Design
dotnet add package Microsoft.EntityFrameworkCore.SqlServer
dotnet add package Microsoft.EntityFrameworkCore.Tools
dotnet add package ElectronNET.API
ElectronNET.API is the Electron.NET package.
Finally, let's open our project in VS Code. To do that, simply execute the following command from the same terminal window:
code .
Open Program.cs in the editor and add the following statements to the CreateHostBuilder() method right before webBuilder.UseStartup<Startup>() :
webBuilder.UseElectron(args);
webBuilder.UseEnvironment("Development");
Add the following method to Startup.cs:
public async void ElectronBootstrap() {
var browserWindow = await Electron.WindowManager.CreateWindowAsync(new BrowserWindowOptions
Width = 1152,
Height = 940,
Show = false
await browserWindow.WebContents.Session.ClearCacheAsync();
browserWindow.OnReadyToShow += () => browserWindow.Show();
browserWindow.SetTitle("Electron.NET with Blazor!");
Add the following code to the bottom of the Configure() method in Startup.cs:
if (HybridSupport.IsElectronActive) {
ElectronBootstrap();
That's it. Your ASP.NET application is now electron-ized. To see the fruits of your labor, type the following command in the terminal window:
electronize init
electronize start
electronize init is a one-time command that creates a manifest file named electron.manifest.json and adds it to your project.
electronize start launches the Electron app. Note that it takes a little longer the first time and the content now appears in an application window, not a browser.
Note that you can still run your application as a web app by simply stopping the Electron app (with
File >>
Exit from the app's menu system) and running the web app as normal with:
dotnet run.Interacting with the Northwind database
Close the Electron app with File >> Exit.
Let us reverse engineer the database with the following command so that it generates a DbContext class and classes representing the Category & Product database entities in a folder named NW:
dotnet-ef dbcontext scaffold "Data Source=localhost,1444;Initial Catalog=Northwind;Persist Security Info=True;User ID=sa;Password=Passw0rd2018" Microsoft.EntityFrameworkCore.SqlServer -c NorthwindContext -o NW --table Products --table Categories
Add the following connection string to the top of appsettings.json just before "Logging":
"ConnectionStrings": {
"NW": "Data Source=localhost,1444;Initial Catalog=Northwind;Persist Security Info=True;User ID=sa;Password=Passw0rd2018"
Open NW/NorthwindContext.cs and delete the OnConfiguring() method so that we do not have confidential connection string information embedded in source code.
Add the following to ConfigureServices() method in Startup.cs:
services.AddDbContext<NorthwindContext>(options => {
options.UseSqlServer(Configuration.GetConnectionString("NW"));
Add a class file named NorthwindService.cs in the Data folder. Replace the class definition with the following code:
public class NorthwindService {
private readonly NorthwindContext _context;
public NorthwindService(NorthwindContext context) {
_context = context;
public async Task<List<object>> GetCategoriesByProductAsync () {
var query = _context.Products
.Include (c => c.Category)
.GroupBy (p => p.Category.CategoryName)
.Select (g => new {
Name = g.Key,
Count = g.Count ()
.OrderByDescending(cp => cp.Count);
return await query.ToListAsync<object> ();
We need to configure the NorthwindService class as scoped so that we can use dependency injection. Add the following statement to the ConfigureServices() method in Startup.cs: