
8

Medhat Elmasry: Electron.NET with ASP.NET MVC & EF
source link: https://blog.medhat.ca/2020/12/electronnet-with-aspnet-mvc-ef.html
Go to the source link to view the article. You can view the picture content, updated content and better typesetting reading experience. If the link is broken, please click the button below to view the snapshot at that time.
In this tutorial I will show you how to develop a simple cross-platform Electron application that retrieves data from the Northwind database and renders results in a chart. The solution also allows you to do the following:
- export data to a CSV file
- setup the solution as a separate desktop application
What is Electron?
Electron is a framework that supports development of apps using web technologies such as Chromium rendering engine and Node.js runtime. The platform supports Windows, MacOS and Linux. Some very popular applications that run on Electron are Visual Studio Code, Discord, Skype, GitHub Desktop and many others. The official site for Electron is https://www.electronjs.org/.
What is Electron.NET?
Electron.NET is a wrapper around Electron that allows .NET web developers to invoke native Electron APIs using C#. To develop with Electron.NET, you need Node.js & Npm installed on your computer. In addition, you must have .NET Core 3.1 or later. The official site for Electron.NET open source project is https://github.com/electronnet/electron.net/.
Running a docker container with SQL-Server Northwind sample database
I will use a docker image that contains the SQL-Server Northwind database. Credit goes to kcornwall for creating this docker image.
To pull & run the Northwind database in a docker container, run the following command in a terminal window:
docker run -d --name nw -p 1444:1433 kcornwall/sqlnorthwind
The above command does the following:
Docker image: kcornwall/sqlnorthwindContainer Name
(--name): nwPorts (-p): Port 1433 in container is exposed as port 1444 on the host computerPassword: The sa password is Passw0rd2018. This was determined from the Docker Hub page for the image.-d: Starts the container in detached mode
(--name): nwPorts (-p): Port 1433 in container is exposed as port 1444 on the host computerPassword: The sa password is Passw0rd2018. This was determined from the Docker Hub page for the image.-d: Starts the container in detached mode
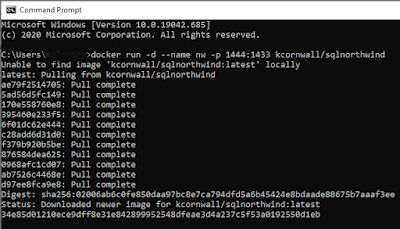
This is what I experienced after I ran the above command:
Let us make sure that the container is running. Execute this command to ensure that the container is running OK.
docker ps
The following confirms that the container is indeed running:
Setup our application
At the time of writing this article, I was using .NET version 5.0.101 on a Windows 10 computer running version 1909
We need two .NET tools. Run the following commands from within a terminal window to install ElectronNET.CLI and the dotnet-aspnet-codegenerator:
dotnet tool install –g ElectronNET.CLI
dotnet tool install -g dotnet-aspnet-codegenerator
dotnet tool install –g dotnet-ef
Let us create an ASP.NET MVC app named ElectronEF with the following terminal window commands:
mkdir ElectronEf
cd ElectronEf
dotnet new mvc
Continue by adding these packages to your project:
dotnet add package Microsoft.VisualStudio.Web.CodeGeneration.Design
dotnet add package Microsoft.EntityFrameworkCore.Design
dotnet add package Microsoft.EntityFrameworkCore.SqlServer
dotnet add package ElectronNET.API
dotnet add package C1.AspNetCore.Mvc
ElectronNET.API is the Electron.NET package and C1.AspNetCore.Mvc is a package from a company named ComponentOne that provides components that we will use (under a short trial license) for creating a visual chart.
Finally, let's open our project in VS Code. To do that, you can simply execute the following command from the same terminal window:
code .
Open Program.cs in the editor and add the following statements to the CreateHostBuilder() method right before webBuilder.UseStartup<Startup>() :
webBuilder.UseElectron(args);webBuilder.UseEnvironment("Development");
Next, open Startup.cs in the editor and add the following statement to the bottom of the Configure() method:
// Open the Electron-Window here
Task.Run (async () => {
await Electron.WindowManager.CreateWindowAsync ();
That's it. Your ASP.NET application is now electron-ized. To see the fruits of your labor, type the following command in the terminal window:
electronize initelectronize start
electronize init is a one-time command that creates a manifest file named electron.manifest.json and adds it to your project.
electronize start launches the Electron app. Note that it takes a little longer the first time and the content now appears in an application window, not a browser.

Interacting with the Northwind database
Let us reverse engineer the database with the following command so that it generates a DbContext class and classes representing the Category & Product database entities in a folder named NW:
dotnet-ef dbcontext scaffold "Data Source=localhost,1444;Initial Catalog=Northwind;Persist Security Info=True;User ID=sa;Password=Passw0rd2018" Microsoft.EntityFrameworkCore.SqlServer -c NorthwindContext -o NW --table Products --table Categories
Add the following connection string to the top of appsettings.json just before "Logging":
"ConnectionStrings": {
"NW": "Data Source=localhost,1444;Initial Catalog=Northwind;Persist Security Info=True;User ID=sa;Password=Passw0rd2018"
Open NW/NorthwindContext.cs and delete the OnConfiguring() method so that we do not have confidential connection string information embedded in source code.
Add the following to ConfigureServices() method in Startup.cs:
services.AddDbContext<NorthwindContext>(options => options.UseSqlServer(Configuration.GetConnectionString("NW")));
Rendering a chart
Add the following instance variable to Controllers/HomeController.cs:
private readonly NorthwindContext _context;
Replace the HomeController constructor with this code:
public HomeController(ILogger<HomeController> logger, NorthwindContext context) {
_logger = logger;
_context = context;
Add the following helper method named getProductsByCategory() that returns a count of products by category from the Northwind database:
private List<object> getProductsByCategory () {var query = _context.Products.Include (c => c.Category).GroupBy (p => p.Category.CategoryName).Select (g => new {Name = g.Key,Count = g.Count ().OrderByDescending (cp => cp.Count);return query.ToList<object> ();
Add a ProductsByCategory() action method to HomeController.cs:
public IActionResult Chart() {ViewBag.CategoryProduct = this.getProductsByCategory ();return View ();
To make available the char control to all views, add the following to Views/_ViewImports.cshtml:
@addTagHelper *, C1.AspNetCore.Mvc
We need a view to render the chart. Therefore, execute the following command to create /Views/Home/Chart.cshtml:
dotnet aspnet-codegenerator view Chart Empty -outDir Views/Home –udl
Replace Views/Home/Chart.cshtml with following code:
ViewData["Title"] = "Number of products by category";<br /><h1>@ViewData["Title"]</h1><div><c1-flex-chart binding-x="Name" chart-type="Bar" legend-position="None"><c1-items-source source-collection="@ViewBag.CategoryProduct"></c1-items-source><c1-flex-chart-series binding="Count" name="Count" /><c1-flex-chart-axis c1-property="AxisX" position="None" /><c1-flex-chart-axis c1-property="AxisY" reversed="true" /></c1-flex-chart></div>
Add these styles to Views/Shared/_Layout.cshtml just before </head>:
<c1-styles /><c1-scripts><c1-basic-scripts /></c1-scripts>
Also in _Layout.cshtml, add the following menu item at around line 35:
<li class="nav-item"><a class="nav-link text-dark" asp-area="" asp-controller="Home"asp-action="Chart">Chart</a></li>
Run the application by typing the following command in the terminal window:
electronize start
You should see the following output:

Save data to file system as CSV file
Add an action method named SaveAs() to Controllers/HomeController.cs with the following code:
public async Task<IActionResult> SaveAs (string path) {
System.IO.StringWriter writer = new System.IO.StringWriter ();
writer.WriteLine ("Name,Count");
var query = this.getProductsByCategory ();
query.ForEach (item => {
writer.Write (item.GetType ().GetProperty ("Name").GetValue (item));
writer.Write (",");
writer.WriteLine (item.GetType ().GetProperty ("Count").GetValue (item));
await System.IO.File.WriteAllTextAsync (path, writer.ToString ());
return RedirectToAction ("Index");
Menu customization
Electron.NET provides a default application menu. Note that there are differences between macOS and other platforms. On macOS, applications have their own menu to the left of the standard File/Edit/View menus.
Add the following using statements at the top of Startup.cs:
using ElectronNET.API.Entities;using System.Runtime.InteropServices;
Add this CreateMenu() method to Startup.cs:
private void CreateMenu () {
bool isMac = RuntimeInformation.IsOSPlatform (OSPlatform.OSX);
MenuItem[] menu = null;
MenuItem[] appMenu = new MenuItem[] {
new MenuItem { Role = MenuRole.about },
new MenuItem { Type = MenuType.separator },
new MenuItem { Role = MenuRole.services },
new MenuItem { Type = MenuType.separator },
new MenuItem { Role = MenuRole.hide },
new MenuItem { Role = MenuRole.hideothers },
new MenuItem { Role = MenuRole.unhide },
new MenuItem { Type = MenuType.separator },
new MenuItem { Role = MenuRole.quit }
MenuItem[] fileMenu = new MenuItem[] {
new MenuItem {
Label = "Save As...", Type = MenuType.normal, Click = async () => {
var mainWindow = Electron.WindowManager.BrowserWindows.First ();
var options = new SaveDialogOptions () {
Filters = new FileFilter[] {
new FileFilter { Name = "CSV Files", Extensions = new string[] { "csv" } }
string result = await Electron.Dialog.ShowSaveDialogAsync (mainWindow, options);
if (!string.IsNullOrEmpty (result)) {
string url = $"http://localhost:{BridgeSettings.WebPort}/Home/SaveAs?path={result}";
mainWindow.LoadURL (url);
new MenuItem { Type = MenuType.separator },
new MenuItem { Role = isMac ? MenuRole.close : MenuRole.quit }
MenuItem[] viewMenu = new MenuItem[] {
new MenuItem { Role = MenuRole.reload },
new MenuItem { Role = MenuRole.forcereload },
new MenuItem { Role = MenuRole.toggledevtools },
new MenuItem { Type = MenuType.separator },
new MenuItem { Role = MenuRole.resetzoom },
new MenuItem { Role = MenuRole.zoomin },
new MenuItem { Role = MenuRole.zoomout },
new MenuItem { Type = MenuType.separator },
new MenuItem { Role = MenuRole.togglefullscreen }
if (isMac) {
menu = new MenuItem[] {
new MenuItem { Label = "Electron", Type = MenuType.submenu, Submenu = appMenu },
new MenuItem { Label = "File", Type = MenuType.submenu, Submenu = fileMenu },
new MenuItem { Label = "View", Type = MenuType.submenu, Submenu = viewMenu }
} else {
menu = new MenuItem[] {
new MenuItem { Label = "File", Type = MenuType.submenu, Submenu = fileMenu },
new MenuItem { Label = "View", Type = MenuType.submenu, Submenu = viewMenu }
Electron.Menu.SetApplicationMenu (menu);
Add following statement in Configure() method of Startup.cs just before await Electron.WindowManager.CreateWindowAsync():
CreateMenu();
Test the save-as functionality by starting the Electron app with the following terminal-window command:
electronize start

Click on File >> Save As ...

Select a location and give the export file a name (like data), then click on save. The content of data.csv should look like this:

Build for specific platform:
You can produce a setup application for Windows, macOS & Linux. To generate the setup application for Windows, execute the following command from a terminal window:
electronize build /target win /PublishReadyToRun false
The result is a setup application located in bin/Desktop that you can distribute. Be patient because it takes time to generate.

I hope you found this article useful and hope you build great Electron.NET apps.
Reference: https://www.grapecity.com/blogs/building-cross-platform-desktop-apps-with-electron-dot-net
Recommend
About Joyk
Aggregate valuable and interesting links.
Joyk means Joy of geeK