

How to Deploy a Full Environment for a Wordpress Site via Docker by Using Terraf...
source link: https://dzone.com/articles/how-to-deploy-a-full-environment-for-wordpress-sit
Go to the source link to view the article. You can view the picture content, updated content and better typesetting reading experience. If the link is broken, please click the button below to view the snapshot at that time.
How to Deploy a Full Environment for a Wordpress Site via Docker by Using Terraform
This tutorial will get you started with developing your first infrastructure in minutes!
Join the DZone community and get the full member experience.
Join For Free
For many users, preparing an environment in AWS to host their website/system can be tough, especially if they’re new to cloud and what that actually means.
Also, after the preparation is done, the creation of resources might take a while, too! But what if you could do all of the following in just twenty minutes?
- Create a VPC and all essentials for public and private subnets.
- Create an EFS and prepare an access point to this storage option.
- Create a launch template to replicate your configuration into multiple EC2s in different subnets.
- Prepare your website as a Docker image to have a consistent replica of your website and its DB.
It feels impossible, right? It’s actually not — this is the beauty of IAC and Terraform. Why don’t we go deeper?
Note: This is a POC script and it did get tested. Yes, it could be better but for the purposes of this article, it’s a good starting point.
What Will You Get?
Check the image below:
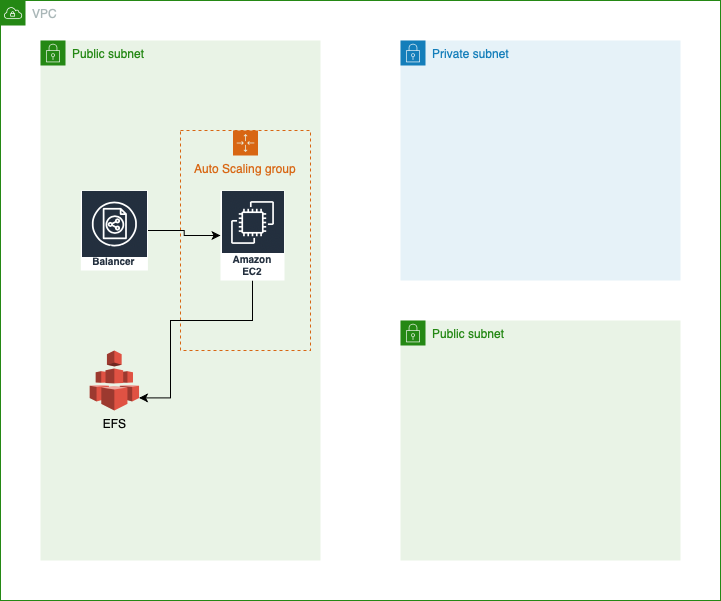
After you run the code as it is, you will get a load balancer placed in one of the public subnets, one EC2 machine that got deployed by the auto scaling launch template, and EFS.
These things are enough to run your website, at least for this use case.
But what actually happened when I run the script is the following:
- For VPC, the script will make a VPC, subnets (public and private), routing tables, and internet gateway.
- For auto scaling, the script will make a launching template with what is needed to replicate the configuration into multiple instances as is required and will make sure that the minimum required instances are always meet the configuration.
- For the load balancer, the script will prepare an endpoint associated with health check metrics.
- For EC2, the script will launch an instance from the configuration script that got attached to the auto scaling launching template. This will install and set up Docker inside the machine and will pull the project from GitHub.
- For EFS, the script will create all needed resources like security group, access point and access point attachment for this storage.
Is that too much? I guess not; some other systems needs a lot more. But let’s agree on one thing: Doing all of these things in 20 minutes manually is exhausting.
The Steps of Deployment
It is really easy and requires just a few clicks. Let’s get started!
Before we start, clone this link.
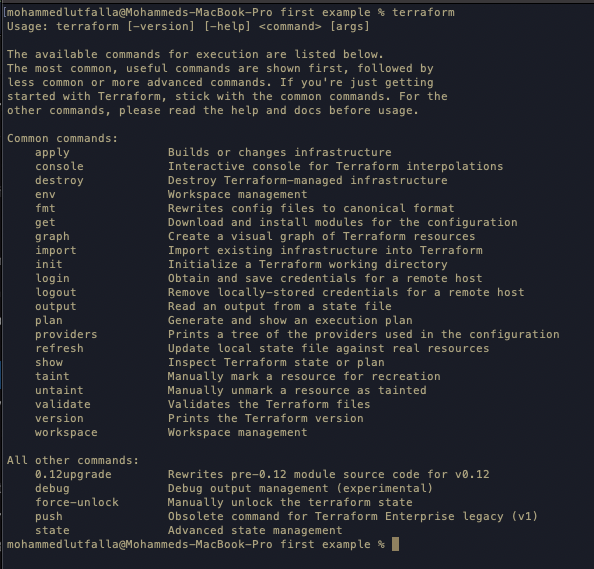
1. Do You Have Terraform Installed?
First things first: Check whether you have Terraform installed on your machine.
2. Do You Have Your AWS Credentials?
Because we are going to deploy these instructions to AWS, make sure one of these two options are available:
- AWS CLI is configured, so you should only know which profile you will use if multiple configurations are placed.
- AWS access and secret keys, because of course we need credentials to access.
Note: Check provider.tf once you decide which connection to use.
3. Some Necessary Commands
Open a terminal window and navigate into the project.
Because we are going to make a new instance, we might need to access the instance, so run these commands.
ssh-keygen -t rsa -b 4096 -C "[email protected]" -f $PWD/id_rsa
Note: Do not change the key name unless you go to vars.ft and change it there also.
Then, run this command to get all needed modules:
xxxxxxxxxx
terraform init

4. Trigger the Script
There is only one step left, maybe two if you want to check what will happen.
To check what resources will be created, run this command:
xxxxxxxxxx
terraform plan
To bring all these planned resources to the life, run this command:
xxxxxxxxxx
terraform apply
fter all resources are alligned in the correct order, a message will ask you to approve these changes. Type yes.
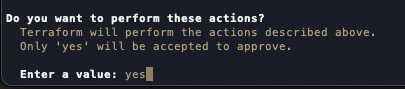
And now, you can relax until the whole process is finished.
Note: After the Terraform script is done, please wait 5-10 minutes before checking the website. The infrastructure is done but the instance script is in progress. EFS mounting needs some time to be done.
To clean everything, run this command:
xxxxxxxxxx
terraform destroy
Important Points
Why EFS in this simple use case? Because I am using Docker to host the website and DB all together, and you have the auto scaling launch template, EFS should insure the consistency of your DB because the DB has a volume pointed into EFS. Any new instance will use EFS as volume.
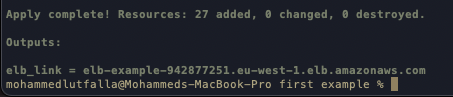
At the end of the script execution, Terraform will return an ELB link and this will not work directly. Why? Because the initial Wordpress page is going to be /admin to finish all needed configuration. So, go to aws console -> EC2 -> your created instance and visit its public IP to finish the setup. Then all is going to be good.
Summary
I have no idea if this precess would be helpful for anyone, but since I know how to make it, so why not share it?
Creating a full basic environment in AWS has many funny turns, especially for newcomers to this platform. This script will provide a few important points to think about for now. Using Docker is really good option, using Terraform is not hard, and finally, IAC is something they need to work on.
Recommend
About Joyk
Aggregate valuable and interesting links.
Joyk means Joy of geeK