

Dynamic NFS Provisioning in Red Hat OpenShift
source link: https://dzone.com/articles/dynamic-nfs-provisioning-in-red-hat-openshift
Go to the source link to view the article. You can view the picture content, updated content and better typesetting reading experience. If the link is broken, please click the button below to view the snapshot at that time.
Dynamic NFS Provisioning in Red Hat OpenShift
This article explains how to set up an NFS client provisioner in Red Hat OpenShift Container Platform by setting up the NFS server in Red Hat Enterprise Linux.
Join the DZone community and get the full member experience.
Join For Free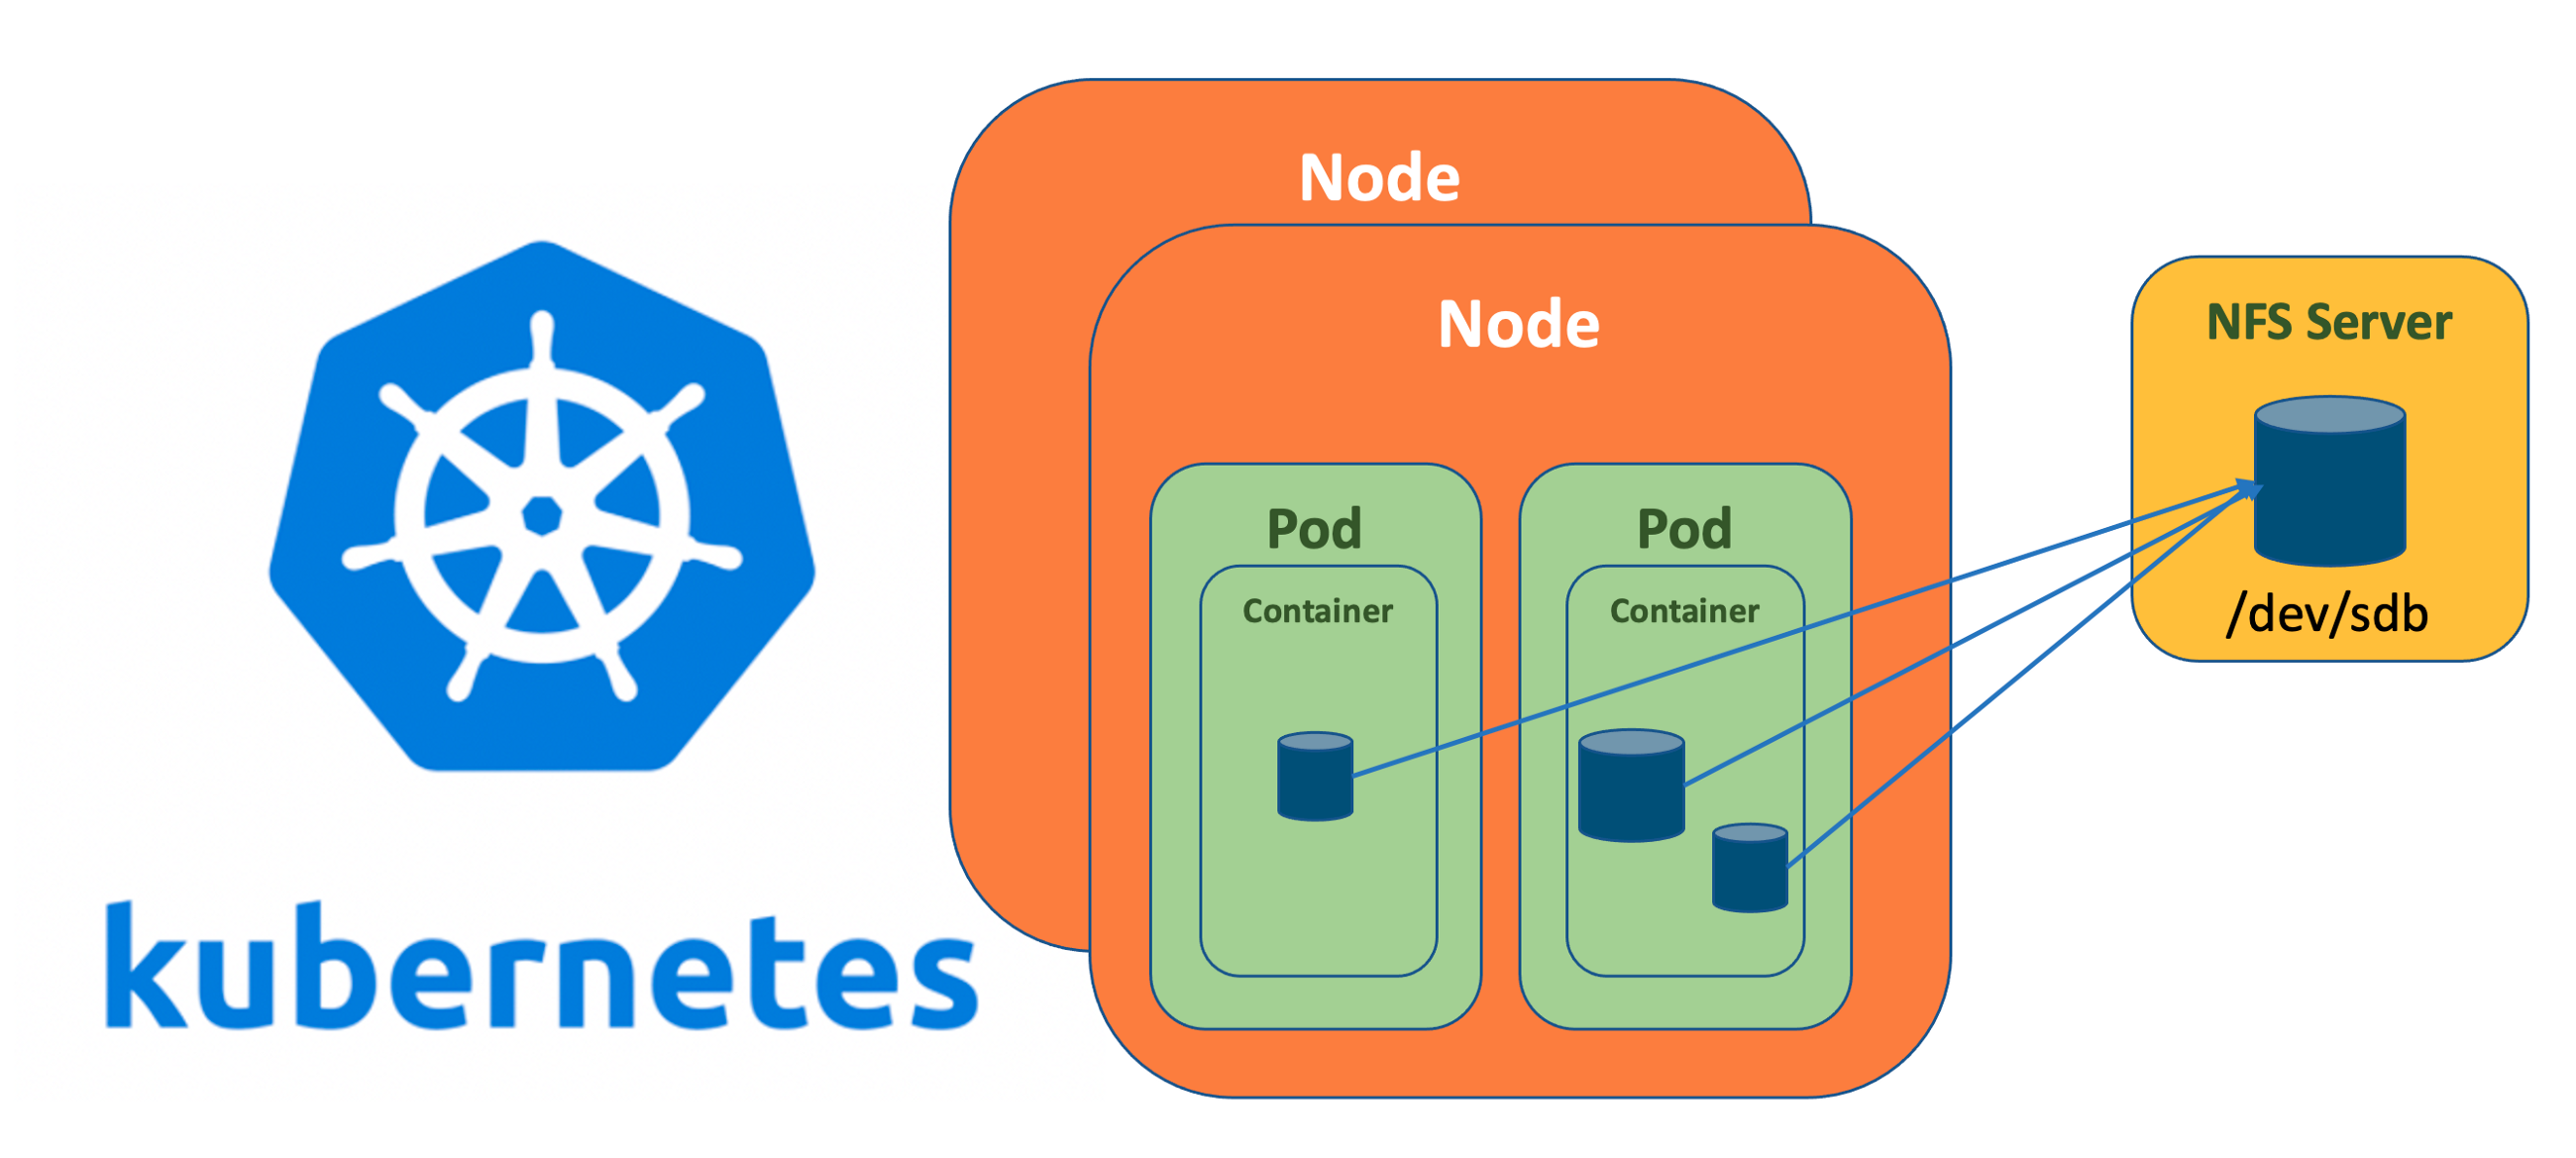
When deploying Kubernetes, one of the very common requirement is to have persistent storage. For stateful applications such as databases, persistent storage is a “Must Have” requirement. The solution is mounting the external volumes inside the containers. In public cloud deployments, Kubernetes has integrations with the cloud providers’ block-storage backends, allowing developers to create claims for volumes to use with their deployments. Kubernetes also works with the cloud provider to create a volume and mount it inside the developers’ pods. There are several options available in Kubernetes to replicate the same behavior on-premise. However, one of the simplest and easiest ways is to set up the NFS server in a Linux machine and provide the back-end storage to the NFS client provisioner within the Kubernetes cluster.
Note: This setup does not address full secure configuration and does not provide high availability for persistent volume. Therefore, it must not be adopted for a production environment.
In the tutorial below, I’ll explain how to set up an NFS client provisioner in the Red Hat OpenShift Container Platform by setting up the NFS server in Red Hat Enterprise Linux.
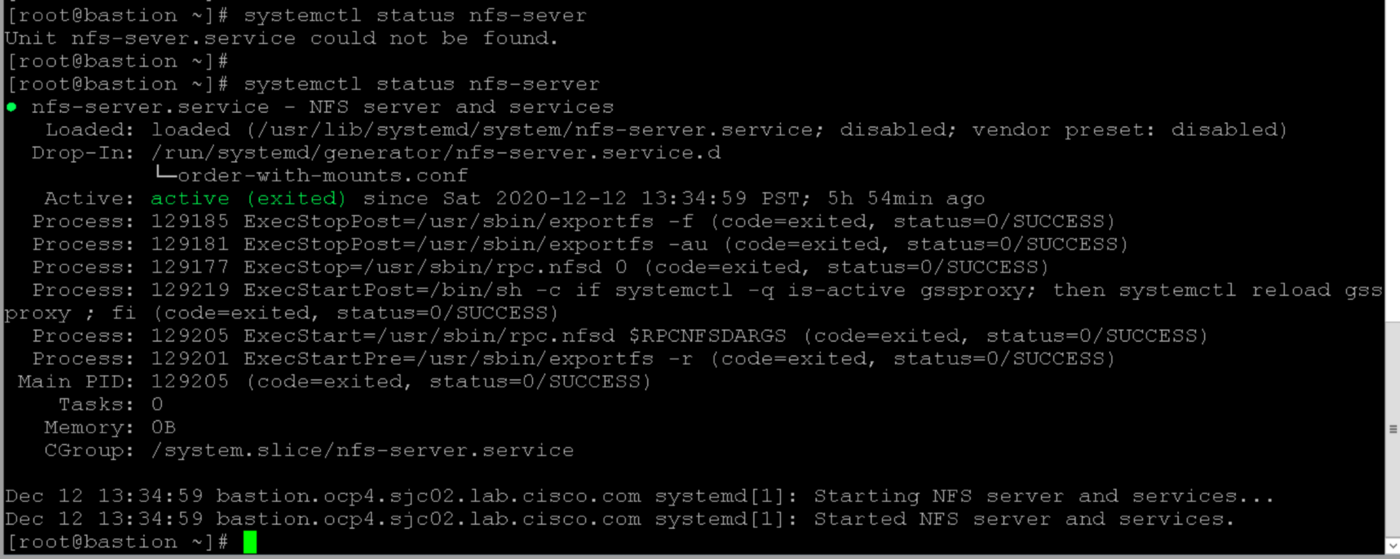
First, let's install the NFS server on the host machine, and create a directory where our NFS server will serve the following files:
# yum install -y nfs-utils# systemctl enable rpcbind
# systemctl enable nfs-server
# systemctl start rpcbind
# systemctl start nfs-server
xxxxxxxxxx
[root@bastion ~]# mkdir -p /nfs-share
[root@bastion ~]# /bin/mount -t xfs -o inode64,noatime /dev/sdb /nfs-share
# [root@bastion ~]# df -h /nfs-share
Filesystem Size Used Avail Use% Mounted on
/dev/sdb 1.7T 104M 1.7T 1% /nfs-share
[root@bastion ~]#chmod -R 777 /nfs-share / # for making matter simple to troubleshoot, but not recommended for production setup
Export the directory created earlier.
xxxxxxxxxx
[root@bastion ~]# cat /etc/exports
/nfs-share *(rw,sync,no_subtree_check,no_root_squash,insecure)[root@bastion ~]# sudo exportfs -rv
exporting *:/nfs-share[root@bastion ~]# showmount -e
Export list for bastion.ocp4.sjc02.lab.cisco.com:
/nfs-share *
[root@bastion ~]#
Now, the Service account must be set using a YAML.file in the OpenShift environment; it will create the role, role binding, and various roles within the Kubernetes cluster as shown below.
xxxxxxxxxx
[root@bastion ~]# cat rbac.yaml
kind: ServiceAccount
apiVersion: v1
metadata:
name: nfs-pod-provisioner-sa
---
kind: ClusterRole # Role of kubernetes
apiVersion: rbac.authorization.k8s.io/v1 # auth API
metadata:
name: nfs-provisioner-clusterRole
rules:
- apiGroups: [""] # rules on persistentvolumes
resources: ["persistentvolumes"]
verbs: ["get", "list", "watch", "create", "delete"]
- apiGroups: [""]
resources: ["persistentvolumeclaims"]
verbs: ["get", "list", "watch", "update"]
- apiGroups: ["storage.k8s.io"]
resources: ["storageclasses"]
verbs: ["get", "list", "watch"]
- apiGroups: [""]
resources: ["events"]
verbs: ["create", "update", "patch"]
---
kind: ClusterRoleBinding
apiVersion: rbac.authorization.k8s.io/v1
metadata:
name: nfs-provisioner-rolebinding
subjects:
- kind: ServiceAccount
name: nfs-pod-provisioner-sa # defined on top of file
namespace: default
roleRef: # binding cluster role to service account
kind: ClusterRole
name: nfs-provisioner-clusterRole # name defined in clusterRole
apiGroup: rbac.authorization.k8s.io
---
kind: Role
apiVersion: rbac.authorization.k8s.io/v1
metadata:
name: nfs-pod-provisioner-otherRoles
rules:
- apiGroups: [""]
resources: ["endpoints"]
verbs: ["get", "list", "watch", "create", "update", "patch"]
---
kind: RoleBinding
apiVersion: rbac.authorization.k8s.io/v1
metadata:
name: nfs-pod-provisioner-otherRoles
subjects:
- kind: ServiceAccount
name: nfs-pod-provisioner-sa # same as top of the file
# replace with namespace where provisioner is deployed
namespace: default
roleRef:
kind: Role
name: nfs-pod-provisioner-otherRoles
apiGroup: rbac.authorization.k8s.io
[root@bastion ~]#
Deploy the service account by running the command below.
xxxxxxxxxx
[root@bastion ~]# oc apply -f rbac.yaml
serviceaccount/nfs-pod-provisioner-sa created
clusterrole.rbac.authorization.k8s.io/nfs-provisioner-clusterRole created
clusterrolebinding.rbac.authorization.k8s.io/nfs-provisioner-rolebinding created
role.rbac.authorization.k8s.io/nfs-pod-provisioner-otherRoles created
rolebinding.rbac.authorization.k8s.io/nfs-pod-provisioner-otherRoles created
[root@bastion ~]# oc get clusterrole,role
Create a storage class NFS using the NFS.YAML file below.
xxxxxxxxxx
apiVersion: storage.k8s.io/v1
kind: StorageClass
metadata:
name: nfs # when creating the PVC, it should mention this name
provisioner: nfs-test # give any name of your choice
parameters:
archiveOnDelete: "false"
[root@bastion ~]#
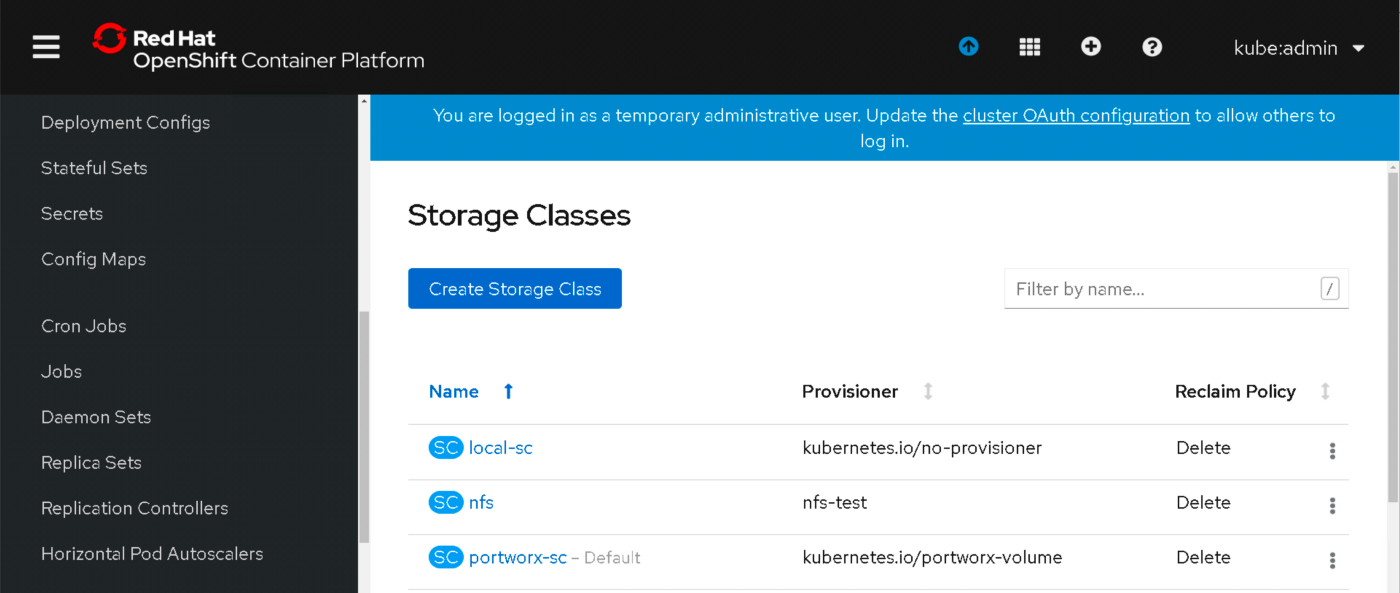
Now, create the storage class from the NFS.YAML file.
xxxxxxxxxx
[root@bastion ~]# oc create -f nfs.yaml
you can verify it by running the following command or in OpenShift console
[root@bastion ~]# oc get storageclass | grep nfs
nfs nfs-test 5h30m
[root@bastion ~]#
Now, create a POD for the NFS client provisioner using the below YAML file.
xxxxxxxxxx
[root@bastion ~]# cat nfs_pod_provisioner.yaml
kind: Deployment
apiVersion: extensions/v1beta1
metadata:
name: nfs-pod-provisioner
spec:
replicas: 1
strategy:
type: Recreate
template:
metadata:
labels:
app: nfs-pod-provisioner
spec:
serviceAccountName: nfs-pod-provisioner-sa # name of service account created in rbac.yaml
containers:
- name: nfs-pod-provisioner
image: quay.io/external_storage/nfs-client-provisioner:latest
volumeMounts:
- name: nfs-provisioner-v
mountPath: /persistentvolumes
env:
- name: PROVISIONER_NAME # do not change
value: nfs-test # SAME AS PROVISONER NAME VALUE IN STORAGECLASS
- name: NFS_SERVER # do not change
value: 10.16.1.150 # Ip of the NFS SERVER
- name: NFS_PATH # do not change
value: /nfs-share # path to nfs directory setup
volumes:
- name: nfs-provisioner-v # same as volumemouts name
nfs:
server: 10.16.1.150
path: /nfs-share
Deploy the NFS client POD.
xxxxxxxxxx
[root@bastion ~]# oc create -f nfs_pod_provisioner.yaml
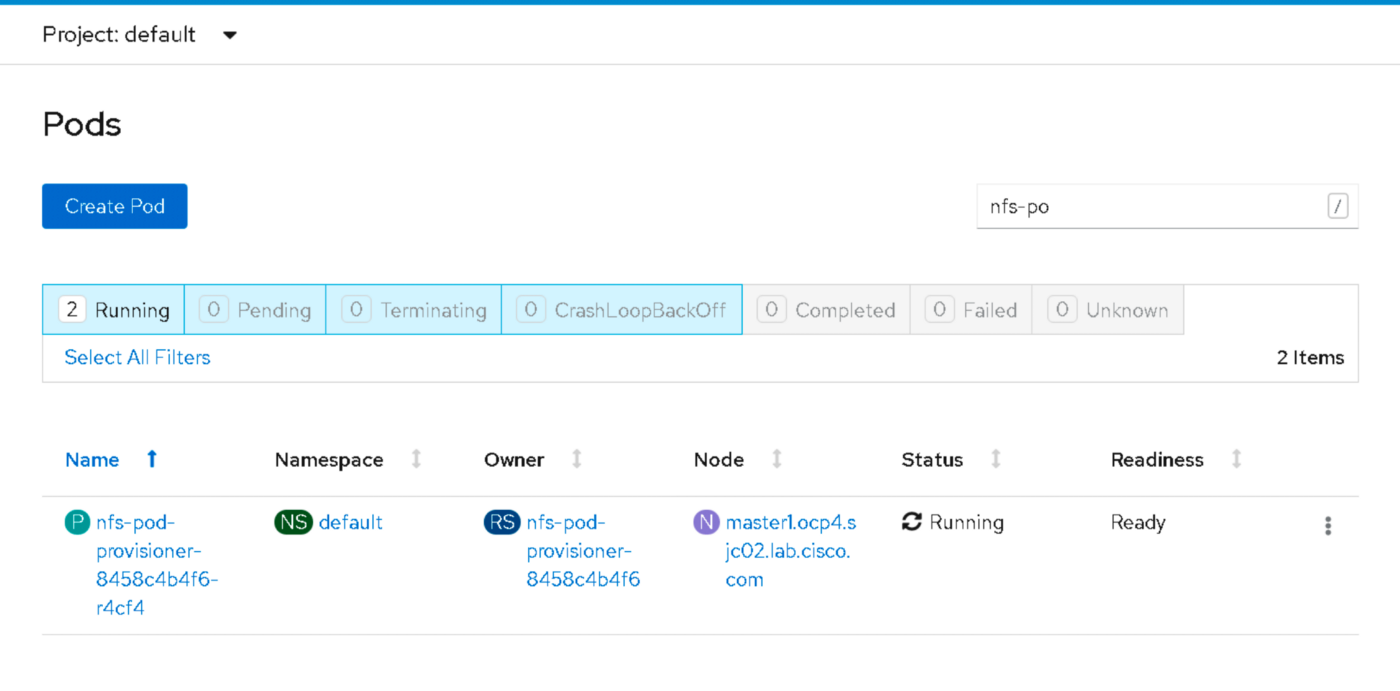
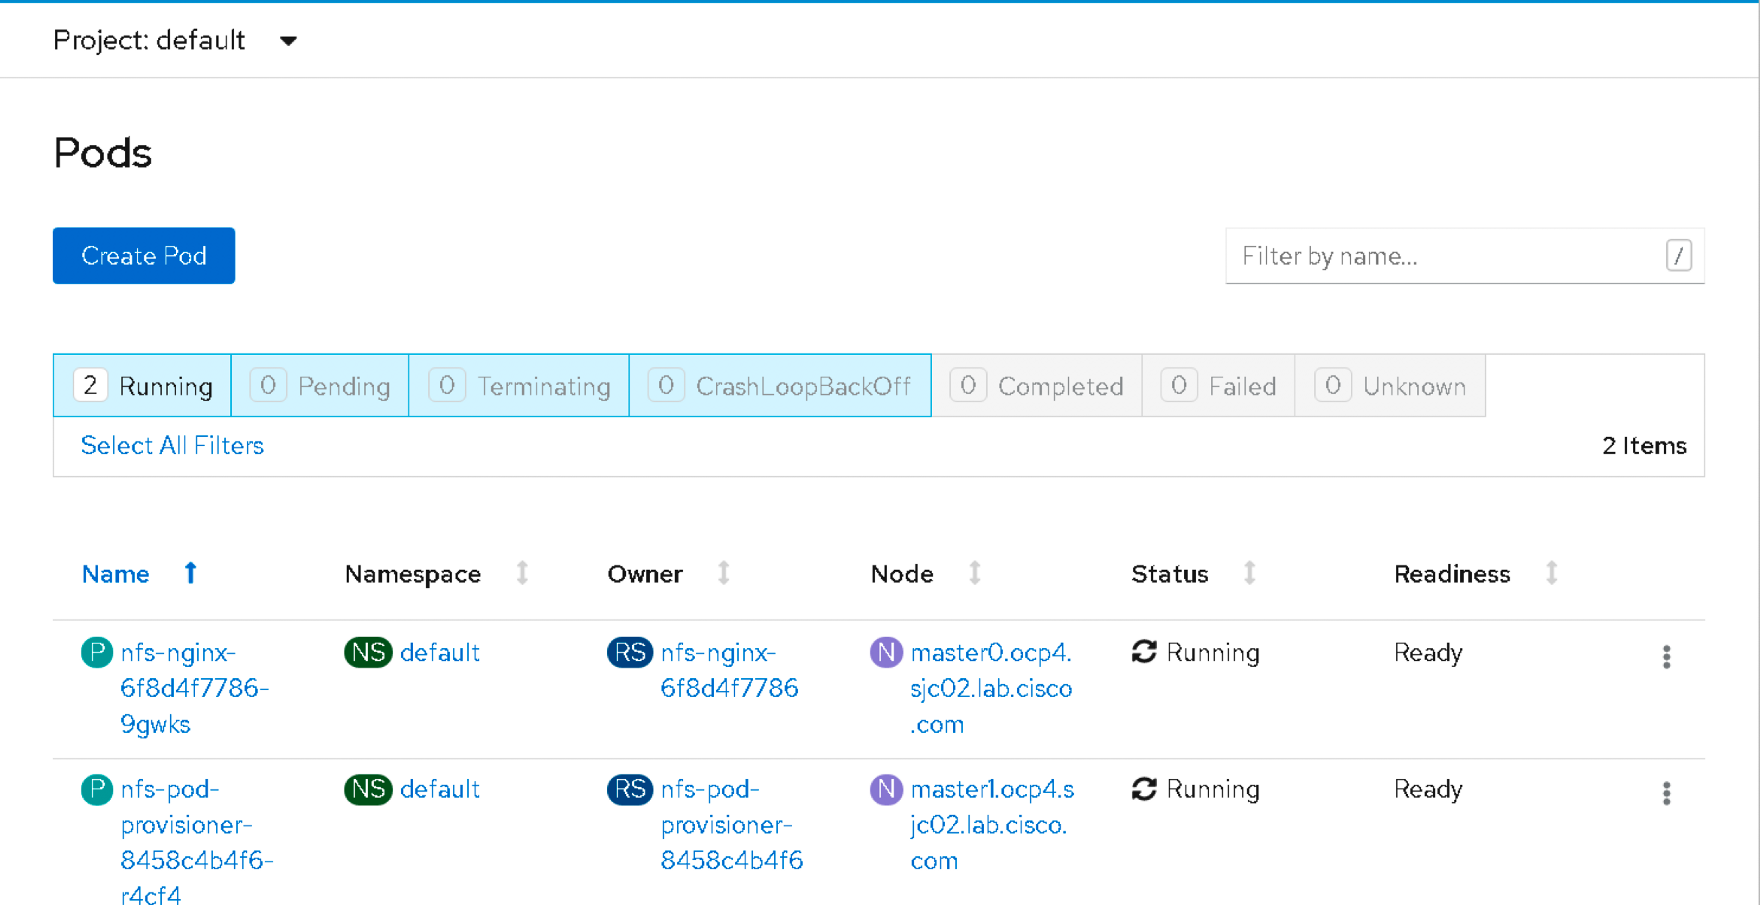
You can verify the POD in running state either via CLI or in the GUI as shown below.
xxxxxxxxxx
[root@bastion ~]# oc get pods
NAME READY STATUS RESTARTS AGE
nfs-pod-provisioner-8458c4b4f6-r4cf4 1/1 Running 0 5h27m
[root@bastion ~]#
[root@bastion ~]#
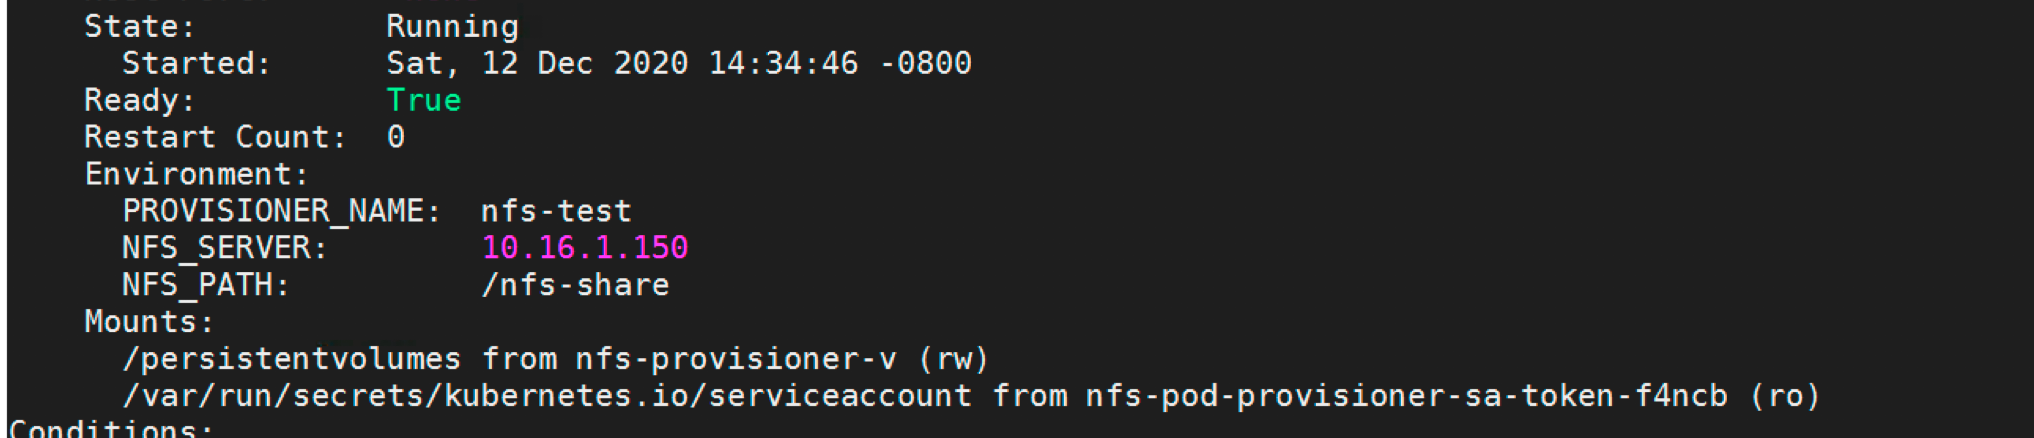
Run the following command to verify if the POD has been created with proper configuration.
xxxxxxxxxx
[root@bastion ~]# oc describe pod nfs-pod-provisioner-8458c4b4f6-r4cf4
Now, test our setup by provisioning an Nginx container by requesting a persistent volume claim and mounting it in the container.
Create a persistent volume claim using the following YAML file.
xxxxxxxxxx
[root@bastion ~]# cat nfs_pvc_dynamic.yaml
apiVersion: v1
kind: PersistentVolumeClaim
metadata:
name: nfs-pvc-test
spec:
storageClassName: nfs # SAME NAME AS THE STORAGECLASS
accessModes:
- ReadWriteMany # must be the same as PersistentVolume
resources:
requests:
storage: 50Mi
[root@bastion ~]#
Apply the YAML file.
xxxxxxxxxx
oc apply -f nfs_pvc_dynamic.yaml
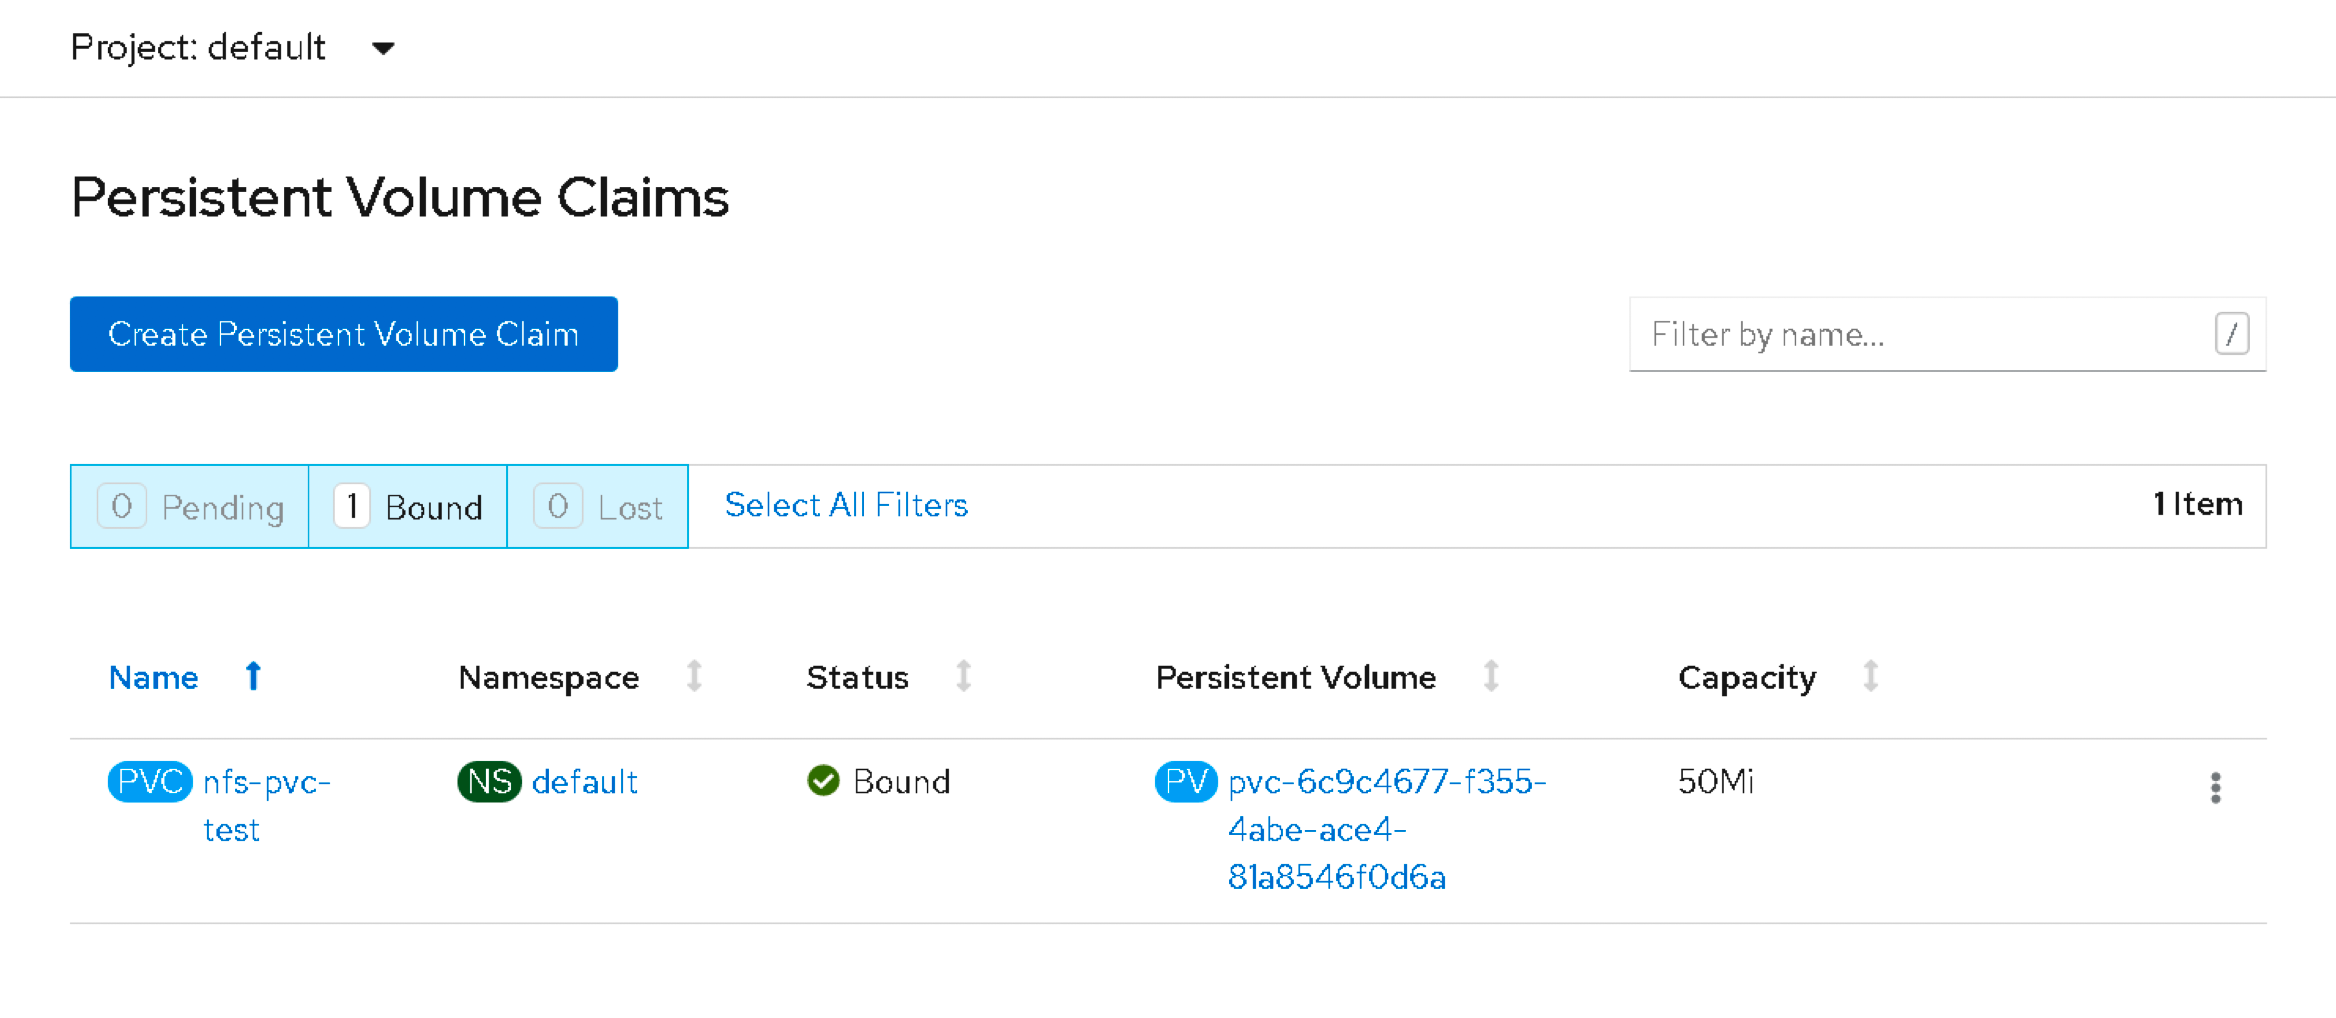
Verify it in the GUI or by running the following.
xxxxxxxxxx
[root@bastion ~]# oc get pvc
NAME STATUS VOLUME CAPACITY ACCESS MODES STORAGECLASS AGE
nfs-pvc-test Bound pvc-6c9c4677-f355-4abe-ace4-81a8546f0d6a 50Mi RWX nfs 5h32m
[root@bastion ~]#
We can verify this persistent volume in the server where the NFS server is configured as shown below.
xxxxxxxxxx
[root@bastion ~]# ls /nfs-share
default-nfs-pvc-test-pvc-6c9c4677-f355-4abe-ace4-81a8546f0d6a
Now, create an Nginx POD, and specify the claim name “NFS-PVC-test” in this case in the YAML file as shown below.
xxxxxxxxxx
[root@bastion ~]# cat ngnix_nfs.yaml
apiVersion: extensions/v1beta1
kind: Deployment
metadata:
labels:
app: nginx
name: nfs-nginx
spec:
replicas: 1
selector:
matchLabels:
app: nginx
template:
metadata:
labels:
app: nginx
spec:
volumes:
- name: nfs-test #
persistentVolumeClaim:
claimName: nfs-pvc-test # same name of pvc that was created
containers:
- image: nginx
name: nginx
volumeMounts:
- name: nfs-test # name of volume should match claimName volume
mountPath: mydata # mount inside of contianer
[root@bastion ~]#
Create the POD.
xxxxxxxxxx
# oc apply -f nginx_nfs.yaml
[root@bastion ~]# oc get pods
NAME READY STATUS RESTARTS AGE
nfs-nginx-6f8d4f7786-9gwks 1/1 Running 0 5h32m
nfs-pod-provisioner-8458c4b4f6-r4cf4 1/1 Running 0 5h43m
[root@bastion ~]#
Now, create a text file inside the pod and verify that it exists inside the /NFS-share folder inside the NFS server.
xxxxxxxxxx
[root@bastion ~]# oc exec -it nfs-nginx-6f8d4f7786-9gwks bash
root@nfs-nginx-6f8d4f7786-9gwks:/# cd mydata
root@nfs-nginx-6f8d4f7786-9gwks:/mydata2# date >> demofile.txt
Verify it in the NFS server.
xxxxxxxxxx
[root@bastion ~]# ls /nfs-share/default-nfs-pvc-test-pvc-6c9c4677-f355-4abe-ace4-81a8546f0d6a/
demofile.txt
[root@bastion ~]# cat /nfs-share/default-nfs-pvc-test-pvc-6c9c4677-f355-4abe-ace4-81a8546f0d6a/demofile.txt
Sun Dec 13 04:25:45 UTC 2020
[root@bastion ~]#
As you can see, the file is replicated in the NFS server. Thanks for reading! Post any comments in the comments section below.
Recommend
About Joyk
Aggregate valuable and interesting links.
Joyk means Joy of geeK