

利用Devstack测试OpenStack管理微软Hyper-V
source link: https://blog.csdn.net/xiaoquqi/article/details/9169105
Go to the source link to view the article. You can view the picture content, updated content and better typesetting reading experience. If the link is broken, please click the button below to view the snapshot at that time.
利用Devstack测试OpenStack管理微软Hyper-V
一、测试环境
Windows 2012 Server R2
Ubuntu 12.04 Server 64bit
二、安装Windows2012 Server
微软官方提供Windows 2012试用版本的下载(http://technet.microsoft.com/zh-cn/evalcenter/hh670538.aspx),安装好后,可以使用180天。安装Windows 2012时,选择带GUI的Datacenter版本,没记错的话应该是最后一项,其他默认即可。
三、配置Hyper-V角色
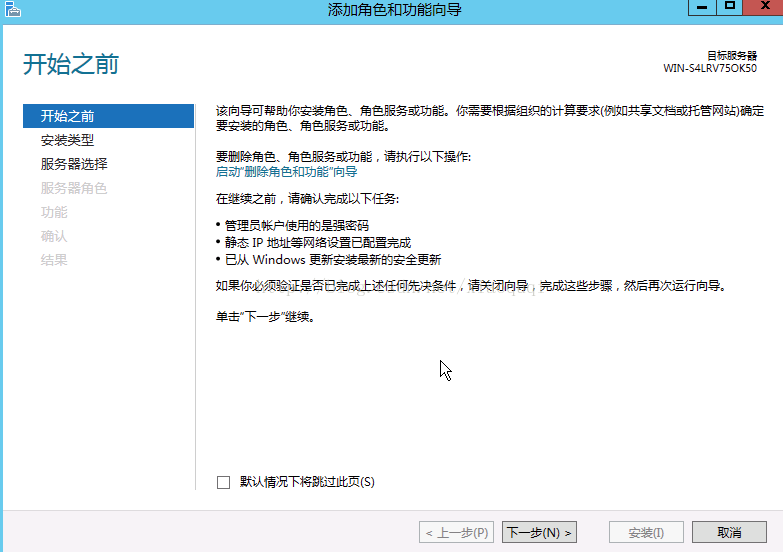
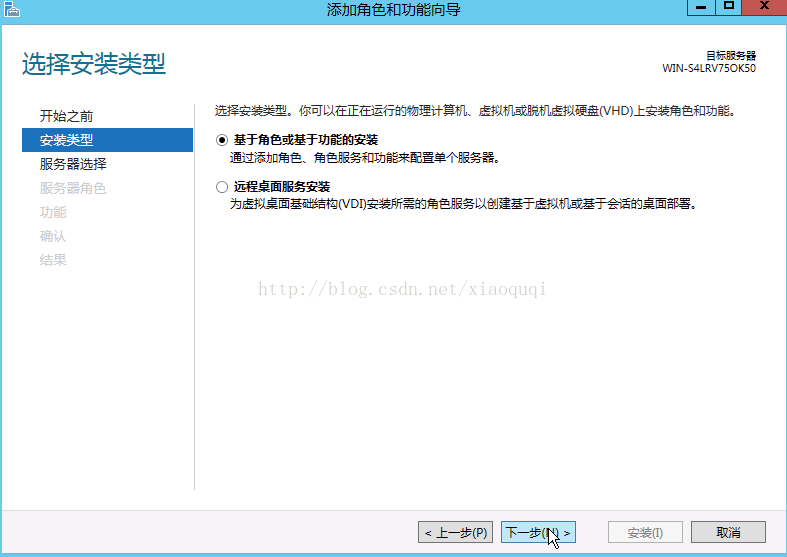
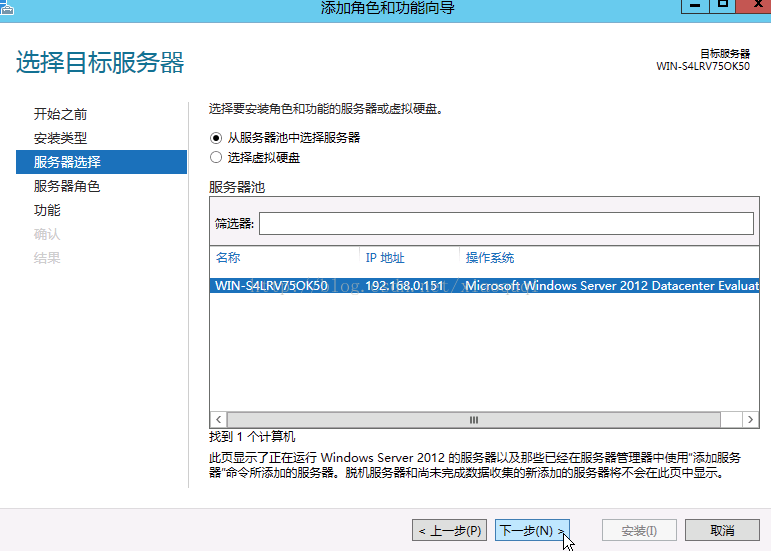
安装并重启系统后,我们需要安装Hyper-V,那么在Windows 2012中,安装Hyper-V的过程被称为添加角色。
打开“服务管理器”(启动系统默认打开),选择“管理”->"添加角色和功能向导"。


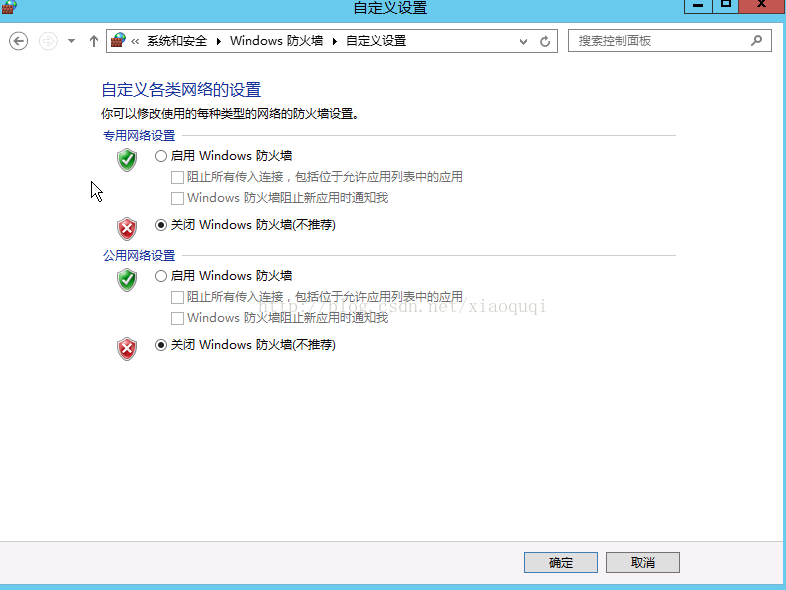
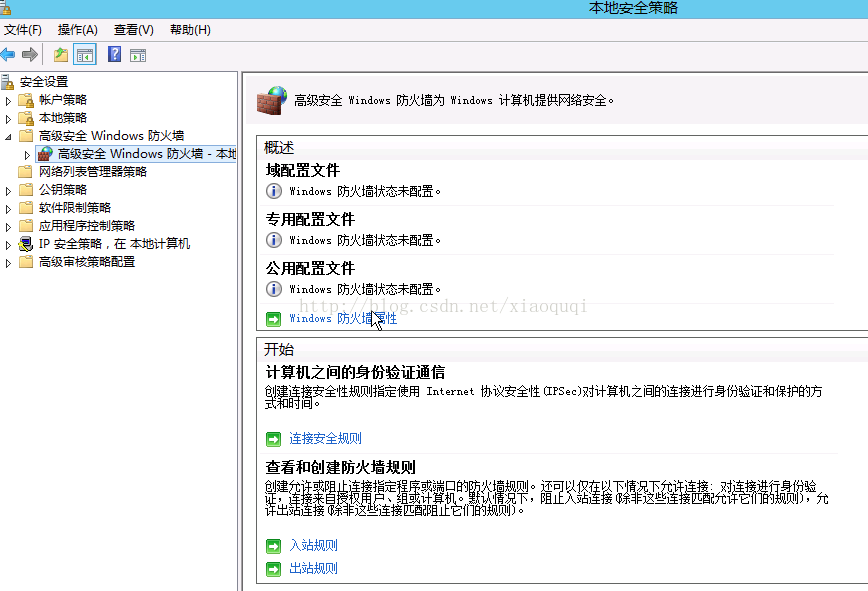
安装完成后,重新启动服务器。这里建议将所有的防火墙、域策略关闭,避免对我们的测试造成不必要的影响。
三、安装Devstack
先安装Devstack是因为,Windows上的nova-compute会连接OpenStack的Controller端,如果不先设置好服务端,还需要再重启Window上的服务。Devstack的安装相对简单,网上的文档很多,这里不再赘述,这里只贴出我的localrc文件。
注意:我使用的Devstack是stable/grizzly版本的分支。
DATABASE_PASSWORD=admin
RABBIT_PASSWORD=admin
SERVICE_TOKEN=admin
SERVICE_PASSWORD=admin
ADMIN_PASSWORD=admin

MULTI_HOST=True

# Hyper-V Testing
disable_service n-cpu

disable_service n-net
enable_service q-svc
enable_service q-agt
enable_service q-dhcp
enable_service q-l3
enable_service q-meta
enable_service quantum
四、安装Windows端的nova-compute
安装好Devstack之后,开始安装Windows端的nova-compute。Cloudbase公司已经提供了打包好的msi文件,直接下载在Windows安装即可。
链接地址:http://www.cloudbase.it/openstack/openstack-compute-installer/
具体步骤文档:http://www.cloudbase.it/installing-openstack-nova-compute-on-hyper-v/
建议开启Log,安装完成后,
日志文件在C:\OpenStack\Log
程序文件在C:\Program Files (x86)\Cloudbase Solutions\OpenStack\Nova下,配置文件在etc中,主要的文件:
nova.conf
[DEFAULT]
auth_strategy=keystone
image_service=nova.image.glance.GlanceImageService
compute_driver=nova.virt.hyperv.driver.HyperVDriver
volume_api_class=nova.volume.cinder.API
fake_network=true
vswitch_name=VRouter
instances_path=C:\OpenStack\Instances
glance_api_servers=192.168.0.31:9292
use_cow_images=true
limit_cpu_features=false
force_config_drive=false
config_drive_inject_password=false
injected_network_template=C:\Program Files (x86)\Cloudbase Solutions\OpenStack\Nova\etc\interfaces.template
policy_file=C:\Program Files (x86)\Cloudbase Solutions\OpenStack\Nova\etc\policy.json
mkisofs_cmd=C:\Program Files (x86)\Cloudbase Solutions\OpenStack\Nova\bin\mkisofs.exe
qemu_img_cmd=C:\Program Files (x86)\Cloudbase Solutions\OpenStack\Nova\bin\qemu-img.exe
verbose=true
allow_resize_to_same_host=true
running_deleted_instance_action=reap
running_deleted_instance_poll_interval=120
resize_confirm_window=5
resume_guests_state_on_host_boot=true
rpc_backend=nova.openstack.common.rpc.impl_kombu
rabbit_host=192.168.0.31
rabbit_port=5672
rabbit_userid=guest
rabbit_password=admin
logdir=C:\OpenStack\Log\
network_api_class=nova.network.quantumv2.api.API
quantum_url=http://192.168.0.31:9696
quantum_auth_strategy=keystone
quantum_admin_tenant_name=service
quantum_admin_username=quantum
quantum_admin_password=admin
quantum_admin_auth_url=http://192.168.0.31:35357/v2.0
quantum_hyperv_agent.conf
[DEFAULT]
verbose=true
control_exchange=quantum
rpc_backend=quantum.openstack.common.rpc.impl_kombu
rabbit_host=192.168.0.31
rabbit_port=5672
rabbit_userid=guest
rabbit_password=admin
logdir=C:\OpenStack\Log\
logfile=quantum-hyperv-agent.log
[AGENT]
polling_interval=2
physical_network_vswitch_mappings=*:VRouter
在服务中会看到两个新的服务

如果安装正常,则可以直接从nova-manage service list中看到Hyper-V计算节点的信息。

五、制作镜像
如果使用Devstack默认的Cirros的镜像,Hyper-V是无法启动的,我也试了上传ISO的镜像,也同样无法启动虚拟机,最后只能自动制作VHD格式的镜像。
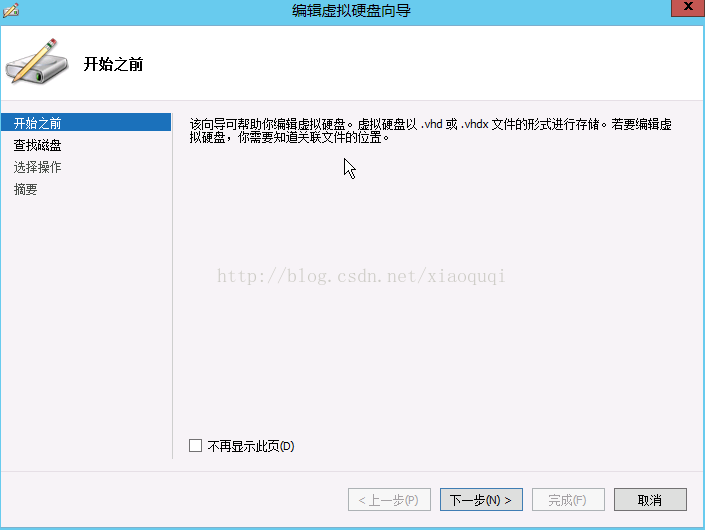
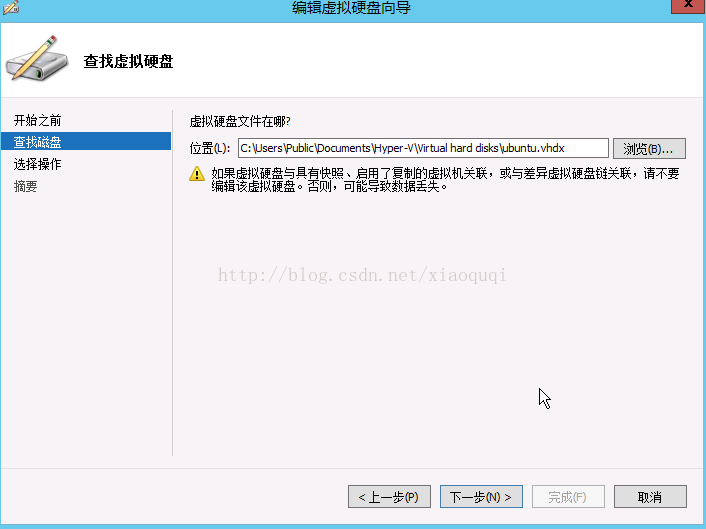
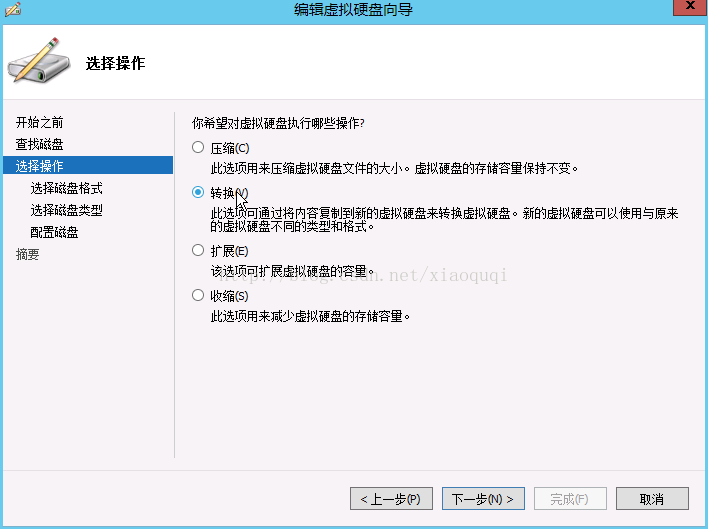
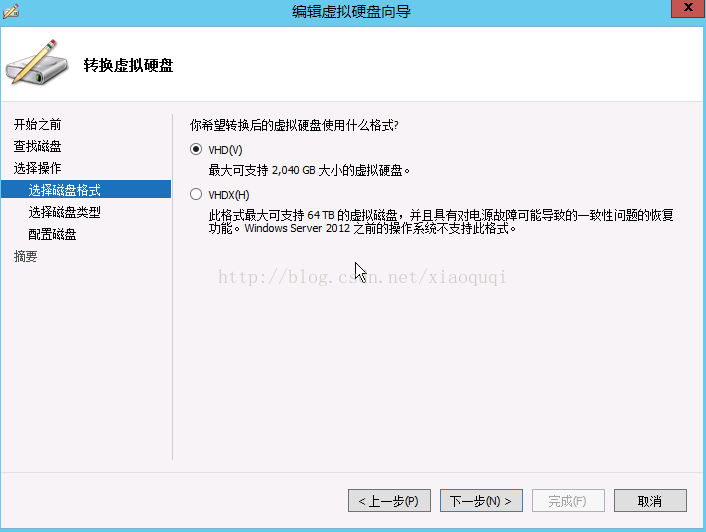
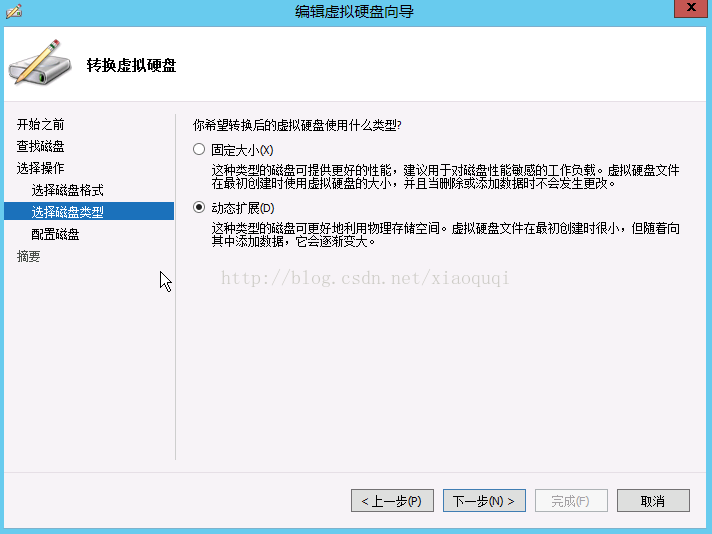
利用Hyper-V安装一台新的Ubuntu 12.04 Server,安装完成后,关闭虚拟机,之后右键选择导出,此时导出的文件会是VHDX类型,我并没有直接上传,还是转换成了VHD类型,具体方法如下:

六、上传镜像、创建新的Flavor
cd devstack
source openrc admin
glance image-create --name ubuntu.vhd --disk-format vhd --container-format bare --file ubuntu.vhd --is-public True
这里需要创建一个新的Flavor,新创建的Flavor要大于或者等于制作VHD的根分区,否则会导致虚拟机创建失败。
nova flavor-create Hyper-V 200 1024 100 1登陆Horizon,选择Launch Instance,注意选择你上传的ubuntu.vhd镜像和你新创建的Flavor。

创建过程中,镜像正在复制


Hyper-V管理器中


Hyper-V管理器中正在制作快照
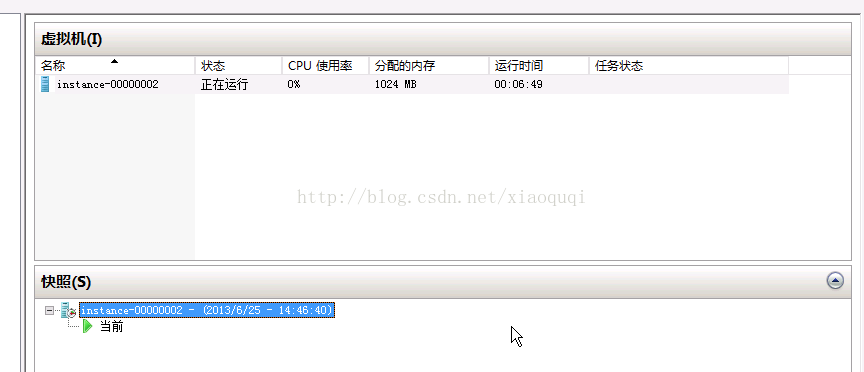
快照创建结束后,并不会保存在Hyper-V中,OpenStack会拿回到Glance中保存。
其他测试尚未进一步测试。
七、遗留问题
1、控制台
2、挂卷测试
3、网络问题
Recommend
About Joyk
Aggregate valuable and interesting links.
Joyk means Joy of geeK