

Zero Crossings And You
source link: http://www.wooji-juice.com/blog/zero-crossings-and-you.html
Go to the source link to view the article. You can view the picture content, updated content and better typesetting reading experience. If the link is broken, please click the button below to view the snapshot at that time.
Welcome to 2020! This post is going to cover a common audio editing issue, something called “Zero Crossings”. It’s not specific to any one app — it can be useful background info for anyone who edits audio — but I’ll also mention how it can be relevant when working with Wooji Juice apps like Ferrite Recording Studio or Hokusai Audio Editor
What Is A Zero Crossing?
When you’re editing audio, it’s typically represented by a waveform, which represents the movement of the microphone/speaker over time:
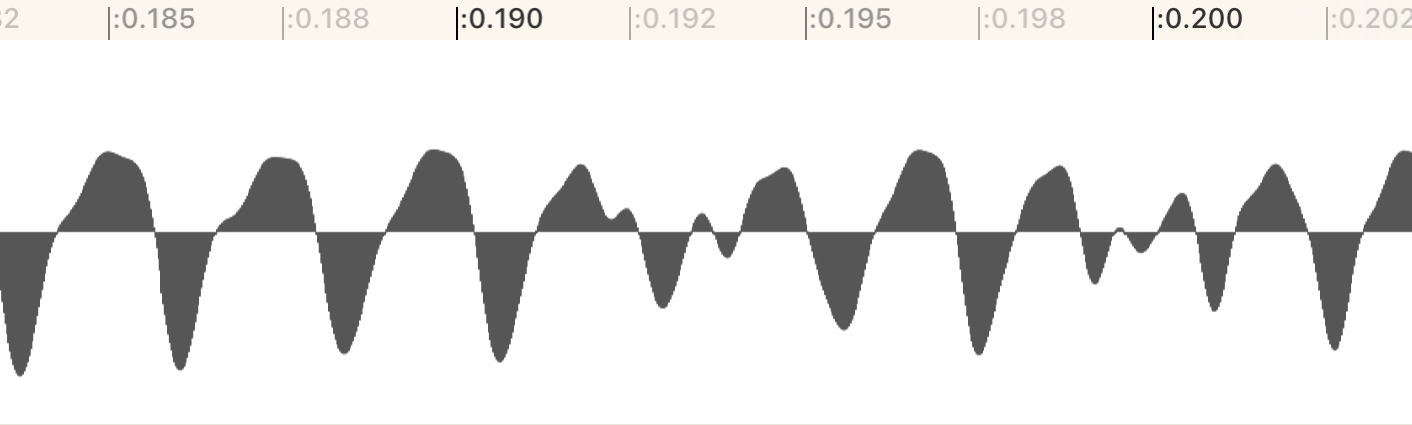
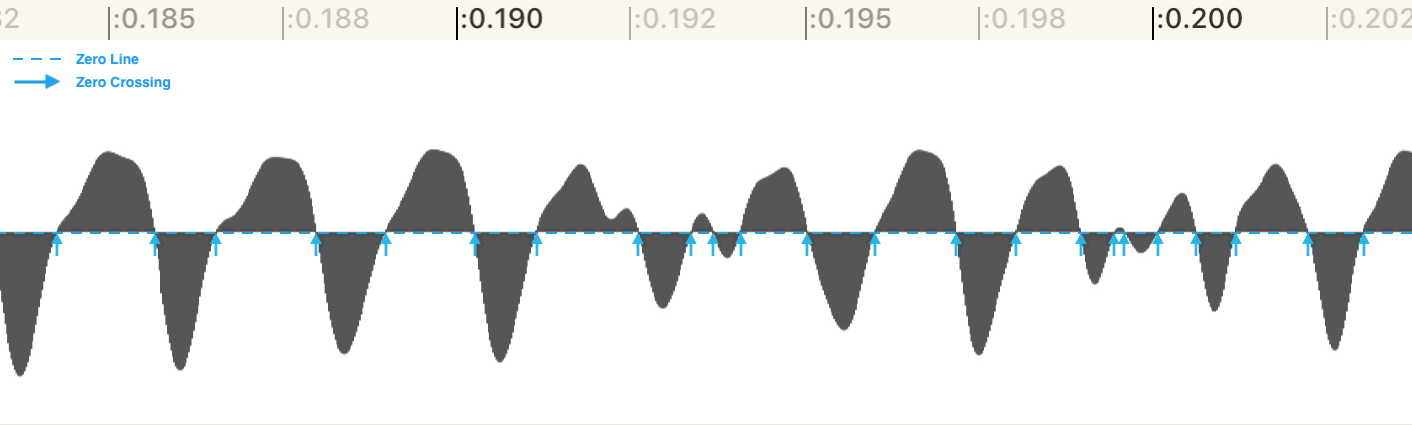
The line down the centre, the position where the mic/speaker rests during silence, is the zero line.
A Zero Crossing isn’t particularly mysterious: it’s nothing more than a place where the waveform crosses over that line:
Why Do They Matter?
They have various uses, but the most common reason to care about zero crossings, and the one we’re going to look at today, is their role in editing audio cleanly.
When you cut two pieces of audio together, you need to ensure that the pieces fit together seamlessly. Decisions about what “sounds right” are largely aesthetic choices, they’re up to you — but from a technical standpoint, you want the waveform to match at the join.
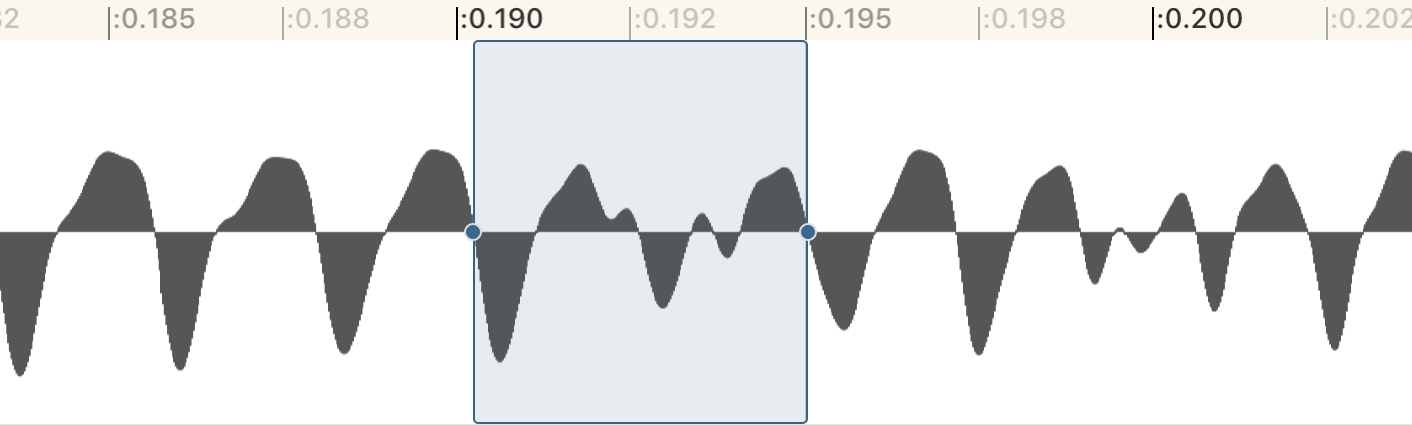
Here’s an example where we’ve selected a piece of audio, and are going to delete it:
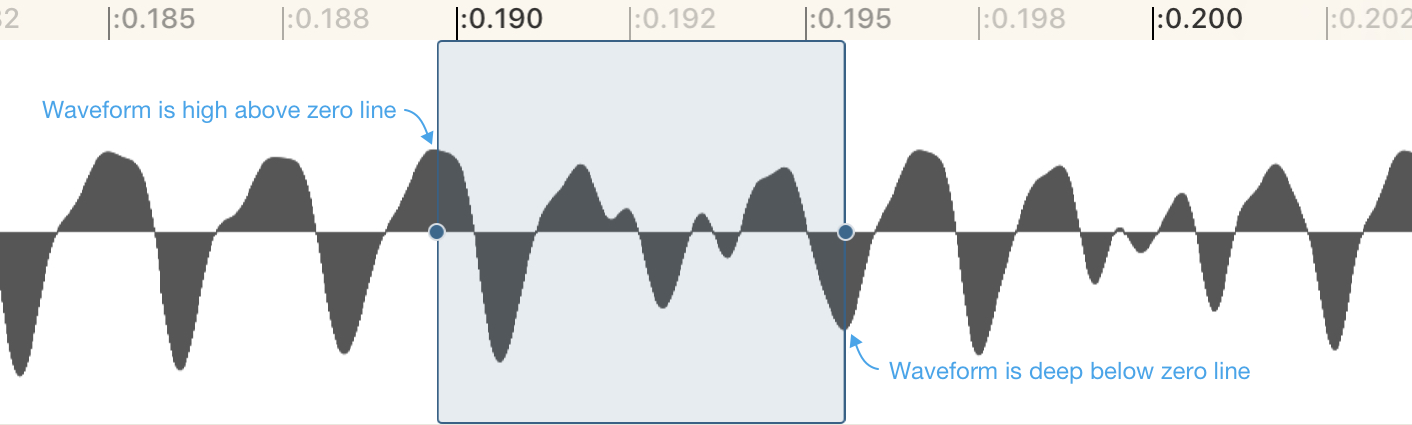
When we do, the two pieces on either side will get pushed together. We want those two sides to match up. But they won’t:
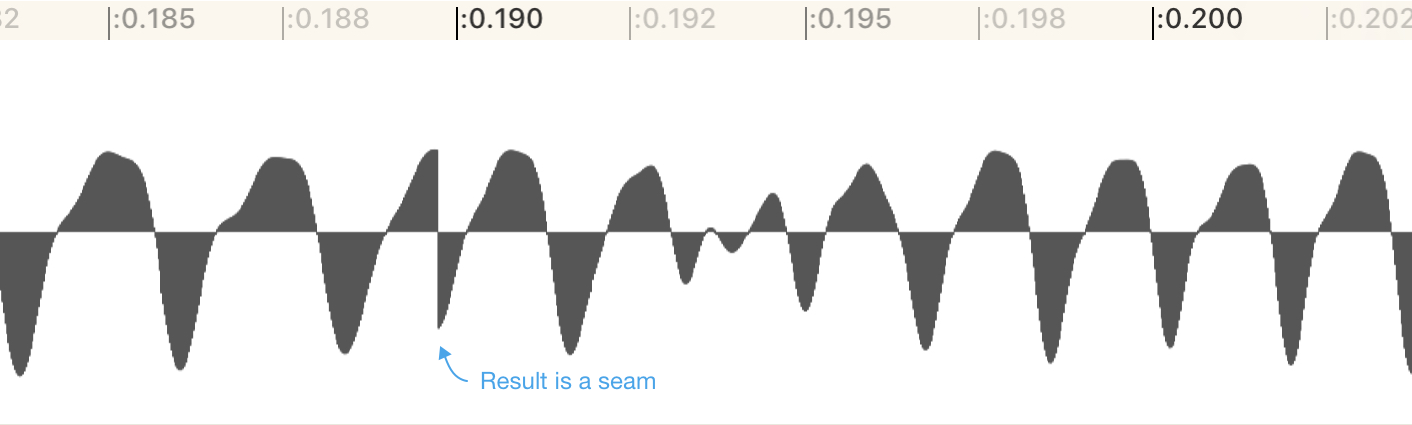
Instead, we get this sharp awkward-looking line (or “seam”) where they join — and if we played this back, we would get an unpleasant click, pop or glitch as the Play Head passed over the seam.
There are various techniques for keeping edits clean, but a very common one is to always edit on a zero crossing, like so:
This time, because the selection’s start and end are both on zero crossings, after deleting it, the waveform fits together seamlessly:
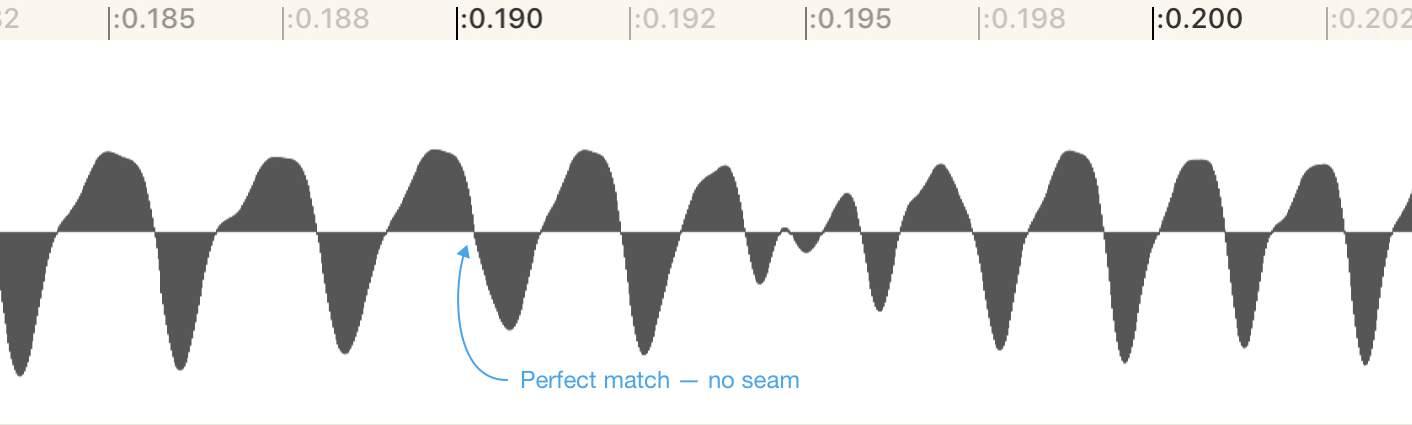
Zero crossings are great for this, because they’re always in a known place (the centre line) and happen so frequently (hundreds, if not thousands, of times a second).
But, it can be time-consuming to have to painstakingly zoom in and make these kinds of tiny adjustments to ensure the edit starts and ends in exactly the right places. So Ferrite and Hokusai both have tools to help. These two apps are designed for very different purposes, so they each take a different approach.
Ferrite: Applying Tiny Fades
Ferrite’s approach is simple: it applies extremely tiny fades to every clip of audio, either fading in at the start, fading out at the end, or crossfading between two clips. These fades are so short, they are undetectable to the human ear, but they ensure glitch-free edits.
You could think of it a bit like creating a convenient zero crossing wherever you need one: by fading in from/out to silence (which, remember, is the zero line), you guarantee the start/end is always on a zero. So the pieces always match, without you having to do anything.
This approach is very easy to work with, and for the kinds of editing Ferrite is designed for — spoken word podcasting, journalism, audiobook narration, etc — it’s perfect. But it isn’t appropriate for some tasks, which is where Hokusai comes in.
Hokusai: Snapping to Zero Crossings
Hokusai is designed for making highly-detailed edits of small pieces of audio where you zoom right in, mess around with waveforms, and every sample counts. As such, it doesn’t want to make any changes to your waveform that you didn’t ask for.
If you’re editing a single-cycle waveform for use in a synthesiser, or extracting a drum hit sample, you don’t want the app to mess with your waveform at all — it could unintentionally change the synthesiser waveshape, or mess up the “transients” at the start of the drum hit, for example.
So instead, Hokusai has a Snap to Zero Crossings feature. When enabled, any time you make a selection, Hokusai will automatically find the closest zero crossings, and adjust the selection to line up with them.
Since zero crossings occur so frequently, this is usually a very minor adjustment — often too small to notice — and it ensures a clean edit.
With stereo sound, however, a larger adjustment might be necessary. Hokusai needs to find a spot where a zero crossing occurs on both left and right channels simultaneously, otherwise, even if the edit is clean on one channel, it might have a “seam” on the other, and sound bad.
For this reason, in the settings, you can choose to only enable Snap to Zero Crossings for mono audio. When working with stereo audio, you’d then need to take care of creating clean edits yourself.
One way to do this, is to manually do the same thing Ferrite does automatically: apply tiny fades. You can use the Fade In and Fade Out commands to fade before/after each edit point, to ensure they match up.
Of course, this takes a little longer — so if you find yourself doing this a lot, it may be a clue that Ferrite is the more appropriate tool for your particular job!
Recommend
About Joyk
Aggregate valuable and interesting links.
Joyk means Joy of geeK