

Audio Clipping
source link: http://www.wooji-juice.com/blog/audio-clipping.html
Go to the source link to view the article. You can view the picture content, updated content and better typesetting reading experience. If the link is broken, please click the button below to view the snapshot at that time.
Audio Clipping
(And Normalisation And More)
This is another post in which we discuss a common issue that’s useful to know when working with audio (in any app, but also showing how it can be relevant to Wooji Juice apps like Ferrite Recording Studio or Hokusai Audio Editor).
Today, we’ll be discussing “clipping”. As we’ve discussed previously, audio is represented by a waveform that represents the movement of the mic/speakers over time:
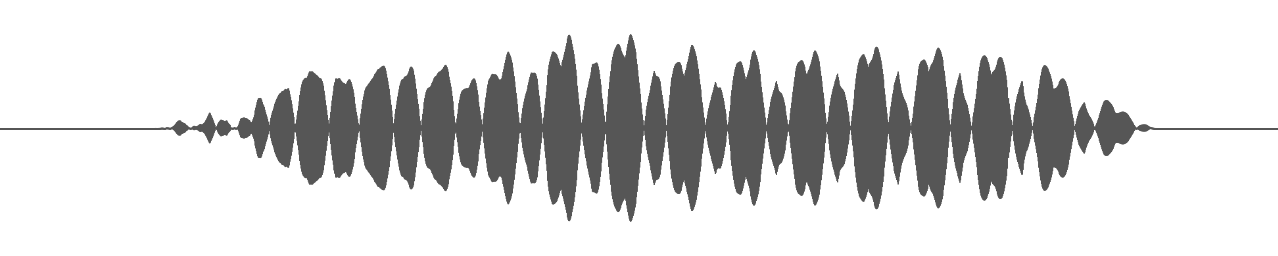
When the audio is silent, you just get a line down the centre. When there is noise, waves start to appear, reaching out towards the edges of the track. The louder the sound, the closer it gets to the edges. The edges represent the maximum possible loudness that the hardware is capable of — the furthest distance the moving part inside a microphone or speaker can move from its centre line without breaking. This means the loudest a wave can be is when it just meets the track edge:

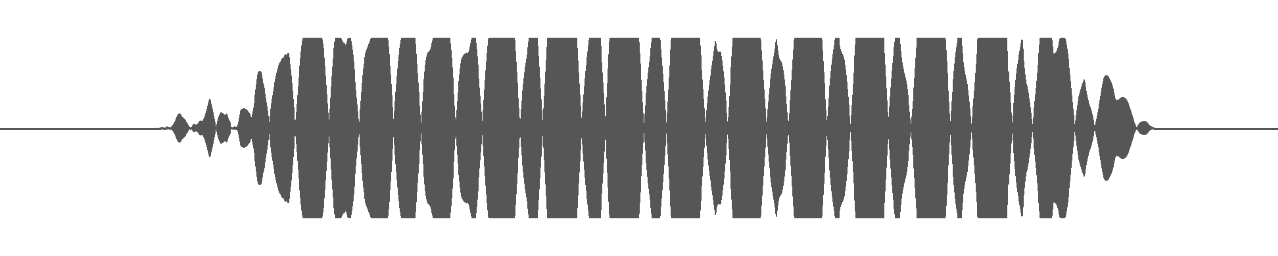
One audio editing tool you may have heard of is normalisation. When you normalise audio, that means the volume gets adjusted so that the very loudest part of the audio just reaches the edge, and no further — as in the example we just saw.
What happens if you try to turn it up even further?
Well, there’s nowhere for it to go, so the tips of the waveform just get cut straight off — like they were clipped off with nail-clippers:

That’s what clipping is. It’s bad because a) some of the audio information has been lost off the edge, and b) it changes the shape of the waveform, in a way that typically sounds pretty unpleasant.
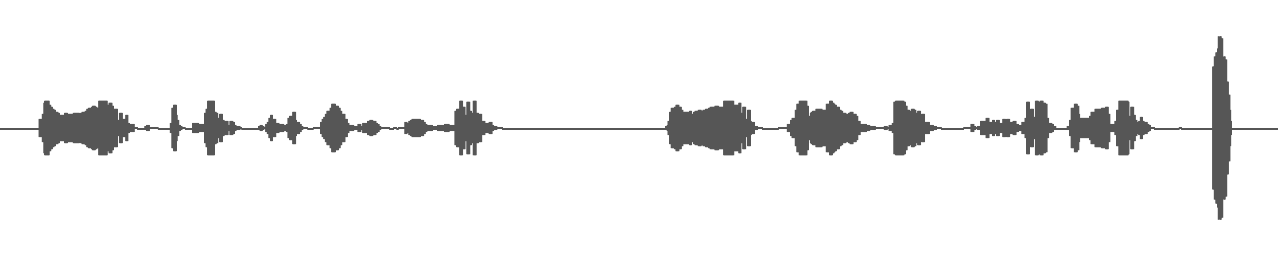
In some audio editors, this damage is “permanent” — if you try to turn the volume back down again, they turn down the clipped version. So you still have bad-sounding audio, just quieter:
But in our Hokusai and Ferrite apps, this is not the case. Behind the scenes, they both preserve the audio, so that when you turn the volume back down, the original shape is restored:
Both apps also have tools to help detect and avoid clipping. For example, both Hokusai and Ferrite can perform normalisation. Sometimes you need something more powerful than normalisation though, so they both have other tools too.
The Limits of Normalisation
Remember, normalisation means finding the loudest part of the audio, then adjusting the volume so that this part just reaches the edge of the track. In other words, it sets the audio to the maximum level that won’t cause clipping.
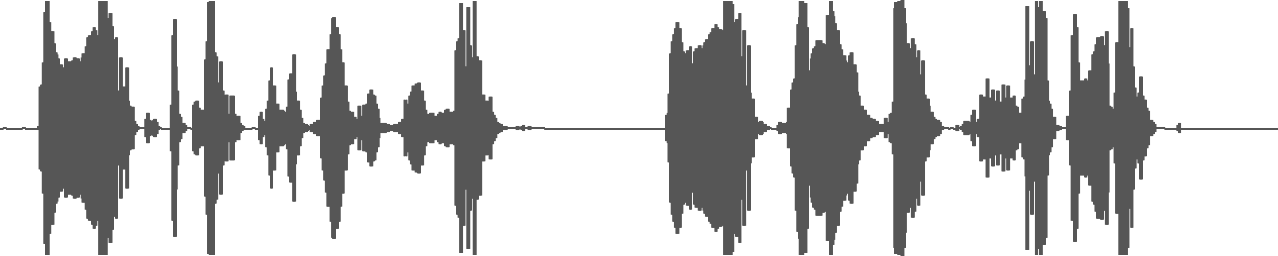
This can be all you need, but consider the following recording:
This recording was fairly quiet, but at one point, there was a loud noise — perhaps the microphone got bumped, making a loud thump.
Normalisation will adjust the volume to ensure no part of the audio clips — that includes the thump, so afterwards it looks like this:

Normalisation has once more turned the volume up as far as it can go, without causing clipping. But the majority of the audio is still quieter than we’d like, because the thump is so much louder than the rest, so it hits the track edge sooner.
Of course, you probably don’t want the thump, but the app doesn’t know that: to the app, it’s all just audio. Maybe you were recording some drums, and wanted a loud thump, it has no idea.
In a case like this, the best solution is usually to edit out the thump, or whatever else is getting in the way, and then re-normalise the rest:
The app is now free to turn up the volume of the rest of the audio much further without causing clipping.
But in other situations, you want to perform more sophisticated changes in volume — raising and lowering it over time. Both Hokusai and Ferrite have tools that can help.
Clipping in Ferrite
Ferrite automatically normalises all audio imported into a project. This means that, even at maximum track volume, all the audio on the track is guaranteed to play back without clipping.
However, that only accounts for one track: if you have audio playing on multiple tracks, that audio is added together. It’s possible for the combination of tracks to clip, once they’re added together, if both are at maximum volume. So if, for example, you have a podcast and two of the hosts are shouting over the top of each other on different tracks, the Final Mix may clip.
If you’re not sure if this is happening or not, keep an eye on the volume level meters in the Final Mix bar during playback. If the audio clips, the meters will glow red for a short while.
There are a number of ways to avoid this: you can turn down the Volume dial on either of the tracks, or the Final Mix itself, to give yourself some “headroom”. Or you can use Automation to turn the volume down just at the points where clipping occurs (again, either per-track or on the Final Mix). If you’re feeling fancy, you can use dynamics tools (such as a Compressor) to auto-adjust the volume (but then again, if you’re comfortable using those, you probably didn’t need this article…).
But perhaps the easiest way is to enable Auto Levelling on the Final Mix, which automatically prevents clipping in the exported project. It goes through and turns the volume up and down as necessary to keep the audio clear and loud, without clipping.
One final note on Ferrite: There’s an option in the Ferrite Settings to allow the volume to go over the maximum. This is off by default, so that no single track can clip. But if you switch it on, the scale of the track volume dials is changed so that they can amplify the audio above the clipping point. If you do this, it will of course cause distortion, unless you edit those parts out, use automation to avoid it, etc — so use this setting with care! With this setting enabled, the “danger area” on the dial is highlighted to warn you.
Clipping in Hokusai
Because Hokusai is designed for very different uses than Ferrite, it doesn’t normalise your audio automatically to avoid clipping when you import or edit it — the general rule for how Hokusai works is to not adjust your audio, except when you ask it to.
But if you record inside the app, you can ask it to normalise the recording for you when you finish it (just turn on the Normalise Recording switch in the recording panel).
You can also normalise any audio in Hokusai — recorded, imported or edited — by selecting it, picking “More…” from the selection menu, and picking Normalise from the list of effects. Hokusai has other tools that can help too, such as the Peak Limiter and Vocal Level Smoother, or even varying the Gain tool by hand.
You can tell if a track in Hokusai clips, either by playing it back and seeing if the level meters glow red (as in Ferrite), or just by looking at the waveform itself: if it “goes off the edge” of the track, you’ll be able to see it.
Like Ferrite, the tracks in Hokusai are mixed together on playback, so if you have multiple tracks that are all close to clipping at the same time, once added together, the mix might still clip.
This leads to the one situation when Hokusai will decide to normalise your audio of its own accord: when you export the audio, and it would clip.
If your audio doesn’t clip, Hokusai won’t normalise it, and so it will be exported exactly as you created it. It’s only if your audio will clip, that Hokusai detects this in advance, and exports normalised audio.
Why does Hokusai break the “don’t adjust the audio automatically” rule here? Because with most audio file formats, once you export audio with clipping in it, you can’t fix it. The damage has already been done, and if you turn the volume back down to avoid clipping, you’ll just end up with quieter (but still clipped) audio, as before:
So in this situation Hokusai will step in to rescue the audio, because the alternative is a distorted/damaged file.
(There are some audio formats that can store audio that goes over the maximum without clipping — for example, 32-bit Floating-Point Wave, which is what Hokusai uses internally to store your audio. If you export in this format, Hokusai won’t normalise your audio — but any app you import it into, will need to fix it somehow, or else play it back with clipping distortion.)
You can avoid this by either turning the audio back down yourself (“by hand”, if you like), or by applying other tools from the Amplitude section of the effects list.
If the problem is due to combining tracks together, you can use the Mix Down Tracks command to combine the tracks, check for clipping, and apply fixes if necessary before exporting.
Oh, and if you’re actively trying to create distortion for special-effects purposes? You might like to try applying one of the distortion effects instead!
Recommend
About Joyk
Aggregate valuable and interesting links.
Joyk means Joy of geeK