

Firebase Push Notifications in Flutter
source link: https://www.coderzheaven.com/2020/01/14/firebase-push-notifications-in-flutter/
Go to the source link to view the article. You can view the picture content, updated content and better typesetting reading experience. If the link is broken, please click the button below to view the snapshot at that time.

Firebase Push Notifications in Flutter
This article will show how to send push notifications in Flutter using Firebase.
We will start with Android.
Add Dependency
For sending push notifications we use a plugin called firebase_messaging…
https://pub.dev/packages/firebase_messaging
Open your pubspec.yaml file and add this dependency
dependencies:firebase_messaging: ^6.0.9Firebase Account
Make sure you have a firebase account before proceeding.
Once you have created your account, proceed by creating a new project.
Open your app-level build.gradle inside your project and then copy your package name.
Register an Android App
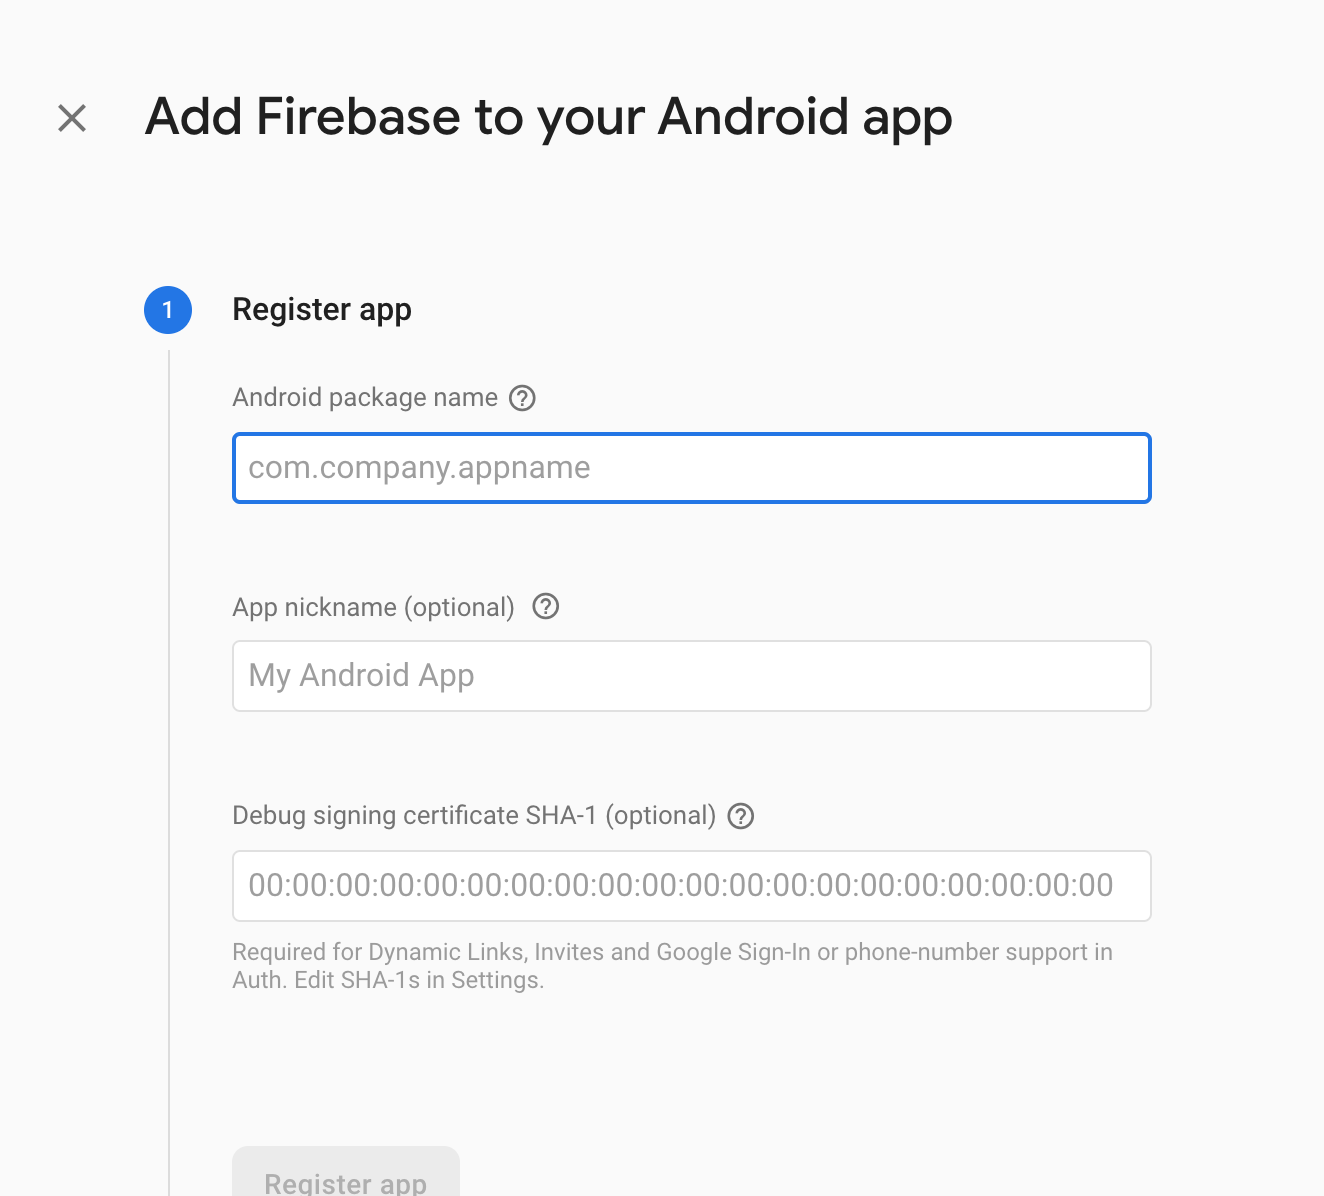
Firebase Register New Android App
In the next step, you should be able to download the google-services.json file.
After downloading the file, make sure to copy it inside the app/ folder of your Android project.
If you have many flavors, make sure you copy to the corresponding app directory.
Android Manifest
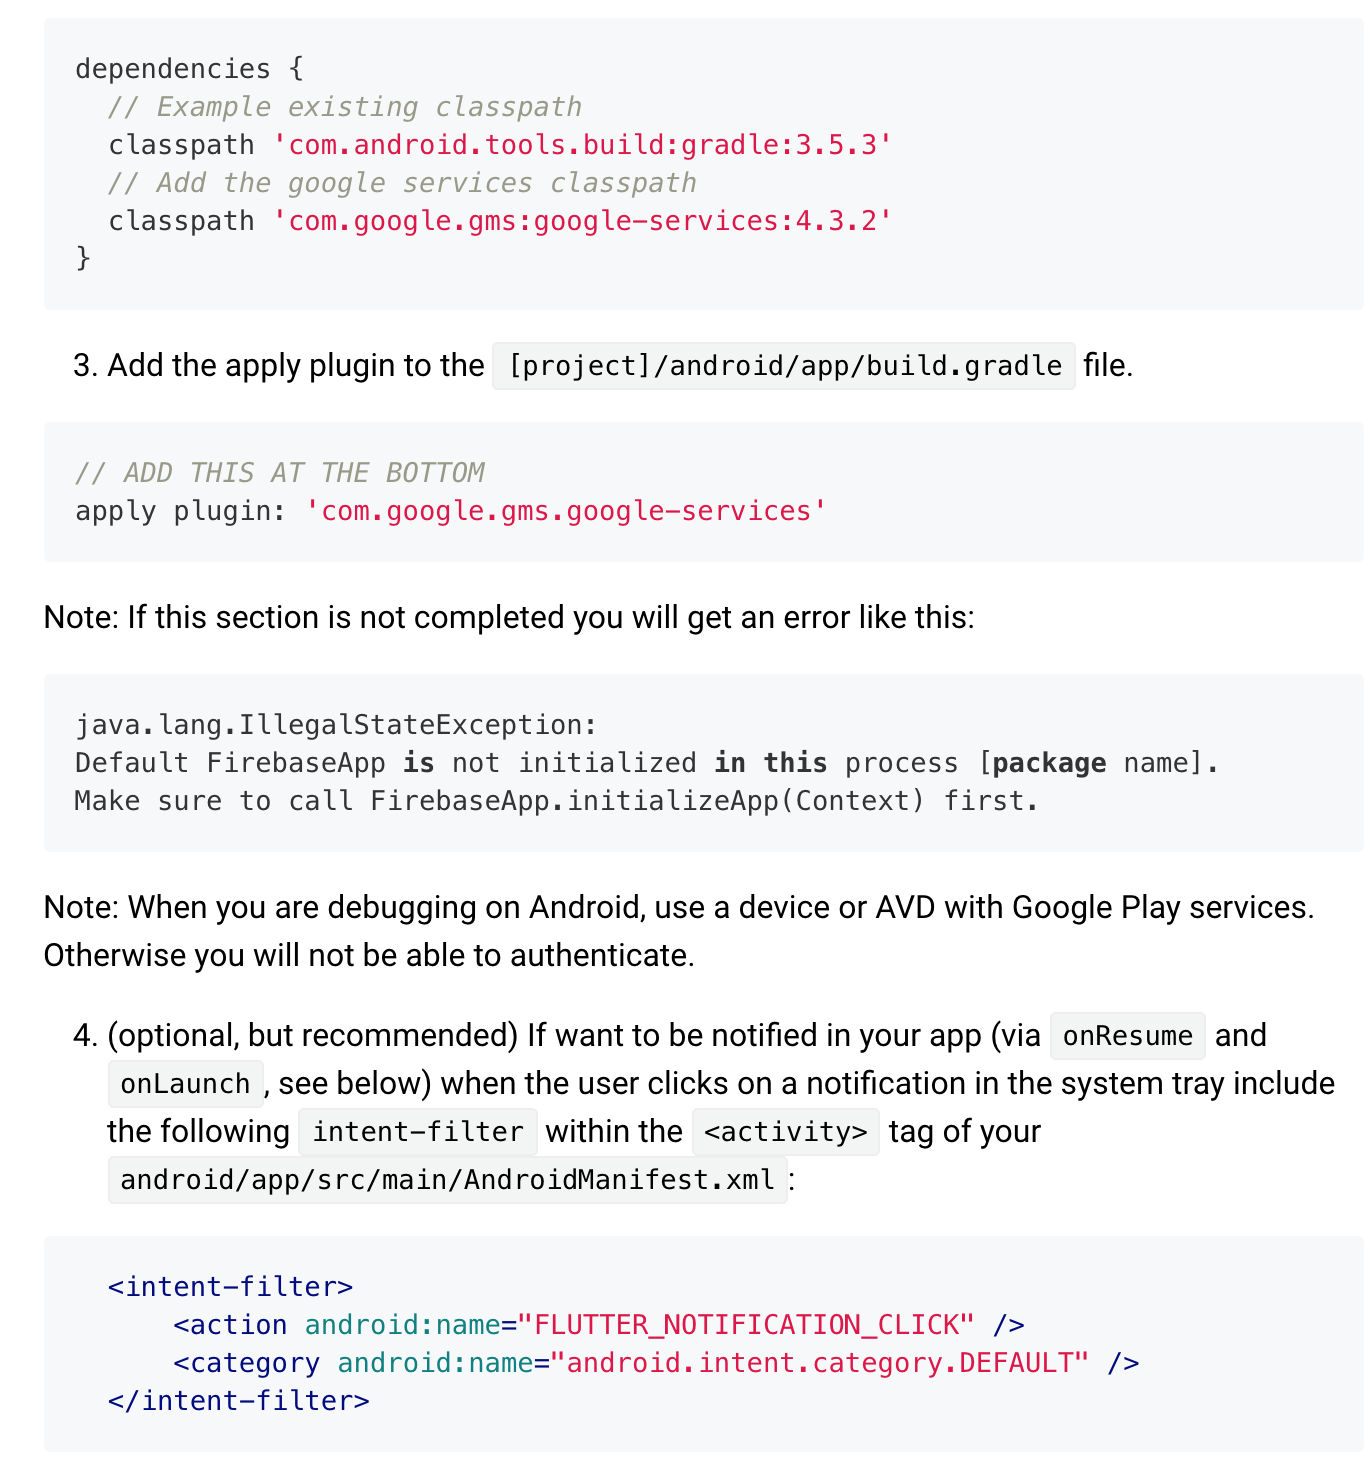
Once you have done the above, Click next on the register app setup and Just run the app and you should be connected to the firebase.
Firebase Set up is complete now. Great.
Similarly for iOS, you will get a GoogleService-Info.plist
Now follow the below steps to complete the set up. You will need an Apple Developer account for this.
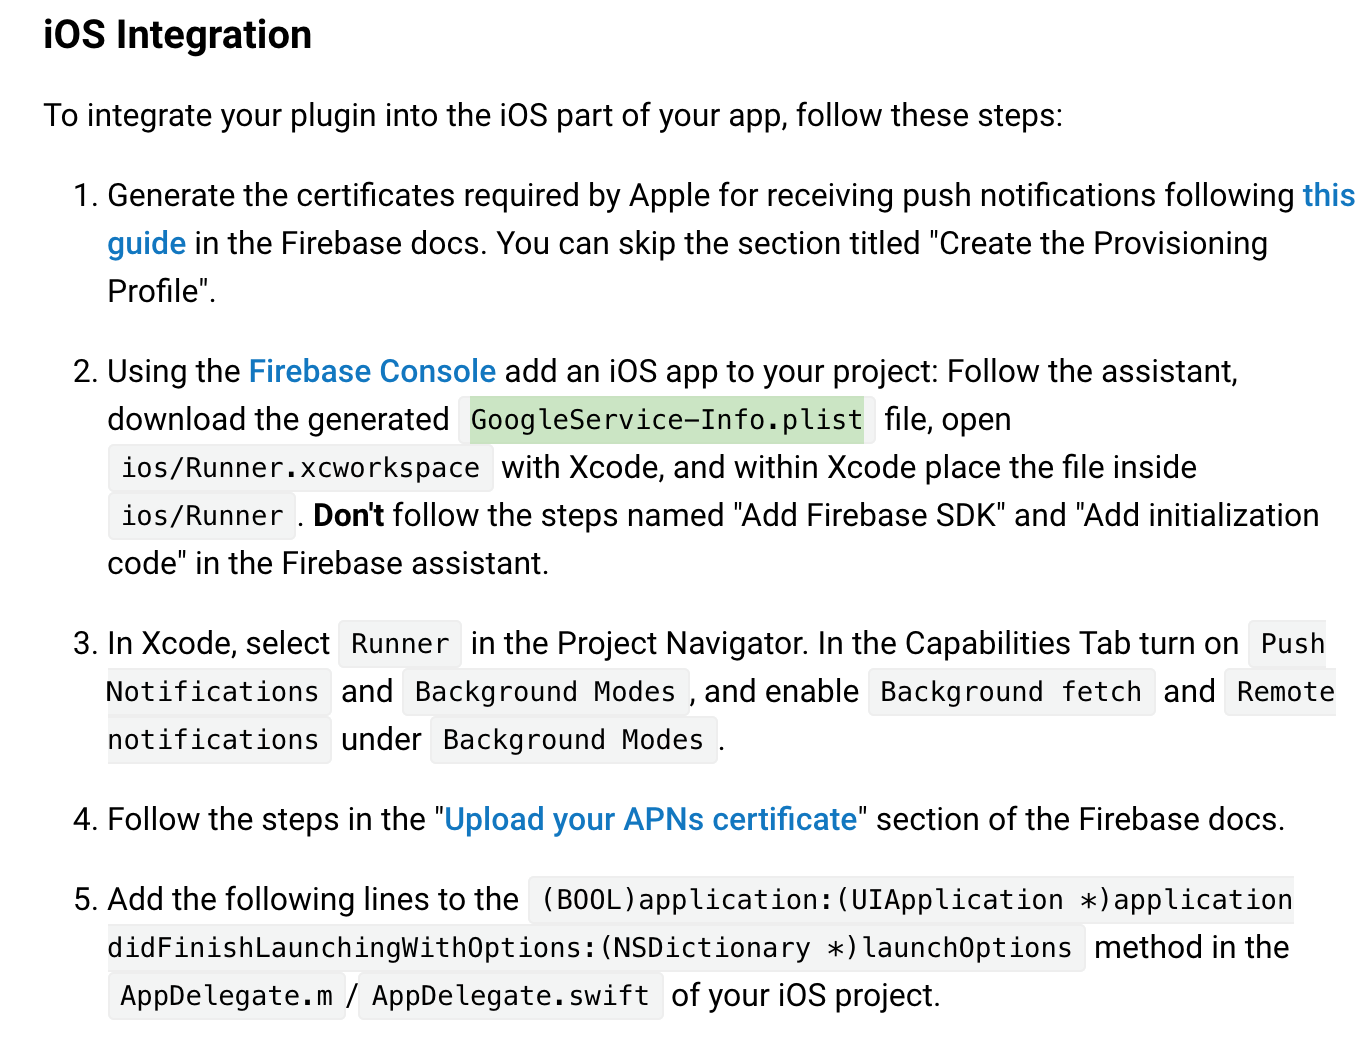
Firebase iOS Set up
Initialization
final FirebaseMessaging _firebaseMessaging = FirebaseMessaging();To send a message directly to a device, it should be uniquely identified by a Device ID, To get the Device Token, call the below method available in the firebase messaging library.
_getToken() {_firebaseMessaging.getToken().then((token) {print("Device Token: $token");});}This will result in a Unique long String which will identify the device you are running on.
Configure the Firebase Callbacks
List<Message> messagesList;_configureFirebaseListeners() {_firebaseMessaging.configure(onMessage: (Map<String, dynamic> message) async {print('onMessage: $message');_setMessage(message);},onLaunch: (Map<String, dynamic> message) async {print('onLaunch: $message');_setMessage(message);},onResume: (Map<String, dynamic> message) async {print('onResume: $message');_setMessage(message);},);_firebaseMessaging.requestNotificationPermissions(const IosNotificationSettings(sound: true, badge: true, alert: true),);}_setMessage(Map<String, dynamic> message) {final notification = message['notification'];final data = message['data'];final String title = notification['title'];final String body = notification['body'];String mMessage = data['message'];print("Title: $title, body: $body, message: $mMessage");setState(() {Message msg = Message(title, body, mMessage);messagesList.add(msg);});}@overrideWidget build(BuildContext context) {return Scaffold(appBar: AppBar(title: Text(widget.title),),body: ListView.builder(itemCount: null == messagesList ? 0 : messagesList.length,itemBuilder: (BuildContext context, int index) {return Card(child: Padding(padding: EdgeInsets.all(10.0),child: Text(messagesList[index].message,style: TextStyle(fontSize: 16.0,color: Colors.black,),),),);},),);}class Message {String title;String body;String message;Message(title, body, message) {this.title = title;this.body = body;this.message = message;}}Here we have a simple class to hold the message coming from firebase console.
onMessage will be fired when the app is in the Foreground State, onLaunch will be fired when the app is killed and no longer running, onResume will be called when the app is running the background.
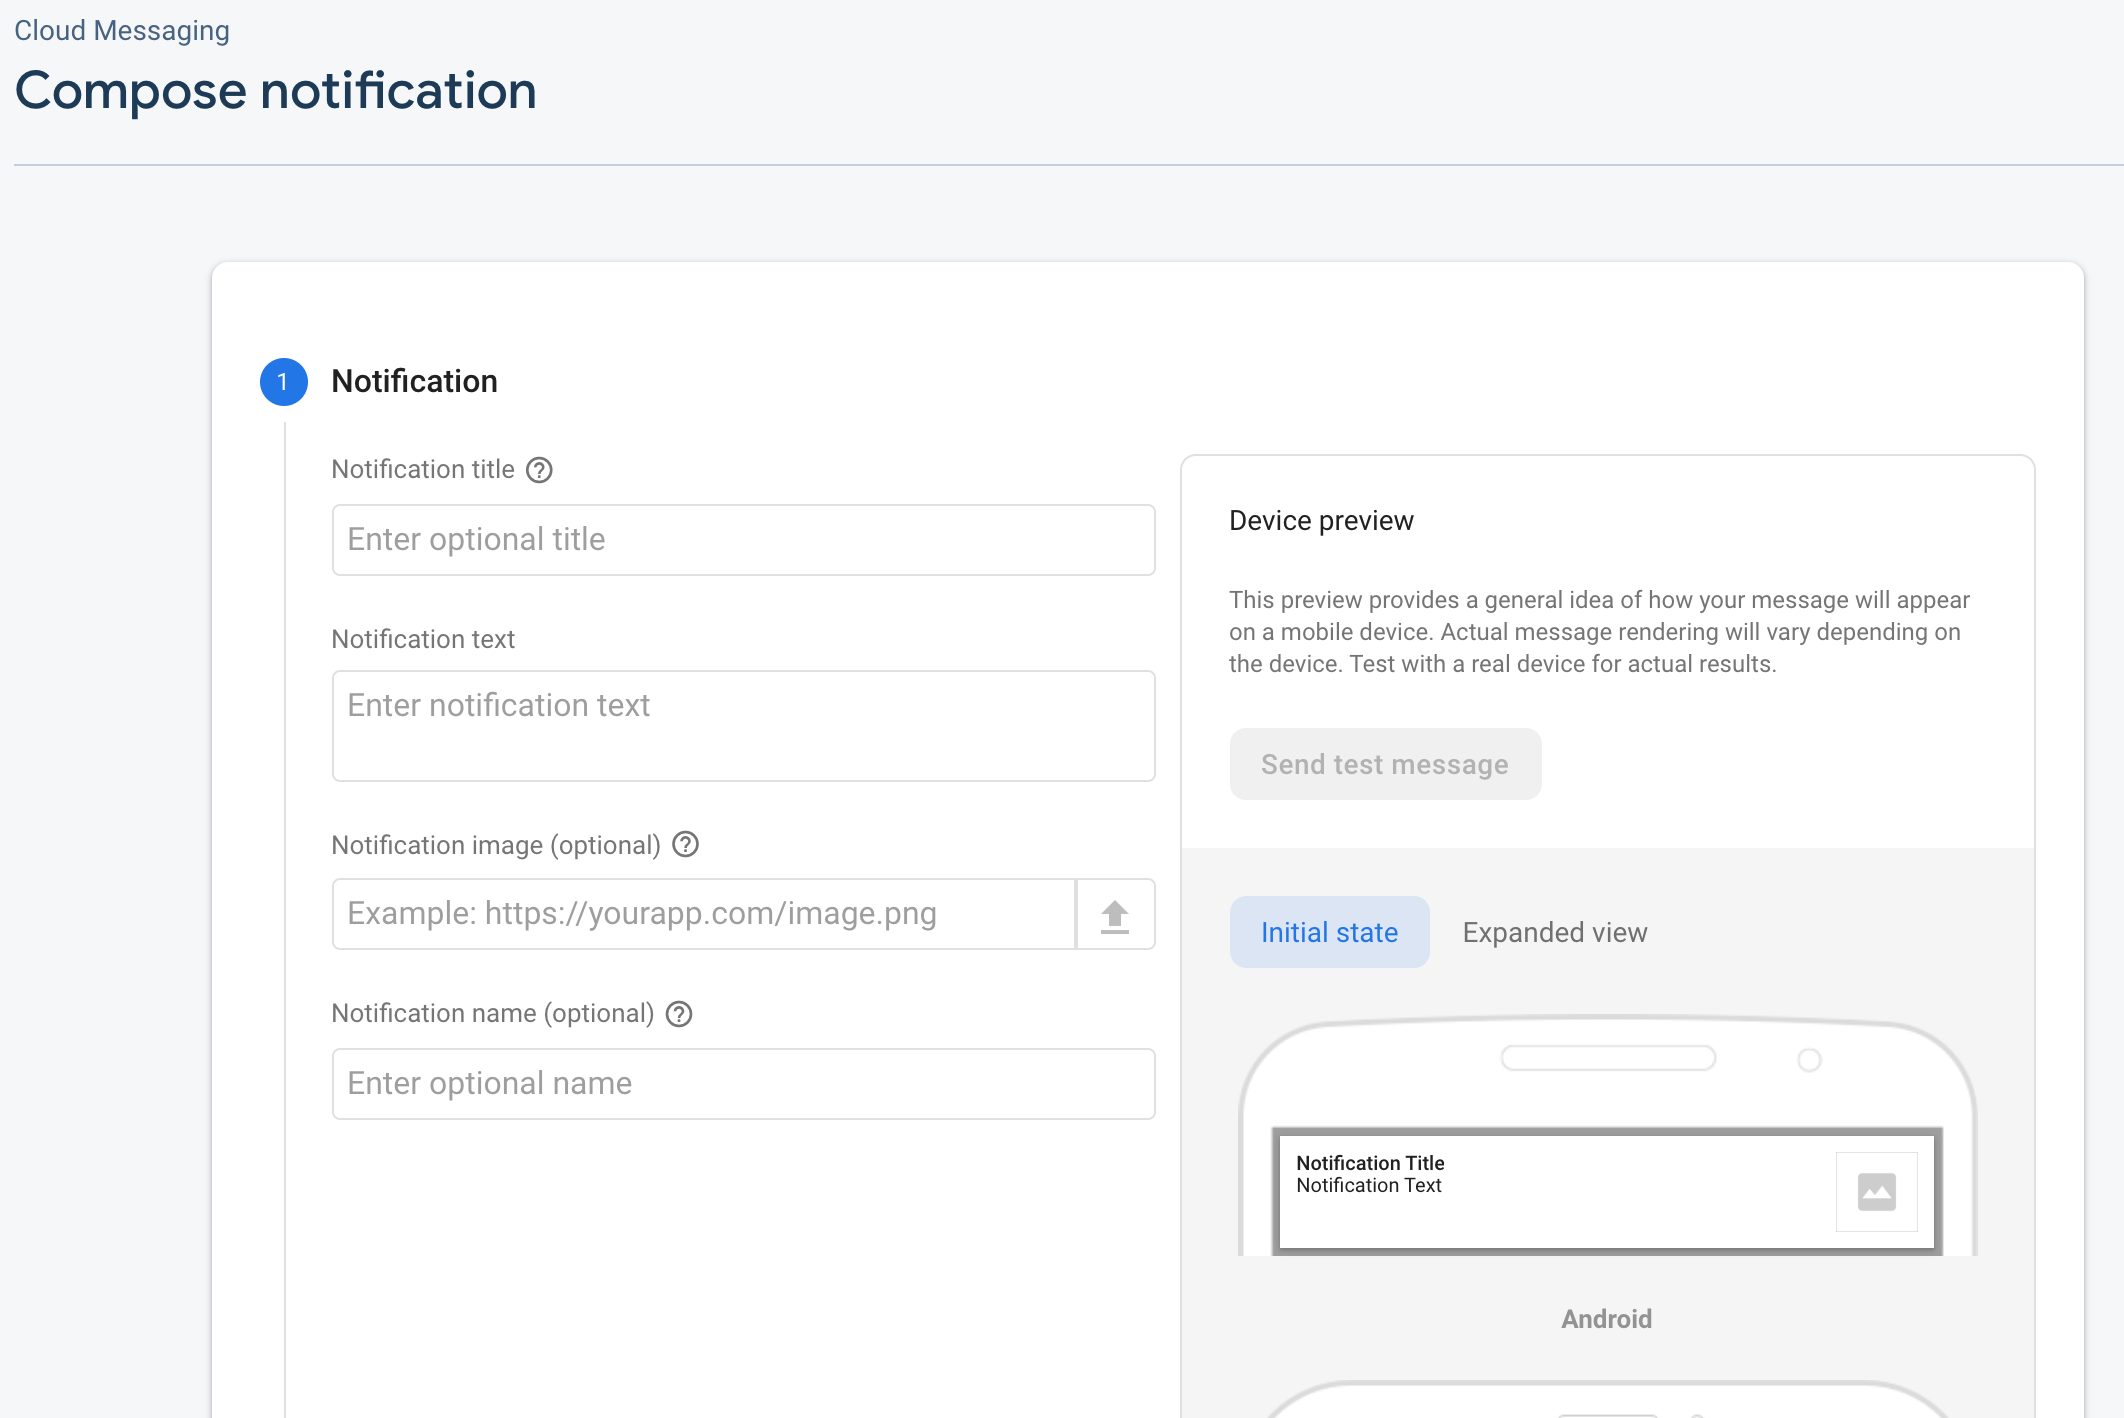
Fire a message
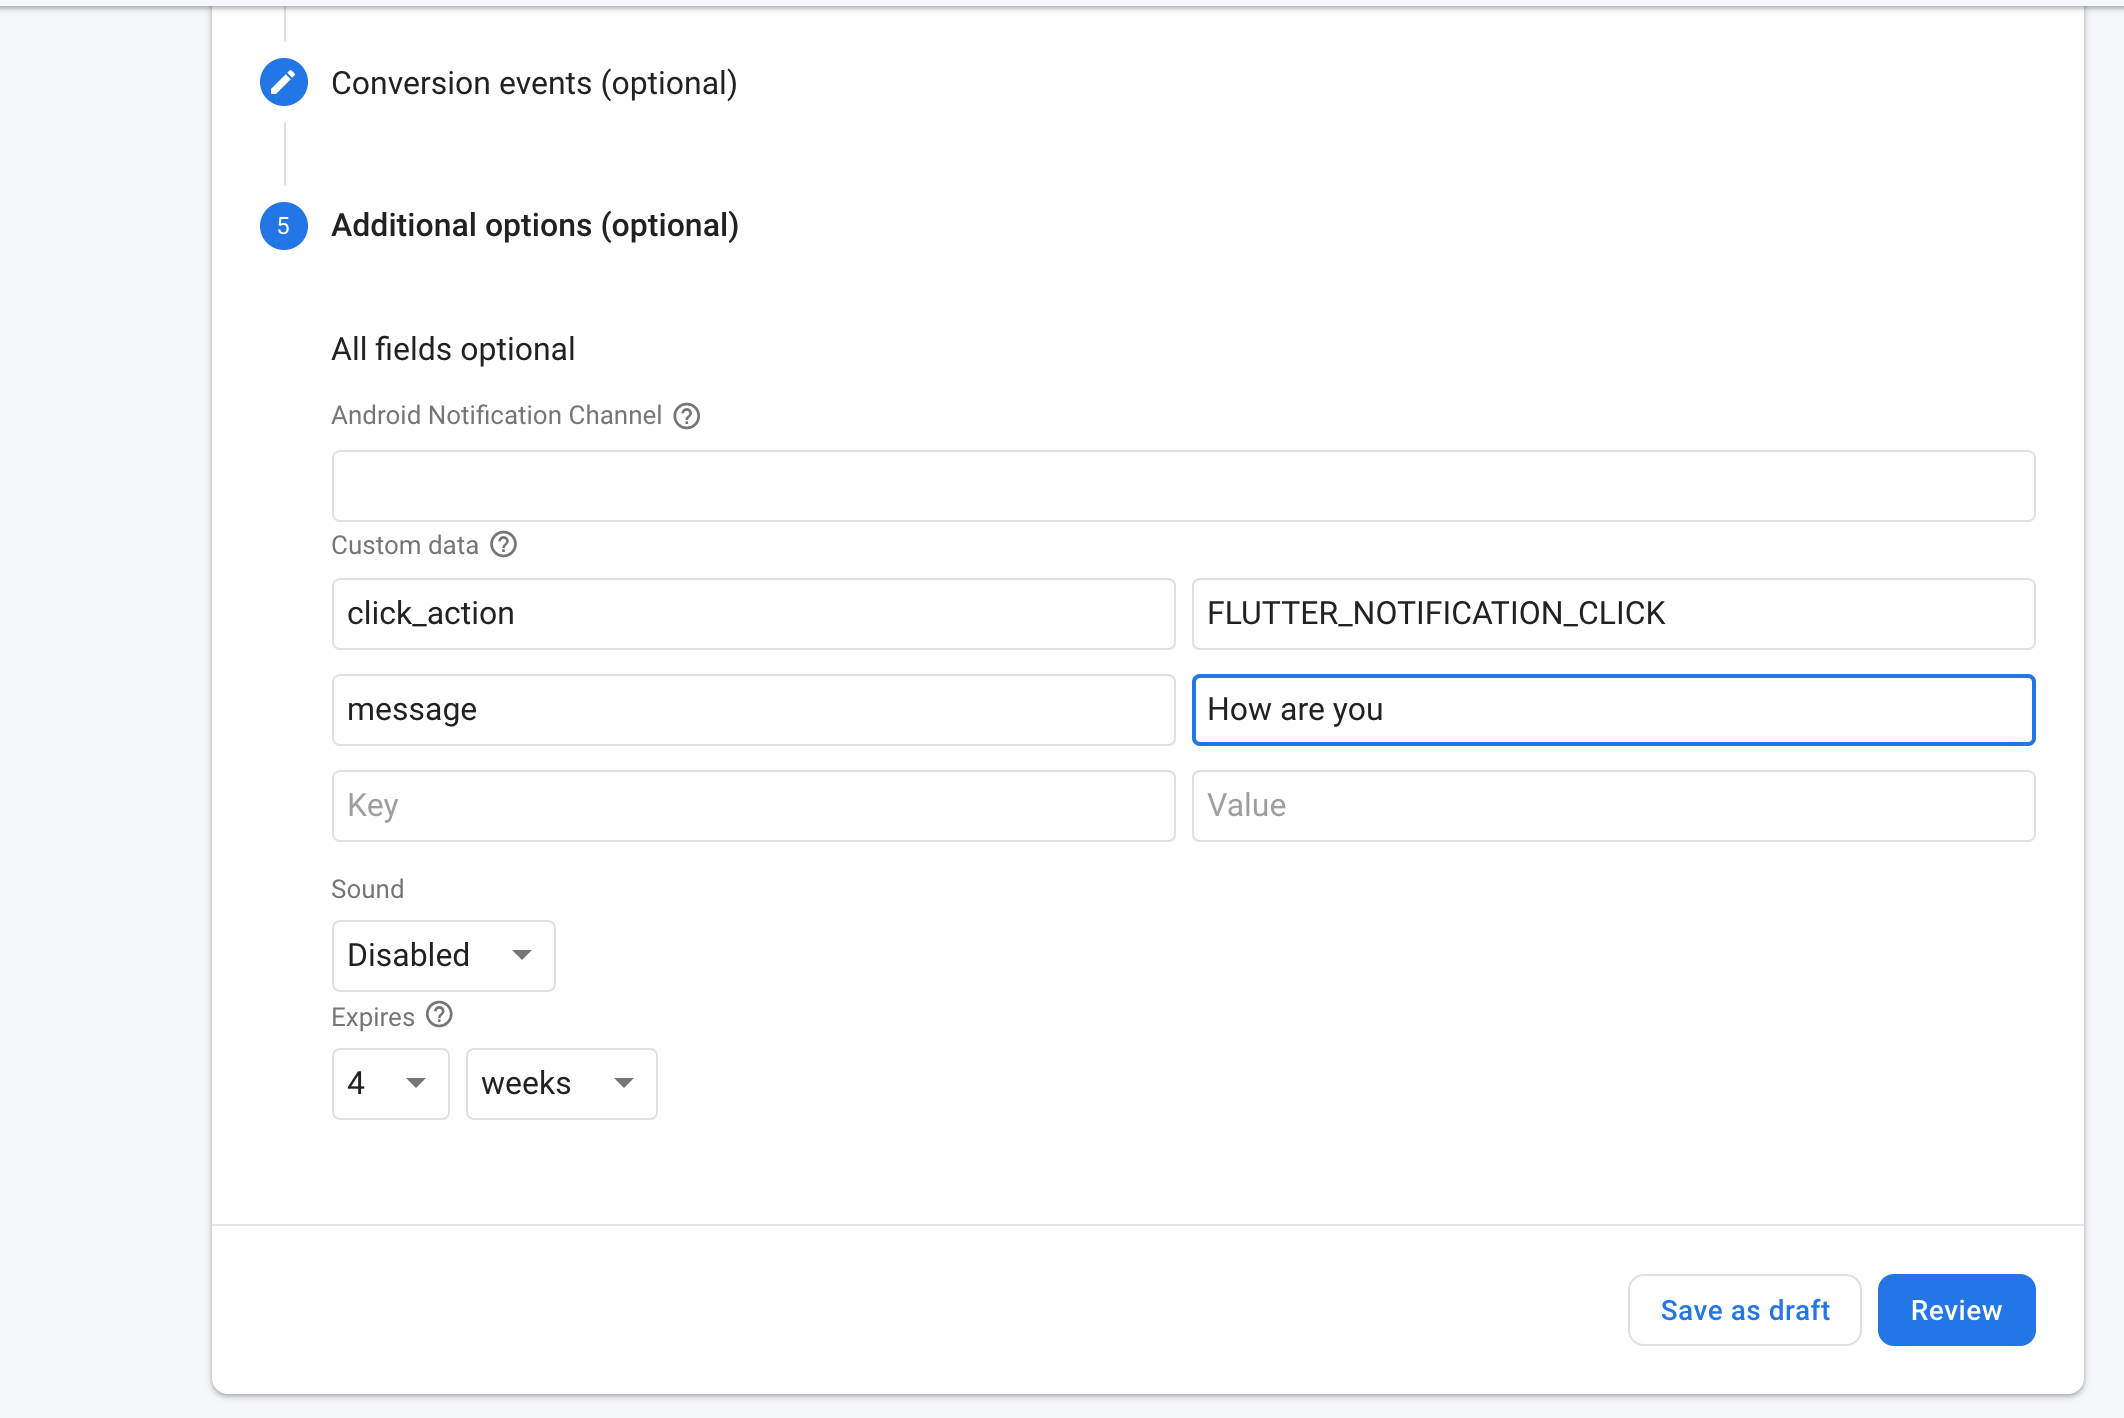
To push a message, you can directly login to the firebase console, Go to ‘Grow’/CloudMessaging section and enter your message and publish it.
Firebase Send Message
Firebase Send Message
Now you should be able to receive messages to device.
Note; It is really important to add ‘click_action’ in the data section with value ‘FLUTTER_NOTIFICATION_CLICK’, unless you wont be able to trigger the callback when the notification comes to system Tray while the app is in background/Killed state.
Cloud Functions
Go to ‘Develop‘ Section in the firebase Dashboard and then to Functions.
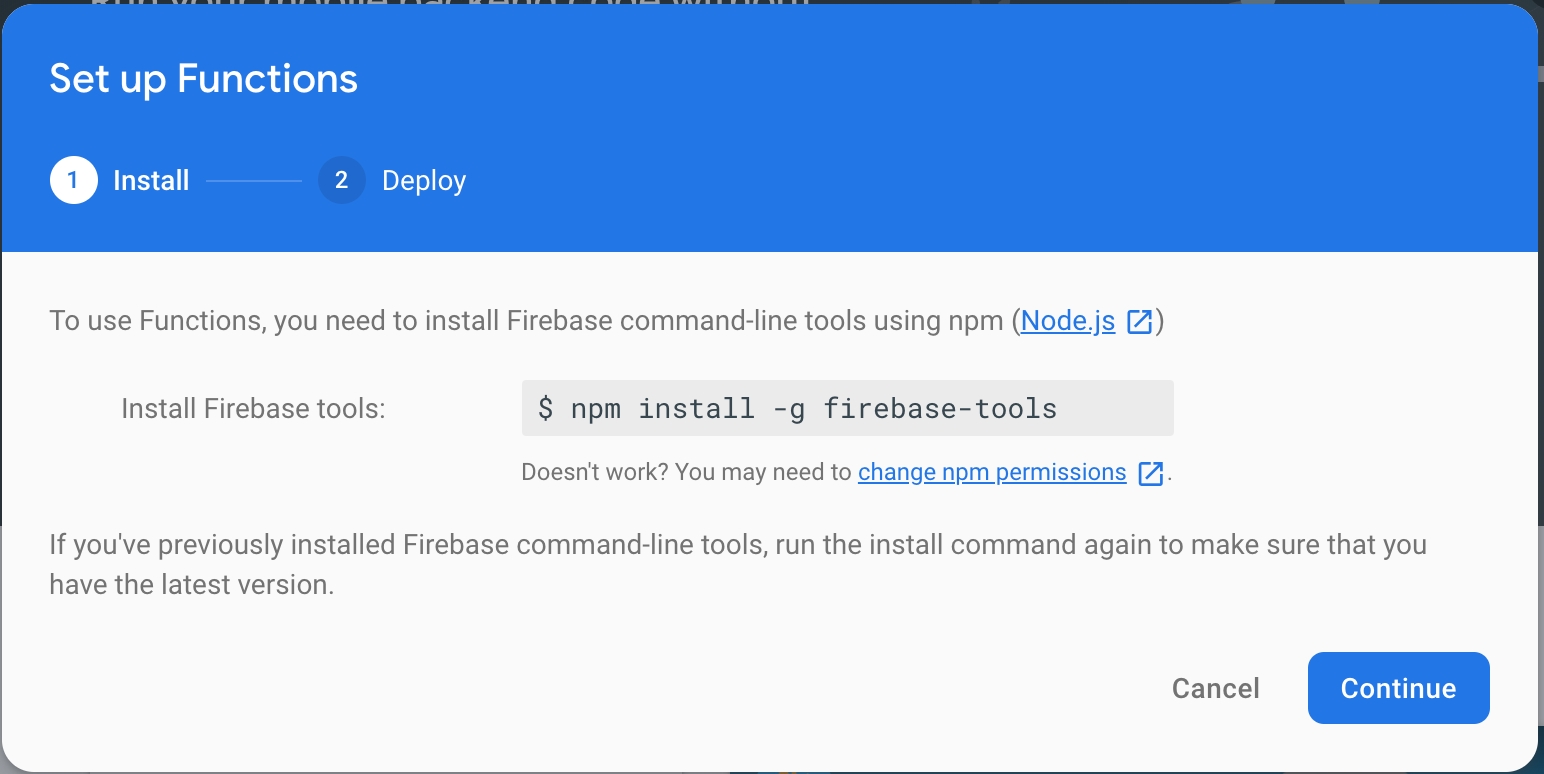
Firebase Set Up Cloud Functions
Note: You should have node installed in your system prior to executing this command.
Next command
$ firebase loginThis will open up the browser and you have to login to your firebase account.
Once logged in, it will come back the Terminal/Command prompt.
If you want to logout try firebase logout in the terminal.
Now create a folder for your project, get into that folder…
Execute below command
$ firebase initNow we will write our Cloud function.
Our aim to trigger a push notification when a new Document is added to the collection.
Create a new Collection in the Firebase Database. I am naming it ‘Messages’. When we add a new Document to the ‘Messages’ collection, we will fire our Cloud function and then send the notification. To save the Device Token, we will create a new Collection named “DeviceTokens”. This collection is only for demo purpose, in your real world project, you will be storing the device tokens in your own database and then read it from there.
Open index.js file in your CloudFunction Project and make the below changes
const functions = require('firebase-functions');const admin = require('firebase-admin');admin.initializeApp(functions.config().functions);var newData;exports.myTrigger = functions.firestore.document('TestCollection/{id}').onCreate(async (snapshot, context) => {//if (snapshot.empty) {console.log('No Devices');return;}newData = snapshot.data();const deviceIdTokens = await admin.firestore().collection('DeviceIDTokens').get();var tokens = [];for (var token of deviceIdTokens.docs) {tokens.push(token.data().device_token);}var payload = {notification: {title: 'Push Title',body: 'Push Body',sound: 'default',},data: {push_key: 'Push Key Value',key1: newData.data,},};try {const response = await admin.messaging().sendToDevice(tokens, payload);console.log('Notification sent successfully');} catch (err) {console.log(err);}});Once we have completed writing our cloud function, we will deploy the function to firebase.
$ firebase deployWait for the Deploy to complete.
So if you try to add a new Documents in the Messages collection, this cloud function will be fired and then will send the notification.
Watch the whole thing in action in my Youtube Tutorial.
- Dashboards
- Free Downloads
- Videos
- Database management system
Recommend
About Joyk
Aggregate valuable and interesting links.
Joyk means Joy of geeK