
18

CentOS 7搭建LAMP环境上线PHPMyAdmin系统-:努力变好
source link: https://blog.51cto.com/14156658/2473170
Go to the source link to view the article. You can view the picture content, updated content and better typesetting reading experience. If the link is broken, please click the button below to view the snapshot at that time.
一、安装Apache服务
关于安装Apache详细配置及原理概述请参考:CentOS 7.4搭建Apache网站服务
[root@centos01 ~]# mount /dev/cdrom /mnt/      <!--挂载LAMP光盘-->
[root@centos01 ~]# cp /mnt/* /usr/src/       <!--将mnt目录下的程序包拷贝到/usr/src/-->
[root@centos01 ~]# mount /dev/cdrom /mnt/     <!--切换操作系统光盘-->
[root@centos01 ~]# rm -rf /etc/yum.repos.d/CentOS-*   <!--删除系统自动yum-->
[root@centos01 ~]# tar zxvf /usr/src/httpd-2.2.17.tar.gz -C /usr/src/  <!--解压缩Apache包-->
[root@centos01 ~]# cd /usr/src/httpd-2.2.17/    <!--进入Apache目录-->
[root@centos01 httpd-2.2.17]# ./configure
--prefix=/usr/local/httpd
--enable-so
--enable-rewrite
--enable-charset-lite
--enable-cgi          <!--配置httpd-->
[root@centos01 httpd-2.2.17]# make && make install      <!--编辑和安装httpd-->
[root@centos01 ~]# ln -s /usr/local/httpd/bin/* /usr/local/bin/     <!--优化程序执行命令-->
[root@centos01 ~]# cp /usr/local/httpd/bin/apachectl /etc/init.d/httpd <!--生成apahce服务-->
[root@centos01 ~]# chmod +x /etc/init.d/httpd       <!--添加执行权限-->
[root@centos01 ~]# vim /etc/init.d/httpd     <!--修改Apache服务控制文件-->
#chkconfig:35 80 20
#description:apache
[root@centos01 ~]# chkconfig --add httpd       <!--添加为系统服务-->
[root@centos01 ~]# chkconfig --level 35 httpd on  <!--设置开机自动启动-->
[root@centos01 ~]# vim /usr/local/httpd/conf/httpd.conf    <!--修改Apache主配置文件-->
98 ServerName 192.168.100.10:80     <!--修改服务器IP地址-->
[root@centos01 ~]# systemctl start httpd     <!--启动Apache服务-->
[root@centos01 ~]# netstat -anptu | grep 80   <!--监听Apache端口号-->
tcp6       0      0 :::80                   :::*                    LISTEN      53682/httpd
二、安装MySQL数据库
安装MySQL详细配置及MySQL原理概述请参考:Centos安装MySQL数据库
[root@centos01 ~]# groupadd mysql   <!--创建管理MySQL的组-->
[root@centos01 ~]# useradd -M -s /sbin/nologin -g mysql mysql
        <!--创建管理MySQL的用户-->
[root@centos01 ~]# yum -y install ncurses-devel   <!--安装依赖程序-->
[root@centos01 ~]# tar zxvf /usr/src/cmake-2.8.6.tar.gz -C /usr/src/  <!--解压缩cmake包-->
[root@centos01 ~]# cd /usr/src/cmake-2.8.6/  <!--进入cmake目录-->
[root@centos01 cmake-2.8.6]# ./configure && gmake && gmake install  <!--安装cmake-->
[root@centos01 ~]# tar zxvf /usr/src/mysql-5.5.22.tar.gz -C /usr/src/ <!--解压缩MySQL包-->
[root@centos01 ~]# cd /usr/src/mysql-5.5.22/  <!--进入MySQL目录-->
[root@centos01 mysql-5.5.22]# cmake
-DCMAKE_INSTALL_PREFIX=/usr/local/mysql
-DDEFAULT_CHARSET=utf8
-DDEFAULT_COLLATION=utf8_general_ci
-DWITH_EXTRA_CHARSETS=all
-DSYSCONFDIR=/etc     <!--配置MySQL-->
[root@centos01 mysql-5.5.22]# make && make install   <!--安装MySQL-->
[root@centos01 mysql-5.5.22]# cp support-files/my-medium.cnf /etc/my.cnf
       <!--生成MySQL配置文件-->
cp:是否覆盖"/etc/my.cnf"? y  <!--输入y-->
[root@centos01 mysql-5.5.22]# cp support-files/mysql.server /etc/init.d/mysqld
         <!--生成服务控制文件-->
[root@centos01 ~]# chmod +x /etc/init.d/mysqld   <!--控制文件添加执行权限-->
[root@centos01 ~]# chkconfig --add mysqld    <!--添加系统服务-->
[root@centos01 ~]# chkconfig --level 35 mysqld on   <!--设置开机自动启动-->
[root@centos01 ~]# vim /etc/profile    <!--优化程序执行命令->
PATH=$PATH:/usr/local/mysql/bin    <!--添加此行-->
[root@centos01 ~]# source /etc/profile      <!--刷新-->
[root@centos01 ~]# /usr/local/mysql/scripts/mysql_install_db
--user=mysql
--basedir=/usr/local/mysql
--datadir=/usr/local/mysql/data     <!--初始化MySQL-->
[root@centos01 ~]# chown -R mysql:mysql /usr/local/mysql/
         <!--修改MySQL安装目录的所有者-->
[root@centos01 ~]# systemctl start mysqld <!--启动MySQL服务-->
[root@centos01 ~]# mysqladmin -uroot password   <!--设置管理MySQL密码-->
New password:        <!--输入密码-->
Confirm new password:      <!--确认密码-->
[root@centos01 ~]# mysql -uroot -ppwd@123  <!--登录MySQL测试-->
三、安装PHP
安装PHP详细配置及原理概述请参考:Centos 7搭建LNMP架构及部署Discuz论坛
[root@centos01 ~]# yum -y install zlib-devel libxml2-devel   <!--安装php依赖程序-->
[root@centos01 ~]# tar zxvf /usr/src/libmcrypt-2.5.8.tar.gz -C /usr/src/
                 <!--解压缩libmcrypt包-->
[root@centos01 ~]# cd /usr/src/libmcrypt-2.5.8/    <!--进入libmcrypt目录-->
[root@centos01 libmcrypt-2.5.8]# ./configure && make && make install
                   <!--安装libmcrypt-->
[root@centos01 libmcrypt-2.5.8]# ln -s /usr/local/lib/libmcrypt.* /usr/lib/   <!--优化路径-->
[root@centos01 ~]# tar zxvf /usr/src/mhash-0.9.9.9.tar.gz -C /usr/src <!--解压缩mhash包-->
[root@centos01 ~]# cd /usr/src/mhash-0.9.9.9/    <!--进入mhash目录-->
[root@centos01 mhash-0.9.9.9]# ./configure && make && make install    <!--安装mhash-->
[root@centos01 mhash-0.9.9.9]# ln -s /usr/local/lib/libmhash.* /usr/lib/   <!--优化路径-->
[root@centos01 ~]# tar zxvf /mnt/mcrypt-2.6.8.tar.gz -C /usr/src/   <!--解压缩mcrypt-->
[root@centos01 ~]# cd /usr/src/mcrypt-2.6.8/    <!--进入mcrypt目录-->
[root@centos01 mcrypt-2.6.8]# ./configure     <!--配置mcrypt-->
[root@centos01 mcrypt-2.6.8]# export LD_LIBRARY_PATH=/usr/local/lib   <!--输入变量-->
[root@centos01 mcrypt-2.6.8]# ./configure          <!--重新配置-->
[root@centos01 mcrypt-2.6.8]# make && make install    <!--编译安装mcrypt-->
[root@centos01 ~]# tar zxvf /usr/src/php-5.3.28.tar.gz -C /usr/src/    <!--解压缩php包-->
[root@centos01 ~]# cd /usr/src/php-5.3.28/     <!--进入php目录-->
[root@centos01 php-5.3.28]# ./configure --prefix=/usr/local/php --with-mcrypt --with-apxs2=/usr/local/httpd/bin/apxs --with-mysql=/usr/local/mysql/ --with-mysqli=/usr/local/mysql/bin/mysql_config --with-config-file-path=/usr/local/php --enable-mbstring    <!--配置php-->
[root@centos01 php-5.3.28]# make && make install   <!--编译安装php-->
[root@centos01 php-5.3.28]# cp php.ini-production /usr/local/php/php.ini
         <!--生成php配置文件-->
[root@centos01 ~]# tar zxvf /usr/src/zendguardloader-php-5.3-linux-glibc23-i386.tar.gz
-C /usr/src/     <!--解压缩zend加速访问模块-->
[root@centos01 ~]# cd /usr/src/ZendGuardLoader-php-5.3-linux-glibc23-i386
/php-5.3.x/
[root@centos01 php-5.3.x]# ls
ZendGuardLoader.so
[root@centos01 php-5.3.x]# cp ZendGuardLoader.so /usr/local/php/lib/php/
           <!--复制zend加速访问模块-->
[root@centos01 php-5.3.x]# vim /usr/local/php/php.ini       <!--加载zend加速访问模块-->
[PHP]
zend_extension=/usr/local/php/lib/php/ZendGuardLoader.so
zend_loader.enable=1
[root@centos01 ~]# vim /usr/local/httpd/conf/httpd.conf
       <!--修改Apache主配置文件支持php-->
99 ServerName 192.168.100.10:80       <!--Apache服务器IP地址和端口号-->
168     DirectoryIndex index.html index.php
311     AddType application/x-httpd-php .php
[root@centos01 ~]# systemctl restart httpd       <!--重新启动apache服务-->
[root@centos01 ~]# vim /usr/local/httpd/htdocs/index.php  <!--编写测试php文件-->
<?php
phpinfo();
?>
四、部署phpMyadmin系统
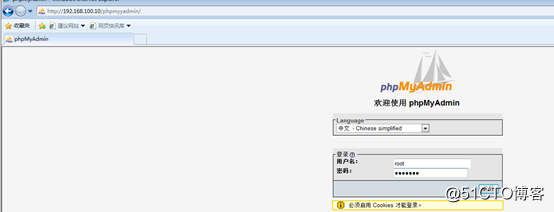
[root@centos01 ~]# tar zxvf /usr/src/phpmyadmin-3.3.10-all-languages.tar.gz -C /usr/src/
        <!--解压缩phpMyAdmin-->
[root@centos01 ~]# mv /usr/src/phpMyAdmin-3.3.10-all-languages/
/usr/local/httpd/htdocs/phpMyAdmin      <!--修改phpmyadmin位置到网站根目录-->
[root@centos01 ~]# cp /usr/local/httpd/htdocs/phpMyAdmin/config.sample.inc.php
/usr/local/httpd/htdocs/phpMyAdmin/config.inc.php<!--创建phpmyadmin系统配置文件-->
1、用户访问phpmyadmin系统
五、安装DNS
安装DNS详细配置及原理概述请参考:CentOS7简单搭建DNS服务
[root@centos01 ~]# yum -y install bind bind-chroot bind-utils
[root@centos01 ~]# cp /etc/named.conf /etc/named.conf.bak
[root@centos01 ~]# echo "" > /etc/named.conf
[root@centos01 ~]# vim /etc/named.conf
options{
listen-on port 53 { any; };
directory "/var/named";
};
zone "benet.com" IN {
type master;
file "benet.com.zone";
allow-transfer { any; };
};
[root@centos01 ~]# named-checkconf -z /etc/named.conf
[root@centos01 ~]# vim /var/named/benet.com.zone
$TTL 86400
@ SOA benet.com. root.benet.com(
2020020710
1H
15M
1W
1D
)
@ NS centos01.benet.com.
centos01 A 192.168.100.10
www A 192.168.100.10
[root@centos01 ~]# named-checkzone benet.com /var/named/benet.com.zone
[root@centos01 ~]# chmod 755 /var/named/benet.com.zone
[root@centos01 ~]# chown named:named /var/named/benet.com.zone
[root@centos01 ~]# systemctl start named
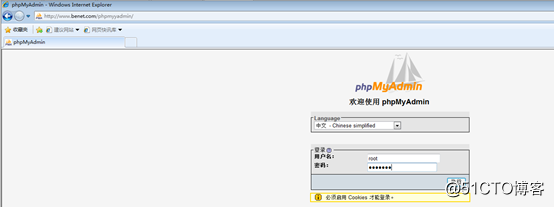
[root@centos01 ~]# systemctl enable named1、使用域名访问phpmyadmin系统
———————— 本文至此结束,感谢阅读 ————————
Recommend
About Joyk
Aggregate valuable and interesting links.
Joyk means Joy of geeK