

Spring Boot with Kotlin | DiscoverSDK Blog
source link: http://www.discoversdk.com/blog/spring-boot-with-kotlin
Go to the source link to view the article. You can view the picture content, updated content and better typesetting reading experience. If the link is broken, please click the button below to view the snapshot at that time.
In a previous article we covered the basics of Kotlin. This lesson will introduce you to the world of using Kotlin with Spring Boot. Kotlin is a new programming language by JetBrains which is now officially, a first-class citizen for Spring Framework 5.
We’ll use the same approach to learn Spring Boot with a project made using the Kotlin programming language. Let’s start by creating a new project.
Creating a Project
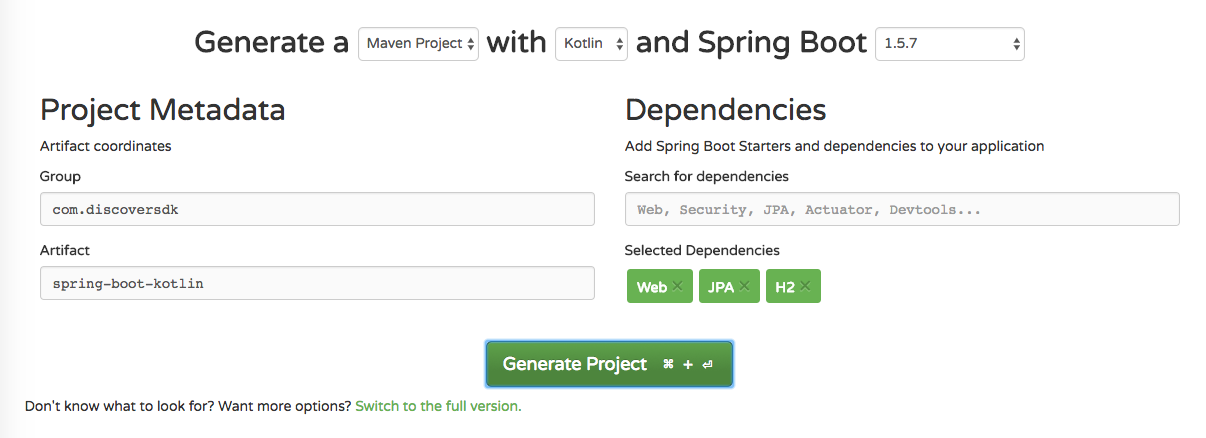
To create a new project for Spring Boot, we will make use of the Spring Initializr tool. As Kotlin is now a first-class citizen, Spring initialz supports Kotlin out of the box.
Here are the details we used for making a project:
Take note that we added three dependencies in above project:
- H2 Database
- Thymeleaf
The H2 database dependency is needed because H2 is an in-memory database. In this lesson, we will demonstrate saving entities to an in-memory database only, which means that the data will be wiped out as soon as the application is stopped.
Thymeleaf is used as we will be making simple views to present our data.
Following are the dependencies added to pom.xml file:
<dependencies>
 <dependency>
    <groupId>org.springframework.boot</groupId>
    <artifactId>spring-boot-starter-data-jpa</artifactId>
 </dependency>
 <dependency>
    <groupId>org.springframework.boot</groupId>
    <artifactId>spring-boot-starter-web</artifactId>
 </dependency>
 <dependency>
    <groupId>org.springframework.boot</groupId>
    <artifactId>spring-boot-starter-thymeleaf</artifactId>
 </dependency>
 <dependency>
    <groupId>org.jetbrains.kotlin</groupId>
    <artifactId>kotlin-stdlib-jre8</artifactId>
    <version>${kotlin.version}</version>
 </dependency>
 <dependency>
    <groupId>org.jetbrains.kotlin</groupId>
    <artifactId>kotlin-reflect</artifactId>
    <version>${kotlin.version}</version>
 </dependency>
 <dependency>
    <groupId>com.h2database</groupId>
    <artifactId>h2</artifactId>
    <scope>runtime</scope>
 </dependency>
 <dependency>
    <groupId>org.springframework.boot</groupId>
    <artifactId>spring-boot-starter-test</artifactId>
    <scope>test</scope>
 </dependency>
</dependencies>
Apart from dependencies, some plugins are also included in the file to support Kotlin in the project. The build section, which includes Kotlin support plugins looks like:
<build>
 <sourceDirectory>${project.basedir}/src/main/kotlin</sourceDirectory>
 <testSourceDirectory>${project.basedir}/src/test/kotlin</testSourceDirectory>
 <plugins>
    <plugin>
       <groupId>org.springframework.boot</groupId>
       <artifactId>spring-boot-maven-plugin</artifactId>
    </plugin>
    <plugin>
       <artifactId>kotlin-maven-plugin</artifactId>
       <groupId>org.jetbrains.kotlin</groupId>
       <version>${kotlin.version}</version>
       <configuration>
          <compilerPlugins>
             <plugin>spring</plugin>
          </compilerPlugins>
          <jvmTarget>1.8</jvmTarget>
       </configuration>
       <executions>
          <execution>
             <id>compile</id>
             <phase>compile</phase>
             <goals>
                <goal>compile</goal>
             </goals>
          </execution>
          <execution>
             <id>test-compile</id>
             <phase>test-compile</phase>
             <goals>
                <goal>test-compile</goal>
             </goals>
          </execution>
       </executions>
       <dependencies>
          <dependency>
             <groupId>org.jetbrains.kotlin</groupId>
             <artifactId>kotlin-maven-allopen</artifactId>
             <version>${kotlin.version}</version>
          </dependency>
       </dependencies>
    </plugin>
 </plugins>
</build>
Let us take note of some parts added above:
- We explicitly mentioned sourceDirectory and testSourceDirectory as this is needed when working with kotlin
- spring-boot-maven-plugin is needed to make an executable JAR when this project is packaged
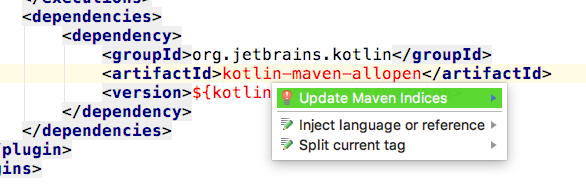
- You may face some issues when using the kotlin-maven-allopen dependency in plugins. You can update local maven indices for it:
If updating local maven indices doesn’t work, just try to package using maven:
mvn clean install packageFinally, one Kotlin class already exist in our pre-made project. It has the following code snippet:
package com.discoversdk.springbootkotlin

import org.springframework.boot.SpringApplication
import org.springframework.boot.autoconfigure.SpringBootApplication

@SpringBootApplication
class SpringBootKotlinApplication

fun main(args: Array<String>) {
  SpringApplication.run(SpringBootKotlinApplication::class.java, *args)
}
In our application, main is the entry point for the Spring Boot app. When this method runs, Spring will:
- Make necessary Beans
- Load all components present in the project
No public access specifier was used with main function, as in Kotlin, all methods are public by default.
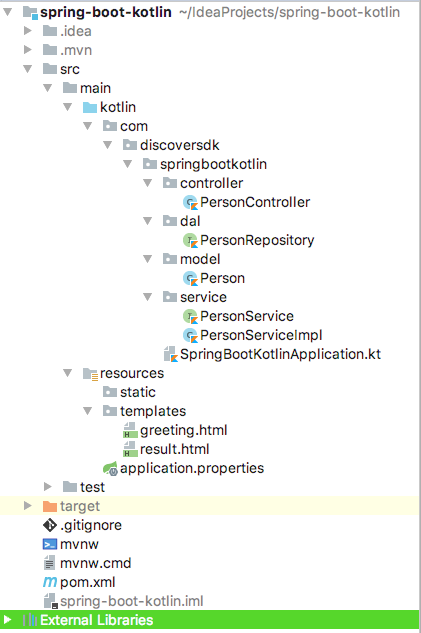
Once complete, our project structure will look like:
Making the Model
To start, we will add a model in our project which we will use as a base to add data. This model will be a Person:
package com.discoversdk.springbootkotlin.model

import javax.persistence.Entity
import javax.persistence.GeneratedValue
import javax.persistence.Id

@Entity
class Person() {

  @Id
  @GeneratedValue
  var id: Long? = null
  var name: String? = null
  var age: Int = 0
}
Simply put, this model has three properties, out of which, ID will be auto-generated by the H2 database.
We leave the package statement at the top so that you know which package to put this class in.
Create Data Access Layer (DAL)
To access data, we create a separate layer. It is always good practice to do this because it helps in keeping the logic of the application completely separate.
Our JPA Repository interface looks like:
package com.discoversdk.springbootkotlin.dal

import com.discoversdk.springbootkotlin.model.Person
import org.springframework.data.jpa.repository.JpaRepository
import org.springframework.stereotype.Repository

@Repository
interface PersonRepository : JpaRepository<Person, Long>
This is so small. This is all because of Kotlin and JPA:
- JPA takes care of simple CRUD methods needed for an entity like to save, delete and update an entity
- With Kotlin, even the curly braces are not needed if the interface is empty
The importance of this JPA Repository interface will actually reflect with its usage in service layer.
Providing the Logic for Data Access
To access our repository data, we will call different methods in Service layer.
Our interface definition for service will be:
package com.discoversdk.springbootkotlin.service

import com.discoversdk.springbootkotlin.model.Person

interface PersonService {

  fun createPerson(person: Person): Person

  fun getPerson(id: Long): Person

  fun editPerson(person: Person): Person

  fun deletePerson(person: Person)

  fun deletePerson(id: Long)

  fun getAllPersons(pageNumber: Int, pageSize: Int): List<Person>

  fun getAllPersons(): List<Person>
}
Please note that all these definitions will not be needed in our sample project. They are present just to give a good idea of how much power does JPA Repositories provide to us. Implementation of the above interface will be:
package com.discoversdk.springbootkotlin.service

import com.discoversdk.springbootkotlin.dal.PersonRepository
import com.discoversdk.springbootkotlin.model.Person
import org.springframework.beans.factory.annotation.Autowired
import org.springframework.data.domain.PageRequest
import org.springframework.stereotype.Service

@Service
class PersonServiceImpl : PersonService {

  @Autowired
  lateinit var personRepository: PersonRepository

  override fun createPerson(person: Person): Person {
      return personRepository.save(person)
  }

  override fun getPerson(id: Long): Person {
      return personRepository.findOne(id)
  }

  override fun editPerson(person: Person): Person {
      return personRepository.save(person)
  }

  override fun deletePerson(person: Person) {
      personRepository.delete(person)
  }

  override fun deletePerson(id: Long) {
      personRepository.delete(id)
  }


  //implemented pagination in this function
  override fun getAllPersons(pageNumber: Int, pageSize: Int): List<Person> {
      return personRepository.findAll(PageRequest(pageNumber, pageSize)).content
  }

  override fun getAllPersons(): List<Person> {
      return personRepository.findAll()
  }
}
Let us look closely in the getAllPersons function. We pass an object of PageRequest, which is accompanied with pageNumber and pageSize. This makes sure that at a time, only few number of results are returned.
Say, pageNumber is 0 and pageSize is 20. In this case, only first 20 results will be returned from the database.
Accessing APIs via Controller
Finally, we can put our logic into use using Controller:
package com.discoversdk.springbootkotlin.controller

import com.discoversdk.springbootkotlin.model.Person
import com.discoversdk.springbootkotlin.service.PersonService
import org.springframework.beans.factory.annotation.Autowired
import org.springframework.stereotype.Controller
import org.springframework.ui.Model
import org.springframework.web.bind.annotation.*

@Controller
class PersonController {

  @Autowired
  lateinit var personService: PersonService

  @RequestMapping(value = "", method = arrayOf(RequestMethod.GET))
  fun greetingForm(model: Model): String {
      model.addAttribute("person", Person())
      return "greeting"
  }

  @RequestMapping(value = "/person", method = arrayOf(RequestMethod.POST))
  fun addPerson(@ModelAttribute person: Person, model: Model): String {
      personService.createPerson(person)
      model.addAttribute("people", personService.getAllPersons())
      return "result"
  }

}
We have made two Web Services here:
- The first service, available at root of the project will just present an HTML page, named greeting.html with a form where we can add a new person
- The second service, available at ‘/person’ is a POST call which will add the received model person in the database and return a list of all available persons in an attribute named ‘people’
Making simple Design
To present our data, we will make a simple UI which will allow us to add a new person.
Note that the HTML pages are kept in src/main/resources/templates/ directory as this is understood by Thymeleaf and Spring Boot.
<!DOCTYPE HTML>
<html xmlns:th="http://www.thymeleaf.org">
<head>
<title>Kotlin Boot</title>
<meta http-equiv="Content-Type" content="text/html; charset=UTF-8"/>
</head>
<body>
<h1>Add new person</h1>
<form action="#" th:action="@{/person}" th:object="${person}" method="post">
<p>Name: <input type="text" th:field="*{name}"/></p>
<p>Age: <input type="number" th:field="*{age}"/></p>
<p><input type="submit" value="Submit"/> <input type="reset" value="Reset"/></p>
</form>
</body>
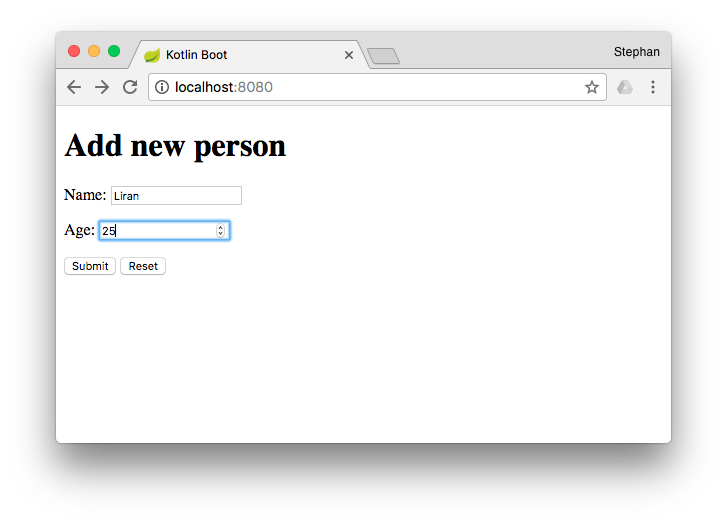
</html>This page looks like this:
Here, we can put simple data and once we hit ‘Submit’, the ‘/person’ POST call will be made as described in this line of the form:
<form action="#" th:action="@{/person}" th:object="${person}" method="post">Above line defines the th:action which needs to be taken once form is submitted.
Next, when the ‘/person’ POST call is made, a new HTML page is opened, named result.html:
<!DOCTYPE HTML>
<html xmlns:th="http://www.thymeleaf.org">
<head>
  <title>Kotlin Boot</title>
  <meta http-equiv="Content-Type" content="text/html; charset=UTF-8"/>
</head>
<body>
<div th:if="${not #lists.isEmpty(people)}">
  <h2>Person List</h2>
  <table class="glyphicon glyphicon-calendar">
      <tr>
          <th>Id</th>
          <th>Name</th>
          <th>Age</th>
      </tr>
      <tr th:each="person : ${people}">
          <td th:text="${person.id}"></td>
          <td th:text="${person.name}"></td>
          <td th:text="${person.Age}"></td>
      </tr>
  </table>
</div>
</body>
</html>
Let us see what happens on this page.
<div th:if="${not #lists.isEmpty(people)}">The above line checks that the list is not empty. If it isn’t, only then this div element will be rendered. Next,
<tr th:each="person : ${people}">
  <td th:text="${person.id}"></td>
  <td th:text="${person.name}"></td>
  <td th:text="${person.Age}"></td>
</tr>
Here, we’re just iterating over the people attribute added in the second rest service. This page will show the following data:
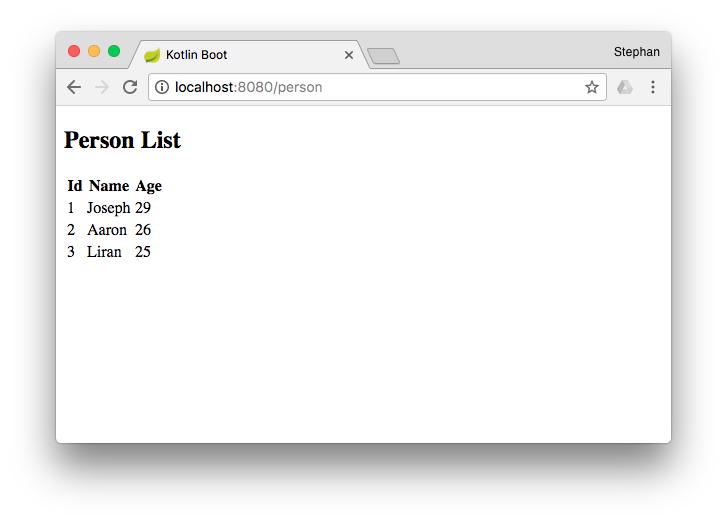
Notice how even the URL has changed. Again, this data will be wiped out once we restart the app as H2 is an in-memory database.
Conclusion
In this lesson, we went through how we can simple a UI and powerful web service with Spring Boot using the Kotlin programming language. Though we made use of the H2 database, any underlying database can be easily replaced using Spring configuration without touching any repository logic for the app.
We will meet again with another complex implementation with Spring Boot and Kotlin. Until next time!
Recommend
About Joyk
Aggregate valuable and interesting links.
Joyk means Joy of geeK