

SpringBoot多环境配置 - xiezhr
source link: https://www.cnblogs.com/xiezhr/p/18107687
Go to the source link to view the article. You can view the picture content, updated content and better typesetting reading experience. If the link is broken, please click the button below to view the snapshot at that time.
在实际项目的开发过程中,我们程序往往需要在不同环境中运行。例如:开发环境、测试环境和生产环境。
每个环境中的配置参数可能都会有所不同,例如数据库连接信息、文件服务器等等。
Spring Boot 提供了非常方便的方式来管理这些不同环境的配置。
一、Spring Profile 介绍
Spring Profile 是 Spring 框架用于处理不同环境配置的解决方案。
Profile 可以帮助我们在不改变应用代码的情况下,根据当前环境动态地激活或者切换不同的配置。
Spring Boot 为每个 Profile 提供了一个独立的 application.properties(或 application.yml)配置文件。
默认情况下,Spring Boot 使用的是 application.properties 文件。
当你激活一个特定的 Profile 时,Spring Boot 会查找名为 application-{profile}.properties 的文件,并把其中的属性加载到 Spring Environment 中。
二、Properties与YAML
Spring Boot支持使用Properties和YAML两种配置方式。
两者功能类似,都能完成Spring Boot的配置,但是Properties的优先级要高于YMAL
2.1 Properties
-
Spring Boot默认的配置文件格式 -
以“.”为分割的key=value键值对,例如,指定端口为8080 配置如下
server.port=8080 -
不支持复杂的数据结构,只支持字符串类型的键值对。因此,它的使用适用于简单的配置场景
2.2YAML
-
采用树状结构,一目了然
server: port: 8080 -
在key后的冒号一定要跟一个空格,如“port: 8080”
-
YAML格式文件不支持注解@PropertySource导入配置 -
支持复杂的数据结构,如列表和键值对,因此,
YAML的使用适用于需要表示复杂数据结构的场合
2.3 如何选择
在 Spring Boot 应用中,你可以根据自己的实际需求,选择使用 YAML 还是 Properties 格式的配置文件。
如果你的配置比较简单,Properties 格式可能会更好些。
如果你的配置比较复杂,或者你希望配置文件更具可读性,那么 YAML 格式可能是更好的选择
三、创建配置文件
3.1 创建配置文件
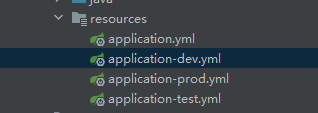
在实际项目开发中,我们一般有三个环境:开发(dev)、测试(test)、生产(prod)。我们需要建立如下几个配置文件
application.yml或者application.properties用于存放所有环境通用的配置application-dev.yml或者application-dev.properties存放开发环境的特殊配置application-test.yml或者application-test.properties存放测试环境的特殊配置application-prod.yml或者application-prod.properties存放生产环境的特殊配置
3.2 配置文件内容
①配置开发环境
application-dev.yml
server: port: 8080 tomcat: uri-encoding: UTF-8environment: name: 开发环境
application-dev.properties
server.port=8080server.tomcat.uri-encoding=UTF-8environment.name=开发环境
②配置生产环境
application-prod.yml
server: port: 8090 tomcat: uri-encoding: UTF-8environment: name: 生产环境
application-prod.properties
server.port=8090server.tomcat.uri-encoding=UTF-8environment.name=生产环境
application-test.yml和application-test.properties 配置文件类似,由于篇幅原因,这里就不一一例举了
四、激活 Profile
在上一小节中,我们创建了三个配置文件即配置了三种环境,那么我们怎么才能激活对应环境呢
4.1 配置文件激活
其实很多简单,我们只需要在application.yml 或者application.properties 添加如下配置即可,即可激活开发环境
①application.yml
# application.ymlspring profiles: active: dev
②application.properties
spring.profiles.active=dev
4.2 启动参数激活
在命令行中设置 spring.profiles.active 系统属性。
例如,你可以使用以下命令来启动你的应用,并激活 "prod" 环境:
# 企业级项目开发中,针对生产环境,一般通过启动命令再指定激活生产 环境java -jar $APP_NAME --spring.profiles.active=prod
4.3 环境变量激活
我们还可以通过配置服务器系统环境变量来激活环境,在环境变量中设置SPRING_PROFILES_ACTIVE 即可,不过这种方式不常用,了解即可
五、测试是否生效
上一小节中,我们通过配置激活了开发环境,我们就来实际验证以下是否生效。
出现下图红框表示部分,说明我们激活了dev 开发环境

本期内容就到这了,希望对你有所帮助,我们下期再见 (●'◡'●)
Recommend
About Joyk
Aggregate valuable and interesting links.
Joyk means Joy of geeK