

Mastering Javascript Ebook PDF
source link: https://javascript.withcodeexample.com/blog/mastering-javascript-ebook-pdf/
Go to the source link to view the article. You can view the picture content, updated content and better typesetting reading experience. If the link is broken, please click the button below to view the snapshot at that time.
Mastering Javascript Ebook Pdf
Unlock the Power of JavaScript: From Basics to Advanced Web Development Techniques
Posted on January 12, 2024 | 37 minutes

JavaScript, often abbreviated as JS, is a powerful and versatile programming language that plays a pivotal role in web development. As a client-side scripting language, it enables developers to create dynamic and interactive content within web browsers. In this section, we’ll explore the fundamentals of JavaScript, understand its significance, and trace its evolution through time.
Mastering JavaScript Ebook
Table Of Content
Introduction
A. What is JavaScript?

JavaScript is a lightweight, interpreted programming language primarily used for enhancing the interactivity of web pages. Developed by Netscape in collaboration with Sun Microsystems in the mid-1990s, JavaScript was initially known as LiveScript. However, to capitalize on the popularity of Java at that time, it was later renamed JavaScript.
Unlike traditional programming languages such as C++ or Java, JavaScript doesn’t require compilation. Instead, it is executed directly by web browsers, making it an integral part of front-end web development. JavaScript interacts with the Document Object Model (DOM) of a web page, allowing developers to manipulate its structure and content dynamically.
With the advent of server-side JavaScript (Node.js), JavaScript’s versatility extends beyond the browser, enabling developers to use the same language for both client-side and server-side development.
B. Why learn JavaScript?
Learning JavaScript is a strategic move for anyone aspiring to become a proficient web developer. Here are some compelling reasons to invest your time in mastering JavaScript:
1. Front-End Web Development:
JavaScript is the backbone of front-end development, allowing developers to create interactive and dynamic user interfaces. It enhances the user experience by enabling real-time updates and responsive design.
2. Versatility:
JavaScript is a versatile language that can be used for both client-side and server-side development. With the rise of Node.js, developers can now use JavaScript for end-to-end application development.
3. Community and Ecosystem:
JavaScript boasts a vast and active community. This has led to the creation of a rich ecosystem of libraries and frameworks, such as React, Angular, and Vue.js, making development more efficient and enjoyable.
4. Job Opportunities:
Proficiency in JavaScript opens up numerous job opportunities. Many companies, large and small, seek developers who are well-versed in JavaScript and its associated frameworks.
5. Cross-Browser Compatibility:
JavaScript helps in achieving cross-browser compatibility. It ensures that web applications work seamlessly across various browsers, providing a consistent experience to users.
C. History and Evolution of JavaScript

JavaScript’s journey from its inception to its current prominence is a fascinating tale of adaptation, innovation, and community collaboration.
1. Birth of LiveScript (1995):
In 1995, Netscape introduced a scripting language for browsers, originally named LiveScript. This language aimed to bring dynamic capabilities to web pages.
2. Renaming to JavaScript (1995):
Riding on the success of Java, Netscape and Sun Microsystems decided to rename LiveScript to JavaScript to leverage Java’s popularity. Despite the name association, the two languages are fundamentally different.
3. ECMAScript Standardization (1997):
JavaScript’s standardization process began in 1997 with the formation of the European Computer Manufacturers Association (ECMA) committee. This effort resulted in the ECMAScript standard, which continues to guide JavaScript development today.
4. AJAX and Web 2.0 (Early 2000s):
JavaScript gained prominence with the advent of Asynchronous JavaScript and XML (AJAX), a technique that allowed web pages to update asynchronously by exchanging small amounts of data with the server. This era marked the shift towards more interactive and responsive web applications, often referred to as Web 2.0.
5. Introduction of Node.js (2009):
Ryan Dahl introduced Node.js in 2009, enabling developers to use JavaScript for server-side programming. This marked a significant expansion of JavaScript beyond the browser, fostering a unified language stack for web development.
6. Modern JavaScript (ES6 and Beyond):
Recent years have witnessed the evolution of JavaScript with the introduction of ECMAScript 2015 (ES6) and subsequent versions. ES6 brought about numerous enhancements, including arrow functions, classes, and template literals, making JavaScript development more expressive and efficient.
7. Frameworks and Libraries (2010s - Present):
The rise of JavaScript frameworks and libraries, such as React, Angular, and Vue.js, has further streamlined web development. These tools provide developers with efficient ways to build complex applications with reusable components.
JavaScript’s journey from a simple scripting language to a versatile, ubiquitous tool for web development underscores its adaptability and enduring relevance in the ever-evolving landscape of technology.
In the upcoming sections, we will delve deeper into the syntax and features of JavaScript, providing practical insights into how to harness the power of this language for web development.
Setting Up Your Development Environment
Ensuring a robust development environment is crucial for a seamless coding experience. In this section, we will guide you through the essential components of a developer’s toolkit, covering text editors and Integrated Development Environments (IDEs), browser developer tools, and introducing Node.js for server-side development.
A. Text Editors and IDEs
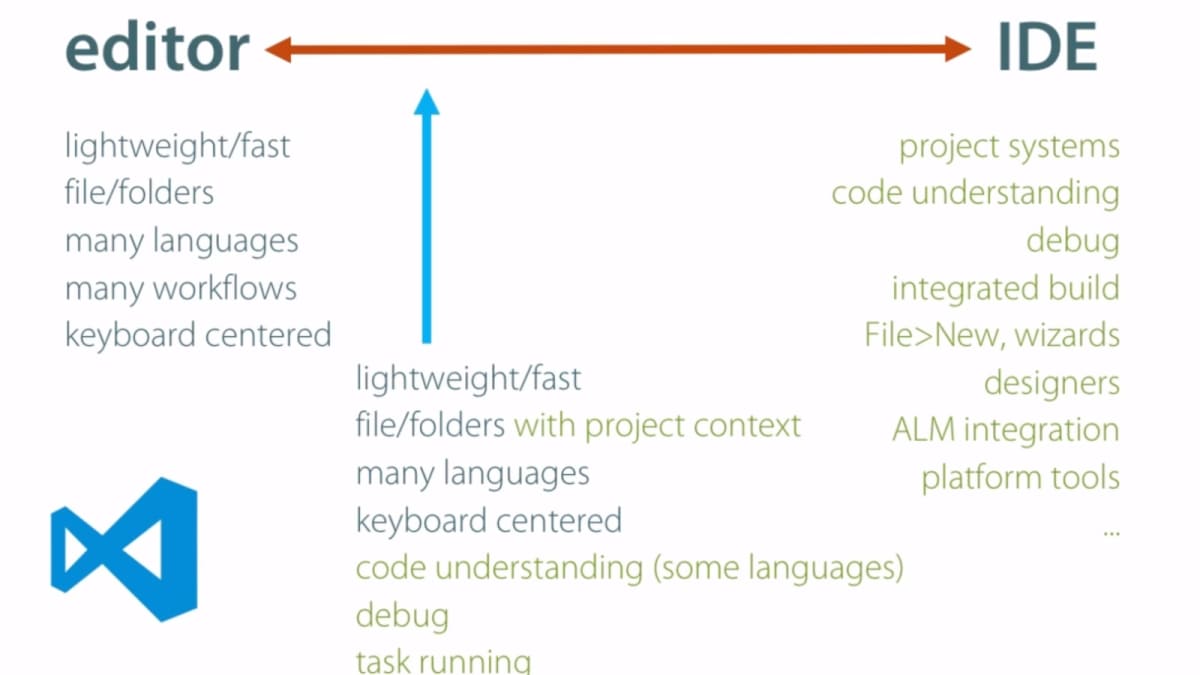
1. Text Editors:
Text editors are lightweight tools designed for editing plain text. They are essential for coding tasks and provide features like syntax highlighting, line numbering, and code completion. Popular text editors include:
- Visual Studio Code (VS Code): An open-source, feature-rich editor developed by Microsoft. It supports a wide range of programming languages, extensions, and has a robust set of features for debugging and version control.

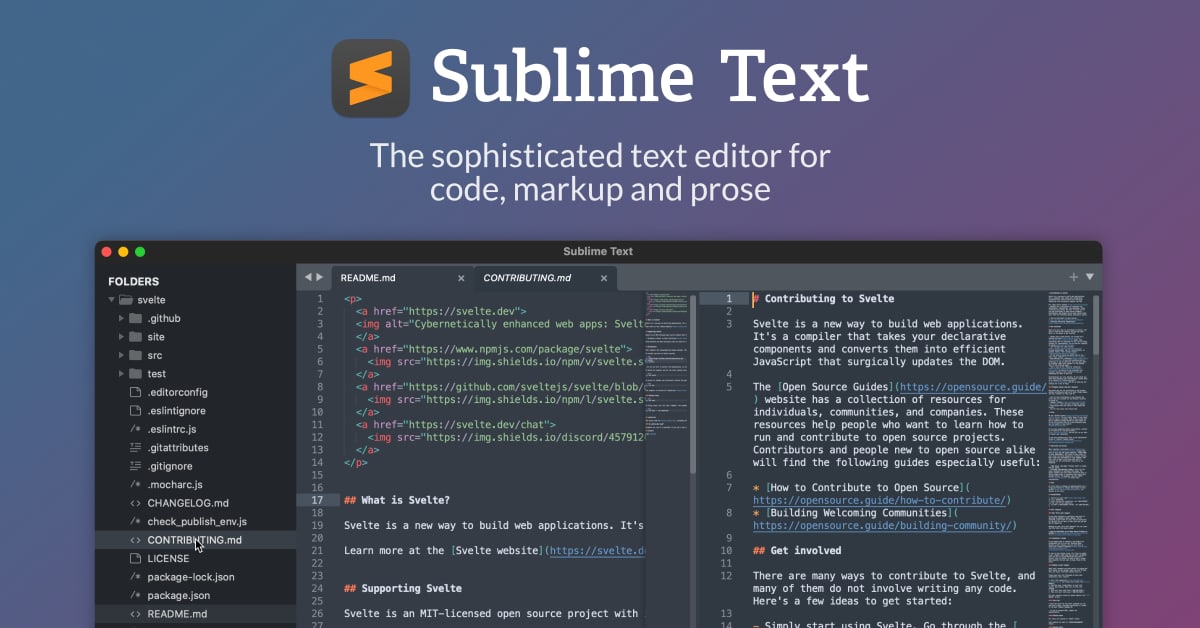
- Sublime Text: Known for its speed and simplicity, Sublime Text is a versatile text editor with a smooth user interface. It supports various plugins for additional functionality.
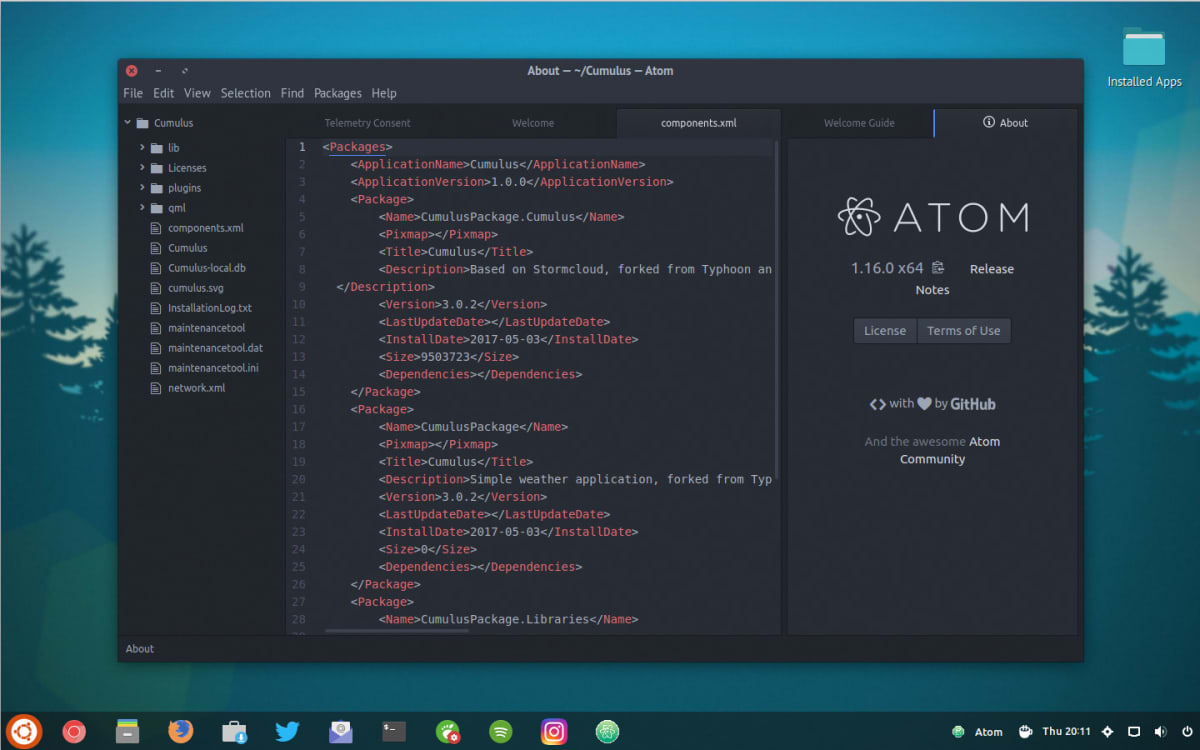
- Atom: Developed by GitHub, Atom is a free and open-source text editor that is highly customizable. It supports a plethora of packages and themes, allowing users to tailor their experience.
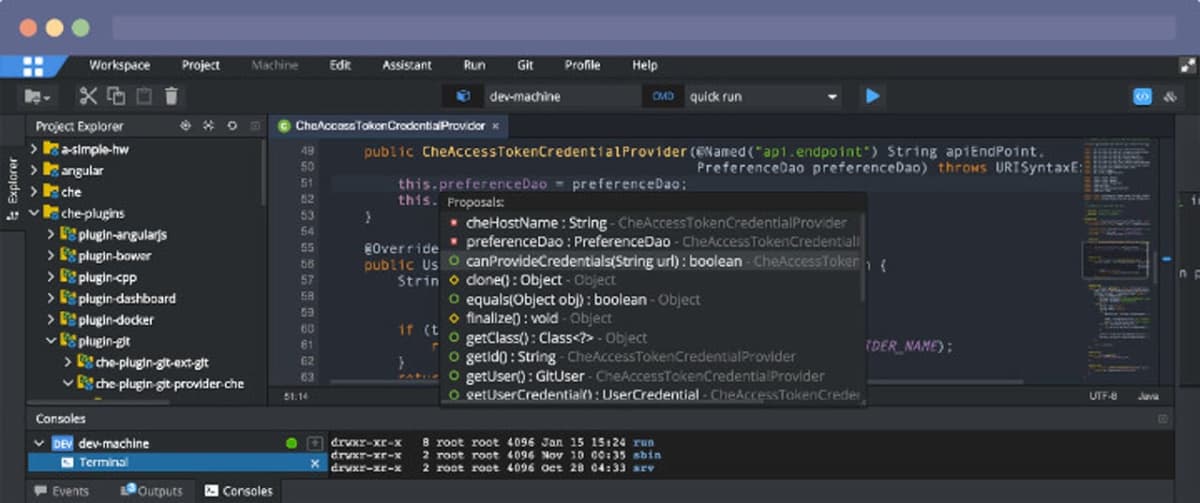
2. Integrated Development Environments (IDEs):
IDEs provide a comprehensive environment for software development, often including features like code debugging, built-in terminal, and integrated version control. Some popular choices include:
Visual Studio: A powerful IDE developed by Microsoft. It supports multiple programming languages and provides advanced debugging and profiling tools.
IntelliJ IDEA: Specifically designed for Java development, IntelliJ IDEA has expanded to support various languages. It is known for its smart code completion and efficient navigation features.

- Eclipse: An open-source IDE widely used for Java development but also supports other languages through plugins. Eclipse offers a vast ecosystem of plugins for diverse development needs.
Choose a text editor or IDE based on your preferences and the requirements of your project. Many developers often use a combination of both, depending on the nature of their work.
B. Browser Developer Tools
1. Chrome Developer Tools:
Google Chrome comes equipped with robust developer tools that facilitate debugging, profiling, and testing of web applications. To access them, right-click on any element on a webpage and select “Inspect” or press Ctrl+Shift+I (Windows/Linux) or Cmd+Opt+I (Mac).
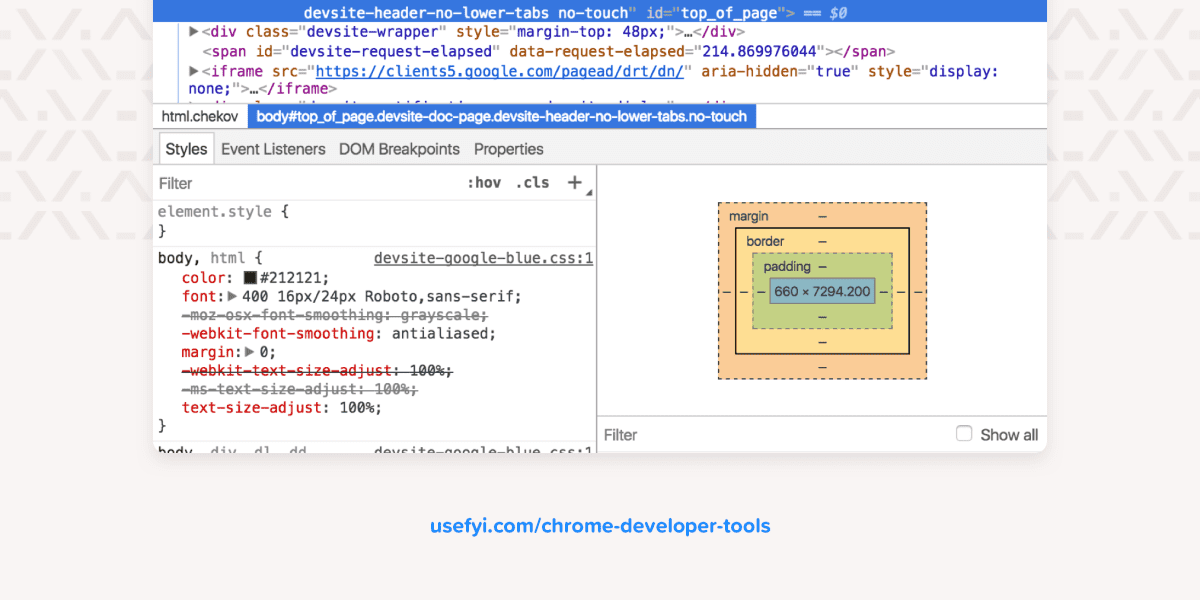
- Elements: Inspect and manipulate the Document Object Model (DOM) of a page.
- Console: Execute JavaScript code and view log outputs.
- Sources: Debug JavaScript code and set breakpoints.
- Network: Monitor network activity and analyze requests/responses.
- Performance: Evaluate the performance of your web application.
2. Firefox Developer Tools:
Mozilla Firefox also provides a comprehensive set of developer tools accessible through Ctrl+Shift+I (Windows/Linux) or Cmd+Opt+I (Mac). Key features include:

- Inspector: Examine and modify the HTML and CSS of a page.
- Console: Execute JavaScript and view logs.
- Debugger: Debug JavaScript code with breakpoints.
- Network Monitor: Analyze network requests and responses.
- Performance: Evaluate the performance of your web application.
Browser developer tools are indispensable for web development, enabling you to diagnose issues, optimize performance, and fine-tune the appearance and behavior of your web pages.
Introduction to Node.js
1. What is Node.js?
Node.js is an open-source, server-side JavaScript runtime environment that allows developers to run JavaScript code outside the browser. It is built on the V8 JavaScript engine from Chrome and enables the execution of JavaScript code on the server, opening up possibilities for building scalable and high-performance web applications.
2. Key Features:
- Event-Driven: Node.js uses an event-driven, non-blocking I/O model that makes it efficient and lightweight, suitable for handling concurrent connections.
- NPM (Node Package Manager): NPM is the default package manager for Node.js, providing a vast ecosystem of reusable packages and modules that simplify development tasks.
- Cross-Platform: Node.js is compatible with various operating systems, allowing developers to create applications that run consistently across different environments.
3. Setting Up Node.js:
- To install Node.js, visit the official Node.js website and download the latest stable version for your operating system.
- Follow the installation instructions for your specific platform.
- Verify the installation by opening a terminal or command prompt and running
node -vandnpm -v.
4. Hello World with Node.js:
Let’s create a simple “Hello, World!” program with Node.js.
// Create a file named hello.js
console.log('Hello, World!');
Save the file and run it using the command node hello.js in the terminal. You should see the output Hello, World!.
Node.js is a powerful tool for server-side development, and its integration with JavaScript simplifies the creation of full-stack applications. As you explore Node.js further, you’ll discover its potential for building scalable and efficient server-side solutions.
In the next sections, we will delve into JavaScript syntax, cover essential concepts, and guide you through practical examples to help you become proficient in both client-side and server-side development.
Basic JavaScript Concepts
Understanding fundamental JavaScript concepts is essential for building a strong foundation in web development. In this section, we’ll explore variables and data types, operators, control flow structures (if statements and loops), and delve into the concepts of functions and scope.
A. Variables and Data Types
1. Variables:
In JavaScript, variables are used to store and manipulate data. They are declared using the var, let, or const keyword.
// Example of variable declaration
let greeting = 'Hello, World!';
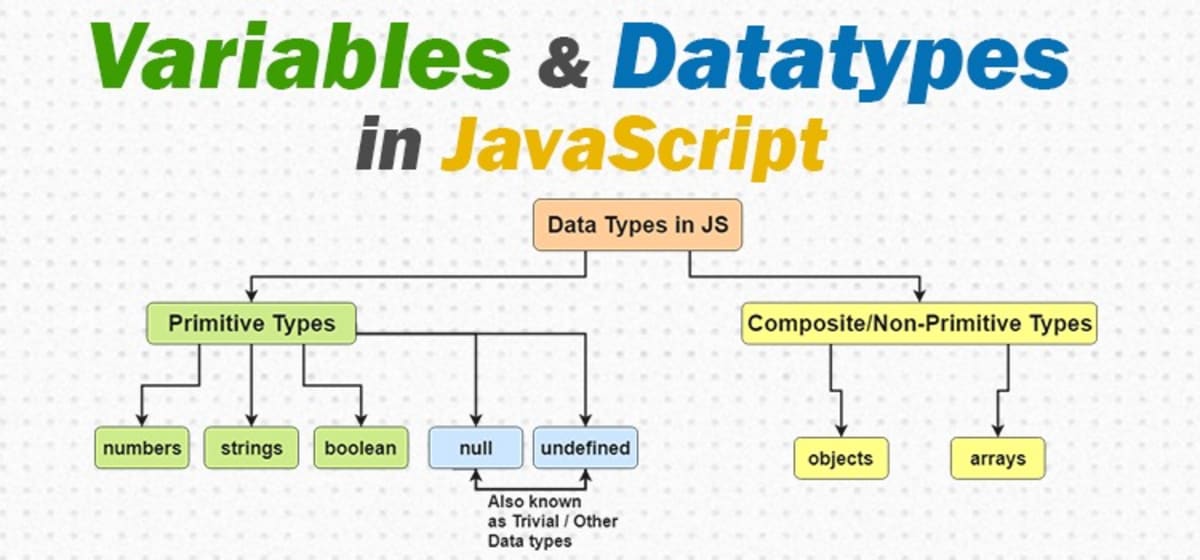
2. Data Types:
JavaScript supports various data types, including:
Primitive Data Types:
- String: Textual data (
'Hello',"World"). - Number: Numeric data (
42,3.14). - Boolean: Logical data (
true,false). - Null: Represents the absence of value (
null). - Undefined: Variable declared but not assigned a value (
undefined).
- String: Textual data (
Composite Data Types:
- Object: Represents a collection of key-value pairs.
- Array: Ordered list of values.
// Examples of data types
let name = 'John'; // String
let age = 25; // Number
let isStudent = true; // Boolean
let person = { name: 'John', age: 25 }; // Object
let numbers = [1, 2, 3, 4, 5]; // Array
B. Operators

1. Arithmetic Operators:
- Addition:
+ - Subtraction:
- - Multiplication:
* - Division:
/ - Modulus (Remainder):
%
let sum = 10 + 5; // 15
let difference = 10 - 5; // 5
let product = 10 * 5; // 50
let quotient = 10 / 5; // 2
let remainder = 10 % 3; // 1
2. Comparison Operators:
- Equal to:
==or=== - Not equal to:
!=or!== - Greater than:
> - Less than:
< - Greater than or equal to:
>= - Less than or equal to:
<=
let isEqual = 5 === '5'; // false (strict equality)
let isNotEqual = 10 != '10'; // false
let isGreaterThan = 15 > 10; // true
3. Logical Operators:
- AND:
&& - OR:
|| - NOT:
!
let isBothTrue = true && true; // true
let isEitherTrue = true || false; // true
let isNotTrue = !true; // false
C. Control Flow (if Statements, Loops)

1. if Statements:
Conditional statements allow you to execute code based on a condition.
let age = 20;

if (age >= 18) {
  console.log('You are eligible to vote.');
} else {
  console.log('Sorry, you are not eligible to vote.');
}
2. Loops:
Loops allow you to repeat code multiple times.
for Loop:
for (let i = 0; i < 5; i++) {
  console.log(i); // Outputs numbers from 0 to 4
}
while Loop:
let i = 0;
while (i < 5) {
  console.log(i); // Outputs numbers from 0 to 4
  i++;
}
D. Functions and Scope
1. Functions:
Functions allow you to encapsulate and reuse blocks of code.
function greet(name) {
  console.log(`Hello, ${name}!`);
}

greet('John'); // Outputs: Hello, John!
2. Scope:
- Global Scope: Variables declared outside any function are in the global scope and can be accessed throughout the entire program.
- Local Scope: Variables declared inside a function are in the local scope and can only be accessed within that function.
let globalVariable = 'I am global';

function exampleFunction() {
  let localVariable = 'I am local';
  console.log(globalVariable); // Accessible
  console.log(localVariable); // Accessible
}

console.log(globalVariable); // Accessible
console.log(localVariable); // Uncaught ReferenceError: localVariable is not defined
Understanding these basic JavaScript concepts sets the stage for more advanced programming and web development. In the upcoming sections, we’ll explore more advanced topics, including object-oriented programming, asynchronous JavaScript, and web APIs.
Mastering JavaScript Ebook
Objects and Arrays

Objects and arrays are fundamental data structures in JavaScript, providing a way to organize and store data efficiently. In this section, we’ll explore creating and manipulating objects, working with arrays, and iterating through both objects and arrays.
A. Creating and Manipulating Objects
1. Creating Objects:
Objects in JavaScript are collections of key-value pairs. Keys are strings, and values can be any data type, including other objects.
// Example of creating an object
let person = {
  firstName: 'John',
  lastName: 'Doe',
  age: 30,
  address: {
    city: 'New York',
    country: 'USA'
  }
};
2. Accessing Object Properties:
You can access object properties using dot notation or square bracket notation.
console.log(person.firstName); // John
console.log(person['address']['city']); // New York
3. Modifying and Adding Properties:
Properties of an object can be modified or new properties can be added.
person.age = 31; // Modifying existing property
person.job = 'Engineer'; // Adding a new property
4. Deleting Properties:
You can delete a property from an object using the delete keyword.
delete person.age;
B. Working with Arrays
1. Creating Arrays:
Arrays are ordered lists of values and can contain various data types.
// Example of creating an array
let fruits = ['apple', 'orange', 'banana', 'kiwi'];
2. Accessing Array Elements:
Array elements are accessed by their index, starting from 0.
console.log(fruits[0]); // apple
3. Modifying and Adding Elements:
Array elements can be modified or new elements can be added.
fruits[1] = 'pear'; // Modifying an existing element
fruits.push('grape'); // Adding a new element to the end
4. Removing Elements:
Elements can be removed from an array using methods like pop(), shift(), or splice().
fruits.pop(); // Removes the last element
fruits.shift(); // Removes the first element
fruits.splice(1, 2); // Removes elements from index 1 to 2 (exclusive)
C. Iterating Through Objects and Arrays
1. Iterating Through Objects:
You can iterate through the properties of an object using a for...in loop.
for (let key in person) {
  console.log(`${key}: ${person[key]}`);
}
2. Iterating Through Arrays:
Arrays can be iterated through using various methods like for, forEach(), map(), and more.
Using
forloop:for (let i = 0; i < fruits.length; i++) { console.log(fruits[i]); }Using
forEach():fruits.forEach(function (fruit) { console.log(fruit); });Using
map():let uppercasedFruits = fruits.map(function (fruit) { return fruit.toUpperCase(); });
Understanding how to create, manipulate, and iterate through objects and arrays is essential for building dynamic and interactive applications. In the next sections, we’ll explore more advanced JavaScript topics, including functions as first-class citizens, asynchronous programming, and interacting with web APIs.
Document Object Model (DOM)
The Document Object Model (DOM) is a critical concept in web development, providing a structured representation of HTML documents. Understanding the DOM allows developers to interact with and manipulate web pages dynamically. In this section, we’ll explore the basics of the DOM, how to select and manipulate DOM elements, and how to handle events.
A. Understanding the DOM
1. What is the DOM?
The Document Object Model (DOM) is a programming interface that represents the structure of a document as a tree of objects. In the context of web development, this document is typically an HTML or XML document. The DOM provides a way for programs to manipulate the structure, style, and content of a document dynamically.
2. DOM Tree:
The DOM represents an HTML document as a hierarchical tree structure. Each element, attribute, and piece of text in the HTML becomes a node in the tree.
<!DOCTYPE html>
<html>
  <head>
    <title>Sample Page</title>
  </head>
  <body>
    <h1>Hello, World!</h1>
    <p>This is a sample paragraph.</p>
  </body>
</html>
The corresponding DOM tree for this HTML document would look like:
Document
├── html
│   ├── head
│   │   └── title
│   │       └── "Sample Page"
│   └── body
│       ├── h1
│       │   └── "Hello, World!"
│       └── p
│           └── "This is a sample paragraph."
└── ...
B. Selecting and Manipulating DOM Elements
1. Selecting Elements:
You can select DOM elements using various methods, such as getElementById, getElementsByClassName, getElementsByTagName, and querySelector.
// Example of selecting elements
let heading = document.getElementById('main-heading');
let paragraphs = document.getElementsByClassName('paragraph');
let firstParagraph = document.querySelector('p');
2. Manipulating Elements:
Once you’ve selected an element, you can manipulate its content, attributes, and style.
// Example of manipulating elements
heading.innerHTML = 'New Heading';
paragraphs[0].style.color = 'blue';
firstParagraph.setAttribute('class', 'important');
3. Creating and Appending Elements:
You can create new elements and append them to the DOM.
// Example of creating and appending elements
let newParagraph = document.createElement('p');
newParagraph.innerHTML = 'This is a new paragraph.';
document.body.appendChild(newParagraph);
C. Handling Events
1. Event Handling:
Events are actions or occurrences that happen in the browser, such as a user clicking a button or the page finishing loading. You can handle events using event listeners.
// Example of event handling
let button = document.getElementById('my-button');

button.addEventListener('click', function () {
  alert('Button clicked!');
});
2. Common Events:
- Click: Triggered when a mouse button is clicked.
- Mouseover/Mouseout: Triggered when the mouse pointer enters/exits an element.
- Keydown/Keyup: Triggered when a key on the keyboard is pressed/released.
- Submit: Triggered when a form is submitted.
let myElement = document.getElementById('my-element');

myElement.addEventListener('mouseover', function () {
  console.log('Mouse over the element!');
});
3. Event Object:
Event listeners receive an event object, which contains information about the event, such as the target element and event type.
button.addEventListener('click', function (event) {
  console.log('Button clicked!');
  console.log('Event type:', event.type);
  console.log('Target element:', event.target);
});
Understanding the DOM, selecting and manipulating elements, and handling events are essential skills for creating interactive and dynamic web pages. In the next sections, we’ll explore more advanced topics, including asynchronous programming and making HTTP requests using JavaScript.
Mastering JavaScript Ebook
Asynchronous JavaScript
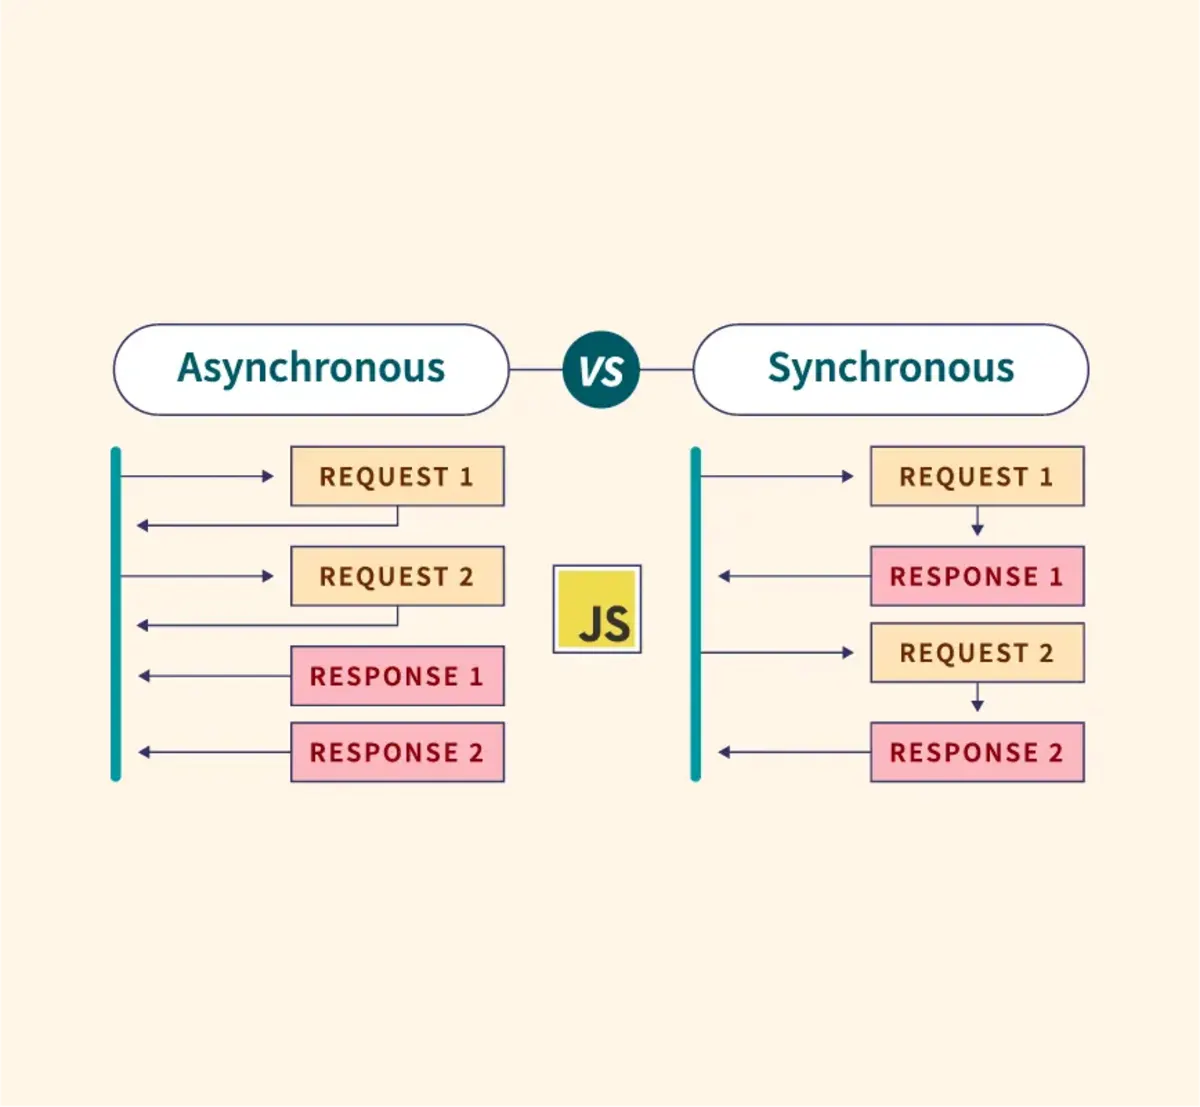
Asynchronous programming is crucial for dealing with operations that may take time, such as fetching data from a server or reading a file. In JavaScript, asynchronous behavior can be achieved through callbacks, promises, and the more recent async/await syntax. In this section, we’ll explore each of these concepts.
A. Callbacks
1. What are Callbacks?
Callbacks are functions passed as arguments to other functions. They are executed after the completion of a particular task or when an event occurs.
function fetchData(callback) {
  // Simulating an asynchronous operation
  setTimeout(function () {
    const data = 'Fetched data!';
    callback(data);
  }, 1000);
}

// Using a callback
fetchData(function (data) {
  console.log(data);
});
2. Callback Hell (Pyramid of Doom):
When multiple asynchronous operations are nested, it can lead to callback hell, making the code hard to read and maintain.
fetchData(function (data) {
  process1(data, function (result1) {
    process2(result1, function (result2) {
      // ...
    });
  });
});
B. Promises
1. Introduction to Promises:
Promises provide a more structured way to handle asynchronous operations. A promise represents the eventual completion or failure of an asynchronous operation, and it can be in one of three states: pending, fulfilled, or rejected.
function fetchData() {
  return new Promise(function (resolve, reject) {
    // Simulating an asynchronous operation
    setTimeout(function () {
      const data = 'Fetched data!';
      resolve(data); // Operation succeeded
      // reject('Error: Unable to fetch data'); // Operation failed
    }, 1000);
  });
}

// Using a promise
fetchData()
  .then(function (data) {
    console.log(data);
  })
  .catch(function (error) {
    console.error(error);
  });
2. Chaining Promises:
Promises can be chained to handle multiple asynchronous operations in a more readable way.
fetchData()
  .then(function (data) {
    return process1(data);
  })
  .then(function (result1) {
    return process2(result1);
  })
  .then(function (result2) {
    // ...
  })
  .catch(function (error) {
    console.error(error);
  });
C. Async/await
1. Introduction to Async/await:
Async/await is a syntax sugar built on top of promises, providing a more concise way to write asynchronous code. It makes asynchronous code look and behave more like synchronous code.
async function fetchData() {
  return new Promise(function (resolve) {
    setTimeout(function () {
      const data = 'Fetched data!';
      resolve(data);
    }, 1000);
  });
}

// Using async/await
async function getData() {
  try {
    const data = await fetchData();
    console.log(data);
  } catch (error) {
    console.error(error);
  }
}

getData();
2. Async/await with Promises:
Async/await is often used with promises to simplify asynchronous code further.
async function processData() {
  try {
    const data = await fetchData();
    const result1 = await process1(data);
    const result2 = await process2(result1);
    // ...
  } catch (error) {
    console.error(error);
  }
}

processData();
Choosing the right approach depends on the specific requirements and style preferences. Async/await, when used appropriately, can lead to more readable and maintainable asynchronous code. In the next sections, we’ll explore advanced topics, including working with APIs and handling errors in asynchronous code.
AJAX and Fetch
AJAX (Asynchronous JavaScript and XML) is a foundational technology in web development that allows you to make asynchronous requests to a server, update parts of a web page without refreshing, and handle responses dynamically. The Fetch API, introduced in modern JavaScript, provides a more powerful and flexible way to perform asynchronous HTTP requests. In this section, we’ll explore making asynchronous requests, handling responses, and using the Fetch API.
A. Making Asynchronous Requests
1. Using XMLHttpRequest (Traditional AJAX):
XMLHttpRequest is a classic method for making asynchronous requests in JavaScript.
var xhr = new XMLHttpRequest();
xhr.open('GET', 'https://api.example.com/data', true);

xhr.onreadystatechange = function () {
  if (xhr.readyState === 4 && xhr.status === 200) {
    var responseData = JSON.parse(xhr.responseText);
    console.log(responseData);
  }
};

xhr.send();
2. Using Fetch API (Modern Approach):
The Fetch API provides a more modern and convenient way to make asynchronous requests. It returns a Promise that resolves to the Response object representing the completion or failure of the request.
fetch('https://api.example.com/data')
  .then(function (response) {
    if (!response.ok) {
      throw new Error('Network response was not ok');
    }
    return response.json();
  })
  .then(function (data) {
    console.log(data);
  })
  .catch(function (error) {
    console.error('Error:', error);
  });
B. Handling Responses
1. Response Object (Fetch):
The Response object provides various methods for working with the response, such as json(), text(), and blob().
fetch('https://api.example.com/data')
  .then(function (response) {
    if (!response.ok) {
      throw new Error('Network response was not ok');
    }
    return response.json();
  })
  .then(function (data) {
    console.log(data);
  })
  .catch(function (error) {
    console.error('Error:', error);
  });
2. Handling JSON Responses:
When working with JSON data, the json() method can be used to parse the response as JSON.
fetch('https://api.example.com/data')
  .then(function (response) {
    if (!response.ok) {
      throw new Error('Network response was not ok');
    }
    return response.json();
  })
  .then(function (data) {
    console.log(data);
  })
  .catch(function (error) {
    console.error('Error:', error);
  });
C. Fetch API
1. Basic Fetch Syntax:
The basic syntax of the Fetch API involves providing the URL and handling the response using promises.
fetch('https://api.example.com/data')
  .then(function (response) {
    if (!response.ok) {
      throw new Error('Network response was not ok');
    }
    return response.json();
  })
  .then(function (data) {
    console.log(data);
  })
  .catch(function (error) {
    console.error('Error:', error);
  });
2. Sending Data with Fetch:
Fetch can be used to send data to the server, such as in a POST request.
fetch('https://api.example.com/postData', {
  method: 'POST',
  headers: {
    'Content-Type': 'application/json',
  },
  body: JSON.stringify({
    key1: 'value1',
    key2: 'value2',
  }),
})
  .then(function (response) {
    if (!response.ok) {
      throw new Error('Network response was not ok');
    }
    return response.json();
  })
  .then(function (data) {
    console.log(data);
  })
  .catch(function (error) {
    console.error('Error:', error);
  });
The Fetch API is a powerful tool for working with asynchronous requests in modern JavaScript. Its simplicity and flexibility make it a preferred choice for many developers. In the upcoming sections, we’ll explore additional topics, including handling errors, working with third-party APIs, and securing web applications.
Mastering JavaScript Ebook
Error Handling and Debugging

Effective error handling and debugging are essential skills for web developers. In this section, we’ll explore handling exceptions, various debugging techniques, and how to use browser developer tools for debugging.
A. Handling Exceptions
1. Try…Catch Statement:
The try...catch statement allows you to handle exceptions (runtime errors) gracefully by providing a fallback mechanism.
try {
  // Code that may throw an exception
  let result = 10 / 0;
  console.log(result); // This line won't be executed if an exception occurs
} catch (error) {
  console.error('An error occurred:', error.message);
} finally {
  // Code that runs regardless of whether an exception occurred
  console.log('Finally block executed.');
}
2. Throwing Custom Errors:
You can throw custom errors using the throw statement to provide more meaningful information.
function divide(a, b) {
  if (b === 0) {
    throw new Error('Cannot divide by zero');
  }
  return a / b;
}

try {
  let result = divide(10, 0);
  console.log(result);
} catch (error) {
  console.error('An error occurred:', error.message);
}
B. Debugging Techniques
1. Console.log:
The simplest way to debug is by using console.log statements to output values and messages to the console.
console.log('Value of x:', x);
2. Debugger Statement:
The debugger statement triggers a breakpoint in your code, allowing you to inspect variables and step through the code.
function myFunction() {
  let x = 10;
  debugger; // Code will pause here
  console.log('Value of x:', x);
}

myFunction();
3. Using breakpoints in DevTools:
Modern browsers provide Developer Tools with advanced debugging features. You can set breakpoints, inspect variables, and step through code execution.

C. Using Browser Developer Tools for Debugging
1. Opening DevTools:
Open the browser’s Developer Tools using Ctrl+Shift+I (Windows/Linux) or Cmd+Opt+I (Mac). Navigate to the “Console” and “Sources” tabs for debugging.
2. Setting Breakpoints:
Click on the line number in the “Sources” tab to set breakpoints. The code will pause at these breakpoints during execution.
3. Stepping Through Code:
Use the “Step Over,” “Step Into,” and “Step Out” buttons to navigate through the code one line at a time.
4. Inspecting Variables:
View and modify variable values in the “Scope” section of the “Sources” tab. Hover over variables in the code to see their current values.
5. Console and Network Tab:
Utilize the “Console” tab for logging messages and errors. The “Network” tab helps inspect HTTP requests and responses.
By mastering these error handling and debugging techniques, developers can identify and resolve issues more efficiently, leading to robust and reliable web applications. In the upcoming sections, we’ll delve into topics such as securing web applications and working with third-party APIs.
ES6 and Modern JavaScript Features
ES6 (ECMAScript 2015) introduced several features that enhance the clarity and conciseness of JavaScript code. In this section, we’ll explore some of these modern JavaScript features, including arrow functions, template literals, destructuring, let and const, as well as classes and modules.
A. Arrow Functions
1. Introduction to Arrow Functions:
Arrow functions provide a more concise syntax for defining functions. They are especially useful for short, one-line functions.
// Traditional function
function add(x, y) {
  return x + y;
}

// Arrow function
const add = (x, y) => x + y;
2. Arrow Functions and this:
Arrow functions do not have their own this context; instead, they inherit this from the surrounding scope.
function MyClass() {
  this.value = 42;

  // Traditional function
  this.method1 = function () {
    console.log(this.value);
  };

  // Arrow function
  this.method2 = () => {
    console.log(this.value);
  };
}
B. Template Literals
1. Introduction to Template Literals:
Template literals provide a convenient way to concatenate strings and include expressions within backticks.
const name = 'John';
const greeting = `Hello, ${name}!`;
2. Multiline Strings:
Template literals allow multiline strings without the need for concatenation.
const multilineString = `
  This is a multiline
  string using template literals.
`;
C. Destructuring
1. Array Destructuring:
Destructuring allows you to extract values from arrays and assign them to variables in a concise way.
const numbers = [1, 2, 3];
const [a, b, c] = numbers;
2. Object Destructuring:
Destructuring can also be applied to objects, allowing you to extract values based on property names.
const person = { name: 'Alice', age: 30 };
const { name, age } = person;
D. Let and Const
1. let and const Declarations:
let and const are block-scoped declarations introduced in ES6. let allows variable reassignment, while const creates constants that cannot be reassigned.
let count = 10;
count = 20; // Valid

const pi = 3.14;
pi = 3.14159; // Error: Cannot reassign a const variable
2. Block Scoping:
Both let and const are block-scoped, meaning they are only accessible within the block (enclosed by curly braces) in which they are defined.
if (true) {
  let insideIf = 'I am inside the if block';
  console.log(insideIf);
}

console.log(insideIf); // Error: `insideIf` is not defined
E. Classes and Modules
1. Classes:
ES6 introduced the class syntax for creating constructor functions and managing object-oriented programming in JavaScript.
class Animal {
  constructor(name) {
    this.name = name;
  }

  speak() {
    console.log(`${this.name} makes a sound.`);
  }
}

const dog = new Animal('Dog');
dog.speak(); // Output: Dog makes a sound.
2. Modules:
Modules allow developers to organize code by splitting it into multiple files. ES6 modules use the export and import syntax.
// math.js
export const add = (a, b) => a + b;

// main.js
import { add } from './math.js';
console.log(add(5, 10)); // Output: 15
These modern JavaScript features improve code readability, maintainability, and developer productivity. Embracing them enhances your ability to write efficient and expressive JavaScript code. In the upcoming sections, we’ll explore more advanced concepts and techniques in web development.
JavaScript Libraries and Frameworks
JavaScript libraries and frameworks play a crucial role in web development, providing pre-built functionalities and structures that streamline the process of building robust and interactive web applications. In this section, we’ll introduce a popular JavaScript library, jQuery, and provide an overview of three prominent JavaScript frameworks: React, Angular, and Vue.
A. Introduction to Popular Libraries (e.g., jQuery)
1. jQuery: A Brief Introduction:
jQuery is a fast, lightweight, and feature-rich JavaScript library that simplifies the process of DOM manipulation, event handling, and AJAX requests.
// Example: Using jQuery to handle a click event
$(document).ready(function () {
  $('button').click(function () {
    alert('Button clicked!');
  });
});
Key Features of jQuery:
- DOM manipulation simplified.
- Event handling made more accessible.
- AJAX requests streamlined.
B. Overview of Popular Frameworks (e.g., React, Angular, Vue)
1. React:
Introduction: React is a declarative, efficient, and flexible JavaScript library for building user interfaces. Developed and maintained by Facebook, React allows developers to build UI components that update efficiently when data changes.
Key Concepts:
- Components: UIs are split into independent, reusable components.
- Virtual DOM: React uses a virtual representation of the DOM for optimal rendering performance.
- JSX: A syntax extension that allows writing HTML elements and components in JavaScript files.
Example:
// React Component
class Greeting extends React.Component {
  render() {
    return <h1>Hello, {this.props.name}!</h1>;
  }
}

// Rendering the component
ReactDOM.render(<Greeting name="John" />, document.getElementById('root'));
2. Angular:
Introduction: Angular is a comprehensive web application framework developed by Google. It follows the MVC (Model-View-Controller) architecture and provides a set of tools for building dynamic and single-page applications.
Key Concepts:
- Two-Way Data Binding: Changes in the UI are reflected in the underlying data model and vice versa.
- Dependency Injection: Promotes modular and maintainable code by injecting dependencies into components.
- Directives: Extends HTML with custom attributes and tags for dynamic behavior.
Example:
// Angular Component
@Component({
  selector: 'app-greeting',
  template: '<h1>Hello, {{ name }}!</h1>',
})
export class GreetingComponent {
  name = 'John';
}
3. Vue:
Introduction: Vue is a progressive JavaScript framework for building user interfaces. It’s designed to be incrementally adaptable, making it easy to integrate with existing projects. Vue emphasizes simplicity and ease of integration.
Key Concepts:
- Reactivity: Vue ensures that changes to data are automatically reflected in the UI.
- Components: Vue applications are built using components that encapsulate both structure and behavior.
- Directives: Special tokens in the markup that tell the library to do something to a DOM element.
Example:
<!-- Vue Component Template -->
<template>
  <h1>Hello, {{ name }}!</h1>
</template>

<!-- Vue Component Script -->
<script>
  export default {
    data() {
      return {
        name: 'John',
      };
    },
  };
</script>
Choosing between a library like jQuery or a framework like React, Angular, or Vue depends on the project requirements, scalability, and personal or team preferences. Each has its strengths and use cases in the diverse landscape of web development. In the upcoming sections, we’ll delve into more advanced topics and emerging trends in the web development ecosystem.
Mastering JavaScript Ebook
Testing in JavaScript
Testing is a crucial aspect of software development, ensuring that code behaves as expected and minimizing the likelihood of introducing bugs. In this section, we’ll explore unit testing with the Jest framework and introduce some testing libraries and tools commonly used in the JavaScript ecosystem.
A. Unit Testing with Frameworks like Jest
1. Introduction to Jest:
Jest is a popular JavaScript testing framework developed by Facebook. It is widely used for unit testing, providing a zero-config setup and a comprehensive set of features for writing and running tests.
// Example Jest Test
test('adds 1 + 2 to equal 3', () => {
  expect(sum(1, 2)).toBe(3);
});
2. Key Features of Jest:
- Zero Configuration: Jest requires minimal configuration, making it easy to set up and use in projects.
- Snapshot Testing: Captures the output of components and compares it to a stored snapshot to identify unexpected changes.
- Mocking: Provides built-in tools for mocking modules, functions, and timers.
// Example Jest Snapshot Test
test('renders correctly', () => {
  const tree = renderer.create(<MyComponent />).toJSON();
  expect(tree).toMatchSnapshot();
});
B. Testing Libraries and Tools
1. Mocha and Chai:
- Mocha: A flexible and feature-rich JavaScript testing framework that supports both asynchronous and synchronous testing.
- Chai: An assertion library that can be paired with Mocha, providing expressive and readable assertions.
// Example Mocha and Chai Test
const assert = require('chai').assert;

describe('Array', function () {
  it('should return -1 when the value is not present', function () {
    assert.equal([1, 2, 3].indexOf(4), -1);
  });
});
2. Jasmine:
- Jasmine: A behavior-driven development (BDD) framework for testing JavaScript code. It provides a clean syntax and supports asynchronous testing.
// Example Jasmine Test
describe('A suite', function () {
  it('contains spec with an expectation', function () {
    expect(true).toBe(true);
  });
});
3. Cypress:
- Cypress: An end-to-end testing framework designed for modern web applications. Cypress allows developers to write and run tests directly in the browser.
// Example Cypress Test
it('should display the correct title', function () {
  cy.visit('https://example.com');
  cy.title().should('include', 'Example Domain');
});
Choosing the right testing framework or library depends on project requirements, team preferences, and the type of testing needed (unit testing, integration testing, end-to-end testing, etc.). Incorporating robust testing practices is essential for building reliable and maintainable JavaScript applications. In the upcoming sections, we’ll explore more advanced topics in web development and stay updated on emerging trends.
Building and Bundling in Web Development
Building and bundling are crucial steps in the web development process, optimizing code, managing dependencies, and preparing projects for deployment. In this section, we’ll introduce build tools like Webpack, discuss the concepts of bundling and minification, and explore the role of transpilers, with a focus on Babel.
A. Introduction to Build Tools (e.g., Webpack)
1. Webpack: A Powerful Build Tool:
Webpack is a popular open-source JavaScript module bundler. It takes your code, assets, and dependencies, and bundles them into static assets for the web. Webpack simplifies the management of project assets and enables features like code splitting and hot module replacement.
// webpack.config.js
const path = require('path');

module.exports = {
  entry: './src/index.js',
  output: {
    filename: 'bundle.js',
    path: path.resolve(__dirname, 'dist'),
  },
};
2. Key Features of Webpack:
- Module Bundling: Bundles JavaScript modules and their dependencies.
- Code Splitting: Divides code into smaller chunks to be loaded on demand.
- Loaders: Transforms non-JavaScript assets (like CSS, images) into valid modules.
- Plugins: Extend the functionality of Webpack with a wide range of plugins.
// Example: Webpack Loaders and Plugins
module.exports = {
  // ...
  module: {
    rules: [
      {
        test: /\.css$/,
        use: ['style-loader', 'css-loader'],
      },
    ],
  },
  plugins: [new HtmlWebpackPlugin({ template: './src/index.html' })],
};
B. Bundling and Minification
1. Bundling: Combining Files for Efficiency:
Bundling involves combining multiple files into a single file (or a few files) to reduce the number of HTTP requests made by the browser. This helps optimize loading times, especially for larger web applications.
// Before Bundling
<script src="module1.js"></script>
<script src="module2.js"></script>
<script src="module3.js"></script>

// After Bundling
<script src="bundle.js"></script>
2. Minification: Reducing File Size:
Minification is the process of removing unnecessary characters (whitespace, comments) and shortening variable and function names from code. This results in smaller file sizes, improving download and execution times.
// Before Minification
function calculateTotalPrice(itemPrice, quantity) {
  // ...
  return itemPrice * quantity;
}

// After Minification
function a(b, c) {return b * c;}
C. Transpilers (e.g., Babel)
1. Babel: The JavaScript Transpiler:
Babel is a JavaScript compiler (transpiler) that converts ECMAScript 2015+ (ES6+) code into a backward-compatible version of JavaScript that can run in older browsers. It enables developers to use modern JavaScript features while ensuring compatibility.
// Before Transpilation (ES6+)
const greet = (name) => `Hello, ${name}!`;

// After Transpilation (ES5)
var greet = function (name) {
  return 'Hello, ' + name + '!';
};
2. Key Features of Babel:
- ES6+ Support: Allows using the latest ECMAScript features.
- Plugin System: Extensible architecture with a wide range of plugins.
- React JSX Support: Transforms JSX syntax used in React applications.
// Example: Babel Configuration
{
  "presets": ["@babel/preset-env"],
  "plugins": ["@babel/plugin-transform-react-jsx"]
}
Using build tools, bundlers, and transpilers is essential for modern web development, improving performance, and ensuring compatibility across browsers. As we advance through the upcoming sections, we’ll explore more advanced topics and trends in the dynamic field of web development.
Mastering JavaScript Ebook
Web Development Best Practices
Building high-quality web applications involves adhering to best practices in code organization, performance optimization, and cross-browser compatibility. In this section, we’ll explore key guidelines in these areas to help you create robust and efficient web projects.
A. Code Organization and Structure
1. Project Structure:
- Organize your project into logical directories (e.g.,
src,public,assets) to separate source code from build artifacts.
/project
  ├── src
  │   ├── components
  │   ├── styles
  │   └── index.js
  ├── public
  │   └── index.html
  ├── assets
  └── ...
2. Modularization:
- Break down your code into modular components and files. This enhances maintainability and reusability.
// Example of Modularization
// user.js
export function getUser() { /* ... */ }

// order.js
export function getOrder() { /* ... */ }

// main.js
import { getUser } from './user';
import { getOrder } from './order';

getUser();
getOrder();
3. Consistent Naming Conventions:
- Adopt consistent naming conventions for files, variables, and functions. This promotes readability and reduces confusion.
// Example of Naming Conventions
// File: user-profile.js
function fetchUserProfile() { /* ... */ }

// Variable
const userName = 'John Doe';
B. Performance Optimization
1. Minimize HTTP Requests:
- Reduce the number of HTTP requests by bundling and minifying your assets. Use a content delivery network (CDN) for popular libraries.
2. Optimize Images:
- Compress and optimize images to reduce their file size. Consider using responsive images and lazy loading for improved performance.
3. Asynchronous Loading:
- Load non-essential resources asynchronously to prevent blocking the rendering of the main content.
<!-- Example of Asynchronous Loading -->
<script async src="script.js"></script>
4. Cache Control:
- Implement proper caching strategies using cache headers to reduce load times for returning visitors.
5. Code Splitting:
- Implement code splitting to load only the necessary code for the current view, improving initial page load times.
C. Cross-Browser Compatibility
1. Use Modern Web Standards:
- Write code that adheres to modern web standards and specifications. This enhances compatibility across various browsers.
2. Test in Multiple Browsers:
- Regularly test your web application in different browsers and their various versions to ensure a consistent and reliable user experience.
3. Feature Detection:
- Use feature detection rather than browser detection to handle variations in browser capabilities.
// Example of Feature Detection
if ('IntersectionObserver' in window) {
  // Use Intersection Observer
} else {
  // Fallback for browsers without support
}
4. Vendor Prefixes:
- Include vendor prefixes for CSS properties to ensure proper rendering in different browsers.
/* Example of Vendor Prefixes */
.example {
  -webkit-border-radius: 5px;
  -moz-border-radius: 5px;
  border-radius: 5px;
}
By following these best practices, you can ensure that your web applications are well-organized, performant, and compatible across different browsers. As web development continually evolves, staying informed about the latest standards and tools is key to maintaining high-quality projects. In the upcoming sections, we’ll explore advanced topics and emerging trends in the dynamic world of web development.
Introduction to Server-Side JavaScript
Server-side JavaScript allows developers to execute JavaScript code on the server, enabling them to build scalable and efficient web applications. In this section, we’ll provide an overview of Node.js, a popular runtime for server-side JavaScript, and demonstrate how to build a simple server using Node.js.
A. Overview of Node.js
1. What is Node.js?
- Node.js is a runtime environment that allows JavaScript to be executed server-side.
- It is built on the V8 JavaScript runtime and provides a non-blocking, event-driven architecture.
2. Key Features of Node.js:
- Asynchronous I/O: Enables handling a large number of simultaneous connections efficiently.
- NPM (Node Package Manager): A rich ecosystem of open-source libraries and tools.
- Single-threaded, Event-Driven: Uses an event loop to handle requests concurrently without creating threads.
3. Use Cases for Node.js:
- Building APIs: Ideal for creating RESTful APIs and server-side applications.
- Real-Time Applications: Well-suited for applications requiring real-time updates (e.g., chat applications).
- Microservices Architecture: Scales well for building microservices-based architectures.
B. Building a Simple Server with Node.js
1. Creating a Basic Server:
- Use the
httpmodule in Node.js to create a simple HTTP server.
// Example: Creating a Simple HTTP Server with Node.js
const http = require('http');

const server = http.createServer((req, res) => {
  res.writeHead(200, { 'Content-Type': 'text/plain' });
  res.end('Hello, Node.js!');
});

const PORT = 3000;
server.listen(PORT, () => {
  console.log(`Server running at http://localhost:${PORT}/`);
});
2. Running the Server:
- Save the code in a file (e.g.,
server.js) and run it using the command:
node server.js
- Access the server at http://localhost:3000/ in a web browser.
3. Handling Requests:
- The server responds with “Hello, Node.js!” for all incoming HTTP requests.
// Handling Requests
const server = http.createServer((req, res) => {
  res.writeHead(200, { 'Content-Type': 'text/plain' });
  res.end('Hello, Node.js!');
});
4. Asynchronous Nature:
- Node.js leverages an asynchronous, non-blocking architecture, allowing it to handle multiple requests simultaneously.
Node.js has become a prominent choice for server-side development, enabling developers to use a unified language (JavaScript) across both client and server environments. In the upcoming sections, we’ll explore more advanced topics and delve into building scalable and robust applications with Node.js.
Deploying a JavaScript Application
Deploying a JavaScript application involves making it accessible to users on the internet. In this section, we’ll discuss choosing a hosting service for your application and explore various deployment strategies to ensure a smooth and reliable deployment process.
A. Choosing a Hosting Service
1. Static vs. Dynamic Hosting:
- Static Hosting: Ideal for single-page applications (SPAs) and websites with minimal server-side logic. Services like Netlify, Vercel, and GitHub Pages are excellent choices.
- Dynamic Hosting: Suitable for applications with server-side logic, databases, and backend services. Platforms like Heroku, AWS, and Google Cloud offer dynamic hosting solutions.
2. Considerations When Choosing a Hosting Service:
- Scalability: Ensure the hosting service can scale to handle increasing traffic.
- Pricing: Understand the pricing model, especially for scalability and additional services.
- Ease of Use: Choose a service that aligns with your team’s expertise and offers a smooth deployment process.
B. Deployment Strategies
1. Continuous Deployment (CD):
- Implement a continuous deployment pipeline to automate the process of deploying changes to production.
- Services like GitHub Actions, GitLab CI/CD, and Travis CI can be used to set up continuous deployment.
# Example GitHub Actions Workflow for Continuous Deployment
name: Continuous Deployment

on:
  push:
    branches:
      - main

jobs:
  deploy:
    runs-on: ubuntu-latest

    steps:
      - name: Checkout Repository
        uses: actions/checkout@v2

      - name: Set Up Node.js
        uses: actions/setup-node@v2
        with:
          node-version: '14'

      - name: Install Dependencies
        run: npm install

      - name: Build Application
        run: npm run build

      - name: Deploy to Hosting Service
        run: npm run deploy
2. Manual Deployment:
- Manually deploy the application by uploading files or using deployment commands when ready to release.
- Suitable for smaller projects or when fine-tuning control over the deployment process.
# Example Manual Deployment Command
npm run deploy
3. Rolling Deployments:
- Gradually roll out new versions of the application to reduce the impact of any issues.
- Deploy changes to a small subset of servers initially and gradually increase the rollout.
4. Blue-Green Deployments:
- Set up two identical environments (blue and green).
- Deploy changes to one environment while keeping the other running.
- Switch traffic to the updated environment once deployment is successful.
Choosing the right hosting service and deployment strategy depends on the nature and scale of your application. Implementing automation through continuous deployment can streamline the deployment process, while manual deployment allows for more fine-tuned control. In the upcoming sections, we’ll explore advanced topics and trends in the ever-evolving landscape of web development.
Further Learning Resources
Continuing your learning journey in web development involves exploring a variety of resources, including books, tutorials, online courses, community forums, and websites. Here, we’ll provide recommendations in both categories to help you further enhance your skills and stay updated on the latest developments in the field.
A. Books, Tutorials, and Online Courses
1. Books:
“Eloquent JavaScript” by Marijn Haverbeke: A comprehensive guide that covers the fundamentals of JavaScript and programming concepts. Read Online
“You Don’t Know JS” series by Kyle Simpson: A series of books diving deep into various aspects of JavaScript, suitable for both beginners and experienced developers. GitHub Repository
“JavaScript: The Good Parts” by Douglas Crockford: A classic book that explores the good parts of JavaScript and provides insights into best practices.
2. Tutorials:
MDN Web Docs: Mozilla Developer Network’s documentation is an excellent resource for learning web development. It covers HTML, CSS, JavaScript, and more. MDN Web Docs
freeCodeCamp: A platform offering interactive coding challenges and projects in HTML, CSS, JavaScript, and more. freeCodeCamp
3. Online Courses:
Coursera - “Web Design for Everybody” by University of Michigan: A specialization that covers HTML, CSS, JavaScript, and responsive web design. Coursera
Udacity - “Front End Web Developer Nanodegree”: A nanodegree program covering HTML, CSS, JavaScript, and popular front-end frameworks. Udacity
Codecademy - “Full-Stack Engineer” Path: An interactive learning path covering both front-end and back-end development. Codecademy
B. Community Forums and Websites
1. Community Forums:
Stack Overflow: A popular Q&A platform where developers can ask and answer questions related to web development. Stack Overflow
Dev.to: A community platform where developers share articles, tutorials, and engage in discussions. Dev.to
2. Websites:
CSS-Tricks: A website by Chris Coyier that covers a wide range of CSS topics, tutorials, and tips. CSS-Tricks
Smashing Magazine: An online magazine that publishes articles on web design and development, covering various aspects of the field. Smashing Magazine
GitHub: Explore open-source projects, contribute to repositories, and collaborate with developers on GitHub. GitHub
Diversify your learning experience by combining books, tutorials, and online courses. Engage with the developer community through forums and stay updated on industry trends by following reputable websites. Remember that web development is a dynamic field, and continuous learning is key to staying ahead. In the upcoming sections, we’ll explore more advanced topics and emerging trends in web development.
Mastering JavaScript Ebook
See also
Recommend
About Joyk
Aggregate valuable and interesting links.
Joyk means Joy of geeK