

Using Form Capture With Realtime Marketing Forms
source link: https://meganvwalker.com/using-form-capture-with-realtime-marketing-forms/
Go to the source link to view the article. You can view the picture content, updated content and better typesetting reading experience. If the link is broken, please click the button below to view the snapshot at that time.
Using Form Capture With Realtime Marketing Forms
A weekly issue covering features, functionality and news on the topic of Marketing, specifically covering Dynamics 365 Marketing and other interesting tools and tips for anyone interested in the subject.
Subscribe Here
*** NOTE: ALL INFORMATION IS ACCURATE AT DATE OF PUBLISHING ***
When considering the right approach for your online marketing forms, it’s not always possible to use forms created in Customer Insights – Journeys (D365 Realtime Marketing forms). You might not want to recreate them all, or you might already be using another solution that you aren’t ready to replace just yet. Whatever the reason, if you’ve authenticated the domain within the marketing app, you can use those existing forms and map them back through to Dynamics so your Contacts and Leads are created and updated automatically without the need for any complicated workflows. This blog will show you how to use the form capture functionality for Realtime.
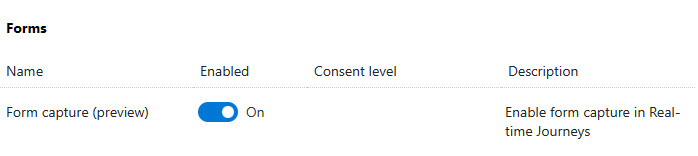
First thing, make sure you are on the latest version, then go in the setting area, feature switches and turn on the form capture option. Note at the time of publishing, this feature is in preview and therefore has it’s own feature switch. This might not be the case if you are implementing later on.
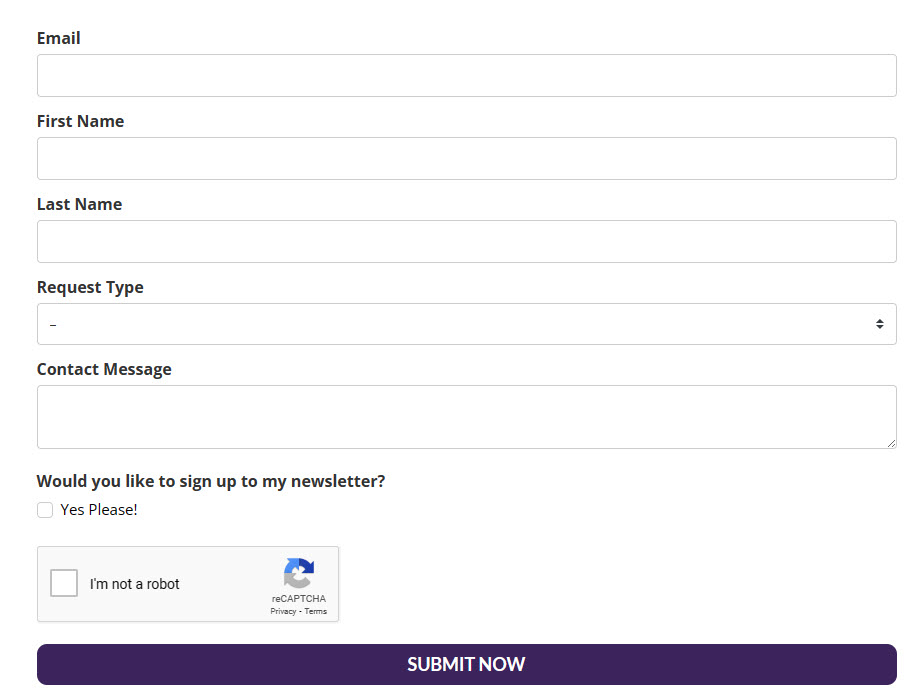
Next, consider the form you want to use for the form capture. I’ve got a form created using a service called Mailerlite that is embedded on my own website. Fairly simple, and I have all of these fields also set up as fields on the Lead table.
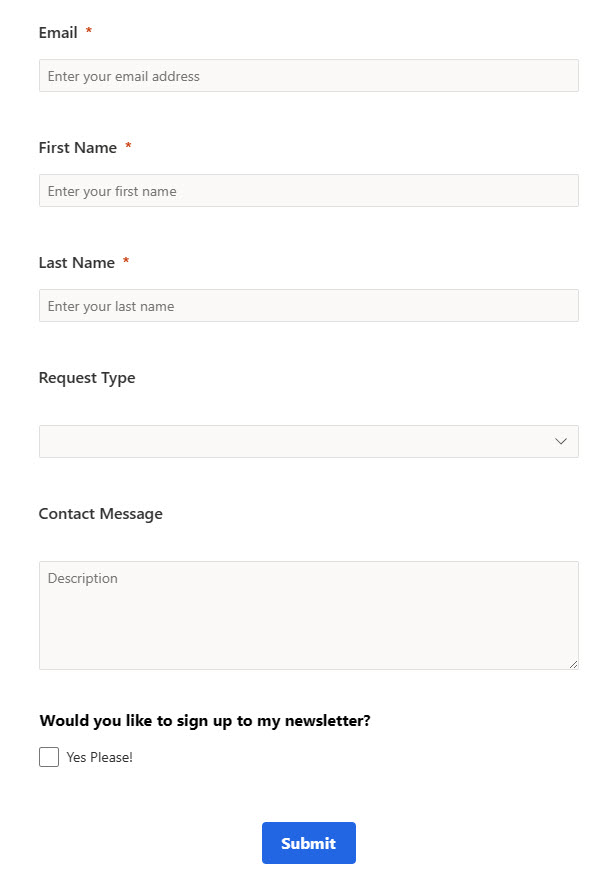
Now I need to make sure I have a form created in Realtime Marketing. It doesn’t matter what it looks like, so don’t worry about styling it in anyway as this form will never actually be shown to anyone. Just make sure you include all of the same fields. You can have fields on your external form that you don’t include here, but just understand that without a matching field for a Lead or Contact, you will miss information without any way to map it. The bottom field for signing up to my newsletter is a Purpose field that when ticked will set a Contact Point Consent record to Opted In.
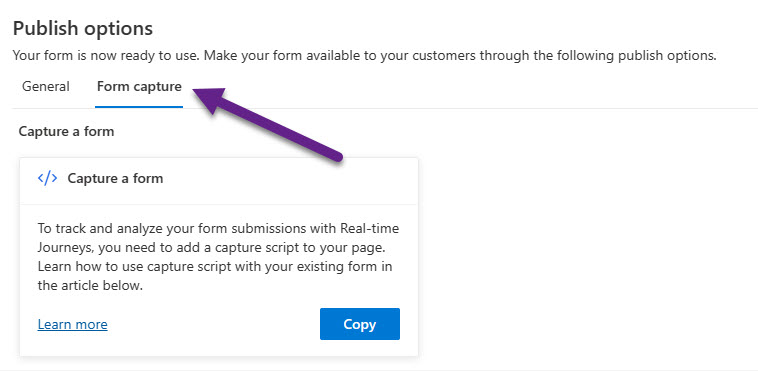
Once you’ve created the form, go ahead and publish it. You’ll now see an option for Form capture. Click this, and then click on the Copy button to get your script.
Paste the script in to something like notepad where you will be able to edit it. Your script will include a link to this Microsoft documentation page: Capture forms in Customer Insights – Journeys – Dynamics 365 Customer Insights
You’ll see that the code includes a script right at the top, then includes a series of sections that include ***Please fill***. These will all need to be replaced with values from your external form. The form needs a value set to make sure it can be found on the page, then each form field needs the value from your form to be mapped to the Dataverse (D365) field name. All other information is provided for you and doesn’t need any modification.
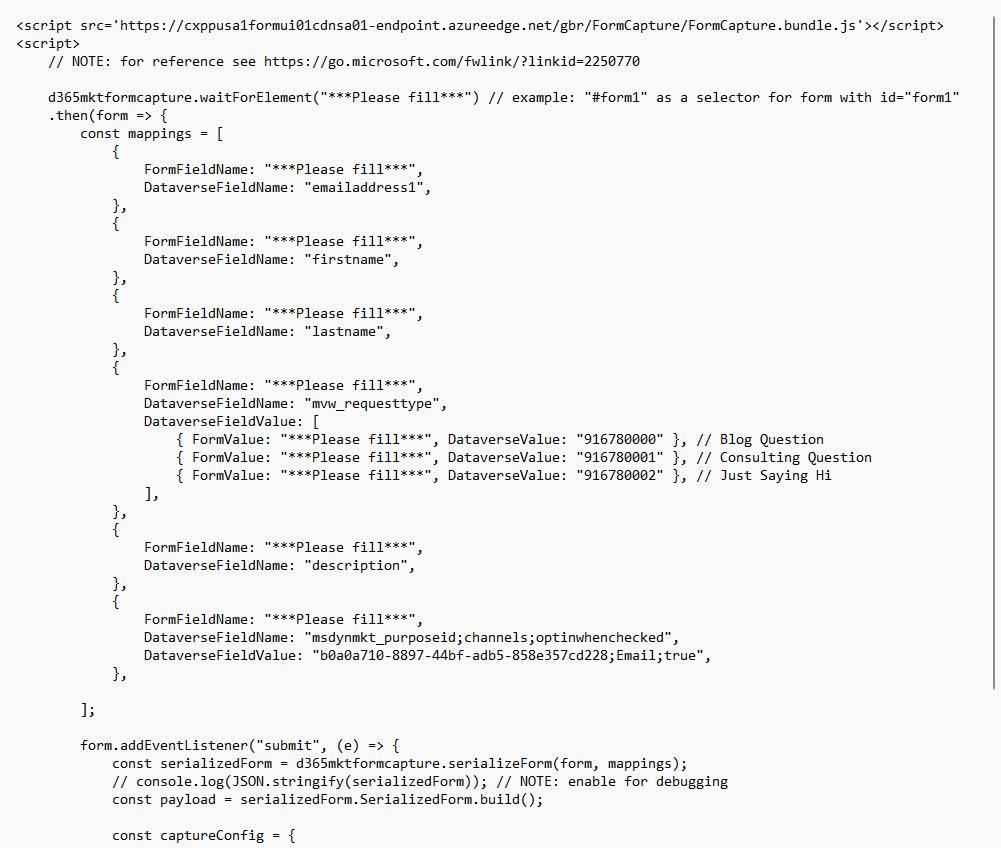
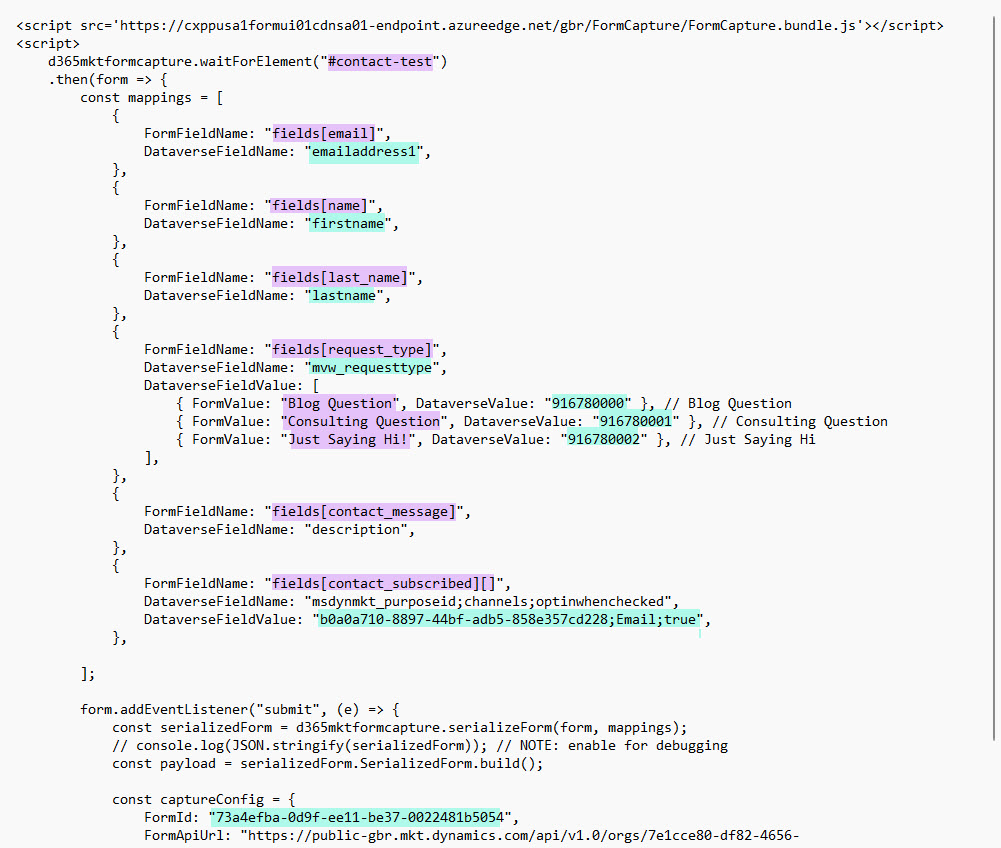
Quite often, a form is given an ID. This provides a way for the form to be found and accessed by the script. My form did not have an id assigned to it, but it’s simple to add. Just find the start of the form code for your external form, then add in id=”name-of-form” to it. See below, I provided the id of contact-test. Doesn’t need to be complicated, the simpler the better. Then take the same id and add it to the top of the script provided by the form in D365 as the form id (see screenshot below where I show my modified script).

Next you need to get the form field name from each of the fields on your external form and add them to the script. The easiest way is to view the form on your website and click in to the first field. Then right click with your mouse, and then click on Inspect.
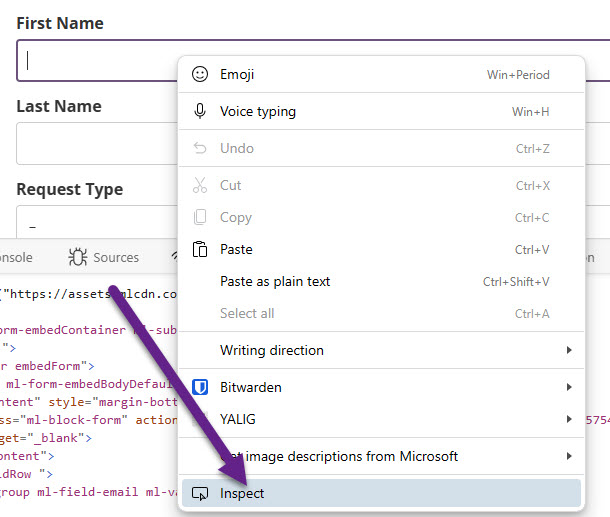
This will then show the code of the form and should open up the input element for that specific field. You are looking for the name of the field like you see below. My email field is called fields[email]. Your form could have a name like Email or email_address for example. You will need to inspect it to be sure.

Go through the same exercise for all of the fields on your form and update them in the script. Below you can see the places I adjusted the script in purple. These are all of the elements that exist on my external form that are mapping in to the items in blue which are from Dataverse. Notice the field for Request Type that has three values. The Dataverse values are added in to the script automatically for you. All I needed to do was add in what the value is that is included in my external form that maps to the correct option. It should be pretty straightforward. The FormId at the bottom will be populated automatically in the script and maps to the correct form in D365, which should not be changed.
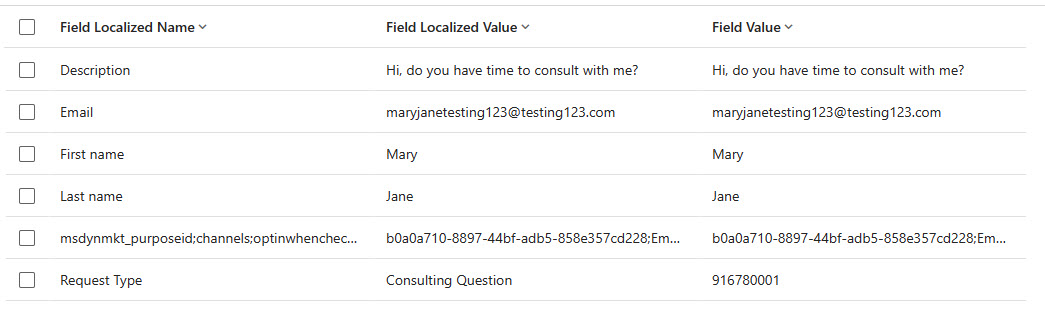
Now take your entire modified script, and add it directly below where your form is on your web page. This likely will be after a closing form tag that looks like this </form>. Now refresh your form and fill it out. Wait a few moments and you should end up with a form submission on the form in D365. Here we can see all of the fields filled out and mapped in to the correct field on the Lead/Contact that was either created or updated.
A weekly issue covering features, functionality and news on the topic of Marketing, specifically covering Dynamics 365 Marketing and other interesting tools and tips for anyone interested in the subject.
Subscribe Here
This is just 1 of 430 articles. You can browse through all of them by going to the main blog page, or navigate through different categories to find more content you are interested in. You can also subscribe and get new blog posts emailed to you directly.
Recommend
About Joyk
Aggregate valuable and interesting links.
Joyk means Joy of geeK