

How to Install Syncthing on Ubuntu 22.04
source link: https://www.howtoforge.com/how-to-install-syncthing-on-ubuntu-22-04/
Go to the source link to view the article. You can view the picture content, updated content and better typesetting reading experience. If the link is broken, please click the button below to view the snapshot at that time.
How to Install Syncthing on Ubuntu 22.04
Syncthing is a secure and open source file synchronisation program for multiple platforms, such as Windows, macOS, Linux, Android, Solaris, Darwin and BSD. It is a decentralised and peer-to-peer (P2P) file synchronisation tool that allows you to synchronise files between devices on a local network or between remote devices over the internet.
In this tutorial, I will show you how to install Syncthing on a Ubuntu 22.04 servers. You will then learn how to establish a connection between Syncthing instances, set up the synchronisation of directories and check the synchronisation.
Prerequisites
To get started with this tutorial, you must have the following:
- Two Ubuntu 22.04 Machines - In this example, we'll use two Ubuntu servers server1 and server2.
- A non-root user with administrator privileges.
Adding Syncthing Repository
Syncthing can be installed in multiple ways, you can install it manually via binary file, or install it via APT for Ubuntu. In this example, you will install syncthing via APT by adding the official repository to both Ubuntu machines.
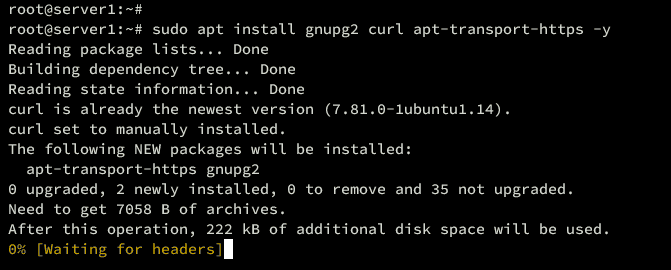
To start, execute the following command to install some basic packages to your Ubuntu system.
sudo apt install gnupg2 curl apt-transport-https -y
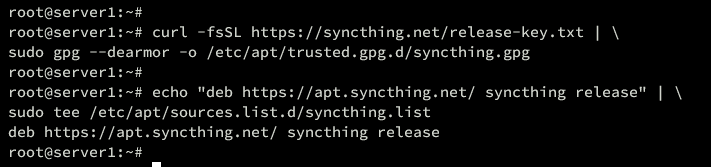
Now, add the syncthing GPG key and repository to your both Ubuntu systems. In this case, you will install the latest release of Syncthing via the APT repository.
curl -fsSL https://syncthing.net/release-key.txt | \
sudo gpg --dearmor -o /etc/apt/trusted.gpg.d/syncthing.gpg

echo "deb https://apt.syncthing.net/ syncthing release" | \
sudo tee /etc/apt/sources.list.d/syncthing.list
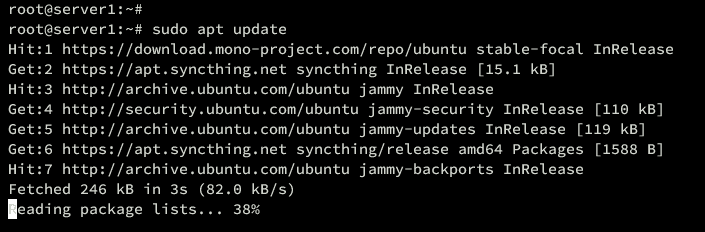
Then, update and refresh your Ubuntu repository using the following command.
sudo apt update
When you see the syncthing repository is available, you're ready to go.
Installing Syncthing
Now that you've added a syncthing repository to both Ubuntu machines, the next step you will install it on both machines and configure it to run as a systemd service. Also, ensure you have a non-root user on both machines to run syncthing.
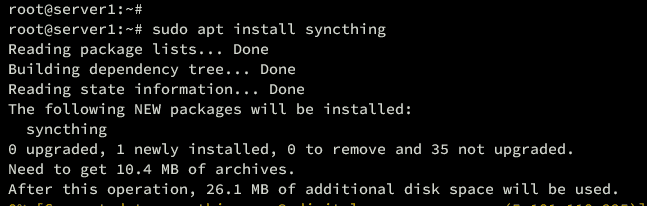
To install syncthing, run the following apt command. Type y and press ENTER to proceed with the installation.
sudo apt install syncthing
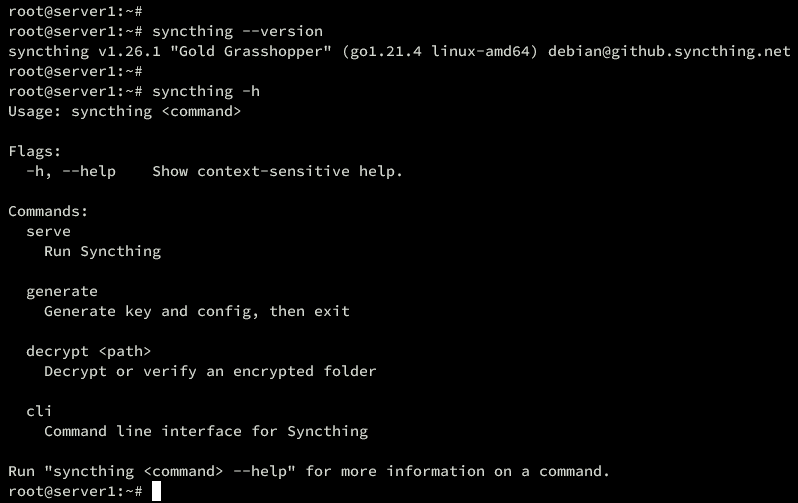
After the installation is complete, verify the syncthing version like this:
syncthing --version
syncthing -h
In the following output, you should see syncthing 1.26 is installed.
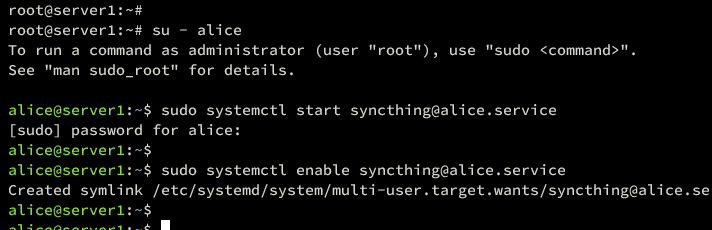
Now that you've installed syncthing, you should start it as per-user. In this example, we'll be using user alice on the server1, and user bob on the server2.
Log in to your user using the command below.
su - alice
Then, start and enable the syncthing service for user alice using the command like this:
sudo systemctl start [email protected]
sudo systemctl enable [email protected]
Be sure to input your password to get the root privileges when asked:
Now verify the syncthing service to ensure that the service is running via the command below.
sudo systemctl status [email protected]
You should see the syncthing service for user alice is running. Also, ensure the syncthing service on bot your servers is running.
Setting Up Firewall
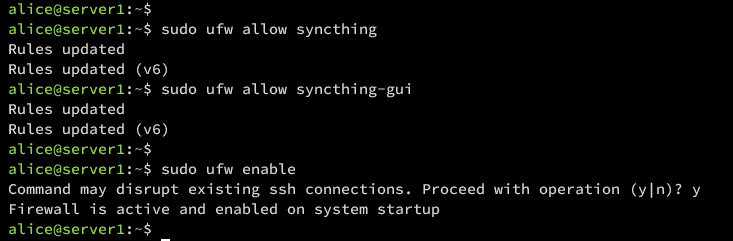
In this guide, you will enable the firewall on both Ubuntu machines. On Ubuntu, you can use UFW (Uncomplicated Firewall), and by default, syncthing also provides a UFW application profile, so you can easily enable it.
Run the command below to add the syncthing and syncthing-gui profiles to UFW.
sudo ufw allow syncthing
sudo ufw allow syncthing-gui
Now add the OpenSSH profile, then start and enable UFW using the below command. Type y to confirm with the operation.
sudo ufw allow OpenSSH
sudo ufw enable
Once complete, you will see the following output.
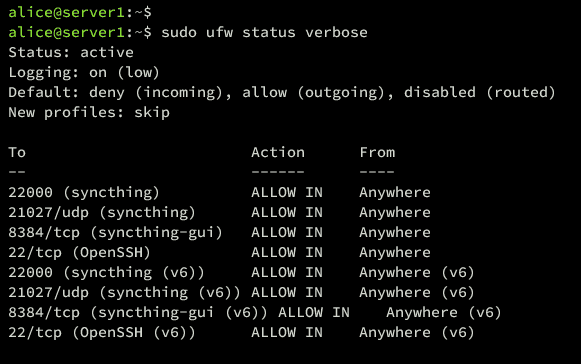
Next, verify the list-enabled rules and profiles on UFW using the command below.
sudo ufw status verbose
Ensure both syncthing and syncthing-gui are added to UFW.
Initializing Syncthing Instances
Now that you've installed Syncthing and configured UFW, you're ready to start initializing your installation. In this step, you will set up syncthing to run on a local IP address with HTTPS enabled, and you will set up user authentication for syncthing.
By default, syncthing is running on localhost. If you want to run syncthing on a local IP address, modify the syncthing configuration ~/.config/syncthing/conf.xml file.
Open the ~/.config/syncthing/conf.xml file using the nano editor command below.
nano ~/.config/syncthing/conf.xml file
Within the '<gui ..>' section, change the 'tls' value to 'true' and change the default localhost to your local IP address.
    <gui enabled="true" tls="true" debugging="false" sendBasicAuthPrompt="false">
        <address>192.168.5.30:8384</address>
        <apikey>GENERATED-API-KEY</apikey>
        <theme>default</theme>
    </gui>
Save and close the file when finished.
Now run the following command to restart the syncthing service.
sudo systemctl restart [email protected]
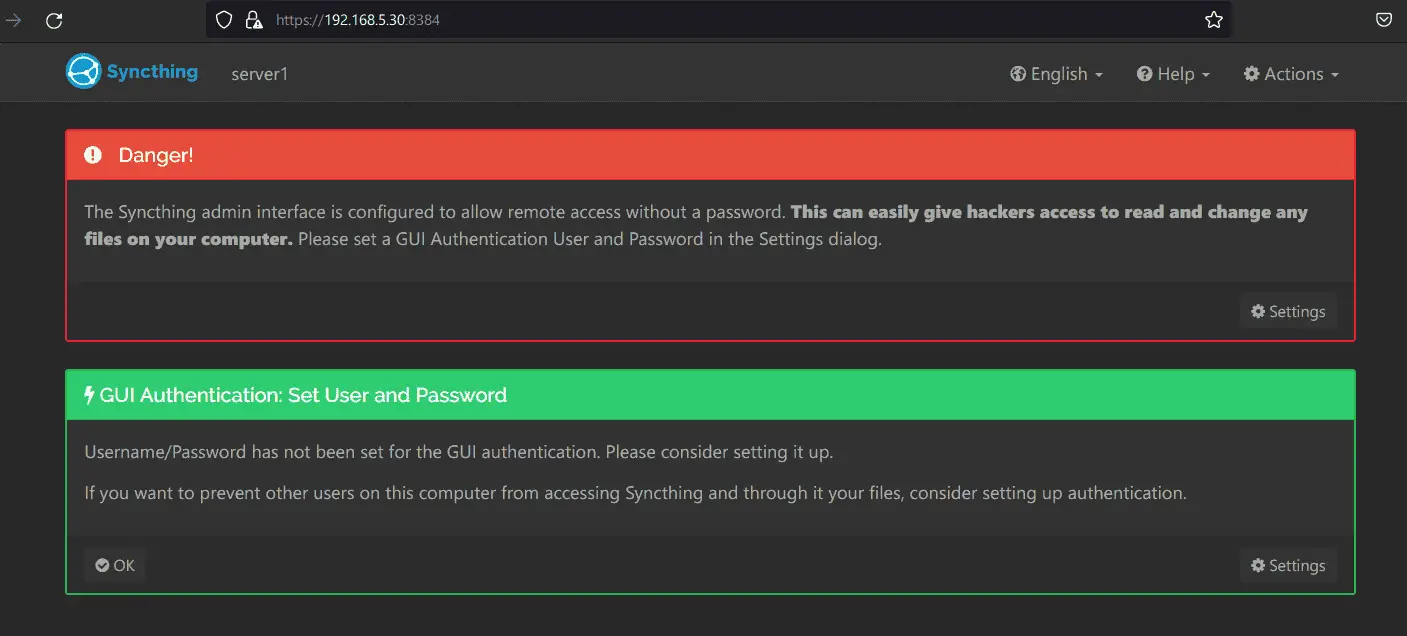
Open your web browser and visit syncthing via server IP address and port 8384 (i.e: https://192.168.5.30:8384/).
If your installation is successful, you should get the following page:
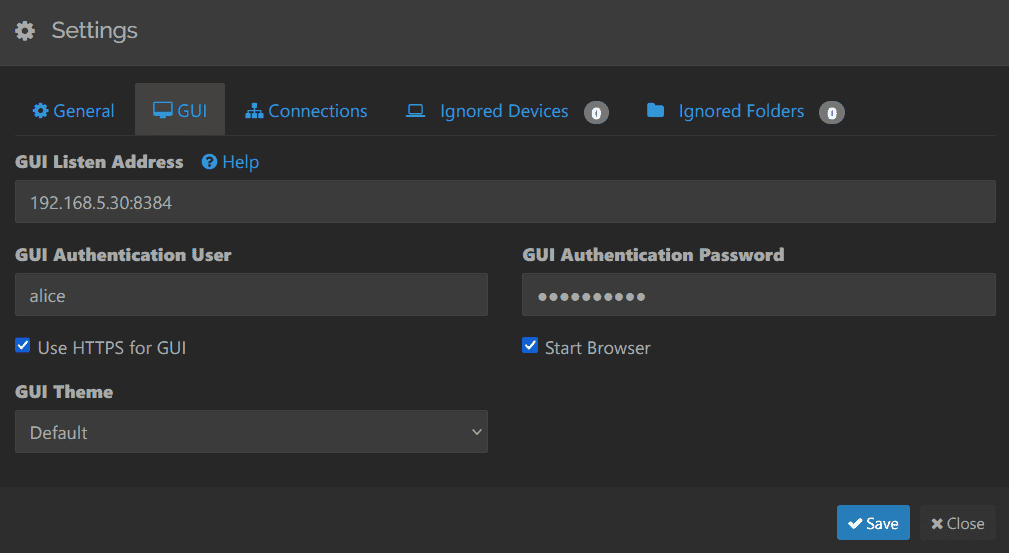
Click Settings to set up syncthing.
Within the GUI tab, change your user and password, then click Save.
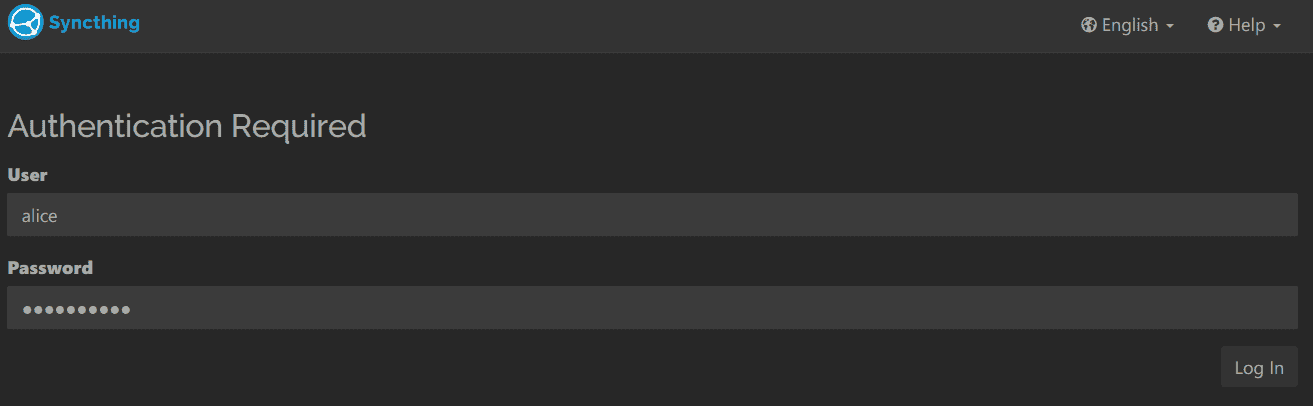
After the new password is configured, you will be prompted with syncthing authentication.
Input your username and password, then click Log In.
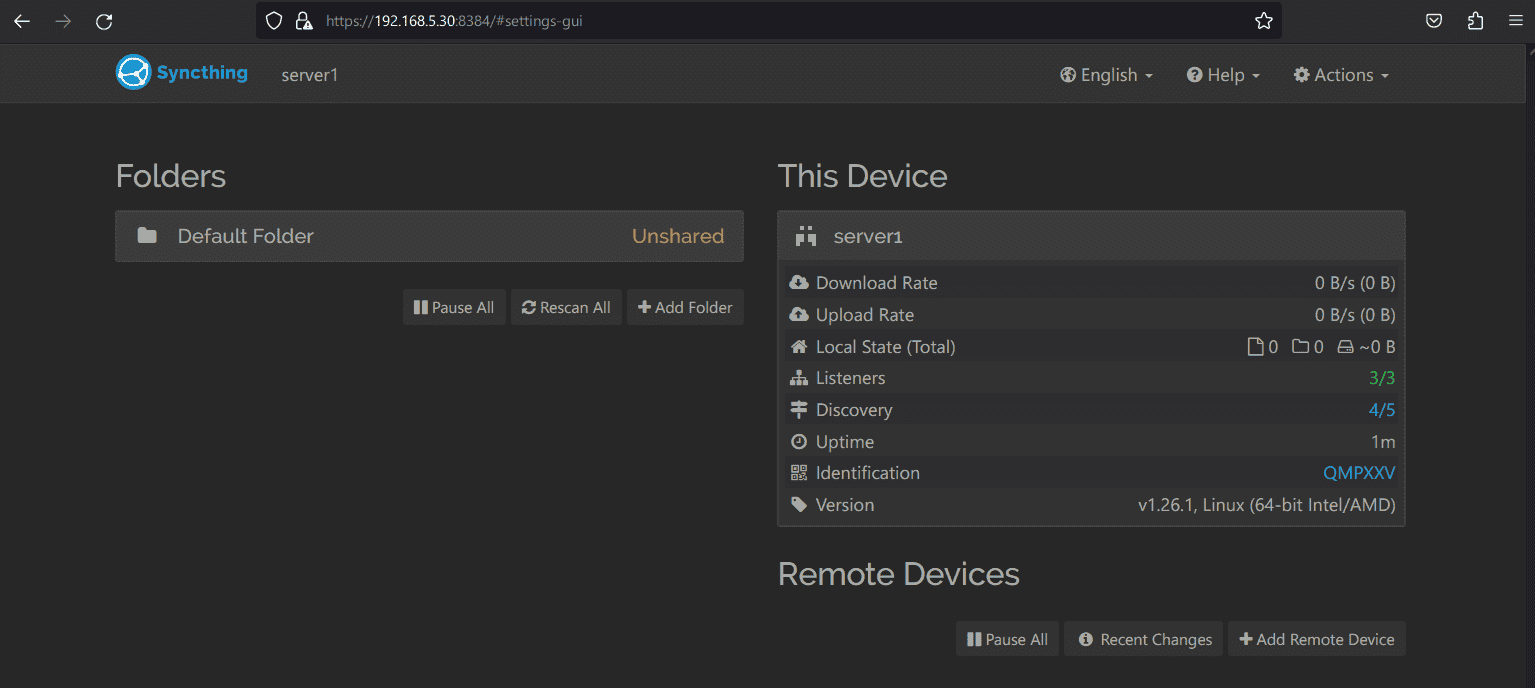
If you have the proper user and password, you should get the syncthing dashboard like the following:
Below is the syncthing dashboard of server2 after the user and password are configured.
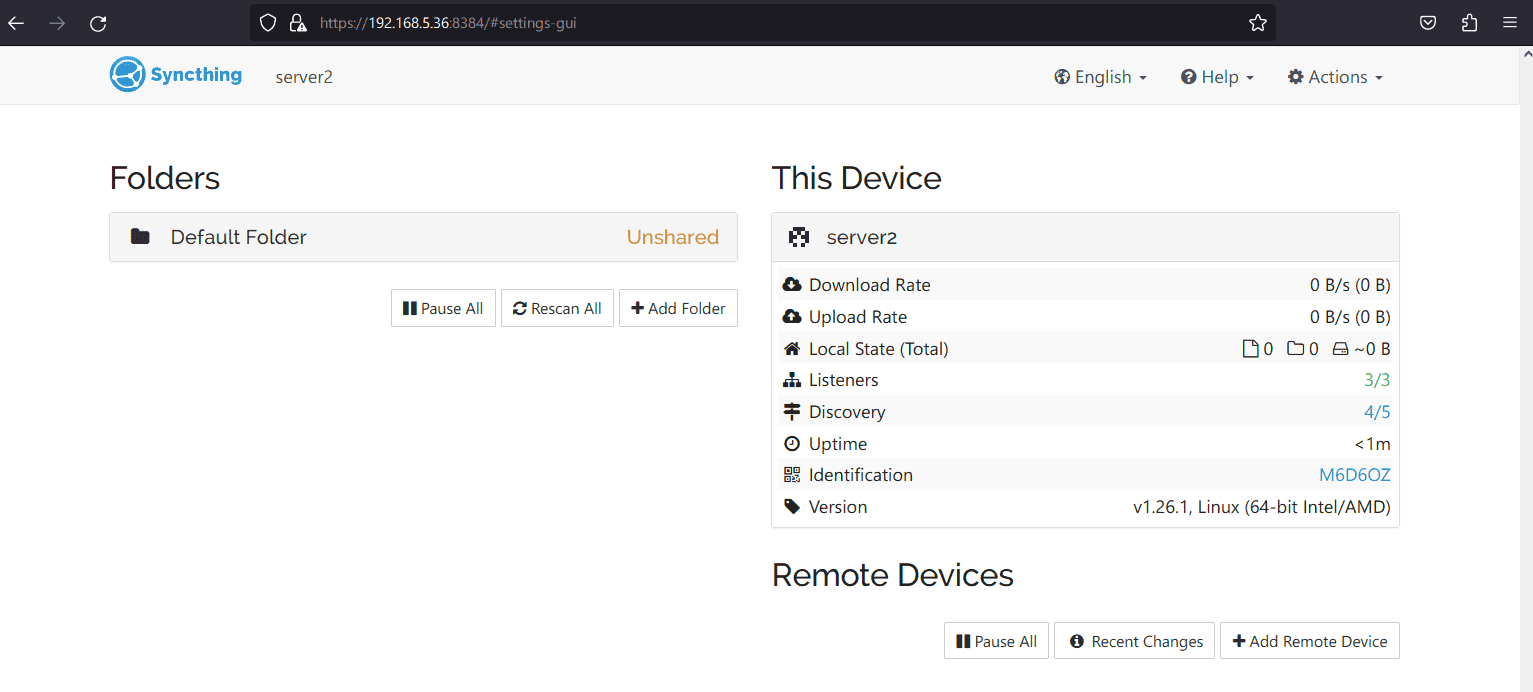
Connecting Two Syncthing Instances
After configuring Synthing on both Ubuntu machines, you will connect, so you can sync files between those machines. To do that, you must verify both machines via GUI.
On the server1, click the Action button at the top right, then select Show ID.
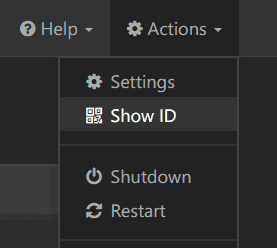
Copy the device ID of the server1. The syncthing device ID is generated automatically during stat. Furthermore, you can also use QRcode to connect between syncthing instances, for example between computers and Android phones.
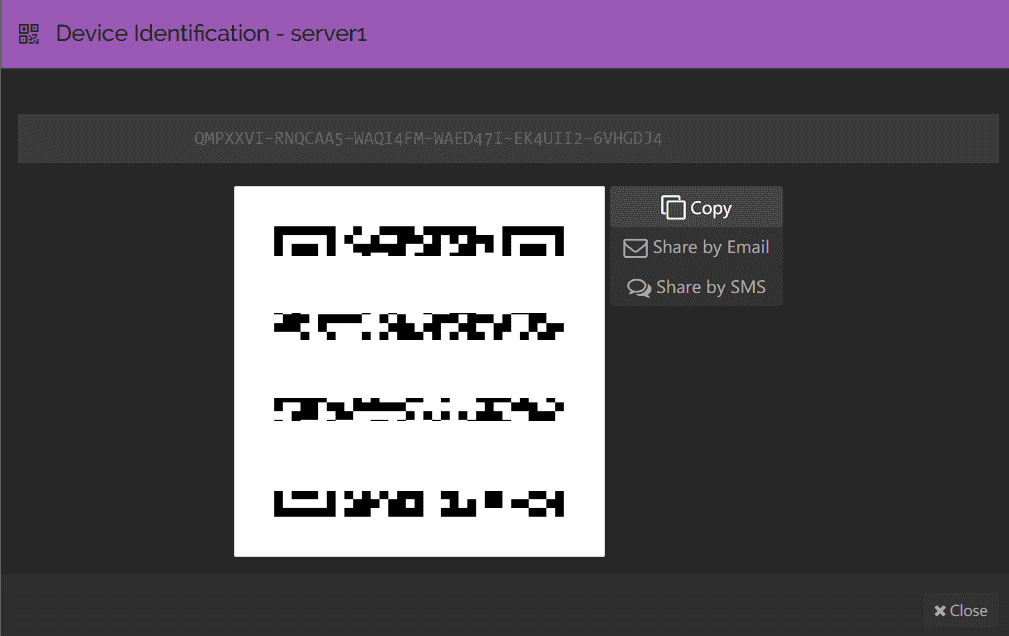
Move to server2, and click Add Remote Device to add a new syncthing instance.
Paste the device ID of server1, input the name as server1, and then click Save to confirm.
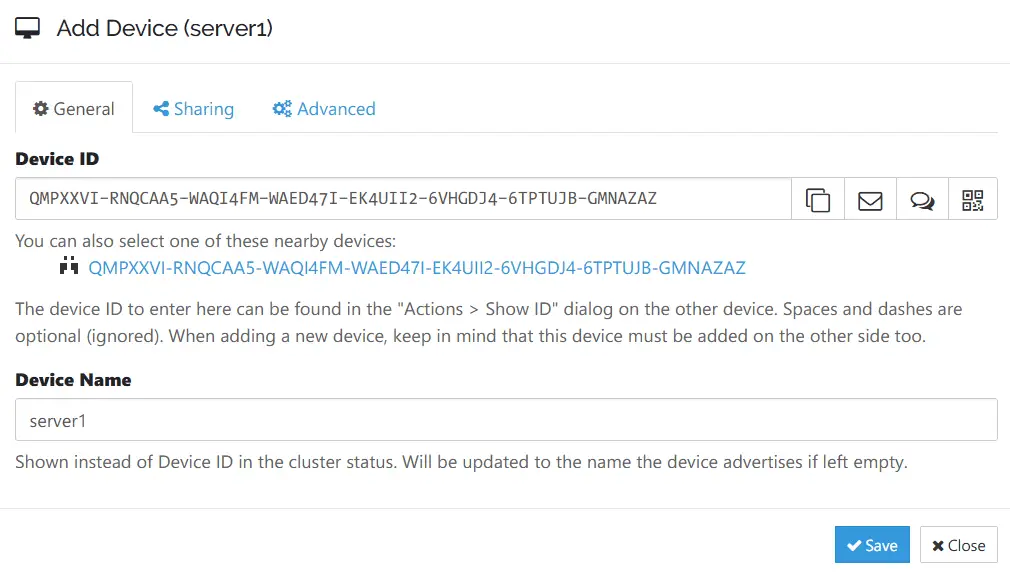
Next, move back to the server1 dashboard and the information about server2 wants to connect to. Click Add Device to add the server1.
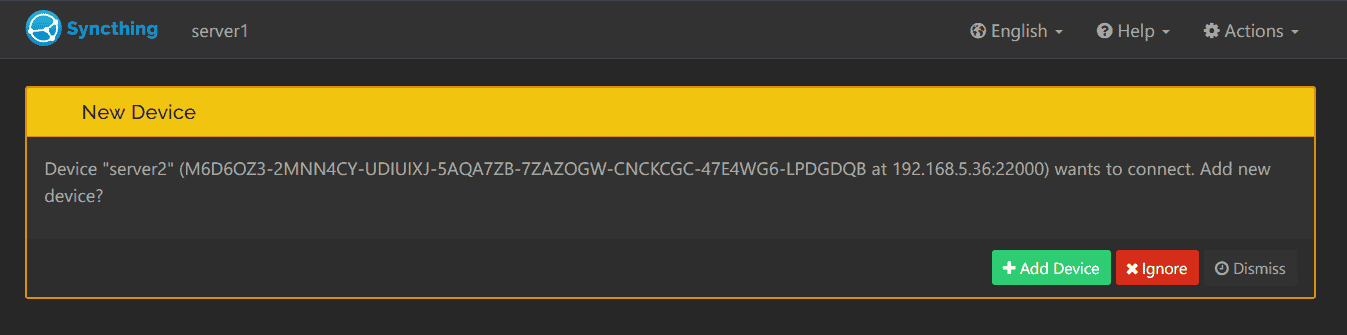
Now, the new pop-up will come up, verify the device ID of server2, then click Save.
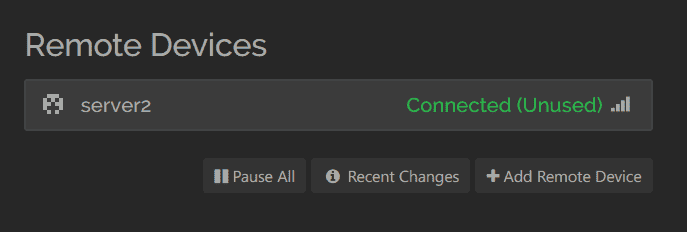
Lastly, go to the syncthing dashboard and move to the Remote Devices section. If the process is successful, you should see the server2 with status connected.
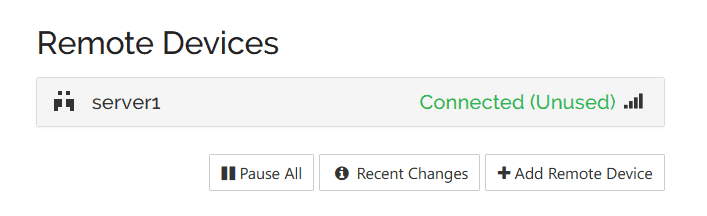
On the other hand, when you check on the server2, you should see that server1 is connected.
Synchronizing Directory with Syncthing
At this point, both server1 and server2 are connected via syncthing. Now, you will learn how to share a directory/folder and sync files between syncthing instances.
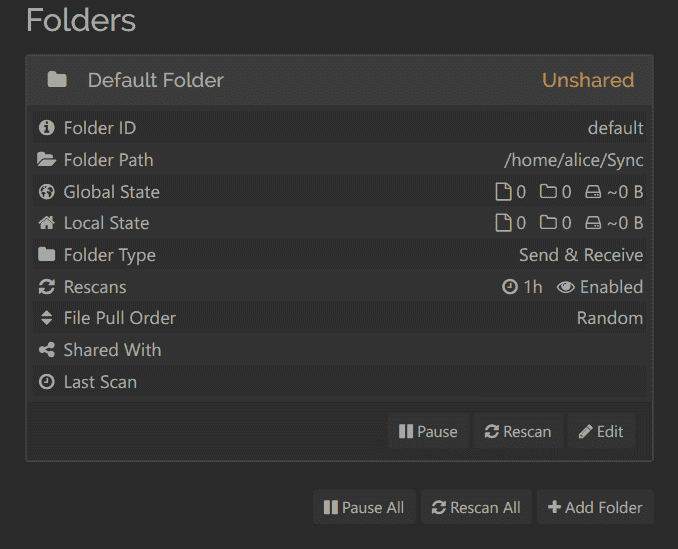
On the server1 dashboard, take a look at the Folders section, and you will find the Default Folder with path directory /home/alice/Sync and status Unshared.
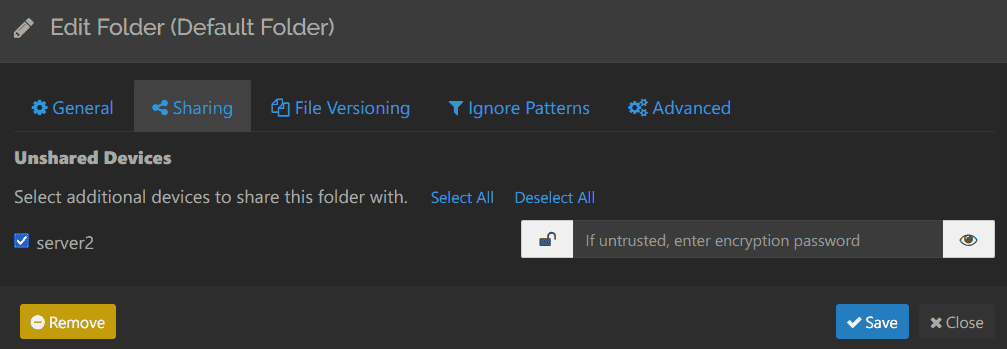
Click Edit to share the Default Folder.
- Move to the Sharing tab, and you will see the list of connected syncthing instances. Select server2 to share the Default Folder with the syncthing instance server2.
- Move to the File Versioning tab, select the File Versioning method that you want to use, and then input how much versioning you want to keep.
Click Save to apply your modification.
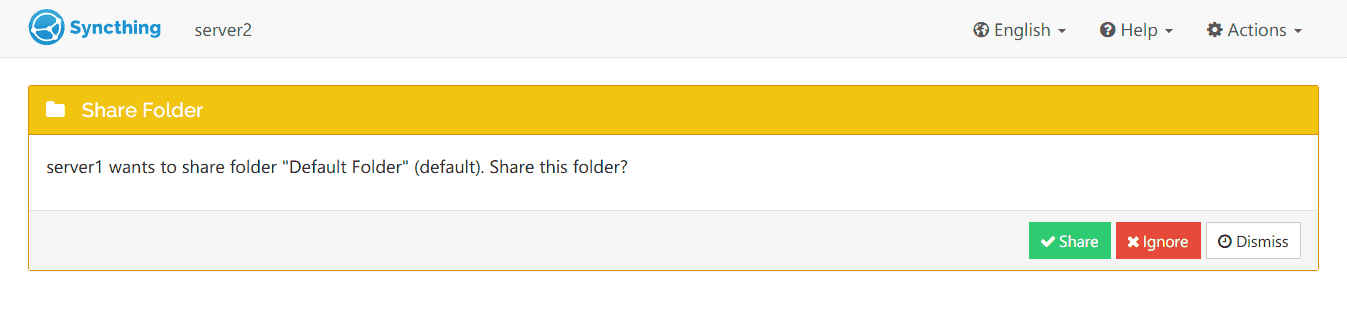
Lastly, move to the server2 dashboard, and you will get the notification message that server1 wants to share the Default Folder. Click Share to confirm.
Once the process is finished, you should see the Default Folder is shared.
On the server1 Default Folder section, you should see the Shared With section with the value server2.
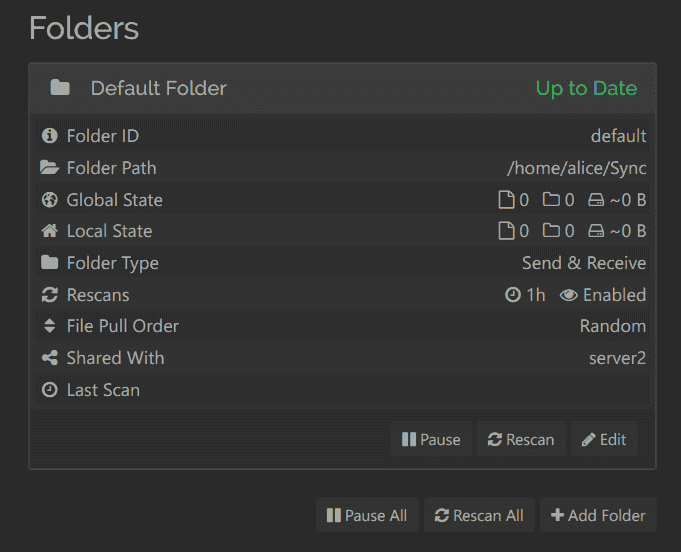
On the server2, you should see the Default Folder and Shared With section to server1.
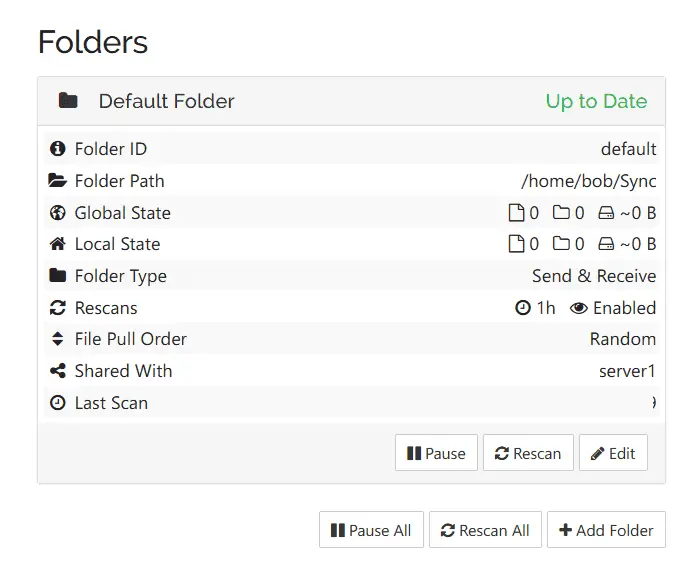
File Synchronization between Synchthing Instances
Now that you've configured the shared directory via Syncthing, let's verify it by creating new files from server1 and verifying the list files on server2 to ensure the synchronization is working.
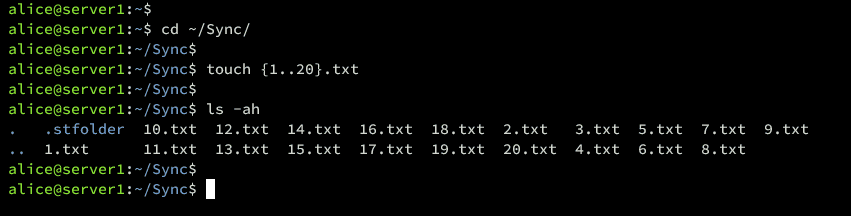
On the server1, go to the Sync directory and create new files using the following command.
cd ~/Sync/
touch {1..20}.txt
Move to server2, go to the Sync directory, and check the list of files in that directory.
cd ~/Sync/
ls -ah
If you see multiple .txt files on the Sync directory, you've accomplished the syncthing installation without any problem.
From here, you can create and share a new directory between syncthing instances. , you can also add new instances.
Conclusion
Congratulations! You've completed the installation of Syncthing on Ubuntu 22.04 servers. You've also learned how to secure syncthing with UFW (Uncomplicated Firewall), connect between syncthing instances, set up shared folders, and verify the synchronization between shared directories.
Furthermore, you can new devices to your current syncthing installation and set up shared folders, so you can access files from multiple devices.
Recommend
About Joyk
Aggregate valuable and interesting links.
Joyk means Joy of geeK