

OpenHarmony应用编译 - 如何在源码中编译复杂应用(3.2-Release)
source link: https://www.51cto.com/article/776223.html
Go to the source link to view the article. You can view the picture content, updated content and better typesetting reading experience. If the link is broken, please click the button below to view the snapshot at that time.

OpenHarmony应用编译 - 如何在源码中编译复杂应用(3.2-Release)

- 开发环境:Windows 11
- 编译环境:Ubuntu 22.04
- 开发板型号:DAYU 200(RK3568)
- 系统版本:OpenHarmony-3.2-Release
- 涉及仓库:applications_launcher
- 在OpenHarmony系统中预安装应用的hap包会随系统编译打包到镜像中,目前有两种编译预安装应用hap包的方式,一种为随系统编译时,编译应用源码生成hap包的方式,另一种是将已生成的hap包放入系统源码中,再进行打包的方式。后者需要开发者使用DevEco Studio或其它途径,把应用源码编译构建为hap包,再将hap放入系统源码中。
- 本文档以系统应用Launcher为例,带大家了解如何通过系统源码编译应用的方式来打包预安装应用。
3.2-Release系统编译Launcher
删除或注释系统中默认的Launcher应用hap包编译方式。
文件位置:applications/standard/hap/BUILD.gn
group("hap") {
  deps = [
    	...
      # "//applications/standard/hap:launcher_hap", // 直接删除或注释,不参与编译
      # "//applications/standard/hap:launcher_settings_hap",  // 直接删除或注释,不参与编译
    	...
  ]
 }
在applications/standard/launcher/product/phone目录中增加BUILD.gn文件。
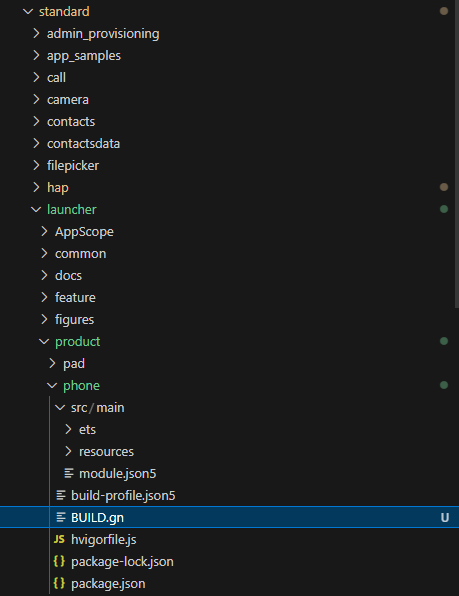
内容如下:
import("//build/ohos.gni")

ohos_hap("launcher_hap") {
  hap_profile = "src/main/module.json"
  deps = [
    ":launcher_js_assets",
    ":launcher_resources",
  ]
  certificate_profile = "../../signature/launcher.p7b"
  hap_name = "Launcher_OS"
  part_name = "prebuilt_hap"
  subsystem_name = "applications"
  js_build_mode = "release"
  module_install_dir = "app/com.ohos.launcher"
}

ohos_js_assets("launcher_js_assets") {
  ets2abc = true
  source_dir = "src/main/ets"
}

ohos_resources("launcher_resources") {
  sources = [ "src/main/resources", "../../common/src/main/resources" ]
  deps = [ ":launcher_app_profile" ]
  hap_profile = "src/main/module.json"
}

ohos_app_scope("launcher_app_profile") {
  app_profile = "../../AppScope/app.json"
  sources = [ "../../AppScope/resources" ]
}- 此处把产物名称hap_name定义为Launcher_OS是为了区分原系统源码中默认的hap包名称,实际可以填写为Launcher。
- 因为launcher_hap中使用了其它har(common)中的资源,所以launcher_resources中的sources需要添加依赖的resources资源目录,在步骤3中launcher_settings_hap
中的配置也是如此。
在applications/standard/launcher/feature/settings目录中增加BUILD.gn文件。
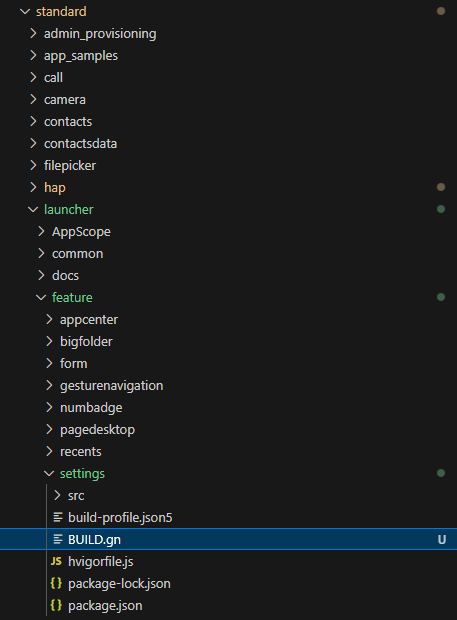
内容如下:
import("//build/ohos.gni")

ohos_hap("launcher_settings_hap") {
  hap_profile = "src/main/module.json"
  deps = [
    ":launcher_settings_js_assets",
    ":launcher_settings_resources",
  ]
  certificate_profile = "../../signature/launcher.p7b"
  hap_name = "Launcher_Settings_OS"
  part_name = "prebuilt_hap"
  subsystem_name = "applications"
  js_build_mode = "release"
  module_install_dir = "app/com.ohos.launcher"
}

ohos_js_assets("launcher_settings_js_assets") {
  ets2abc = true
  source_dir = "src/main/ets"
}

ohos_resources("launcher_settings_resources") {
  sources = [ "src/main/resources", "../../common/src/main/resources" ]
  deps = [ ":launcher_settings_app_profile" ]
  hap_profile = "src/main/module.json"
}

ohos_app_scope("launcher_settings_app_profile") {
  app_profile = "../../AppScope/app.json"
  sources = [ "../../AppScope/resources" ]
}- 此处把产物名称hap_name定义为Launcher_Settings_OS是为了区分原系统源码中默认的hap包名称,实际可以填写为Launcher_Settings。
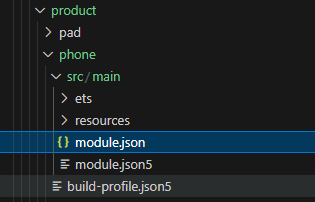
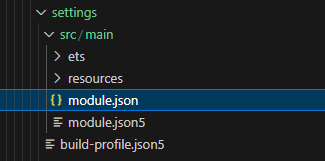
因为系统编译只可读取json后缀的配置文件,所以需要把应用源码中的app.json5和module.json5文件复制,并改名为app.json和module.json文件。
复制applications/standard/launcher/AppScope/app.json5文件为app.json。

复制applications/standard/launcher/product/phone/src/main/module.json5文件为module.json。
复制applications/standard/launcher/feature/settings/src/main/module.json5文件为module.json。
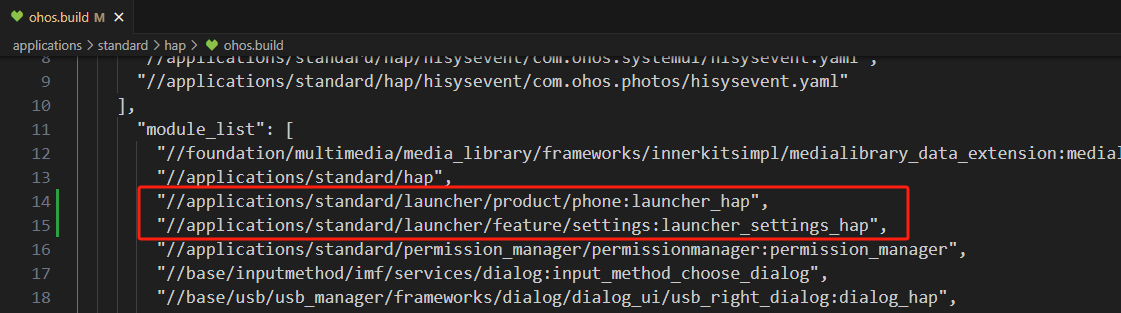
在applications/standard/hap/ohos.build文件module_list中增加launcher_hap模块和launcher_settings_hap模块编译。
{
  "subsystem": "applications",
  "parts": {
    "prebuilt_hap": {
	  	...
      "module_list": [
       	...
        "//applications/standard/launcher/product/phone:launcher_hap",
        "//applications/standard/launcher/feature/settings:launcher_settings_hap",
        ...
      ]
    }
  }
}
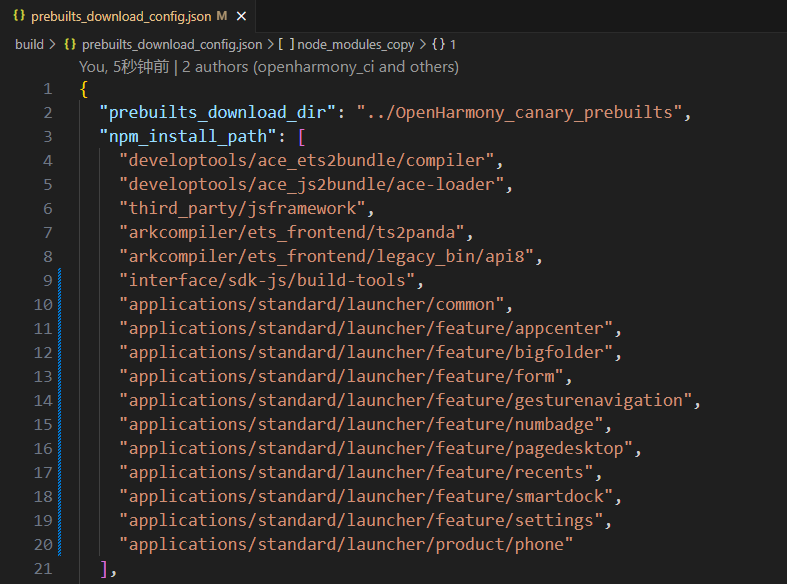
修改预编译配置build/prebuilts_download_config.json文件,把launcher依赖增加到npm_install_path列表中。
{
  "prebuilts_download_dir": "../OpenHarmony_canary_prebuilts",
  "npm_install_path": [
    "developtools/ace_ets2bundle/compiler",
    "developtools/ace_js2bundle/ace-loader",
    "third_party/jsframework",
    "arkcompiler/ets_frontend/ts2panda",
    "arkcompiler/ets_frontend/legacy_bin/api8",
    "interface/sdk-js/build-tools",
    "applications/standard/launcher/common",
    "applications/standard/launcher/feature/appcenter",
    "applications/standard/launcher/feature/bigfolder",
    "applications/standard/launcher/feature/form",
    "applications/standard/launcher/feature/gesturenavigation",
    "applications/standard/launcher/feature/numbadge",
    "applications/standard/launcher/feature/pagedesktop",
    "applications/standard/launcher/feature/recents",
    "applications/standard/launcher/feature/smartdock",
    "applications/standard/launcher/feature/settings",
    "applications/standard/launcher/product/phone"
  ],
  ...
}
执行预编译指令。
bash build/prebuilts_download.sh --skip-ssl可以在应用源码中看到应用内的依赖已经被正确的加载。

执行源码编译指令。如果以下2个目录产物正确,则说明应用源码编译方式修改成功。
在out/rk3568/obj/applications/standard/launcher目录中,会生成2个hap的编译产物。
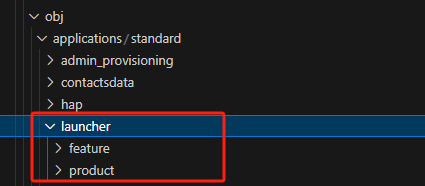
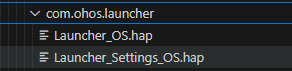
在out/rk3568/packages/phone/system/app/com.ohos.launcher目录中,是实际系统环境中的hap包产物。
烧录系统验证功能。
Launcher正常启动:

系统应用目录文件正确:

Recommend
-
9
v72.01 鸿蒙内核源码分析(Shell解析篇) 子曰:“苟正其身矣,于从政乎何有?不能正其身,如正人何?” 《论语》:子路篇 百篇博客系列篇.本篇为: v72.xx 鸿蒙内核源码分析(Shell解析篇) | 应用窥视内核的窗口 进程管理相关篇为:
-
10
OpenHarmony预置系统应用编译安装全流程记录 作者:拓维信息田怡婧 2022-02-21 14:49:26 SystemUI应用是OpenHarmony中预置的系统应用,为用户提供系统相关信息展示及交互界面,包括系统状态、系统提示、系...
-
8
开源鸿蒙首款IDE开发OpenHarmony 3.1 Release应用-51CTO.COM 开源鸿蒙首款IDE开发OpenHarmony 3.1 Release应用 作者:鸿联 2022-04-18 10:37:01 2022年3月30日,OpenHarmony 3.1 Release及配套南...
-
6
想了解更多内容,请访问:
-
5
想了解更多内容,请访问:
-
3
想了解更多内容,请访问:
-
8
OpenHarmony 通话应用源码剖析 推荐 原创 作者:赖尧 通话应用主要提供通话相关用户交互界面,根据电话服...
-
15
OpenHarmony开发之系统源码编译 原创 精华 随着OpenHarmony3.1的发布,越来越多的开发者将目光聚焦到OpenHarmony系统开发上。对于首次接触OpenHarmony的开发者来说,如何进行源码编译是一个大难题,本文将...
-
12
如何在OpenHarmony应用侧获取屏幕DPI 作者:离北况归 2023-10-08 15:23:09 笔者之前分享过如何在设备侧修改屏幕 DPI,本文则介绍在OpenHarmony应用侧获取屏幕DPI。
-
7
OpenHarmony应用编译 - 如何在源码中编译复杂应用(4.0-Release) 作者:TiZizzz 2023-12-11 17:30:52 在OpenHarmony系统中预安装应用的hap包会随系统编译打包到镜像中,目前有两种编译预安装应用hap包的方式,一...
About Joyk
Aggregate valuable and interesting links.
Joyk means Joy of geeK