

Automate Firebase Deployments for Web Builds with Appflow
source link: https://ionic.io/blog/automate-firebase-deployments-for-web-builds-with-appflow
Go to the source link to view the article. You can view the picture content, updated content and better typesetting reading experience. If the link is broken, please click the button below to view the snapshot at that time.
Automate Firebase Deployments for Web Builds with Appflow
Tim Wills

This is a guest post by Tim Wills, CTO at Uckers.com. Connect with Tim at @TimW_Tech.
Are you building an app that deploys to both mobile and web from the same codebase? Do you want to automate your CI/CD process? If so, Ionic’s mobile CI/CD platform Appflow with Firebase can provide all you need to automate front and back end deployments.
Why Appflow? If, like me, you want to simplify your CI/CD workflow and are deploying the same code to web and mobile, environments can become messy. Appflow allows you to set up one single source of truth for your environments.
Sure, we could set up a GitHub Action to deploy to Firebase hosting, but then you’ve got to manage another set of environments for that web build. Added to that, if you have separate environments for the back end, you can greatly simplify things by using Firebase Functions and deploying those from Appflow too (other steps required after this walkthrough).
Appflow is primarily for mobile app deployments, but the Appflow documentation for mobile deployments is easy to follow if you get stuck. Automatic deployment to Firebase requires a bit more work, so I’ll cover this in detail.
Here’s what we’ll do:
- Start an Ionic template app using Git for source control
- Connect it to a Firebase back end
- Run web builds from the Appflow dashboard
- Create a post-deploy script to deploy to Firebase Hosting on completion of each web build in Appflow
Getting Started
Open a Terminal window:
npm install -g @ionic/cli
ionic start
Press Y to use the App Creation Wizard and start a “menu” template app using your preferred framework (I used React). Give it a name like “My Great App”. You’ll be directed to create an account which you need to do to use Appflow — we will come back to this later.
Go back to your terminal window, change to your new app directory and serve the app:
cd my-great-app
ionic serve
Let’s get this app checked into source control.
Go to your Git provider account (I used GitHub) and create a new repo called “my-great-app”. Don’t add a readme or license, as we’re going to overwrite it with the code below. Go to your app’s directory in Terminal and set up your new repo as the remote:
git init
touch README.md
git add README.md
git commit -m "first commit"
git remote add origin https://github.com/[GIT_USERNAME]/my-great-app.git
git push -u -f origin main
Be careful with the -f (force) flag, I’ve just used it to help get set up quickly here.
Setting up Firebase
Next we need to install Firebase and deploy to hosting from a local machine. Go to the Firebase Console and create a new project called “My Great App”. Choose whether or not to enable analytics and create the project.
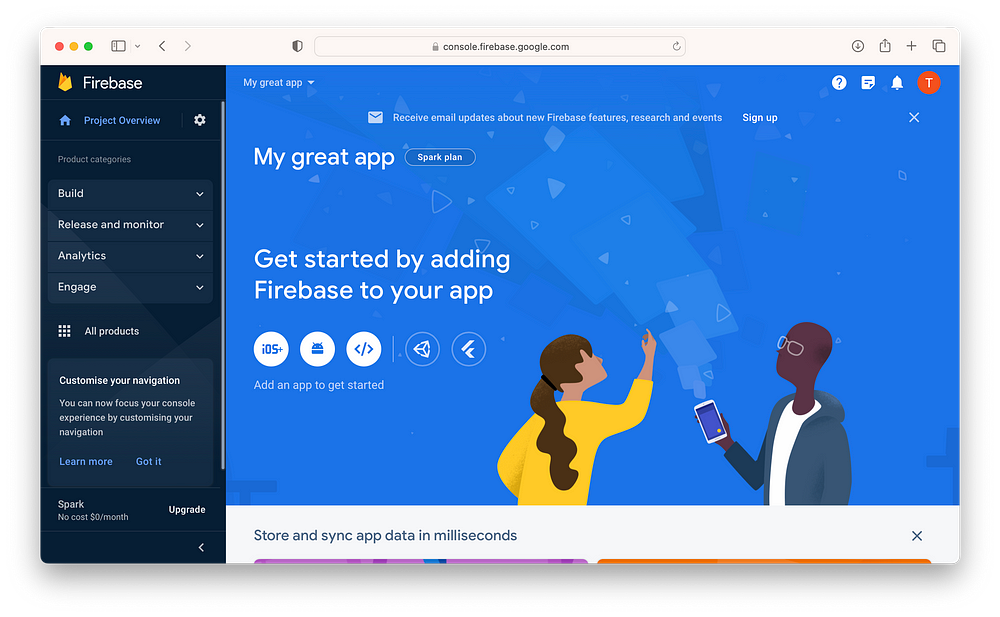
Create a web app by clicking on the “</>” icon. Give your app a nickname, check the “Also set up Firebase Hosting” box, and register the app. Follow the instructions to add the Firebase SDK and install the CLI.
Next, login and initialize Firebase in the root directory of your app:
firebase login
firebase init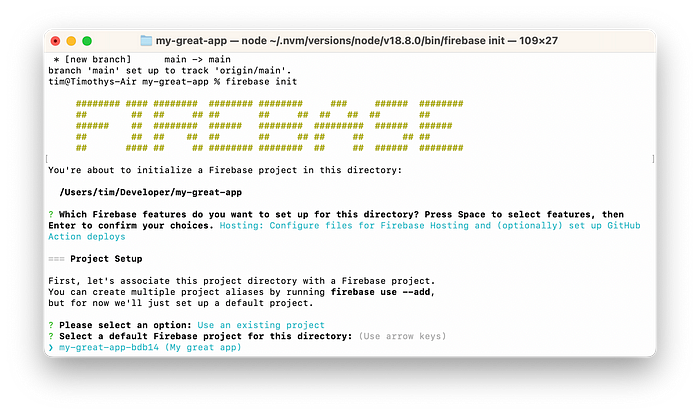
The firebase init command takes you through the options, so use the spacebar to select Firebase Hosting only. You can set up anything else later by running firebase init again. Select the Firebase project that you created just now (my-great-app).
The next step is important– you’ll need to provide the public directory of the web build folder. The current version of the ionic template app uses dist so be sure to type that in correctly.
Answer “y” to configure as a single page app but select “n” for automatic deployments with GitHub to complete setup. Now you have an app that can be deployed to Firebase Hosting. However, we’ve not actually built the Ionic app.
Go back to your root directory and type:
ionic buildNow you’ve built the app we can deploy it:
firebase deploy --only hostingThe terminal will then show the live web address of your site and also the Firebase hosting console page.
Enter Appflow
We’ve now got the web app up and running and could automate CI/CD with GitHub Actions if we want, so what’s the point in using Appflow? Let’s imagine this app is much more involved, with iOS and Android deployment targets and multiple environments.
Just running a deploy from GitHub actions or a local machine will require duplication of all sorts of information. Ideally, we want one platform to define how the build is made and then send it to multiple targets. Fortunately, we can do this with Appflow.
We made an Appflow account earlier so let’s go back to the Appflow Dashboard. From the Apps screen, click on the “New app” button in the upper right and then “Import app.” On the next screen, choose Capacitor as the framework (all Ionic apps use Capacitor, even if we aren’t using Capacitor specifically in this walkthrough).
Connect your GitHub account and link Appflow with the repository you created above. Once your repo is connected, create a build from the commit we made above (“first commit”).
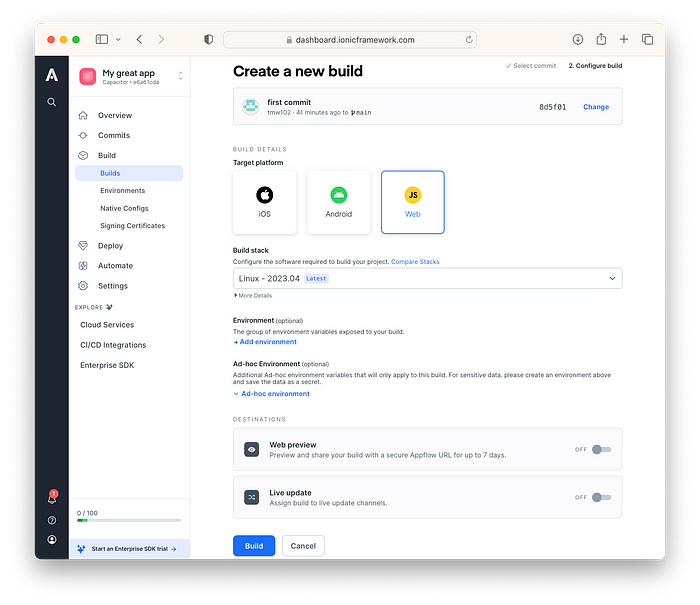
Choose ‘Web’, use the latest build stack, but leave the web preview and live update options unselected. Go ahead and build the web app.
This will create the web app on the Appflow servers, however it is not deployed anywhere yet. You can download the .zip from the build page if you want to, or read on for how to deploy from Appflow to Firebase.
Setting up Firebase Deployments
Well done for getting this far! Let’s look at some code.
Open the app in your preferred IDE. Create a new file in the root directory called web-deploy.sh.
Paste in the following code:
#!/usr/bin/env bash
echo "Deploying to Firebase Hosting..."
firebase deploy --only hosting
This is customizable. You can, if you wish, use any of the Firebase CLI tools but would need additional configuration for functionality beyond hosting alone.
We also need the Firebase Tools in the package.json file to make them available on the Appflow server.
Go back to the a terminal window in the app root directory and install the tools:
npm install firebase-toolsNow we need to ensure the web-deploy.sh script we just created is executed in Appflow once your app has finished building.
We need to add two scripts to the package.json file:
- A post-build script to deploy to Firebase
- A pre-build script to get the credentials for a service worker account and make them available to the post build script
Add the following to the scripts: section:
"prebuild": "if [ \"$CI_PLATFORM\" = \"web\" ]; then node ./gen-firebase-key-json.js; fi",
"postbuild": "if [ \"$CI_PLATFORM\" = \"web\" ]; then chmod +x ./web-deploy.sh && ./web-deploy.sh; fi"
$CI_PLATFORM is an environment variable passed by Appflow so we can check that we are only deploying on a web build and not a native mobile app build. We also need to alter the permissions to execute the web-deploy script.
Create the other file mentioned in the root of the project called gen-firebase-key-json.js. This will contain your JSON key from the Google Cloud service account giving you access to deploy to hosting.
Setting the Google Cloud Credentials
For security, we don’t want to put private keys in our repo and check them in to source control. Instead, we’re going to create a private key, add it to Appflow secrets, and then bring it into the gen-firebase-key-json.js file through an environment variable.
We can’t bring environment variables directly into a JSON file, so we need this file to be a JavaScript file that generates the JSON file with the correct key when it is run from the pre-build script. Still with me? Ok, let’s create the credentials needed.
Go back to the Firebase console project settings at the top left and click the service accounts tab. Follow the “Manage service account permissions” link on the right.

This will take you to the relevant Google Cloud project. We now need to create a service account following these instructions. Click “Create service account” at the top of the Google Cloud page you just opened. Add the details shown below (the ID is auto-generated) and click Create and continue.

Next we need to add the Firebase Hosting Admin role to the account. Search for it in the role box and make sure it is exactly that wording (it is different to the Google instructions). Click continue and then done.
Now, click the 3 dots at the end of the row of your newly created service account (appflow-web-deployer) and click manage keys. Add a key, (select create new key) and choose the JSON option. It will be downloaded for you.
This key allows access to deploy to your Firebase hosting site, so keep it safe or ideally destroy it once it has been uploaded to Appflow.
Your key will look like this:
{
 "type": "service_account",
 "project_id": "my-great-app-bdb14",
 "private_key_id": "[YOUR_PRIVATE_KEY_ID]",
 "private_key": "[YOUR_PRIVATE_KEY]",
 "client_email": "[YOUR_ACCOUNT]",
 "client_id": "[YOUR_CLIENT_ID]",
 "auth_uri": "https://accounts.google.com/o/oauth2/auth",
 "token_uri": "https://oauth2.googleapis.com/token",
 "auth_provider_x509_cert_url": "https://www.googleapis.com/oauth2/v1/certs",
 "client_x509_cert_url": "https://www.googleapis.com/robot/v1/metadata/x509/[YOUR_ACCOUNT]",
 "universe_domain": "googleapis.com"
}
Adding Credentials to Appflow
First we need to take the private key alone and add that as an Appflow secret. Start by creating an environment in Appflow.
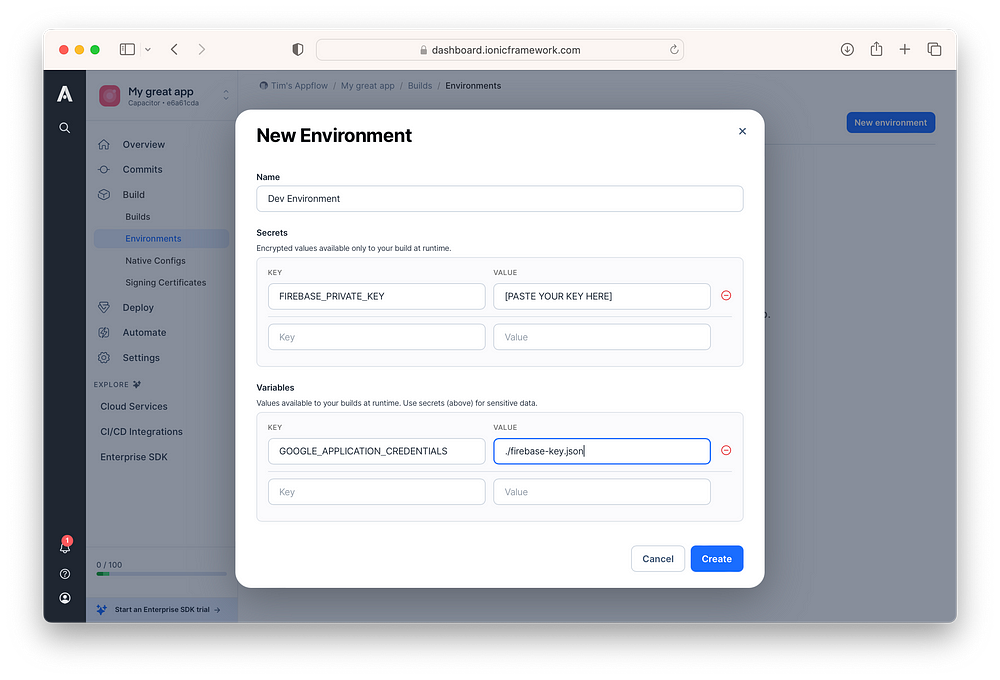
Go to the Appflow Dashboard > Environments > New environment. Name your environment “Dev environment” and add the following:
- To Secrets:
- Key: FIREBASE_PRIVATE_KEY
- Value: everything between the quotation marks from the “private_key” field in the JSON file created in the last step
- To Variables:
- Key: GOOGLE_APPLICATION_CREDENTIALS
- Value: ./firebase-key.json
You can set this environment up how you wish with variables for deploying to other platforms, for example. This is why it is so useful to deploy to Firebase from here – you can have one single source of truth for the environment your builds are built in regardless of platform. Go ahead and create the environment.
The final step (we’re nearly there!) is to create the JavaScript file that will generate the firebase-key.json in the pre-build phase. All you need to do is go back to the JSON key you downloaded, turn it into a .js format (no quotes for field names), remove the actual private key and replace it with the environment variable (secret) we just created.
The last line (and the import) saves the file so it will be present at the GOOGLE_APPLICATION_CREDENTIALS path when the post-build script runs. You should end up with a file looking like this:
import fs from 'fs';

const credentials = {
   type: "service_account",
   project_id: "[YOUR_PROJECT_ID]",
   private_key_id: "[YOUR_PRIVATE_KEY_ID]",
   private_key: process.env.FIREBASE_PRIVATE_KEY?.replace(/\\n/g, '\n'),
   client_email: "[YOUR_ACCOUNT]",
   client_id: "[YOUR_CLIENT_ID]",
   auth_uri: "https://accounts.google.com/o/oauth2/auth",
   token_uri: "https://oauth2.googleapis.com/token",
   auth_provider_x509_cert_url: "https://www.googleapis.com/oauth2/v1/certs",
   client_x509_cert_url: "https://www.googleapis.com/robot/v1/metadata/x509/[YOUR_ACCOUNT]",
   universe_domain: "googleapis.com"
 }

 fs.writeFileSync('./firebase-key.json', JSON.stringify(credentials, null, 2));
Save it to your project root as gen-firebase-key-json.js.
Now we need to commit the changes but before we do, just make sure we’re not committing pointless files. Alter the .gitignore file and add /dist on a new line. You should now have just some changes from Firebase and the files you added earlier waiting for a commit.
Add a commit message like “automated firebase hosting deploy”, commit and push to the remote.
Deploying the Web Build
Go back to the Appflow Dashboard to the Commits screen and you should now see your commit at the top of the list. Click start build, select Web and this time, make sure you select the “Dev Environment” you just created under the Environment option.
As the build progresses, you should see the pre-build script run immediately following npm run build in the build log. After the build completes, you will then see the rather verbose logging of Firebase Hosting doing its thing and then hopefully a successful job. There may be a couple of errors regarding not having iOS and Android targets but that’s ok, we don’t need them for now.
Once the job completes, verify that the update has actually taken place by going back to the Firebase console and selecting Hosting from the left-hand side. You should see the most recent release was uploaded by your service account just now. Congrats for your first successful deployment!
Where to Go from Here
Now that you’ve set up hosting, if you’re using other Firebase services like Firestore and Functions, you can deploy to these as well using your web-deploy.sh script. This means Functions can have access to all your Appflow environments, greatly simplifying cross platform CI/CD.
Not using Appflow for web and native mobile builds yet? Get started with a free account today!
Recommend
About Joyk
Aggregate valuable and interesting links.
Joyk means Joy of geeK