

Create Figma Plugins with ChatGPT
source link: https://uxplanet.org/create-figma-plugins-with-chatgpt-8ca5d844a7e8
Go to the source link to view the article. You can view the picture content, updated content and better typesetting reading experience. If the link is broken, please click the button below to view the snapshot at that time.

Create Figma Plugins with ChatGPT
This is a wholesome guide to create Figma plugin using Chat GPT-4. With this guide, harness the untapped potential of AI and let it guide your plugin development journey.
Note : While ChatGPT shoulders a significant part of the coding load, it’s essential for you to have a foundational grasp of HTML and JavaScript. This understanding ensures you can validate the code and understand its logic. Following the guide paves the path to efficient plugin creation, but bear in mind, it isn’t a fully autonomous process.
Debugging the code, seeking solutions for edge cases, and additional tasks still require your intervention.
Let’s get started
- Setting up environment
- Writing Plugin Requirements
- Code with GPT
- Final Touches
🛠️ Setting up environment
Setup your code editor
Download and install Visual Studio Code from here. This is where you will be editing and updating the code.
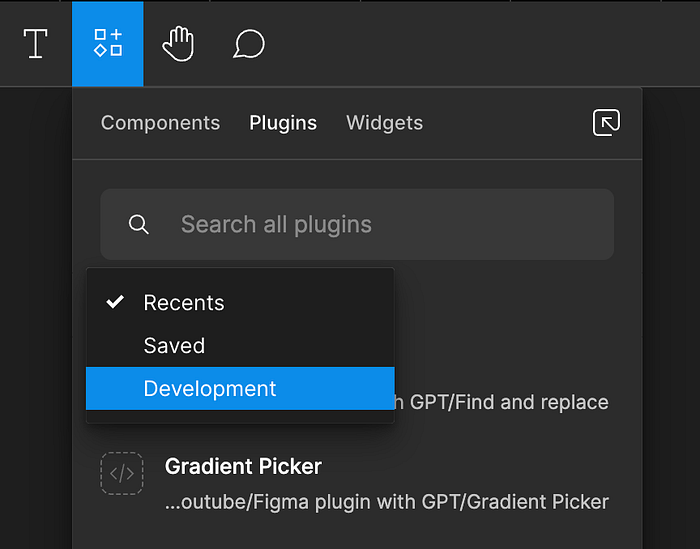
New development plugin in Figma
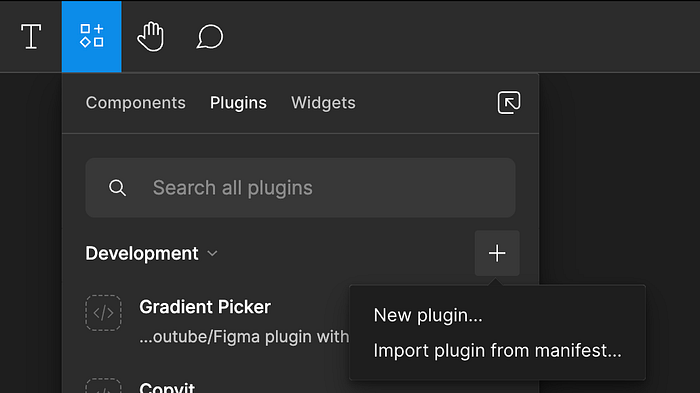
Navigate to Figma and click on the plugins icon. In the dropdown menu, select “Development”. On the right-hand side, you’ll see a plus icon — click this and then select “New Plugin”.
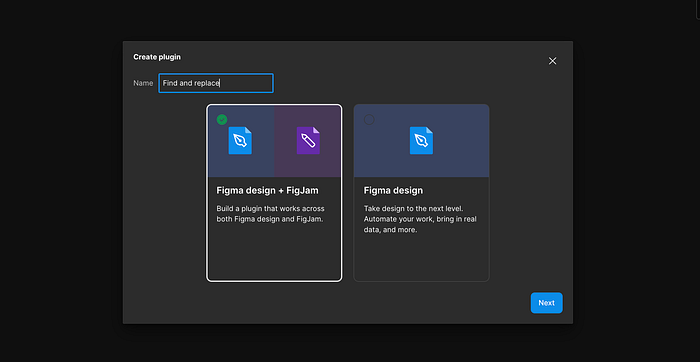
Follow the Figma Wizard steps
New plugin wizard will appear, choose whether you want your plugin to work with Figma, Figjam, or both. Onto next step, to have full control over the user interface, select the Custom UI option.
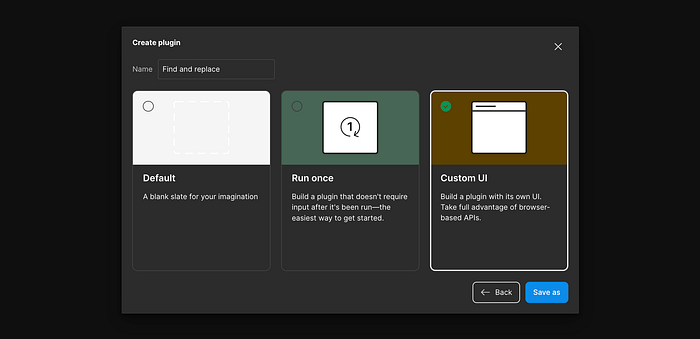
Finally click on Save as and choose the folder where you want to store your plugin files.
- Load your plugin into Visual Studio Code
Open Visual Studio Code and simply drag and drop your Figma plugin folder into it.
- Sign up for ChatGPT
To make use of ChatGPT, you’ll need to sign up. The free version offers considerable capabilities, but GPT-4 is a significant advancement. Its enhanced functionalities could have a positive impact on your code outputs and debugging process. Therefore, if it’s within your budget, I would recommend trying GPT-4 for a month at least. You’ll find its versatility extends beyond plugin development, proving invaluable in a variety of tasks.
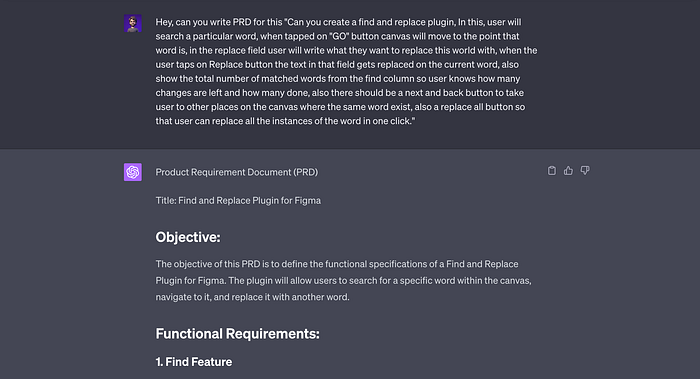
🧐 Writing Plugin Requirements
At this stage, you’ll need to focus on crafting the requirements for your plugin. Much like the product thinking approach, this stage will consume a significant portion of your time and it’s crucial to get it right to save alot of back and forth at the coding stage with GPT.
The good news is, you just need a basic outline of all desired features, and ChatGPT will help with the structuring of a Product Requirements Document (PRD).
Simply feed ChatGPT the core thought process, could be a lump of all the ideas that you’re getting regarding the plugin and it will generate a PRD structure. From there, it’s just a matter of refining and expanding that structure until all your requirements are clearly outlined. Once you have a finalized PRD, you are all set to instruct ChatGPT to begin the creation of your plugin.
ChatGPT-4 is a remarkable tool that extends its capabilities to aiding in coding even for API plugins. However, as we’ve touched on earlier, when dealing with more intricate plugins, a higher degree of coding proficiency becomes essential. This is because, after each iteration, you’ll need to cross-check the code to ensure the product aligns with your PRD and is functioning as envisioned.
🧑🏻💻 Code with GPT
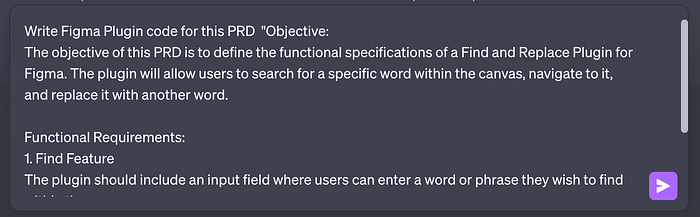
As we approach the coding phase with ChatGPT, begin with a clear prompt:
Write Figma plugin code for this PRD: “Insert your whole PRD text here”.
Once you’ve done this, let the AI take the reins and perform its magic. After the first iteration of code is generated, transfer it into the relevant files in your Visual Studio Code editor, save it, and head back to Figma.
Navigate to your newly minted development plugin and click on “Run”. Your plugin window should pop up.
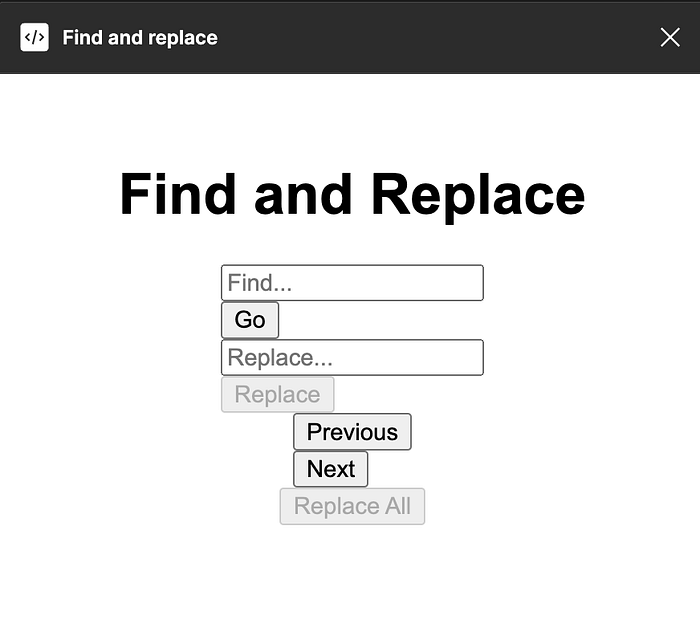
Since ChatGPT isn’t necessarily a designer, ignore the UI for now, your main task is to ensure that all functionalities are operating correctly and no errors arise.
If there are issues or certain elements not functioning as expected, you can relay your exact problem to ChatGPT and it will provide an updated code to resolve it.
Tips for the coding stage
- Define names and other semantics: Name the buttons, input fields, and similar elements which make sense to you, in your PRD, so that ChatGPT uses these exact names in the code. This can expedite the debugging process.
- Ask for code optimization: ChatGPT can also help with code optimization. Ask it for suggestions to make your code more efficient or performant.
- Leverage the explainability feature: Use the explainability feature of GPT-4 to understand the generated code better. Ask GPT-4 to explain complex pieces of code or logic in simple terms.
- Copy paste the exact errors from console window to GPT-4, it will help it understand the error to it’s origin and solve it better.
✨ Final Touches
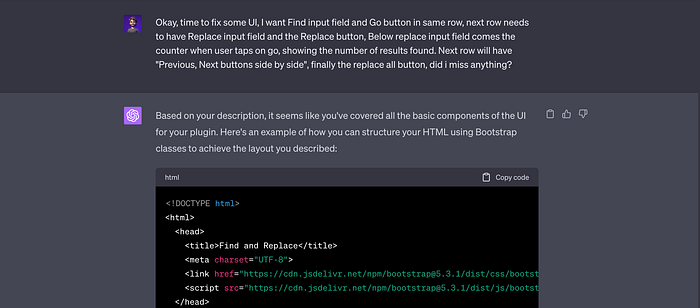
You can instruct GPT-4 to enhance the final code by incorporating a frontend framework, such as Bootstrap, to give your user interface a more polished appearance.
You also have the freedom to guide GPT-4 on elements like the placement of Call to Action buttons, their color, and the desired margins between each element or from the edges. ChatGPT can seamlessly implement these updates in the code.
However, remember to review the updated code thoroughly to ensure all changes have been implemented correctly and the code remains functional.
There you go, you’ve your first plugin successfully created with GPT-4.
I am building my Medium community and if you find my content interesting and helpful, join my medium page by clicking the Follow button 🤗
Recommend
About Joyk
Aggregate valuable and interesting links.
Joyk means Joy of geeK