

Multiple Emulators with VS Code
source link: https://keyholesoftware.com/2023/06/20/multiple-emulators-with-vs-code/
Go to the source link to view the article. You can view the picture content, updated content and better typesetting reading experience. If the link is broken, please click the button below to view the snapshot at that time.
Multiple Emulators with VS Code
Recently, I was joking with some team members, trying my best to get someone to develop a VS Code plugin for me that would allow VS Code to simultaneously connect to multiple Android emulators.
I was working on some font sizing issues in Flutter and needed to test the changes on multiple device viewport sizes. Needless to say, it was taking too much time to ramp various Android emulators up and down.
Later that day, I decided to start playing with the debugger and emulator options, with no expectations of finding anything substantial. Sometimes throwing something against the wall to see if it sticks provides the best surprises!
To my surprise, I could run multiple Android emulators at the same time while attaching a debugger to each emulator. Shaking my head, I have to ask myself why I didn’t try this earlier. The win is being able to change the code and have the change push to all the Android emulators automatically. Big win!
The rest of this blog is a walkthrough of how to get this going on your machine. Let’s get started.
The Tutorial
There are a couple of paths you can take to accomplish multiple emulators. I’ll post one of them, and then you can use that knowledge to find the path best for you.
Before we begin, I’ll assume:
- You have VS Code installed.
- You have Android SDK installed.
- You have Android emulators already created.
- You have VS Code configured to access the emulators.
In this example, I’m developing a Flutter application. However, these steps are similar to other app stacks, so you should be able to generalize for whichever tools you’re using.
Step 1: Fire Up the First Emulator

- You can click on the Devices’ Label (as shown by the “#1” in the image above) to show the list of devices and emulators to run.
- The first emulator, “NexusS T,” is running, as seen in the list of available devices (#2) as well as the emulator window title. The active emulator is also shown as the device label from callout #1.
- The
Start Debuggingcommand (#3) will run the app and attach a debugger to the active emulator.
Step 2: Fire Up the Second Emulator
Starting the second emulator is very similar to starting the first.

- In the list of available emulators, choose the second emulator to run (#1).
- When the second emulator is up and running, the emulator name will move up to the “Available Devices” section of the list (#2).
Step 3: Attach Debugger to Second Emulator
With the start of the second emulator, the new emulator becomes the active emulator that VS Code will interact with.

- Before attaching the second debugger, verify that the correct emulator is selected (#1).
- Select “Start Debugging” to run the app and attach the debugger (#2).

- Once the second debugger is available, the debugger selection dropdown lists the two active debuggers. A recent VS Code update made it easier to verify which emulator a debugger was attached to.
Step 4: Fast Testing UI Changes
With both emulators visible, actively running, and ready to receive updates, let’s make an easily identifiable code change.
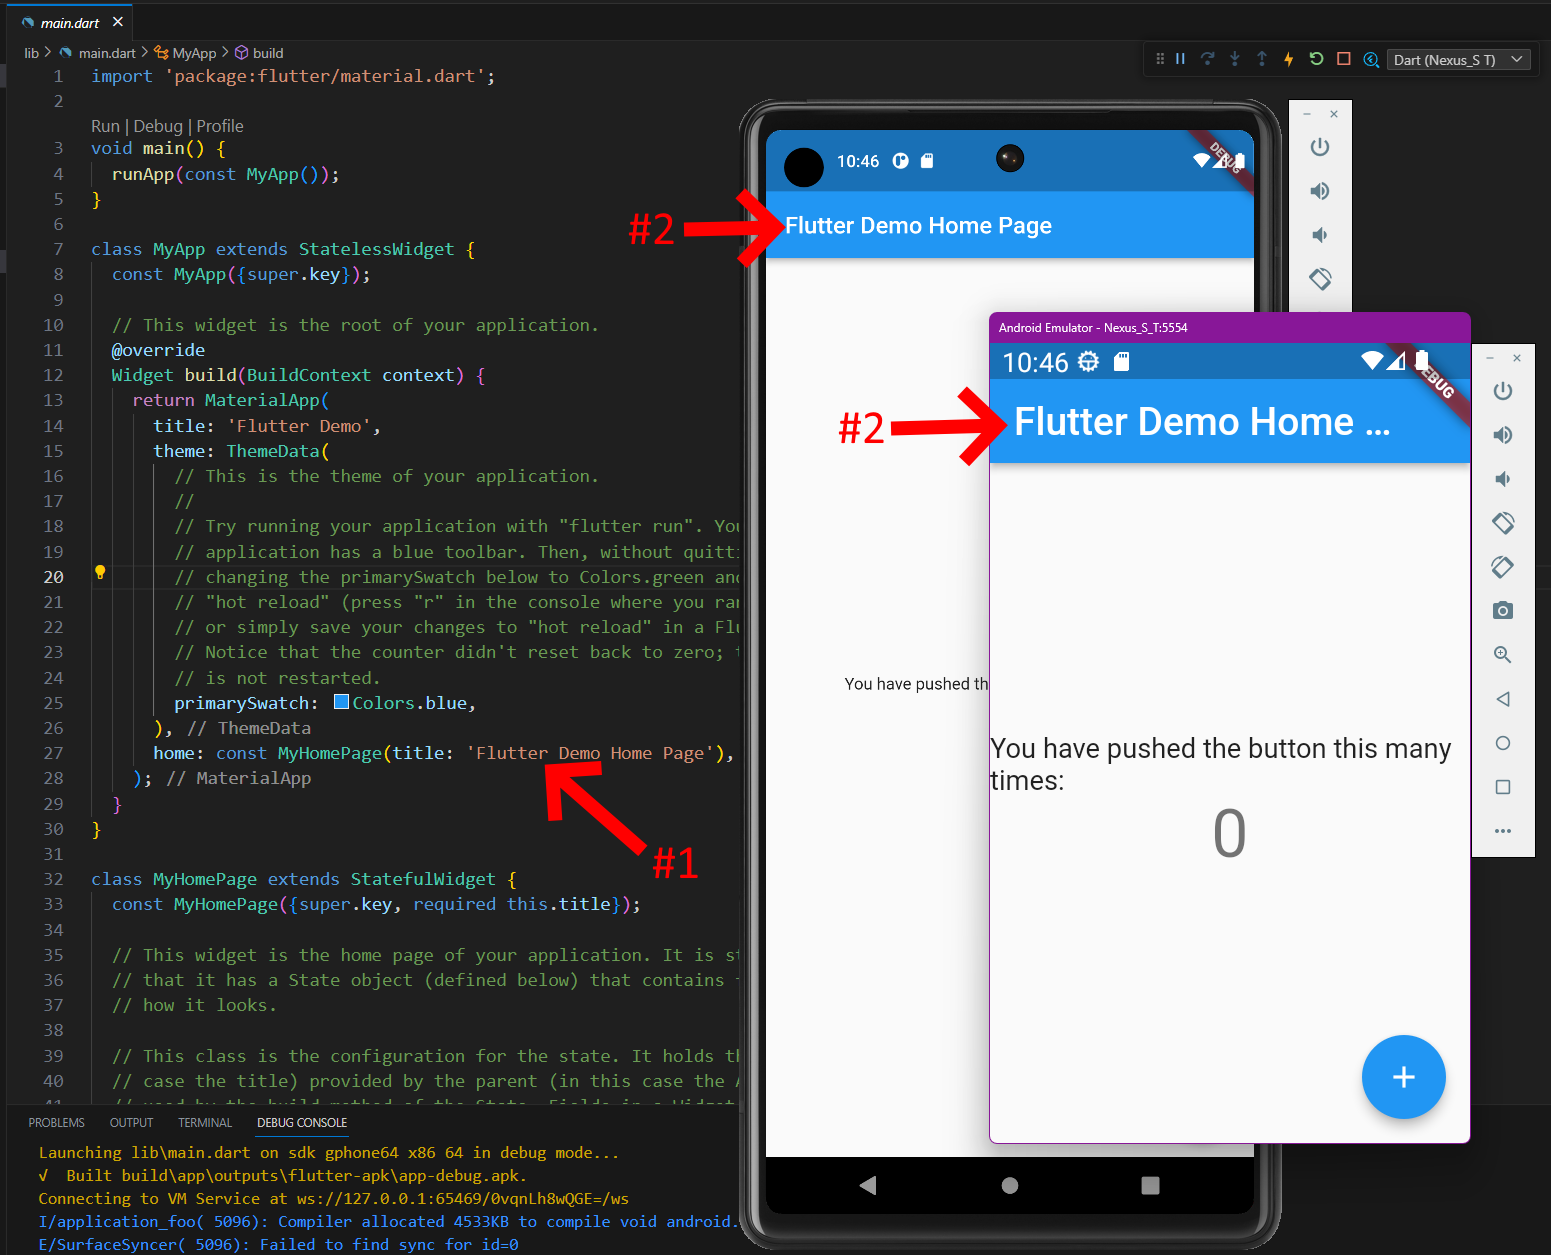
- To assist in proving the effect, we’ll update the widget text in the code to test how it appears with two different screen sizes and resolutions (#1).
- We can see the text is too long for the screen size in one of the emulators and needs shortening (#2).
- Let’s change
DemotoFooand save the changes.
- After updating the text in the source, a save automatically triggers a rebuild (#1).
Voila!!! You’re finished. As #2 points out, both emulators received the code change without any additional time-consuming steps.
In Conclusion
Sometimes it’s the little things that make a difference. It is nice finding productivity boosts from unexpected places. Saving these little bits of time will add up over time and will be a huge benefit to my overall productivity.
I hope this step-by-step tutorial on how to create multiple emulators with VS Code helps you save some time, too.
Thanks for reading! Follow the Keyhole Dev Blog for more time-saving, programming hacks.
Recommend
About Joyk
Aggregate valuable and interesting links.
Joyk means Joy of geeK