

Automate eSignature Requests for New RowShare Entries with Zapier
source link: https://boldsign.com/blogs/automate-esignature-requests-for-new-rowshare-entries-with-zapier/?utm_campaign=alvinashcraft_blog_edmjun23
Go to the source link to view the article. You can view the picture content, updated content and better typesetting reading experience. If the link is broken, please click the button below to view the snapshot at that time.
Automate eSignature Requests for New RowShare Entries with Zapier
- Jayavigneshwaran
- June 16, 2023
We’re excited to announce our partnership with RowShare, aimed at enhancing your electronic signature workflow experience. Together, BoldSign and RowShare offer a seamless integration that simplifies your document handling process. By going one step further and adding BoldSign’s eSignature integrations on Zapier to the equation, you can streamline your workflows and automate document processes with ease. Whether you’re in the legal field, business, or any profession that relies on eSignatures, the RowShare integration is designed to bring efficiency and convenience to your day-to-day work.
In this blog post, we’ll dive into the power of connecting BoldSign and RowShare. Imagine generating BoldSign signature requests automatically whenever a new entry is made on RowShare. This integration is just one example of how BoldSign and RowShare work together to revolutionize your document handling.
To get started, you just need a valid Zapier account and a BoldSign account, which can be either a paid or a free sandbox account. If you haven’t created a BoldSign account yet, you can easily sign up for a free account right now.
Getting started
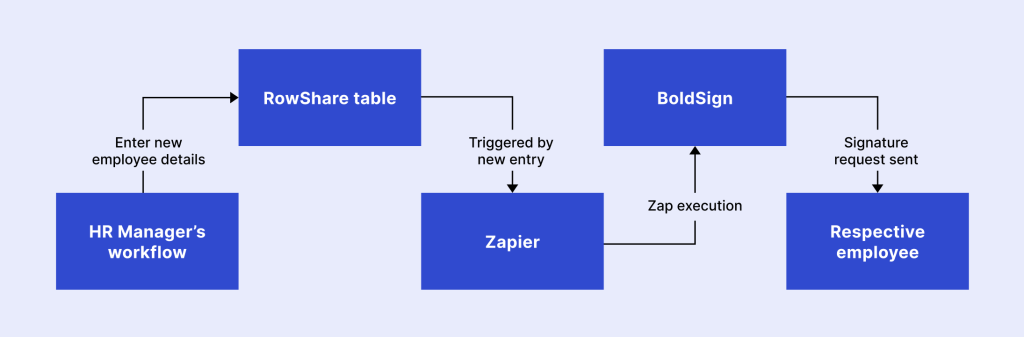
Let’s say that you’re an HR manager responsible for updating new employee details in a RowShare table and creating signature requests for onboarding agreements. Instead of manually creating each request, you can simplify the process using Zapier. By creating a Zap, whenever you enter employee details in the RowShare table, a signature request will be automatically generated and sent to the respective employee through BoldSign. The following flowchart illustrates the workflow of this scenario:
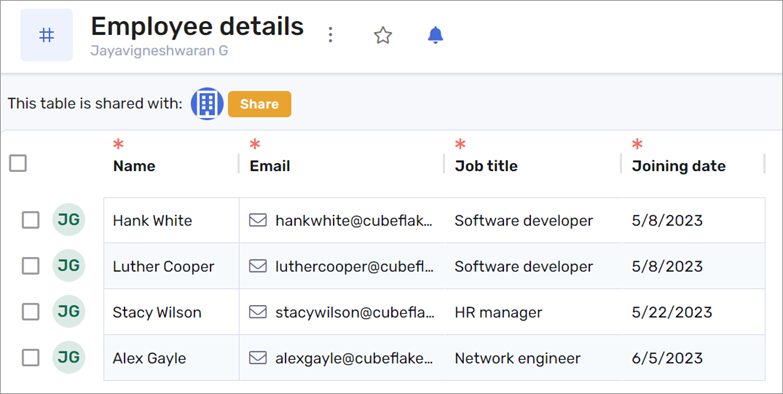
To create a Zap for this scenario, it’s essential to have a RowShare table populated with the necessary details. An example RowShare table with details is shown in the following figure:
Additionally, you should have a BoldSign template to automate signature requests creation on Zapier. If you don’t have a template, you can easily create one by following the instructions provided in the “Creating templates” and “How to create a template” articles.
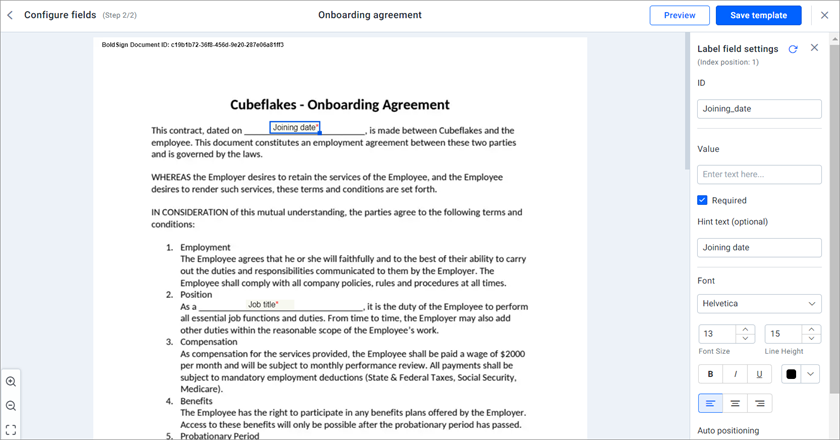
For our scenario, I have created a BoldSign template designed for new employee onboarding.

Furthermore, I have incorporated two label form fields, namely “Joining Date” and “Job Title,” into the document. The values for these fields will be mapped from the RowShare table during the Zap creation. By mapping the corresponding values from the RowShare table, you can eliminate the need for manual data entry when generating signature request documents.
We are all set now and can proceed with Zap creation.
Creating the Zap
Let’s create a Zap in Zapier for connecting BoldSign and RowShare apps.
A preconfigured Zap template is available for this scenario. Navigate to Send BoldSign signature requests for new RowShare rows page and click the Try this template button.
Trigger section: In the Account column, connect your RowShare account and in the Trigger column, select the table you want to use from RowShare.
In the Test column, test the trigger. The RowShare table rows will be displayed. Continue by selecting a row from it.
Action section: In the Action column, choose the BoldSign template and select a value for Sandbox Mode. If you select True, the signature request will be sent in sandbox mode, allowing you to test the integration without consuming API credits.
You will be prompted for recipient name, recipient email, cc, and other values. Assign the RowShare table values for Recipient Name and Recipient Email. Additionally, you will be prompted to enter values for the label form fields (Joining_date and Job_title) that were previously added in the BoldSign template document. Map the appropriate fields for them.
In the Test column, test the trigger. Now a new signature request will be created in BoldSign and sent to the recipient for signature.
The following screenshot shows the overview page of the created signature request document in the BoldSign web application.
Publish the Zap and turn it on.
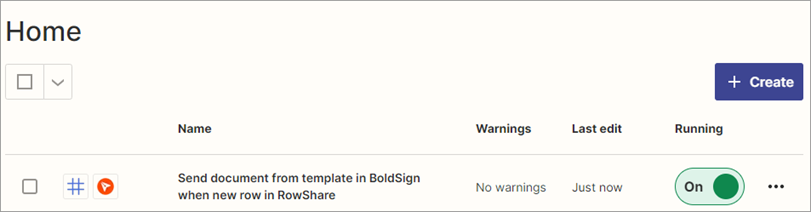
Now, whenever a new row is added in the RowShare table, a new signature request will be created in BoldSign. You can view the created Zap on the Zaps page in Zapier.
The employee onboarding agreement process has been successfully automated. From this point forward, whenever a new employee joins the company, the onboarding agreement process will be seamlessly handled without the need for manual intervention. This automation, created in Zapier, saves a significant amount of time and eliminates the possibility of human errors, making the process more efficient and reliable.
Conclusion
Thank you for exploring how BoldSign eSignature integrations on Zapier and RowShare can automate eSignature requests and streamline the process. Start your 30-day free trial today and experience the efficiency and convenience of automating your eSignature workflows with BoldSign.
We have a comprehensive collection of knowledge base articles on Zapier, providing valuable guidance and instructions.
We value your feedback, so please share your comments below. For further assistance, schedule a demo or reach out to our support team through our support portal. Choose BoldSign to optimize your digital documentation processes and achieve seamless eSignature workflows.
Recommend
About Joyk
Aggregate valuable and interesting links.
Joyk means Joy of geeK