

Spring Boot 3.1中如何整合Spring Security和Keycloak
source link: https://blog.didispace.com/spring-boot-3-keycloak-21/
Go to the source link to view the article. You can view the picture content, updated content and better typesetting reading experience. If the link is broken, please click the button below to view the snapshot at that time.
Spring Boot 3.1中如何整合Spring Security和Keycloak
在今年2月14日的时候,Keycloak 团队宣布他们正在弃用大多数 Keycloak 适配器。其中包括Spring Security和Spring Boot的适配器,这意味着今后Keycloak团队将不再提供针对Spring Security和Spring Boot的集成方案。但是,如此强大的Keycloak,还要用怎么办呢?本文就来聊聊,在最新的Spring Boot 3.1版本之下,如何将Keycloak和Spring Security一起跑起来。
这里所采用的框架与工具版本信息如下:
- Spring Boot 3.1.0
- Keycloak 21.1.1
如果您采用的是其他版本,本文内容不一定有效,但可以作为参考。
配置Keycloak
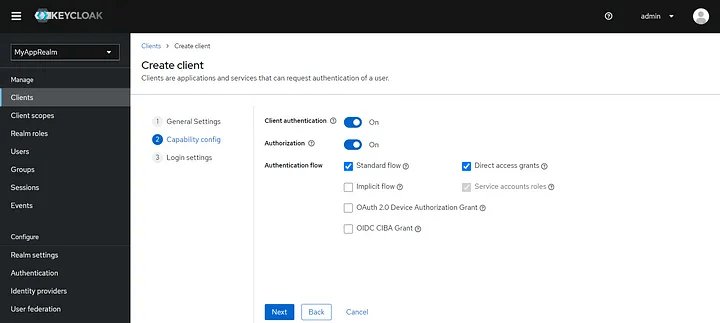
第一步:为Spring Boot应用创建Realm,并在下面创建一个Client

第二步:创建一个SYS_ADMIN角色,并创建一个用户赋予SYS_ADMIN角色
第三步:调用Keycloak接口生成Access Token,可以用下面的curl命令或者其他任何发请求的工具,比如:Postman等。
curl --location 'http://localhost:9090/realms/MyAppRealm/protocol/openid-connect/token' \
--header 'Content-Type: application/x-www-form-urlencoded' \
--data-urlencode 'username=<YOUR_USER_NAME>' \
--data-urlencode 'password=<YOUR_USER_PASSWORD>' \
--data-urlencode 'grant_type=password' \
--data-urlencode 'client_id=My-Awesome-App' \
--data-urlencode 'client_secret=<KEYCLOAK_CLIENT_SECRET>' \
--data-urlencode 'scope=openid'
记住获得到Access Token,后续验证时候要用。
如果您学习过程中如遇困难?可以加入我们超高质量的Spring技术交流群,参与交流与讨论,更好的学习与进步!
配置Spring Boot应用
第一步:创建一个Spring Boot应用,这个很简单,这里不赘述了。如果您还不会,可以看看我的Spring Boot教程
第二步:在pom.xml中添加依赖:
<dependency>
   <groupId>org.springframework.security</groupId>
   <artifactId>spring-security-oauth2-jose</artifactId>
</dependency>
第三步:修改配置文件
spring:
  security:
    oauth2:
      resourceserver:
        jwt:
          issuer-uri: http://localhost:9090/realms/MyAppRealm
          jwk-set-uri: http://localhost:9090/realms/MyAppRealm/protocol/openid-connect/certs
第四步:创建一个需要鉴权的测试接口
@RequestMapping("/test")
@RestController
public class MySuperSecuredController {

@GetMapping("/hello")
    public String hello(){
        return "hello";
    }

}
第五步:创建SecurityFilterChain,用来告知Spring Security在JWT令牌中查找角色信息的位置。
@Configuration
@EnableWebSecurity
public class WebSecurityConfig {


    @Bean
    public SecurityFilterChain securityFilterChain(HttpSecurity httpSecurity) throws Exception {
        httpSecurity
                .authorizeHttpRequests(registry -> registry
                        .requestMatchers("/test/**").hasRole("SYS_ADMIN")
                        .anyRequest().authenticated()
                )
                .oauth2ResourceServer(oauth2Configurer -> oauth2Configurer.jwt(jwtConfigurer -> jwtConfigurer.jwtAuthenticationConverter(jwt -> {
                    Map<String, Collection<String>> realmAccess = jwt.getClaim("realm_access");
                    Collection<String> roles = realmAccess.get("roles");
                    var grantedAuthorities = roles.stream()
                            .map(role -> new SimpleGrantedAuthority("ROLE_" + role))
                            .toList();
                    return new JwtAuthenticationToken(jwt, grantedAuthorities);
                })))
        ;

return httpSecurity.build();
    }
}
在完成了上面配置所有之后之后,启动Spring Boot应用,同时保证Keycloak也在运行中。
尝试请求/test/hello接口:
- 当不包含
Authorization头信息的时候,将返回401错误 - 当包含
Authorization头信息(前文用调接口获取的Access Token)的时候,才能正确访问到。
虽然Keycloak 团队宣布了不再对Spring Security提供适配,但Spring Security长期以来一直为OAuth和OIDC提供强大的内置支持。所以,只要我们理解Spring Security是如何处理OAuth和OIDC的,那么与Keyloak的集成依然不复杂。
好了,今天的分享就到这里!如果您学习过程中如遇困难?可以加入我们超高质量的Spring技术交流群,参与交流与讨论,更好的学习与进步!欢迎关注我的独立博客和公众号:程序猿DD,持续分享技术干货。
Recommend
About Joyk
Aggregate valuable and interesting links.
Joyk means Joy of geeK