

玩一玩 Ubuntu 下的 VSCode 编程 - 一线码农
source link: https://www.cnblogs.com/huangxincheng/p/17368881.html
Go to the source link to view the article. You can view the picture content, updated content and better typesetting reading experience. If the link is broken, please click the button below to view the snapshot at that time.
1. 讲故事
今天是五一的最后一天,想着长期都在 Windows 平台上做开发,准备今天换到 Ubuntu 系统上体验下,主要是想学习下 AT&T 风格的汇编,这里 Visual Studio 肯定是装不了了,还得上 VSCode,刚好前几天买了一个小工控机,这里简单记录下 零到一 的过程吧。
二:搭建一览
1. VSCode 安装
在 Ubuntu 上也有类似 Windows 的微软商店的 软件市场,可以在商店中直接安装。
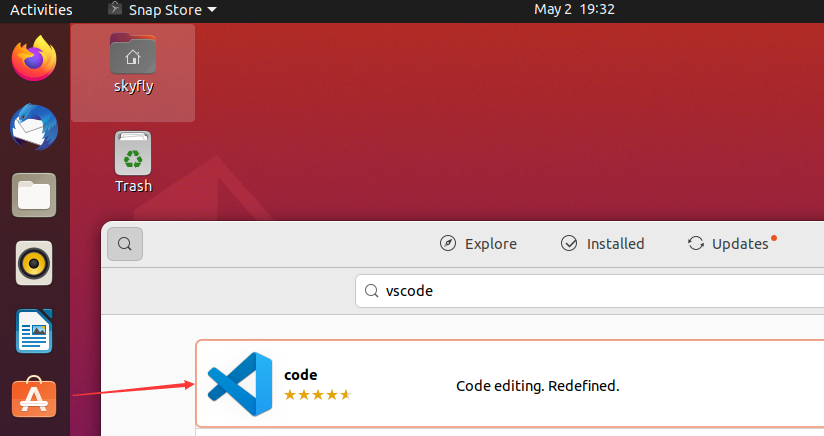
既然要换体验,那就多用命令的方式安装吧。
sudo apt update

sudo apt install software-properties-common apt-transport-https wget

wget -q https://packages.microsoft.com/keys/microsoft.asc -O- | sudo apt-key add -

sudo add-apt-repository "deb [arch=amd64] https://packages.microsoft.com/repos/vscode stable main"

sudo apt install code

code
2. gcc 安装
由于 ubuntu 自带了 gcc,g++,gdb 所以这一块大家不需要操心,可以用 -v 观察各自的版本。
skyfly@skyfly-virtual-machine:~/Desktop$ g++ -v
nux-gnu --target=x86_64-linux-gnu
Thread model: posix
gcc version 9.4.0 (Ubuntu 9.4.0-1ubuntu1~20.04.1)

skyfly@skyfly-virtual-machine:~/Desktop$ gdb -v
GNU gdb (Ubuntu 9.2-0ubuntu1~20.04.1) 9.2
3. 配置 vscode
为了能够让 vscode 跑 C++ 程序,先配置下 launch.json 文件。
// An highlighted block
{
    // Use IntelliSense to learn about possible attributes.
    // Hover to view descriptions of existing attributes.
    // For more information, visit: https://go.microsoft.com/fwlink/?linkid=830387
    "version": "0.2.0",
    "configurations": [
        {
            "name": "(gdb) Launch",
            "type": "cppdbg",
            "request": "launch",
            "program": "${workspaceFolder}/${fileBasenameNoExtension}.out",
            "args": [],
            "stopAtEntry": false,
            "cwd": "${workspaceFolder}",
            "environment": [],
            "externalConsole": true,
            "MIMode": "gdb",
            "preLaunchTask": "build",
            "setupCommands": [
                {
                    "description": "Enable pretty-printing for gdb",
                    "text": "-enable-pretty-printing",
                    "ignoreFailures": true
                }
            ]
        }
    ]
}
再配置下 tasks.json 文件。
{
    // See https://go.microsoft.com/fwlink/?LinkId=733558
    // for the documentation about the tasks.json format
    "version": "2.0.0",
    "tasks": [
        {
            "label": "build",
            "type": "shell",
            "command": "g++",
            "args": [
                "-g",
                "${file}",
                "-std=c++11",
                "-o",
                "${fileBasenameNoExtension}.out"
            ]
        }
    ]
}
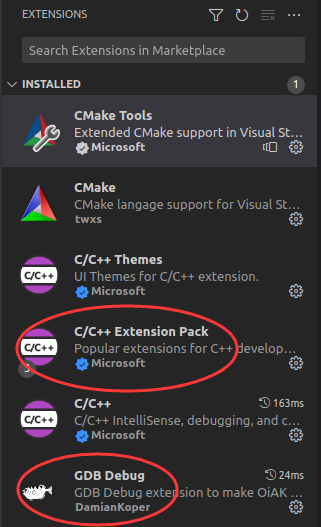
然后在 VSCode 面板中安装下 GDB Debug 和 C/C++ Extension Pack 两个插件,其他都是附带上去的,截图如下:
3. 一个简单的程序测试
为了方便体验 AT&T 风格,写一个多参数的方法,顺带观察寄存器传值。
#include <iostream>

using namespace std;

int mytest(int a, int b, int c, int d, int e, int f, int g)
{
    printf("a=%d,b=%d,c=%d,d=%d,e=%d,f=%d,g=%d", a, b, c, d, e, f, g);

    return 0;
}

int main()
{
    int a = 10;
    int b = 11;
    int c = 12;
    int d = 13;
    int e = 14;
    int f = 15;
    int g = 16;

    mytest(a,b,c,d,e,f,g);
}
在 mytest 方法下一个断点,然后在 DEBUG CONSOLE 窗口输入 -exec disassemble /m 就能看到本方法的汇编代码,截图如下:
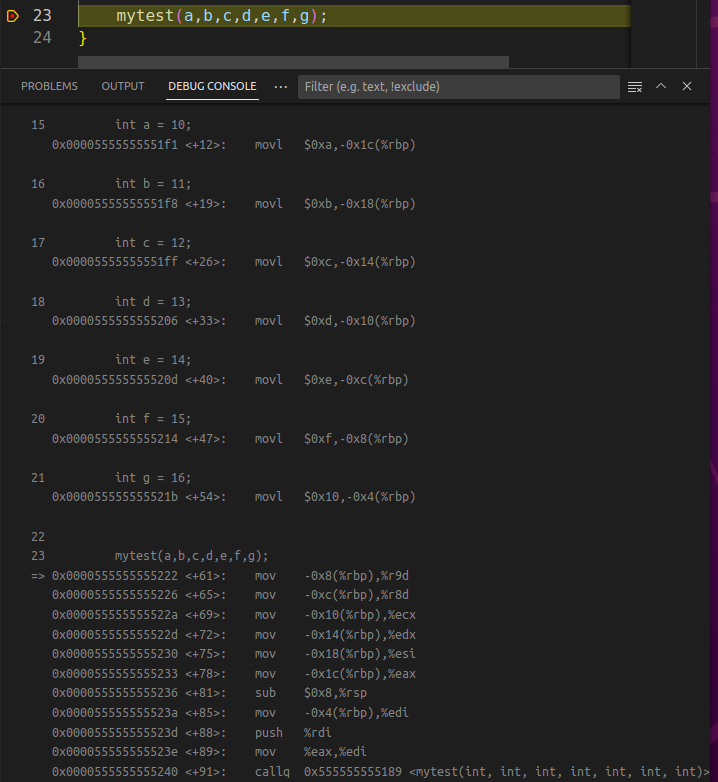
仔细观察上图,可以看到 mytest 方法的前六个参数依次使用了 edi, esi, edx, ecx, r8d, r9d 寄存器,虽然都是 X64 调用协定,和 Windows 平台的4个寄存器有明显不同哈。
既然都看了默认的x64,不看 x86 的传递就有点遗憾哈,要想编译成 32bit 的,需要做一些简单配置。
$ sudo apt-get install build-essential module-assistant
$ sudo apt-get install gcc-multilib g++-multilib
然后在 g++ 编译时增加 -m32 参数,在 tasks.json 中增加即可。
{
    // See https://go.microsoft.com/fwlink/?LinkId=733558
    // for the documentation about the tasks.json format
    "version": "2.0.0",
    "tasks": [
        {
            "label": "build",
            "type": "shell",
            "command": "g++",
            "args": [
                "-g",
                "-m32",
                "${file}",
                "-std=c++11",
                "-o",
                "${fileBasenameNoExtension}.out"
            ]
        }
    ]
}
接下来观察下汇编代码,可以发现走的都是 栈空间。
24	    mytest(a,b,c,d,e,f,g);
=> 0x565562a2 <+80>:	sub    $0x4,%esp
   0x565562a5 <+83>:	pushl  -0xc(%ebp)
   0x565562a8 <+86>:	pushl  -0x10(%ebp)
   0x565562ab <+89>:	pushl  -0x14(%ebp)
   0x565562ae <+92>:	pushl  -0x18(%ebp)
   0x565562b1 <+95>:	pushl  -0x1c(%ebp)
   0x565562b4 <+98>:	pushl  -0x20(%ebp)
   0x565562b7 <+101>:	pushl  -0x24(%ebp)
   0x565562ba <+104>:	call   0x5655620d <mytest(int, int, int, int, int, int, int)>
   0x565562bf <+109>:	add    $0x20,%esp
还有一个问题,在x86下能不能混着用寄存器呢?就比如 windows 上的 fastcall 调用协定,其实是可以的,就是在 mytest 方法上加 __attribute__((regparm(N))) 标记,这里的 N 不能超过 3 ,即参与传递的寄存器个数,修改后如下:
__attribute__((regparm(3)))
int mytest(int a, int b, int c, int d, int e, int f, int g)
{
    printf("a=%d,b=%d,c=%d,d=%d,e=%d,f=%d,g=%d", a, b, c, d, e, f, g);

    return 0;
}
然后把程序跑起来再次观察,很明显的看到这次用了 eax, edx, ecx 来传递方法的前三个参数,汇编代码如下:
24	    mytest(a,b,c,d,e,f,g);
=> 0x565562aa <+80>:	mov    -0x1c(%ebp),%ecx
   0x565562ad <+83>:	mov    -0x20(%ebp),%edx
   0x565562b0 <+86>:	mov    -0x24(%ebp),%eax
   0x565562b3 <+89>:	pushl  -0xc(%ebp)
   0x565562b6 <+92>:	pushl  -0x10(%ebp)
   0x565562b9 <+95>:	pushl  -0x14(%ebp)
   0x565562bc <+98>:	pushl  -0x18(%ebp)
   0x565562bf <+101>:	call   0x5655620d <mytest(int, int, int, int, int, int, int)>
   0x565562c4 <+106>:	add    $0x10,%esp
习惯了 Intel 风格的汇编,再看 AT&T 风格的会极度不舒服,简直是逆天哈,感觉都是反方向的,相信熟悉一段时间之后就好了,本篇的一个简单搭建,希望对你有帮助。
Recommend
About Joyk
Aggregate valuable and interesting links.
Joyk means Joy of geeK