

OpenGL Mac开发-如何使用imgui(1.89.4)插件进行调试 - 星门
source link: https://www.cnblogs.com/cangxw/p/17279430.html
Go to the source link to view the article. You can view the picture content, updated content and better typesetting reading experience. If the link is broken, please click the button below to view the snapshot at that time.

OpenGL Mac开发-如何使用imgui(1.89.4)插件进行调试
2023-04-01 21:23 星门 阅读(32) 评论(0) 编辑 收藏 举报
为了调试我们的OpenGL Demo,可以尝试使用一个成熟的开源GUI插件imgui。
1,首先进入imgui在github上的地址。
在Release中下载最近的版本,可以得到一个Zip压缩包。
现在是2023年的4月1日,我下载到的版本是1.89.4,与Cherno的OpenGL教程中的代码略微有些区别。如果你看的是Cherno的教程,也可以尝试下载1.60版本,并按照Cherno的代码来。
2,Zip包解压后,首先将根目录的代码文件全部复制加入项目中(imconfig.h, imgiu_demo.cpp, imgui.draw_cpp, imgui_internal.h...)。
3,进入example目录,由于我这边用的GLFW库,因此进入example_glfw_opengl3目录。这里我们看到和Cherno教程不同的地方,这里只有一个main.cpp的代码文件。其实所有的实现文件已经转移到backends文件夹里了。注意这里需要拷贝五个文件到工程目录下,分别是imgui_impl_glfw.h,imgui_impl_glfw.cpp,imgui_impl_opengl3_loader.h,imgui_impl_opengl3.h和imgui_impl_opengl3.cpp。example目录下的main文件可以作为参考代码方便一会的测试。
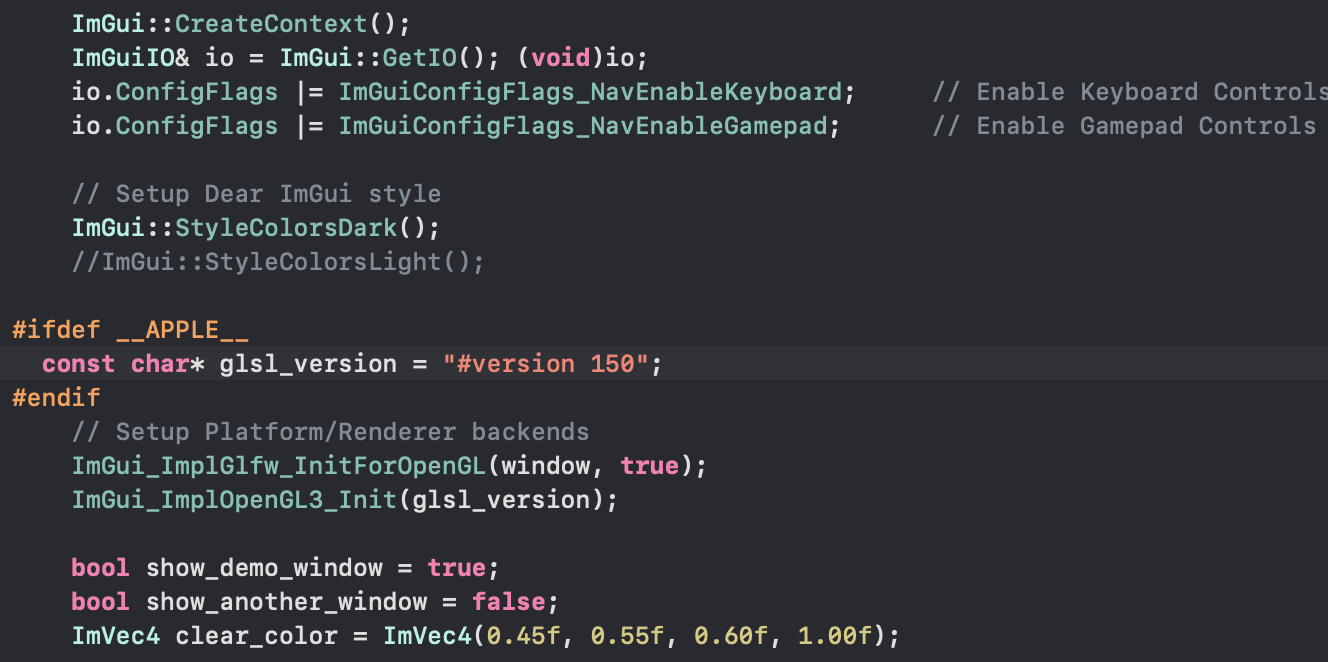
4,进入自己工程的main方法,引用头文件
然后在mainLoop前初始化imgui
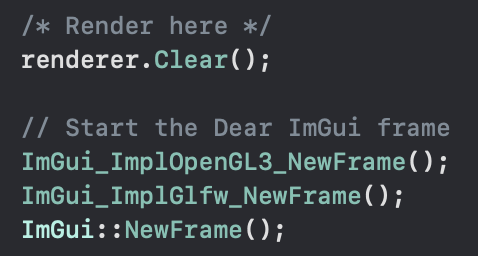
5,在渲染循环,调用GLClear后,我们需要开启imgui的frame
6,接下来就可以开始渲染绘制imgui的内容,我们可以看到example的main.cpp文件中,提供了三个窗口的demo,直接抄就行

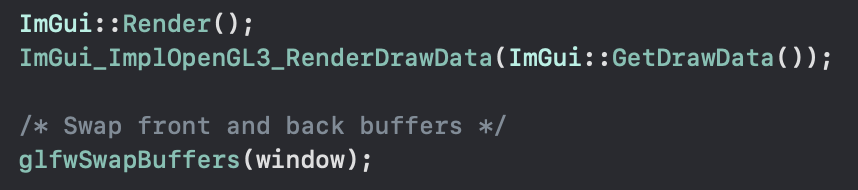
7,在swap buff前,我们需要提交imgui的渲染数据
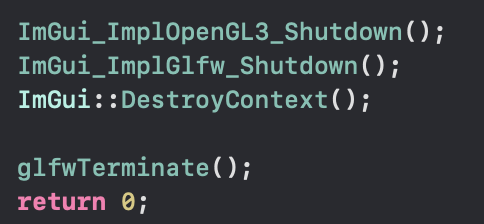
8,最后在销毁窗口前我们需要销毁imgui
9,运行程序可以看到

Recommend
-
36
作者:Mike Ash, 原文链接 ,原文日期:2018-06-29 译者: Big...
-
11
使用 Xamarin 在 iOS 真机上部署应用进行调试 发布于 2019-01-27 21:17 更新于 2020-10-31 01:00 虽然 Xamarin 可以在 Win...
-
27
使用VS 2017进行Linux C/C++远程GDB调试同济大学 计算机科学与技术硕士在读既然你已经知道了makefile是咋回事了,又嫌麻烦每次都要用ftp传代码+开个终端测试那就不妨...
-
8
使用Delve进行Golang代码的调试 youyouxia263 · 大约2小时之前 · 15 次点击 · 预计阅读时间 6 分钟 · 不到1分钟之前 开始浏览 ...
-
12
[本文结构] 这是Gradle插件开发系列(点击查看)系列的第三篇,整个文档基于开发的插件
-
7
前提准备 在打开 Xcode 之前,我们需要准备两个库: GLFW 和 GLAD 。这是开发 OpenGL 需要依赖的库,所以先看看如何准备好这两个库吧: GLFW 在我们...
-
10
使用 VSCode 对 Linux 内核进行调试 发表于 2020-05-05...
-
14
如何使用prerender-spa-plugin插件对页面进行预渲染本文主要是介绍使用prerender-spa-plugin插件在针对前端代码进行预渲染。预渲染(SSG)和服务端(SSR)渲染有一定的区别,大家想...
-
14
想了解更多关于开源的内容,请访问:...
-
7
JMeter 扩展开发:自定义 JMeter 插件的调试 精选 原创 EMQ映云科技 2022-12-15 1...
About Joyk
Aggregate valuable and interesting links.
Joyk means Joy of geeK