

How to enable and use Locked Folder in Google Photos
source link: https://www.androidcentral.com/how-enable-and-use-locked-folder-google-photos
Go to the source link to view the article. You can view the picture content, updated content and better typesetting reading experience. If the link is broken, please click the button below to view the snapshot at that time.
How to enable and use Locked Folder in Google Photos
(Image credit: Android Central)
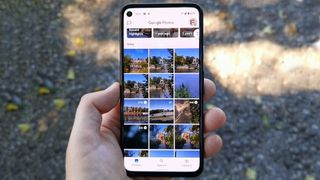
Google Photos is handy for making all of your captured memories accessible from just about anywhere using cloud storage. But, for security's sake, you may not want every picture you capture tossed up into the cloud. That's where Google's Locked Folder feature in Google Photos comes in.
The Locked Folder will not only keep people who are using your phone from accessing the content stored in that folder without knowing your passcode but will also prevent that content from syncing to the cloud. The feature launched as a Pixel exclusive, but it has been available on all Android phones for several years now. Here's how you can create and use the feature.
How to enable and set up a locked folder in Google Photos
1. Launch Google Photos on your phone.
2. Select the Library tab at the bottom of the page.
3. Tap the Utilities button.

(Image credit: Android Central)
4. Find and select Set up Locked Folder or Locked Folder option.
5. Tap the Set up button at the bottom right of the app.
6. Follow the prompt to unlock your phone.
With the Locked Folder set up, you can directly move photos from your account into the Locked Folder. This will automatically delete them from your cloud storage, so they won't be accessible or unlocked, so to speak, on other devices.
How to start filling your Locked Folder
1. Access your newly created Locked Folder in Google Photos.
2. Use your pin, passcode, or fingerprint to unlock your Locked Folder.
3. Select the Move items button in your empty Locked Folder.
4. Tap each photo or video you want to select.
5. Press the Move button in the upper-right corner of the app.
6. Once again, unlock your Locked Folder using your password/pin/fingerprint.
7. Read the pop-up and tap Continue.
8. Tap Move to confirm moving the selected content into your Locked Folder.
And that's it. You can start adding all the photos you'd like to your Locked Folder.
After your Locked Folder is set up
If you've already put photos into your Locked Folder, you can always add more by selecting them in the Google Photos app, pressing the three-dot menu button, and selecting Move to Locked Folder. You can also access the Locked Folder from the camera app on your Pixel phone and then begin to take pictures that will save directly to the Locked Folder.
If you're running low on storage and can't rely on the Locked Folder to back up all your files, you can also turn to the best USB-C thumb drives to secure your content. You can easily plug a Type-C flash drive directly into your phone and keep it in a safe place when not in use.
External storage solution for your phone
If you're running out of internal storage to secure your content, you can turn to the SanDisk Ultra Dual Drive to make an external backup and use SanDisk Memory Zone to encrypt your files.
Recommend
About Joyk
Aggregate valuable and interesting links.
Joyk means Joy of geeK