

Vue(3.0) Composition API | Bootstrap(v5) | JSON Server | CRUD Example
source link: https://www.learmoreseekmore.com/2023/03/vue3-composition-api-bootstrap5-jsonserver-crud-example.html
Go to the source link to view the article. You can view the picture content, updated content and better typesetting reading experience. If the link is broken, please click the button below to view the snapshot at that time.

%20%20Angular(v14)%20%20MongoDB%20%20CRUD%20Example.png)
In this article, we are going to implement a sample Vue(3.0) CRUD example, using JSON Server(Fake API).
Vue(3.0):

Create Vue(3.0) Application:


Setup JSON Server(Fake API):

Now to invoke the above added command, run the below command in vue application root folder


Configure Bootstrap Menu:
- <!DOCTYPE html>
- <html lang="en">
- <head>
- <meta charset="UTF-8" />
- <link rel="icon" href="/favicon.ico" />
- <meta name="viewport" content="width=device-width, initial-scale=1.0" />
- <title>Vite App</title>
- <link
- href="https://cdn.jsdelivr.net/npm/[email protected]/dist/css/bootstrap.min.css"
- rel="stylesheet"
- integrity="sha384-GLhlTQ8iRABdZLl6O3oVMWSktQOp6b7In1Zl3/Jr59b6EGGoI1aFkw7cmDA6j6gD"
- crossorigin="anonymous"
- />
- </head>
- <body>
- <div id="app"></div>
- <script type="module" src="/src/main.js"></script>
- <script
- src="https://cdn.jsdelivr.net/npm/[email protected]/dist/js/bootstrap.bundle.min.js"
- integrity="sha384-w76AqPfDkMBDXo30jS1Sgez6pr3x5MlQ1ZAGC+nuZB+EYdgRZgiwxhTBTkF7CXvN"
- crossorigin="anonymous"
- ></script>
- </body>
- </html>
- (Line: 8-13) Bootstrap CSS reference
- (Line: 18-22) Bootstrap JS reference
Next, remove the default CSS file 'src/assets/main.css' and also remove its reference from the 'main.js'
- <script setup>
- import { RouterLink, RouterView } from "vue-router";
- </script>
- <template>
- <nav class="navbar bg-primary" data-bs-theme="dark">
- <div class="container-fluid">
- <a class="navbar-brand" href="#">7 Wonders Of The World</a>
- </div>
- </nav>
- <div class="container">
- <RouterView />
- </div>
- </template>
- <style scoped>
- </style>
- Here added our bootstrap. The 'RouterView' is the default component loads from the 'vue-router'. The 'RouterView' component renders the page content

Install Axio Library:
Create A 'AllWonders' Vue Component:

- import { createRouter, createWebHistory } from "vue-router";
- import AllWonders from "../views/wonders/AllWonders.vue";
- const router = createRouter({
- history: createWebHistory(import.meta.env.BASE_URL),
- routes: [
- path: "/",
- name: "home",
- component: AllWonders,
- export default router;
- Here configured a route like '/' to our 'AllWonders' component.
Implement Read Operation:
- <script setup>
- import { ref, onMounted } from "vue";
- import axios from "axios";
- const allWonders = ref([]);
- onMounted(() => {
- axios.get("http://localhost:3000/wonders").then((response) => {
- allWonders.value = response.data;
- </script>
- <template>
- <div class="container mt-3">
- <div class="row row-cols-1 row-cols-md-3 g-4">
- <div class="col" v-for="item in allWonders" :key="item.id">
- <div class="card">
- <img :src="item.imageUrl" class="card-img-top" alt="..." />
- <div class="card-body">
- <h5 class="card-title">{{ item.name }}</h5>
- <p class="card-text">Location: {{ item.location }}</p>
- </div>
- </div>
- </div>
- </div>
- </div>
- </template>
- (Line: 1) The 'setup' attribute added to the script tag that represents we are using the composition API approach.
- (Line: 4) Declared 'allWonders' variable of type 'ref'. The 'ref' type is used to declare the reactive properties. Here 'ref([])' means an empty array will be the initial value for the 'allWonders' variable. The 'ref' imports from the 'vue' library.
- (Line: 5) The 'onMounted' is the life cycle method. Here we can add our logic that needs to be executed on the component mounted. Here generally we invoke our APIS whose response we want to display on page load.
- (Line: 6-8) Using 'axios.get()' invoking our HTTP GET API endpoint. Here API response assigned to 'allWonders' variable. In vue to assign value to 'ref' variable we should assign to '{variable}.value', we can't directly assign it to the variable itself.
- (Line: 12-24) Inside the 'template' element we have to render all our component HTML content.
- (Line: 14) The 'v-for' attribute is used to loop the HTML element based on the collection variable(allWonders). The ':key' attribute is assigned with a unique values like 'id' this helps with HTML track.
- In vue to render any data dynamically or data binding we have to use ''{{}}"
Now run both vue application and Json Server(fake API).

Create A 'AddWonders.vue' Component:

- import { createRouter, createWebHistory } from "vue-router";
- import AllWonders from "../views/wonders/AllWonders.vue";
- import AddWonders from "../views/wonders/AddWonders.vue";
- const router = createRouter({
- history: createWebHistory(import.meta.env.BASE_URL),
- routes: [
- path: "/",
- name: "home",
- component: AllWonders,
- path: "/add-wonder",
- name: "Add Wonder",
- component: AddWonders,
- export default router;
- (Line: 12-16) Configured the '/add-wonder' router for 'AddWonders.vue' component.
Implement Create Operation:
- <script setup>
- import axios from "axios";
- import { reactive } from "vue";
- import { useRouter } from "vue-router";
- let newWonder = reactive({
- name: "",
- location: "",
- imageUrl: "",
- const router = useRouter();
- const addNewWonder = () => {
- axios.post("http://localhost:3000/wonders", newWonder).then(() => {
- router.push("/");
- </script>
- <template>
- <div class="container mt-4 w-50">
- <form @submit.prevent="addNewWonder">
- <legend >Add New Wonder's</legend>
- <div class="mb-3">
- <label for="txtwonderName" class="form-label">Wonder Name</label>
- <input
- type="text"
- v-model="newWonder.name"
- class="form-control"
- id="txtwonderName"
- />
- </div>
- <div class="mb-3">
- <label for="txtLocation" class="form-label">Location</label>
- <input
- type="text"
- v-model="newWonder.location"
- class="form-control"
- id="txtLocation"
- />
- </div>
- <div class="mb-3">
- <label for="txtImageUrl" class="form-label">Image URL</label>
- <input
- type="text"
- v-model="newWonder.imageUrl"
- class="form-control"
- id="txtImageUrl"
- />
- </div>
- <button type="submit" class="btn btn-primary">Add</button>
- </form>
- </div>
- </template>
- (Line: 1) The 'setup' attribute added to the script tag that represents we are using the composition API approach.
- (Line: 5-9) The 'reactive' type loads from 'vue' library. The 'reactive' type is appropriate for creating models for the form binding. Here we defined properties like 'name', 'location', and 'imageUrl' which can use for form binding.
- (Line: 11-15) The 'addNewWonder' method contains logic to invoke the HTTP Post API call.
- In vue to enable the form model binding we will use 'v-model' attribute. Each form field must be decorated with the 'v-model'.
- (Line: 20) The '@submit.prevent' event raises on clicking the form submit button, but it won't reload the page since we configured the 'prevent' event. Here '@submit.prevent' is registered with 'addNewWonder' method.
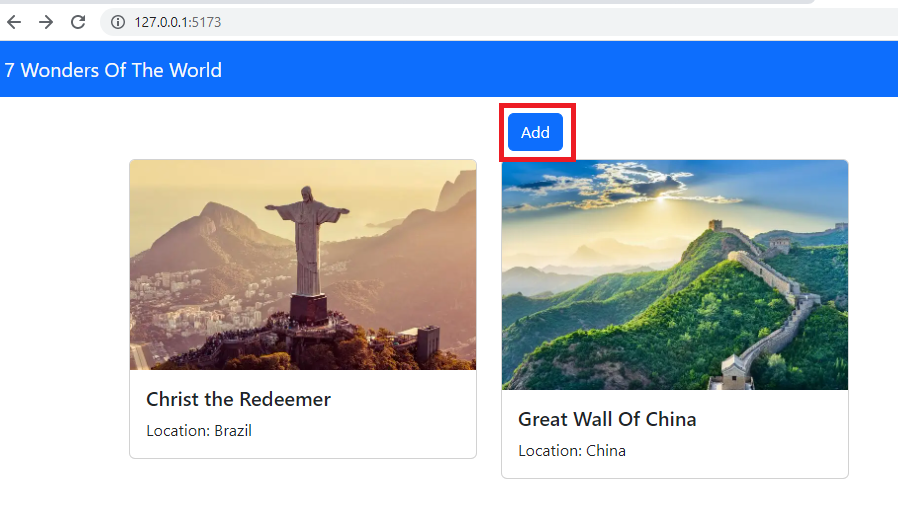
Let's configure the 'Add' button in 'AllWonders.vue' component so that we can navigate from the 'AllWonders.vue' to 'AddWonders.vue'.
- <script setup>
- import { ref, onMounted } from "vue";
- import axios from "axios";
- const allWonders = ref([]);
- onMounted(() => {
- axios.get("http://localhost:3000/wonders").then((response) => {
- allWonders.value = response.data;
- </script>
- <template>
- <div class="container mt-3">
- <div class="row m-2">
- <div class="col col-md-4 offset-md-4">
- <RouterLink to="/add-wonder" class="btn btn-primary">Add</RouterLink>
- </div>
- </div>
- <div class="row row-cols-1 row-cols-md-3 g-4">
- <div class="col" v-for="item in allWonders" :key="item.id">
- <div class="card">
- <img :src="item.imageUrl" class="card-img-top" alt="..." />
- <div class="card-body">
- <h5 class="card-title">{{ item.name }}</h5>
- <p class="card-text">Location: {{ item.location }}</p>
- </div>
- </div>
- </div>
- </div>
- </div>
- </template>
- (Line: 15) Added the 'RouterLink' its 'to' attribute configured with '/add-wonder' route.
(Step 1)


Create A 'EditWonders.vue' Component:

Now configure routing for the 'EditWonders.vue' component in 'router/index.js'.
- import { createRouter, createWebHistory } from "vue-router";
- import AllWonders from "../views/wonders/AllWonders.vue";
- import AddWonders from "../views/wonders/AddWonders.vue";
- import EditWonders from "../views/wonders/EditWonders.vue";
- const router = createRouter({
- history: createWebHistory(import.meta.env.BASE_URL),
- routes: [
- path: "/",
- name: "home",
- component: AllWonders,
- path: "/add-wonder",
- name: "Add Wonder",
- component: AddWonders,
- path: "/edit-wonder/:id",
- name: "Edit Wonder",
- component: EditWonders,
- export default router;
- (Line: 18-22) configured the 'edit-wonder/:id' route for the 'EditWonders.vue' component. Here ':id' is the dynamic placeholder where we define an item to edit the 'id' value in the route.
Implement Update Operation:
- <script setup>
- import axios from "axios";
- import { reactive, onMounted } from "vue";
- import { useRouter, useRoute } from "vue-router";
- let wonderToUpdate = reactive({
- id: 0,
- name: "",
- location: "",
- imageUrl: "",
- const router = useRouter();
- const route = useRoute();
- onMounted(() => {
- axios
- .get(`http://localhost:3000/wonders/${route.params.id}`)
- .then((response) => {
- wonderToUpdate.id = response.data.id;
- wonderToUpdate.name = response.data.name;
- wonderToUpdate.location = response.data.location;
- wonderToUpdate.imageUrl = response.data.imageUrl;
- const updateWonder = () => {
- axios.put(`http://localhost:3000/wonders/${route.params.id}`, wonderToUpdate).then(() => {
- router.push("/");
- </script>
- <template>
- <div class="container mt-4 w-50">
- <form @submit.prevent="updateWonder">
- <legend>Update Wonders</legend>
- <div class="mb-3">
- <label for="txtWonderName" class="form-label">Name</label>
- <input
- type="text"
- v-model="wonderToUpdate.name"
- class="form-control"
- id="txtWonderName"
- />
- </div>
- <div class="mb-3">
- <label for="txtLocation" class="form-label">Location</label>
- <input
- type="text"
- v-model="wonderToUpdate.location"
- class="form-control"
- id="txtLocation"
- />
- </div>
- <div class="mb-3">
- <label for="txtImageUrl" class="form-label">Image URL</label>
- <input
- type="text"
- v-model="wonderToUpdate.imageUrl"
- class="form-control"
- id="txtImageUrl"
- />
- </div>
- <button type="submit" class="btn btn-primary">Update</button>
- </form>
- </div>
- </template>
- (Line: 1) The 'setup' attribute added to the script tag that represents we are using the composition API approach.
- (Line: 6-11) The 'reactive' type loads from the 'vue' library. The 'reactive' type is appropriate for creating the model for the form binding in vue. Here we defined properties like 'id', 'name', 'location', and 'imageUrl' which can use for the form binding.
- (Line: 13) The 'useRouter' loads from the 'vue-router' library that helps with navigation.
- (Line: 14) The 'useRoute' loads from the 'vue-router' library that helps to read the URL parameters.
- (Line; 16-25) The 'onMounted' is a Vue life-cycle method in which we invoke the get by 'id' endpoint to populate the item data on to our update form.
- (Line: 27-31) Here we defined a method like 'updateWonder' that contains logic to invoke the HTTP PUT request to update the item.
- In vue enable the form model binding we will use 'v-model' attribute. Each form field must be decorate with 'v-model'.
- (Line: 35) The '@submit.prevent' event raises on clicking the form submit button, but it won't reload the page since we configured the 'prevent' event. Here '@submit.prevent' is registered with 'updateWonder' method.
Let's configure the 'Edit' button in 'AllWonders.vue' component. So that we can navigate from the 'AllWonders.vue' to 'EditWonders.vue'.
- <div class="card">
- <img :src="item.imageUrl" class="card-img-top" alt="..." />
- <div class="card-body">
- <h5 class="card-title">{{ item.name }}</h5>
- <p class="card-text">Location: {{ item.location }}</p>
- <router-link class="btn btn-primary" :to="`/edit-wonder/${item.id}`">Edit</router-link>
- </div>
- </div>
- (Line: 6) The 'Routerlink' is configured as our Edit button. Here is our dynamically generated edit route adding at 'to' attribute.
(Step 1)


Create A 'ConfirmDeletePopup' Component:
- <script setup></script>
- <template>
- <div
- class="modal fade"
- id="deleteModal"
- tabindex="-1"
- aria-labelledby="exampleModalLabel"
- aria-hidden="true"
- <div class="modal-dialog">
- <div class="modal-content">
- <div class="modal-header">
- <h1 class="modal-title fs-5" id="exampleModalLabel">
- Delete Confirmation!
- </h1>
- <button
- type="button"
- class="btn-close"
- data-bs-dismiss="modal"
- aria-label="Close"
- ></button>
- </div>
- <div class="modal-body">Are you sure to delete this item</div>
- <div class="modal-footer">
- <button
- type="button"
- class="btn btn-secondary"
- data-bs-dismiss="modal"
- Close
- </button>
- <button
- type="button"
- @click="$emit('confirmdelete-click')"
- class="btn btn-danger"
- Confirm Delete
- </button>
- </div>
- </div>
- </div>
- </div>
- </template>
- Here we added the bootstrap modal HTML content.
- (Line: 5) Make sure to give 'id' attribute value fo the bootstrap modal.
- (Line: 34) Here button click emits 'confirmdelete-click' which means we are trying to receive an event from the child component(ConfirmDeletePopup.vue) to the parent component(like 'AllWonders.vue'). To emit the event we have to use '$emit()'.
Implement Delete Operation:
- <script setup>
- import { ref, onMounted } from "vue";
- import ConfirmDeletePopup from "../../components/ConfirmDeletePopup.vue";
- import axios from "axios";
- const allWonders = ref([]);
- const itemToDeleteId = ref([0]);
- let deleteModal;
- onMounted(() => {
- deleteModal = new window.bootstrap.Modal(
- document.getElementById("deleteModal"));
- axios.get("http://localhost:3000/wonders").then((response) => {
- allWonders.value = response.data;
- const openDeleteModal = (id) => {
- itemToDeleteId.value = id;
- deleteModal.show();
- const confirmDelete = () => {
- axios
- .delete(`http://localhost:3000/wonders/${itemToDeleteId.value}`)
- .then(() => {
- allWonders.value = allWonders.value.filter(
- (_) => _.id !== itemToDeleteId.value
- itemToDeleteId.value = 0;
- deleteModal.hide();
- </script>
- <template>
- <div class="container mt-3">
- <div class="row m-2">
- <div class="col col-md-4 offset-md-4">
- <RouterLink to="/add-wonder" class="btn btn-primary">Add</RouterLink>
- </div>
- </div>
- <div class="row row-cols-1 row-cols-md-3 g-4">
- <div class="col" v-for="item in allWonders" :key="item.id">
- <div class="card">
- <img :src="item.imageUrl" class="card-img-top" alt="..." />
- <div class="card-body">
- <h5 class="card-title">{{ item.name }}</h5>
- <p class="card-text">Location: {{ item.location }}</p>
- <router-link class="btn btn-primary" :to="`/edit-wonder/${item.id}`"
- >Edit</router-link
- > |
- <button
- type="button"
- @click="openDeleteModal(item.id)"
- class="btn btn-danger"
- Delete
- </button>
- </div>
- </div>
- </div>
- </div>
- </div>
- <ConfirmDeletePopup @confirmdelete-click="confirmDelete"></ConfirmDeletePopup>
- </template>
- (Line: 7) Declared the variable like 'deleteModal'.
- (Line: 10-11) Bootstrap instance assigned to the 'deleteModal'.Here we use the modal 'id' attribute value while creating the bootstrap instance.
- (Line: 18-21) The 'openDeleteModal' method contains logic to show the delete confirmation modal on clicking the delete button. Here we set the item to delete 'id' value to 'itemToDelete' variable.
- (Line: 23-33) The 'confirmDelete' method contains logic to invoke the delete
- API call. On successful deletion, we are going to update our 'allWonders' variable and then hide the bootstrap modal.
- (Line: 52-58) Here we added the 'Delete' button and its click registered with the 'openDeleteModal' method.
- (Line: 64)Rendered our 'ConfirmDeletePopup' component and registered with '@confirmdelete-click' which reads the button click from the child component(ConfirmDeletePopup.vue)

Support Me!
Buy Me A Coffee
PayPal Me
Video Session:
Wrapping Up:
Refer:
Follow Me:
Recommend
-
6
Angular 10 Universal Server Side Rendering (SSR) CRUD Example by Didin J., updated on Aug 28, 2020 The comprehensive Angular 10 tutorial on building CRUD web application using Angular Universal Server-side render...
-
14
Laravel 8 CRUD operation example using Google Firebase 397 views 3 months ago Laravel CRUD operation is a basic par...
-
14
CRUD with Image Upload in Laravel 8 Example 1076 views 5 months ago Laravel In this tutorial we will go over the demonstratio...
-
24
-
9
In this article, i will share with you how to make a simple CRUD operation application in laravel 8 with example. as you know laravel 8 already release with the many new features and functionality. this tutorial is for beginners. so, if any start...
-
7
VueJs CRUD Example using MongoDB | Express.js | Vue.js | Node.js 136414 views 2 years ago VueJs This is a step by step MEVN sta...
-
10
Laravel 8 - Livewire CRUD with Bootstrap Modal 118340 views 9 months ago Laravel In this article, I would really like to perc...
-
9
Part-1 | .NET 6 Web API | SQL Database | React JS(v18) | CRUD Example
-
6
Part-6 | NestJS(v9) | Angular(v14) | MongoDB | CRUD Example
-
5
Part-1 | .NET7 Web API | SQL Database | VueJS(3.0) - Composition API | CRUD Example
About Joyk
Aggregate valuable and interesting links.
Joyk means Joy of geeK